
Specifications


5-106
106 | Maintaining and Transporting the Printer
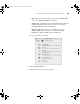
5. Examine the nozzle check pattern to make sure it has no gaps or lines.
• If the printout looks okay as shown below, you’re done. Click
Finish.
• If you see any gaps as shown below, click Clean to clean the print
head and follow the on-screen instructions.
6. If the nozzles do not clear after a few cleaning cycles, run a Power
Cleaning Cycle, as described in the next section.
Running a Power Cleaning Cycle
You can run a power cleaning cycle from the control panel if the normal
cleaning process is not sufficient to clear the nozzles. However, the power
cycle uses a large quantity of ink, so it is recommended only as a last resort.
The cartridges need to be at least 50% full to use power cleaning. You may
need to replace a low cartridge to run the cleaning cycle. After cleaning, you
can reinsert the old cartridge.
1. Print a nozzle check to make sure the print head needs cleaning, as
described on page 102.
2. Make sure the printer is ready and the red B ink light on the printer’s
LCD panel is not on or flashing.
3. Press the
Menu button.
4. Press the button until you see
MAINTENANCE, then press
Menu .
5. Press the button until you see
PWR CLEANING, then press
Menu . Press Menu again to start the power cleaning.
6. Follow the instructions on the LCD panel to raise or lower the ink
levers.
Caution: Don’t run a
cleaning cycle while
thick media is loaded in
the printer.
sp4800Guide.book Page 106 Tuesday, March 7, 2006 3:49 PM