
Specifications
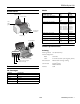
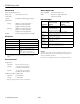
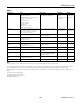

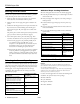


EPSON Stylus C64
8/03 EPSON Stylus C64 - 5
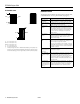
Installing the First Ink Cartridges
1. Turn on the printer.
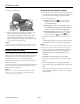
2. Lower the printer’s output tray, pull out the extension, and
open the cover.
3. Shake the package of ink cartridges four or five times. Then
remove the cartridges from the package. (Don’t shake them
after removing the packaging.)
Caution:
Don’t touch the green circuit board on the front of the cartridge;
you may inhibit normal operation and printing.
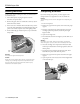
4. Open the cartridge cover.
5. Lower each ink cartridge down into its holder with the
green circuit board facing the front. Then gently push each
ink cartridge down until it is firmly seated.
The color of the cartridge label should match the marker on
the holder.
6. Close the cartridge cover.
7. Press the H ink button and close the printer cover.
The green P power light flashes as your printer charges ink
for several seconds.
Caution:
Don’t turn off the printer while the green P power light is flashing,
unless the printer hasn’t moved or made noise for more than
5 minutes.