Specifications
Table Of Contents
- Important Information
- Front Matter
- Contents
- Introduction
- Basic Printing
- Advanced Printing
- Printing on Special Media
- Managing Print Jobs
- Network Printing
- Optional Interfaces
- Maintenance and Transportation
- Troubleshooting
- Specifications
- Index

Maintenance and Transportation Page 139
Removing and Installing Ink Cartridges
You can replace a cartridge when the
B black or
A color ink out light is
either flashing or on. (If you perform these steps when
both
ink out lights
are
off
, the printer cleans the print heads, as described in Cleaning the
Print Head.)
Follow these steps to replace ink cartridges:
1 Remove the new ink cartridge from its packaging.
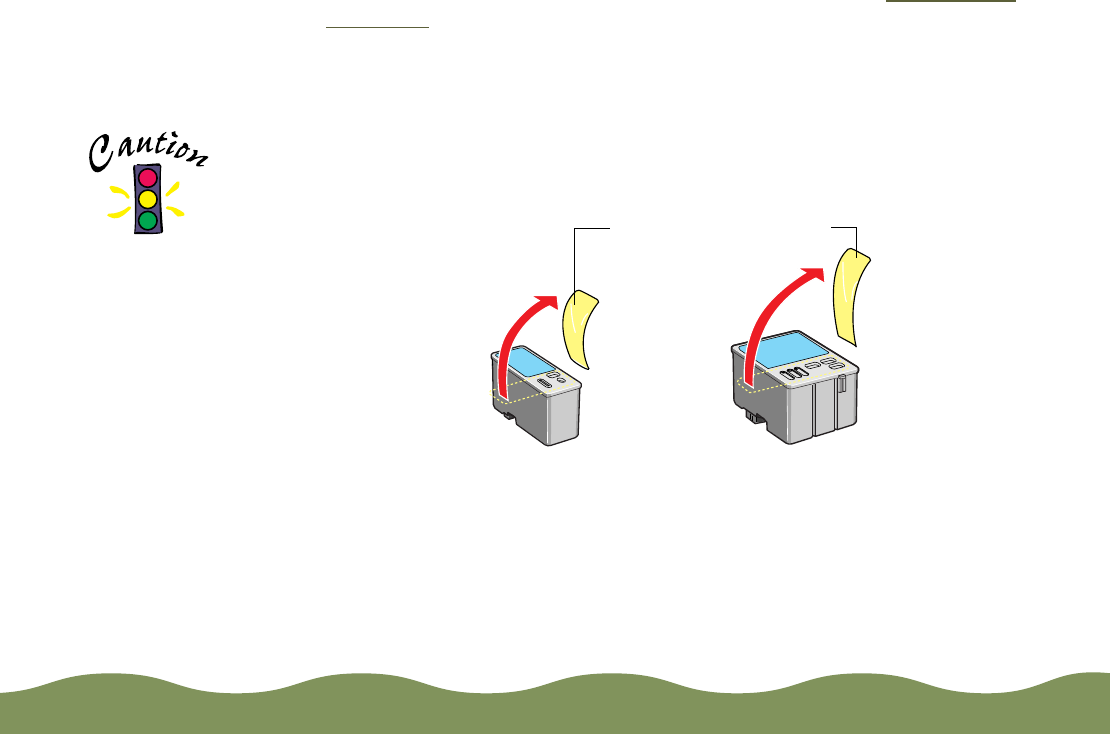
2 Remove
only
the yellow part of the tape seal on top as shown below.
Don’t pull off the blue portion or try to remove the clear seal
underneath the cartridge.
3 Make sure the printer is turned on and not printing, then open the
printer cover.
You must remove the
yellow tape from the
top of the cartridge or
you will permanently
damage it. Do not
remove the clear seal
from the bottom of
the cartridge; ink will
leak.
black cartridge color cartridge
Remove the yellow tape
color900.book Page 139 Wednesday, January 6, 1999 12:39 PM


