
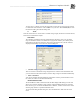
System information


Blastware Compliance Module
___________________________________________________
4–86 Blastware Operator Manual
4.4 Remote Access
The Remote Access menu contains Auto Call Home and Start Blastware Mail. Blastware Mail
is also accessible via the Windows Start, Programs menu. The Auto Call Home feature has three
communication options, 1) Serial, or 2) UDP/IP and 3) TCP/IP .
4.4.1 Auto Call Home™ Overview
Use the Auto Call Home program for easy, remote access to your monitor and data, using Serial
or IP communications. Whenever an event occurs, the monitor automatically places a call to your
PC and downloads event data into a central location on your hard disk drive. When the monitor is
ready to call in, it switches its modem on, and dials in to your PC. When communication has been
established, the PC checks the serial number of the monitor, and then executes the instructions you
have set for that specific monitor. Once data has been downloaded, the PC terminates
communication.
To use this feature, you require a telephone or cellular modem connection to your Micromate,
Series III Blastmate or Minimate Plus (with a serial number of 6000 or more), or Series IV unit, a
PC equipped with a free serial port, and the Microsoft® Windows® operating system. If using the
Auto Call Home Serial Communications option, each communications port used on the PC must
also have a modem. The Auto Call Home program is not available for use with units that have a
serial number less than 6000, the Minimate Blaster or any of the Series II units (DS477/677 and
DS077).
NOTE: When connecting to a Series IV unit, TCP is the recommended communication protocol
for reliability of messages being transferred between the unit and Blastware
4.4.2 Steps for a Successful Auto Call Home Configuration
Review each step below, and proceed to the corresponding Subsection that is referenced to make
the required configuration settings:
1. Ensure that you have a Micromate, Blastmate III or Minimate Plus with a serial number
of 6000 or higher, or a Series IV unit.
2. Take a moment to review the entire Remote Access Section of this manual.
3. Review the protocol descriptions outlined in this Section for Auto Call Home IP and
Serial communications. Determine what type of communications protocol you will be
using, a) Serial, b) UDP/IP or c) TCP/IP. Proceed to the appropriate section within this
chapter for more information on these communication setups.
4. Purchase the required software and modem(s). Purchase a communications package from
your local service provider. Install the required software as per the manufacturer’s
instructions. For a list of required software and communication requirements for IP
communications, refer to Section Setting up an Airlink Raven Modem for Auto Call
Home UDP/IP and TCP/IP.
5. Connect the instrument to your computer and start Blastware.
6. Proceed to the Setup Unit Section. Setup the unit dependent on the communications
protocol, (i.e. cellular modem/telephone line or IP communications).
7. Proceed to the Setup PC Section and configure your PC. Configure the Communication
Settings for Serial, UDP/IP or TCP/IP. For Serial Communications, refer to the
Subsection Configure Auto Call Home Serial Communications, or for IP
Communications, refer to the Subsections Configure Auto Call Home UDP/IP
Communications, Setting up an Airlink Raven Modem for Auto Call Home UDP/IP,
and Using Internet Protocol (IP) Communications. Or, if you prefer, refer to the
TCP/IP section for those configurations.