
System information


Blastware Compliance Module
___________________________________________________
4–92 Blastware Operator Manual
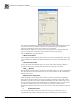
(4) Destination
This displays the directory where the data from the monitor will be copied. To select a
directory, click on the button to the right of the description field. The following dialog box
appears:
Navigate through your directories to select the destination directory. Press Select to make that
directory the destination for downloaded Events. To create a new directory, press Create and
enter the name of the directory in the dialog box that appears.
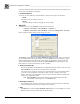
i "Disconnect after being connected for 'x' minutes (Range 1-9999)"
Check this box to have the Call Home connection automatically terminated after a certain
time (1-9999 minutes). The timer starts as soon as the PC is successfully connected to the
remote unit. If a Call Home connection is terminated because of this timeout a "Session
timeout" entry is made in the CALLHOME.LOG.
NOTE: Make sure that the timeout is long enough to allow all Events to download. For
example, a 1- second 4-channel Event recorded at 1024 sps takes about 1 minute to
transfer using a typical modem connection. For Series IV units, ensure that the range is
set to handle extremely large Events or thousands of stored Events.
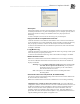
ii Clear All
Press this button to clear all settings in the Auto Call Home PC Setup dialog box.
If you wish to clear the settings for only one monitor, erase the serial number. The
Description field and all settings within the Call Home Setup dialog box will clear
automatically.
iii __ Units in List
This area lets you control how many monitor entries appear in the list (the minimum is
five). The current number appears in the title. To add more entries, click on the More
button. To remove entries, click on the Less button.
Note: Whenever you press the Less button, you will erase any settings you have
made in the entry you are deleting. For example, if there are 7 monitors in the
list, and you press Less once, you will erase all settings for Monitor 7.
iv Command Buttons
Select OK to save your settings and return to the Main Window, or Cancel to leave
the dialog box without changing the current settings.
c. Load Setup
Use the Load Setup function to automatically send saved setup files to remote units. Access this
dialog by selecting the Remote Access menu > Auto Call Home > Start > Settings > Load Setup.