EPSON Stylus CX6400 EPSON Stylus CX6400 Parts Accessories Ink Cartridges Feeder guard Paper support Scanner lid Cartridge Part number Black (high capacity) T043120 Black ink (standard capacity) T044120 Cyan T044220 Magenta T044320 Yellow T044420 Color Multi-Pack T044520 Media USB cable Paper name Size Part number EPSON Premium Bright White Paper Letter S041586 EPSON Glossy Photo Paper or EPSON Photo Paper Letter S041141 S041272 S041271 S041649 Borderless 4 × 6 inches, non-perfora
EPSON Stylus CX6400 Single sheets Specifications Size Letter (8.5 × 11 inches) A4 (8.3 × 11.7 inches) Half-letter (5.5 × 8.5 inches) A5 (5.8 × 8.3 inches) Legal (8.5 × 14 inches) Executive (7.3 × 10.5 inches) 4 × 6 inches (101.6 × 152.4 mm) 5 × 7 inches (127 × 178 mm) 8 × 10 inches (203 × 254 mm) Paper type Plain bond paper or special media distributed by EPSON Thickness 0.003 to 0.004 inch (0.08 to 0.
EPSON Stylus CX6400 Envelopes Top (A): 0.12 inch (3.0 mm) Slot A Left (B-L): 0.12 inch (3.0 mm) Slot B Right (B-R): 0.12 inch (3.0 mm) Bottom (C): 0.78 inch (20 mm) Note: Depending on the type of paper, the print quality may deteriorate in the bottom area of the print, or this area may be smeared. Before printing large jobs using an extended margin setting, print a single sheet to confirm print quality.
EPSON Stylus CX6400 Macintosh:® The EPSON folder automatically opens (if it doesn’t, double-click the EPSON CD-ROM icon). Then double-click the Security Lock icon. Environmental Temperature Operation 50 to 95 °F (10 to 35 °C) Storage* – 4 to 140 °F (– 20 to 60 °C) 1 month at 104 °F (40 °C) Transit* – 4 to 140 °F (– 20 to 60 °C) 120 hours at 140 °F (60 °C) You see this screen: Humidity (without condensation) * Operation 20 to 80% RH Storage* 5 to 85% RH Stored in shipping container 4.
EPSON Stylus CX6400 5. Press the button next to OK on the LCD screen. The security feature is now turned off. 6. Press the Copy button to exit setup. If you forget your PIN, you can regain access to the CX6400 by running the security lock program from your computer: 1. Make sure the CX6400 is connected to your computer. Then insert your Stylus CX6400 software CD-ROM in your CD-ROM or DVD drive. 2. Windows: If you see the Software Installation screen, click Exit.
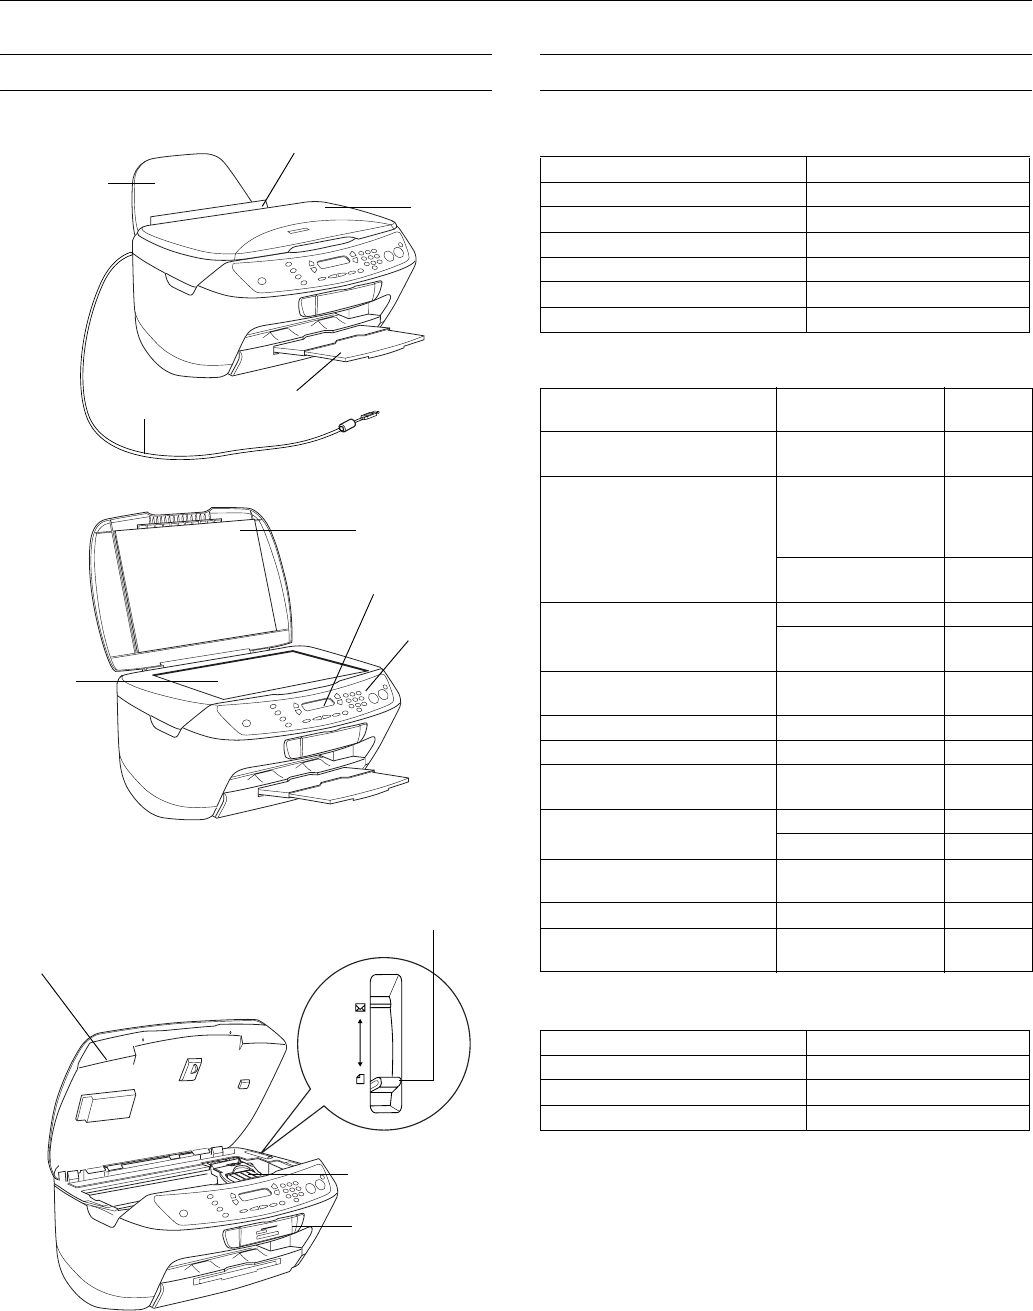
EPSON Stylus CX6400 Note: If you place your document against the guides, the edges next to the guides won’t be scanned. Number of Copies Press one or two buttons on the control panel’s numeric keypad to select the number of copies you want to print. If you need to scan a thick document, such as a book, you can remove the scanner lid. Open the scanner lid completely, then lift it out. Gently press down the original to keep it flat on the document table.
EPSON Stylus CX6400 Copy Layout setting Reduce or Enlarge Copies Result Press the top right button to resize your image. Poster Prints the original image on separate sheets (4, 9, or 16) that you can paste together to make a large poster Glossy Photo Copies two originals onto one sheet 4-up Copies four originals onto one sheet If you notice reduced print quality at the bottom of your copy, try using the Standard setting.
EPSON Stylus CX6400 Cancel Copies and Settings Selecting Photos To Print You can cancel a copy job in progress, or cancel the settings you’ve changed. You can select the photos you want to print either by filling in the ovals on the index form and scanning the form, or by selecting photos from the control panel. ❏ To cancel a job in progress, press the x Stop button. Canceling appears on the LCD screen, and your page is ejected.
EPSON Stylus CX6400 5. Use the numeric keypad to enter the number of copies you want to print (up to 99), then press OK. 2. Press the top left button next to the LCD screen until you see To PC on the screen. Then press the OK button. The first time you do this, you see a window on your computer asking you to select the program to launch for this action. Select EPSON Smart Panel, and then select the Always use this program for this action box. Click OK.
EPSON Stylus CX6400 Control Panel Error Messages To diagnose some problems, check the LCD screen on the CX6400 for these error messages: Error Message Solution No XXX ink cartridge – – – > Press the Color button to install new ink cartridge. The indicated ink cartridge is not installed. Install the cartridge as described on page 11. XXX ink out – – – > Press the Color button to begin replacement ink cartridge. The indicated ink cartridge is out of ink. Replace the cartridge as described on page 11.
EPSON Stylus CX6400 4. Press the green button next to the LCD screen until you see Nozzle check displayed, then press the x Color button to print the nozzle check. Use these ink cartridges within six months of installing them and before the expiration date on the package: 5.
EPSON Stylus CX6400 3. When done, press the OK button. When your ink starts getting low, make sure you have replacement cartridges available. You cannot print if an ink cartridge is empty. 5. Identify the cartridge you need to replace. Press in the tab at the back of the cartridge to release it, then lift the cartridge straight out. Dispose of it carefully. Removing and Installing Ink Cartridges Follow these steps to replace a cartridge: 1. Make sure the CX6400 is turned on and not printing. 2.
EPSON Stylus CX6400 The CX6400 begins charging the ink delivery system, and Charging appears on the LCD screen. Wait for the message to disappear before using the CX6400. Caution: Never turn off the CX6400 while Charging appears on the LCD screen, unless it hasn’t moved or made noise for more than 5 minutes. This may cause incomplete charging of the ink.