
User's Guide
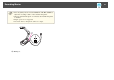
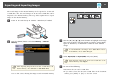
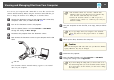


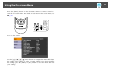

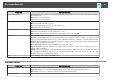

Image Menu
Basic image adjustments such as focus, zoom, and brightness are discussed in "Displaying a Document or Other Materials" p.26. You can make these further
adjustments by pressing the [Menu] button to open the Image menu.
a
When projecting a live image, you can adjust the Image menu settings.
Setup Item Explanation/Select
White Balance Adjusts the image color based on the lighting in the room where you're presenting.
Auto: Automatically adjusts the image color according to the display environment.
Cloudy: Suitable for use in cloudy weather.
Daylight: Suitable for use in fair weather.
Fluorescent: Suitable for use in a room with fluorescent lighting.
Incandescent: Suitable for use in a room with incandescent lamps.
Focus Lets you manually adjust the focus if auto-focus doesn't produce a sharp enough image.
Near: Adjusts the focus in.
Far: Adjusts the focus out.
Image Mode Selects the setting to adjust for the image type you are displaying from the camera.
Normal: Default setting.
Text: Suitable for projecting black-and-white text.
Display: Suitable for directly projecting the display of a tablet PC etc.
Color/B&W/Negative Displays the image in color or black-and-white.
Color: Displays the image in color.
Black&White: Displays the image in black-and-white.
Negative: Displays the image as a negative.
Image Rotation Lets you rotate an upside-down image.
Normal: Displays the image as it actually is.
180 degrees: Displays the image upside-down.
On-screen Menu List
49