
User`s guide


c
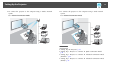
Install the wireless LAN unit in the projector, if necessary. See the
User's Guide supplied with the projector for more details.
d
Turn on the projector.
e
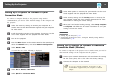
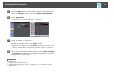
Press the Menu button on the remote control or the control panel,
select the Network menu, and select Network Configuration.
f
Select Wireless LAN.
A screen like one of the following is displayed.
g
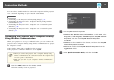
Select On for Wireless LAN Power.
h
Select Advanced for Connection Mode.
i
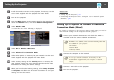
Select other options as necessary for your network. See the User's
Guide supplied with the projector for more details.
j
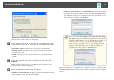
Select security settings on the Security menu as necessary for
your network. Check with your network administrator for more
information on making the correct settings.
k
When you have finished making settings, select Setup Complete
or Complete and follow the on-screen instructions to save your
settings and exit the menus.
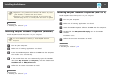
Related Links
• "Setting Up the Projector" p.12
• "Connecting the Projector and a Computer over a Network System
(Wireless)" p.20
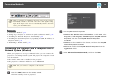
Setting Up a Projector to Connect in Advanced
Connection Mode (Wired)
To connect a computer to the projector using a wired LAN, you need to
select network settings on the computer and the projector.
a
Contact your network administrator and check that DHCP is
available under the current network environment.
a
If DHCP is not available, write down the following values that
are available for your projector.
• IP Address
• Subnet Mask
• Gateway Address
b
Connect the computer to the network.
a
To set up a network connection, if necessary, see the
documentation supplied with your computer or network
adapter.
c
Connect a LAN cable to the projector.
d
Turn on the projector.
Setting Up the Projector
15