
Specifications

Slideshow lets you play back and project image files stored on USB
storage devices and digital cameras.
This section explains the basic operations for Slideshow.
Although the following steps are explained based on the Remote
Control, you can perform the same operations from the projector’s
Control panel.
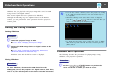
Starting and Closing Slideshow
Starting Slideshow
Procedure
A
Switch the projected image to USB.
s User's Guide "Changing the Projected Image"
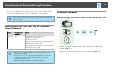
B
Connect the USB storage device or digital camera to the
projector.
s User's Guide "Connecting and Removing USB Devices
(EB-1925W/1920W/1915/1910/1830 only)"
Slideshow starts and the file list screen is displayed.
Closing Slideshow
Procedure
To close Slideshow, disconnect the USB device from the
USB(TypeA) port on the projector. For digital cameras, hard disks,
and so on, turn off the power to the device and then disconnect.
q
• You can also connect a memory card to the projector by loading
it in a USB card reader. However, some card readers may not
be compatible.
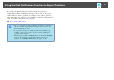
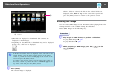
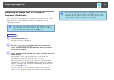
• When the following screen (Select drive screen) is displayed,
press the [
][ ][ ][ ] buttons to select the drive you
want to use, and then press the [Enter] button.
• To display the Select drive screen, position the cursor on Select
drive in the top half of the file list screen, and then press the
[Enter] button.
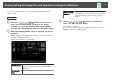
Slideshow Basic Operations
The following describes the procedures for playing images using
Slideshow, and projection operations.
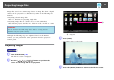
Procedure
A
Use the [ ][ ][ ][ ] buttons to position the
cursor on the file or folder you want to access.
Slideshow Basic Operations
45