
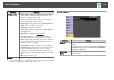
Operation Manual


c
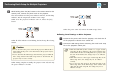
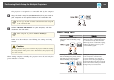
While holding down the [Esc] button on the remote control or the
control panel, connect the power cord to the projector.
The status indicator and the power indicator turn blue, and the lamp
indicator and the temperature indicator turn orange.
When all of the projector's indicators turn on, release the [Esc]
button.
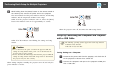
When all of the indicators start flashing, the batch setup file is being
written.
Caution
• Do not disconnect the power cord from the projector while the file is
being written. If the power cord is disconnected, the projector may not
start correctly.
• Do not disconnect the USB storage device from the projector while the
file is being written. If the USB storage device is disconnected, the
projector may not start correctly.
When writing completes normally, the projector turns off, and only
the power indicator is lit blue.
When the power turns off, remove the USB storage device.
Reflecting Saved Settings to Other Projectors
a
Disconnect the power cord from the projector, and check that all
of the projector's indicators have turned off.
b
Connect the USB storage device containing the saved batch setup
file to the projector's USB-A port.
a
• When the USB memory drive contains 1 to 3 types of batch
setup files, the file is reflected to the projector with the same
model number. If there are multiple files for a projector with
the same model number, the settings may not be reflected
correctly.
• When there are four or more types of batch setup files on the
USB storage device, the settings may not be reflected
correctly.
• Do not store any data except for the batch setup file on the
USB storage device. If the USB storage device contains data
other than the batch setup file, the settings may not be
reflected correctly.
Performing Batch Setup for Multiple Projectors
137