
User`s guide


Useful Functions
45
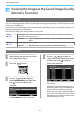
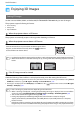
Enjoying 3D Images
Setting 3D Images
Set the source to HDMI1, HDMI2, or WirelessHD (EH-TW9200W/EH-TW8200W only) to view 3D images.
The projector supports following 3D formats.
•
Frame Packing
•
Side by Side
•
Top and Bottom
When the projector detects a 3D format
The projector automatically projects a 3D image when detecting a 3D format.
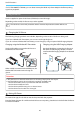
When the projector cannot detect a 3D format
Some 3D TV broadcasts may not contain 3D format signals. If this
happens, set the 3D format manually. Press the
button to
set the 3D format on the AV device.
c
•
For details on 3D format settings on the AV device, see the documentation supplied with the AV device.
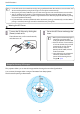
•
When the 3D format has not been correctly set up, an image will not be correctly projected as shown
below.
If the 3D image cannot be viewed
Check the following if the 3D effect is not displayed correctly, even after setting the 3D formats.
•
The synchronization timing for the 3D Glasses may have been inversed. Inverse the synchronization using Inverse
3D Glasses, and then try again.
s Signal - 3D Setup - Inverse 3D Glasses p.68
•
The image is not displayed in 3D if 3D Display is set to Off. Press the button on the remote control. s Signal -
3D Setup - 3D Display p.68
c
•
How a 3D image is perceived varies depending on the individual.
•
When a 3D image is displayed, a warning about viewing 3D images is displayed. You can turn off this
warning by setting 3D Viewing Notice to Off.
s Signal - 3D Setup - 3D Viewing Notice p.68
•
You can also convert 2D images to 3D images. s p.50
•
During 3D projection, the following Configuration menu functions cannot be changed.
Aspect (set to Normal
*
), Noise Reduction (set to Off), Overscan (set to Off), Advanced - Sharpness,
Picture in Picture
•
How the 3D image is viewed may change depending on the temperature of the surroundings and how
long the lamp has been used. Refrain from using the projector if the image is not projected normally.