E Printed on 100% recycled paper. Printed in Japan 402168001 (9002466) 02.03-.
About The Manuals and Notations Used Types of Manual The documentation for your EPSON projector is divided into the following four manuals. Refer to the manuals in the order given below. Unpacking and Installation Guide This manual contains information on the procedures from unpacking the projector through to starting to use the projector, and also describes the included accessories.
Contents Advanced Operations Functions for Enhancing Projection .................................................................18 Using the Environment Setting Menus................................................................... 18 Description of Functions ........................................................................................ 21 Saving and Retrieving Image Quality Settings (Memory) ..................................... 22 Using the Menu Functions.....................................
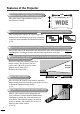
Features of the Projector 1280 Adoption of a wide 1280 x 720 dot panel This panel allows high-definition images to be reproduced accurately. 720 Adoption of a special high-resolution DCDi video circuit developed by Faroudja. This circuit greatly reduces the jagged edges that resulted from conventional progressive conversion, to produce much smoother and natural movement. (p.
*Speakers are not included with the projector and must be purchased separately.
Basic Operations This chapter describes basic operations such as turning the projector on and off and adjusting the projected images. Turning On the Projector ...................................6 • Connecting the Power Cord ............................................... 6 • Turning On the Power and Projecting Images.................. 7 Turning Off the Projector...................................8 Adjusting the Screen Image............................ 10 • Adjusting the Image Size ....................
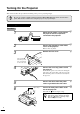
Turning On the Projector This section describes the procedure from turning on the power to projecting images. Be sure to read the separate Safety Instructions/World-Wide Warranty Terms and check the points that must be noted before using the projector to project images. Connecting the Power Cord Procedure 1 Check that the power is turned off for the projector and all components connected to the projector. 2 Connect the computer or other video source to the projector. Refer to the Setup Guide.
Connecting the Power Cord Turning On the Power and Projecting Images Turning On the Power and Projecting Images Procedure 1 2 Basic Operations Turn on the power for all equipment connected to the projector. For a video source, press the [Play] button at the video source to start playback if necessary. Check that the indicator on the projector has stopped flashing and lights orange. Press the [Power] button on either the remote control or the projector's control panel to turn on the power.
Turning Off the Projector Follow the procedure below to turn off the power of the projector. Procedure 1 2 Turn off the power for the signal sources that are connected to the projector. Check that the power for all connected components has been tuned off. Power OFF? Please press to power off. key again 3 Press the [Power] button once more. The lamp unit will turn off and the indicator will flash orange as the cool-down period starts.
7 Retract the front adjustable foot if it is extended. Gently push down on the projector while pressing the foot adjust button. Attach the lens cover. Attach the lens cover to the lens when not using the projector, in order to stop the lens from getting dusty or dirty.
Adjusting the Screen Image You can adjust the screen image in order to obtain the best possible picture. Adjusting the Image Size The size of the projected image is basically determined by the distance from the projector to the screen. (Refer to the Setup Guide.) The following procedures explain how to adjust the screen image once the projector itself has been set up. Turn to Tele to reduce the size Procedure Turn to Wide to increase the size Turn the zoom ring on the projector to adjust the image.
Adjusting the Image Size Correcting Keystone Distortion Adjusting the Image Angle Displaying a Test Pattern Correcting Keystone Distortion If the projector is set up so that it is at an angle to the screen, a type of distortion known as "keystone distortion" may occur. Keystone correction can be carried out if the angle of the projector is within a range of approximately 15° vertically from the perpendicular. Approx. 15° above Approx.
Adjusting the Screen Image Displaying a Test Pattern When setting up the projector, you can project a test pattern onto the screen and use this test pattern to adjust the projected images before a video source has been connected. The following two types of test pattern are available. • Crosshatch This can be used to adjust the focus and correct keystone distortion. • Grayscale pattern This can be used to adjust dark and light shades to the desired shade.
Adjusting the Image Quality Focusing the Screen Image Selecting the Image Aspect Ratio Selecting the Color Mode Automatic Adjustment of Computer Images The quality of the screen images can be adjusted as follows. Focusing the Screen Image Turn the focus ring to adjust the image focus. Procedure • If the surface of the lens is dirty or misted Focus ring Basic Operations over as a result of condensation, it may not be possible to adjust the focus correctly.
Adjusting the Image Quality Selecting the Image Aspect Ratio The aspect ratio for projected images can be selected from the following five types of setting. However, the aspect ratio settings that can be selected will vary depending on the input signal.
Focusing the Screen Image Selecting the Image Aspect Ratio Selecting the Color Mode Automatic Adjustment of Computer Images Squeeze mode When images in squeeze mode are displayed on a 4:3 TV screen Viewed using the projector Images output in 4:3 format Basic Operations Use this setting if the connected video source has a 16:9 output mode (Squeeze mode). If images in squeeze mode are viewed on a 4:3 TV screen, the images are compressed horizontally and elongated vertically.
Adjusting the Image Quality Focusing the Screen Image Selecting the Image Aspect Ratio Selecting the Color Mode Automatic Adjustment of Computer Images Automatic Adjustment of Computer Images This function lets you adjust computer images to the optimum settings. Automatic adjustment involves adjustment of tracking display position and synchronization (sync) . While an image is being projected from the computer, press the [Auto] button on the remote control.
Advanced Operations This chapter describes functions for enhancing the projection of images, and how to use the environment setting menus. Functions for Enhancing Projection .............. 18 • Using the Environment Setting Menus ............................ 18 • Displaying and Operating Full Menus...............................................18 • Displaying and Operating Line Menus..............................................20 • Description of Functions ..............................................
Functions for Enhancing Projection This section describes the various useful functions that can be used to enhance projection. Function Summary Reference page Black level adjustment Adjusts the brightness of dark shades. p.21 White level adjustment Adjusts the brightness of light shades. p.21 Color adjustment Adjusts the hues of light shades to the desired level. p.
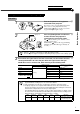
Using the Environment Setting Menus Memory Description of Functions 3 Select a menu item. Press the [Select] button on either the projector's control panel or the remote control to accept a selection. The sub-menu corresponding to the selected item in the main menu appears. Projector Video Black Level Advanced White Level 0 0 - + + Setting Sharpness 0 - + About Color 0 - Reset All Tint 0 - + + Color Mode Select Color Adjustment Color Temp.
Functions for Enhancing Projection Displaying and Operating Line Menus Procedure 1 Press the [Select] button on either the projector's control panel or the remote control. The line menu appears. Projector Black Level Remote control 0 - + 2 Select an item to be set. If using the projector's control panel, press the and buttons. If using the remote control, press the [Select] button up and down. Projector Remote control 3 Select the setting value.
Using the Environment Setting Menus Memory Description of Functions Description of Functions This section describes commonly-used functions. "Black Level" and "White Level" adjustments are the adjustment values that are in effect before the signals are sampled by the A/D converter, and so they are adjusted to match the input signal so that they do not cause distortion. Use "Color Adjustment" to adjust the color and contrast. Black Level Adjustment This adjusts the brightness of dark shades.
Functions for Enhancing Projection Saving and Retrieving Image Quality Settings (Memory) Up to a maximum of six adjustment values in the "Video" and "Advanced" menus can be memorize per input source, and settings for six different sources can be recorded, for a total of 36 possible settings. You can save the adjustment values for particular video scenes, and then use the memory button on the remote control to retrieve these settings at a single touch. (p.
Using the Environment Setting Menus Memory Description of Functions Retrieving Saved Image Quality Settings Press one of the remote control memory buttons [1] to [6] corresponding to the image quality settings to be retrieved. The images being projected will be adjusted according to the settings that are retrieved.
Using the Menu Functions The environment setting menus can be used to carry out a variety of settings and adjustments. Two types of menu (full menus and line menus) can be used to make environment settings. This section describes all of the functions that are available in the environment setting menus using the full menus as examples. The menus have a hierarchical structure, with a main menu that is divided into sub-menus. Refer to "Using the Environment Setting Menus" (p.18) for details on using the menus.
Video menu Setting menu Advanced menu About menu Reset All menu Video Menu • • “Video” menu adjustments cannot be carried out when no image signal is being input. The items appearing in the “Video” menu will vary depending on the input signal that is being projected. Items in menus other than the menu for the signal currently being input cannot be adjusted.
Using the Menu Functions Main menu Video Sub-menu Color Adjustment Default setting Function Only one of the following settings can be made at any one time. It is not possible for both settings to be enabled at the same time. Color Temp. setting (p.21) :Allows lighter colors to be adjusted so that they • Color Temp. range from having a red tinge to having a blue tinge. When the color temperature is lower, the red content is greater and color tones appear softer.
Video menu Setting menu Advanced menu About menu Reset All menu Computer (D-RGB/A-RGB DVI-I, InputB (A-RGB)) A(Analog)-RGB D(Digital)-RGB Video Black Level Advanced White Level Setting Sharpness 0 - About Color Mode Select Reset All Tracking 0 Sync. 0 Color Temp RGB Memory 1 4 Video 2 3 5 Video Black Level Advanced White Level 0 Auto Manual Setting Sharpness 0 About Color Mode Reset All Color Adjustment Color Temp.
Using the Menu Functions Main menu Video Sub-menu Color Adjustment Default setting Function Only one of the following settings can be made at any one time. It is not possible for both settings to be enabled at the same time. Color Temp. setting (p.21) :Allows lighter colors to be adjusted so that they • Color Temp. range from having a red tinge to having a blue tinge. When the color temperature is lower, the red content is greater and color tones appear softer.
Video menu Setting menu Advanced menu About menu Reset All menu Advanced Menu Video Progressive Advanced Motion Detect 1 Setting Noise Reduction OFF About Position Adjust Reset All Video Signal Input A Select Input B Setup Level Reset [ Film/Auto 4 5 ] NR2 [ Auto ] Select Select 0% 7.
Using the Menu Functions Main menu Advanced Sub-menu Default setting Function Input B Selects the type of signal being input to the Input B port. RGB Setup Level (Adjustment is only possible when composite, S-Video, 525i/p or 625i/p signals are being input.) If using a foreign product that has different black level (setup level) settings, use this function to obtain correct images. Check the specifications of the connected equipment when changing this setting.
Main menu Setting Sub-menu Video menu Setting menu Advanced menu About menu Reset All menu Default setting Function Projection Selects the projection method in accordance with the projector and screen setting-up method.
Using the Menu Functions Video menu Setting menu Advanced menu About menu Reset All menu Computer (D-RGB/A-RGB DVI-I, InputB (A-RGB)) Computer Video Lamp Advanced Reset Lamp Timer Setting Video Source About Input Signal Reset All Frequency H V SYNC Polarity H 0H Execute kHz Hz V SYNC Mode Resolution Refresh Rate Select x Hz Enter Main menu About Sub-menu Default setting Function Lamp Displays the cumulative lamp operating time.
Troubleshooting This chapter describes troubleshooting procedures for the projector. Using the Help ..................................................34 When Having Some Trouble ............................ 35 When the Indicators Provide No Help ............
Using the Help If a problem occurs with the projector, the Help function uses on-screen displays to assist you in solving the problem. It uses a series of menus in a question and answer format. The questions vary depending on the type of video source. Procedure 1 Press the [Help] button on either the remote control or the projector's control panel. The Help menu will be displayed. Projector Remote control 2 Select a menu item. If using the projector's control panel, press the and buttons.
When Having Some Trouble If you are having a problem with the projector, first check the projector's indicators. The projector is provided with the following three indicators. These indicators alert you to problems with projector operation. Operation indicator Lamp indicator Temperature indicator The following tables show what the indicators mean and how to remedy problems that they indicate.
When Having Some Trouble Indicator status Red Red Orange Projector status High temperature inside projector (overheating) High-speed cooling in progress Problem and remedy The lamp will turn off automatically and projection will stop. Wait for about 5 minutes without operating the projector. After 5 minutes have elapsed, the projector's cooling fan will stop. When the cooling fan stops, turn off the main power switch and then turn it back on again.
When the Indicators Provide No Help If any of the following problems occur and the indicators do not offer a solution, refer to the pages given for each problem. No images appear p.37, p.38 Images appear dark p.41 Poor image quality p.39 Images appear green p.41 Only part of the image is displayed (Large/small) p.40 The remote control does not work p.41 The image colors are not right The power does not turn off p.40 p.
When the Indicators Provide No Help Condition No images appear (Messages do appear) “Not Suppored.” message appears on the screen. “No-Signal.”message appear on the screen. Probable cause 38 Remedy Does the input signal setting match the connected source? Use the “Video Signal”, “Input A” or “Input B” commands in the “Advanced” menu to select the signal format that matches the connected source. “Advanced” - “Video Signal”, “Input A”, “Input B” (p.
Condition Poor image quality • The image is fuzzy • Part of the image is out of focus • The whole image is out of focus • The image is distorted • The image contains interference Probable cause Remedy Has the focus been adjusted correctly? Adjust the focus. (p.13) Has the front adjustable foot been adjusted so that the projection angle is too big? Adjust the projection angle. (p.10) Is the projector at the correct distance? The recommended distance from the projector to the screen is within 0.
When the Indicators Provide No Help Condition • Image is too large (Only part of the image is displayed) • Image is too small Probable cause Remedy The display mode (aspect ratio ) setting may not be selected correctly. Press the [Aspect] button on either the remote control or the projector's control panel. (p.14) Has the "Position" setting been adjusted correctly? Use the “Position” command in the “Advanced” menu to adjust. (p.
Condition Images appear dark Probable cause Remedy Is the lamp due for replacement? Replace the lamp with a new one. (p.46, 47) If the indicator is flashing orange, it means that the lamp will soon be due for replacement. When the lamp is nearly due for replacement, the image will become darker and the tint will become poorer.
When the Indicators Provide No Help Condition The power does not turn off (after the [Power] button is pressed) Probable cause Is the indicator still orange? This projector is designed so that the indicator remains lit even when after the power has been turned off. Is the fan still operating? After the [Power] button on either the remote control or the projector's control panel is pressed to turn off the power, the cool-down period starts.
Appendices This chapter provides information on maintenance procedures to ensure the best level of performance for the projector for a long time. Maintenance .....................................................44 • Cleaning.............................................................................. 44 • Cleaning the Projector Case...............................................................44 • Cleaning the Lens ..............................................................................
Maintenance This section describes maintenance tasks such as cleaning the projector and replacing consumable parts. Cleaning You should clean the projector if it becomes dirty or if the quality of projected images starts to deteriorate. Be sure to read the separate Safety Instructions/World-Wide Warranty Terms for details on safe handling of the projector during cleaning. Cleaning the Projector Case Clean the projector case by wiping it gently with a soft cloth.
Cleaning Replacing Consumables Replacing Consumables This section describes how to replace the lamp and the air filter. Lamp Replacement Period It is time to replace the lamp when: • The message "Lamp Replace" appears on the screen when projection starts. The message appears for 30 seconds, and disappears again after 30 seconds have passed. A message will be displayed. • The indicator flashes orange or lights red. Lamp indicator flashes orange or lights red.
Maintenance Replacing the Lamp • If the lamp stops working and needs to be replaced, there is the danger that the lamp may break when handled. If replacing the lamp of a projector which has been installed to the ceiling, you should remove the projector from the ceiling before replacing the lamp. If the projector cannot be removed from the ceiling, you should always assume that the lamp is broken and handle it with extreme care during removal.
Cleaning Replacing Consumables 6 Install the lamp cover. Insert the two cover tabs into the projector, and then press the other side of the lamp cover until it clicks into place. • Install the lamp securely. If the lamp cover is removed, the lamp turns off automatically as a safety precaution. Moreover, the lamp will not turn on if the lamp or the lamp cover is not installed correctly. • Replacement lamps are provided with a spare air filter.
Maintenance Replacing the Air Filter Procedure 1 2 3 Turn off the power switch at the rear of the projector, and then disconnect the power cord. (p.8) Put your finger into the recess in the air filter hook, and lift up the air filter to remove it. In order to prevent any dust on the air filter from getting into the projector, be sure to stand up the projector so that the handle is at the top. Install the new air filter.
Optional Accessories The following optional accessories are available for purchase if required. This list of optional accessories is current as of February 2002. Details of accessories are subject to change without notice. Spare lamp ELPLP17 Digital video cable ELPKC21 (3 m (9.8 ft) - for DVI-D/DFP 20-pin) ELPSC06 DFP cable for connecting the projector to a computer with a digital RGB output interface. 60 inch screen ELPSC07 DVI analog cable ELPKC25 (3 m (9.
List of Supported Signal Resolutions Component Video Input Units: dots Aspect Signal Resolution Normal (Default) Squeeze Zoom Through Squeeze Through SDTV (525i, 60Hz) 640 × 480 640 × 360 (When zoomed) 960 × 720 (4:3 aspect) 1280 × 720 (16:9 aspect) 1280 × 720 (16:9 aspect) 590 × 442 (4:3 aspect) 786 × 442 (16:9 aspect) SDTV (625i, 50Hz) 768 × 576 768 × 432 (When zoomed) 960 × 720 (4:3 aspect) 1280 × 720 (16:9 aspect) 1280 × 720 (16:9 aspect) 700 × 525 (4:3 aspect) 934 × 525 (16:9 aspect
Component Video Input RGB Input Composite Video/S-Video Input RGB Input Units: dots Aspect Signal Resolution Normal (Default) Zoom Through PC98 640 × 400 1152 × 720 – 640 × 400 EGA 640 × 350 1280 × 700 – 640 × 350 640 × 480 640 × 360 (When zoomed) 960 × 720 1280 × 720 640 × 480 VESA 72/75/85, iMac*1 640 × 480 640 × 360 (When zoomed) 960 × 720 1280 × 720 640 × 480 SVGA 56/60*/72/75/85/, iMac*1 800 × 600 800 × 450 (When zoomed) 960 × 720 1280 × 720 800 × 600 XGA 43i/60*/70/75/8
Specifications 52 Product name Home Theatre Projector EMP-TW100 Dimensions 348 (W) x 104 (H) x 274 (D) mm (13.7 (W) x 4.09 (H) x 10.79 (D) inches) (not including protruding parts) Panel size 0.87 inches Display method Polysilicon TFT active matrix Drive method Full-line 12-phase block sequential writing Resolution 921,600 pixels (1280 (W) x 720 (H) dots) x 3 Focus adjustment Manual Zoom adjustment Manual (approx. 1:1.35) Lamp (light source) UHE lamp, 150 W, Model No.
Safety USA UL1950 3rd Edition Canada CSA C22.2 No.950 -95 (cUL) European Community The Low Voltage Directive (73/23/EEC) IEC60950 2nd Edition, +Amd.1, +Amd.2, +Amd.3, +Amd.
Appearance 274 (10.79) 104 (4.09) 114 (4.49) 348 (13.
Part Names and Functions Front/Top Rear Control panel Base Remote control Front/Top Temperature indicator (p.35) Indicates abnormalities in the internal projector temperature. Zoom ring (p.10) Adjusts the image size. Focus ring (p.13) Adjusts the image focus. Lamp indicator (p.35) Indicates a problem with the projection lamp or that the lamp needs to be replaced. Lamp cover (p.46) Open this cover when replacing the lamp unit inside the projector. Operation indicator (p.
Part Names and Functions Control Panel [Power] button (p.7) Press to turn the projector power on and off. [Source] button (p.7) Switches the input source between InputA → InputB → S-Video → Video → D-RGB → A-RGB each time the button is pressed. [Menu] button (p.18) The environment setting menus turn on and off each time the [Menu] button is pressed. [Keystone] buttons (p.11) Press to select an item in an environment setting menu or help menu.
Front/Top Rear Control panel Base Remote control Rear RS-232C port Connects the projector to a computer using an RS-232C cable. This port is for service use, and should not normally be used. Trigger port When the projector power is turned on, 12 V DC is output from this port. When the projector's power is turned off, the output becomes 0 V to communicate the projector's power ON/OFF status to an external device.
Part Names and Functions Front/Top Rear Control panel Base Remote control Remote Control (Illumination) button (Setup Guide) The [Power], [Pattern], [Menu], [Esc], [Aspect] and [Colortune] buttons illuminate for 10 seconds each time this button is pressed. Remote control lightemitting area (Setup Guide) Outputs infrared remote control signals. [Menu] button (p.18) The environment setting menus turn on and off each time the [Menu] button is pressed. [Aspect] button (p.
Glossary 3-2 pull-down function This function directly converts image sources that have been recorded in the same 24-frame format used for movies into 60-frame progressive signals. This allows data such as DVD software that has been recorded in 24-frame format to be played back on large screens with more natural and accurate reproduction, without any loss of image quality from the original movie. Aspect ratio The ratio between an image's length and its height.
Glossary 60 HDTV An abbreviation for High-Definition Television. It refers to high-definition systems which satisfy the following conditions.
Index H A Handle ................................................55 HDTV.....................................14, 50, 51 About menu........................................ 31 Advanced menu ........................... 22, 29 Air filter cleaning............................... 44 Air filter replacement......................... 48 Appearance ........................................ 54 A-RGB/D-RGB DVI-I port .............................. 7, 57, Setup Guide Aspect ratio ........................................
DECLARATION of CONFORMITY According to 47CFR, Part 2 and 15 Class B Personal Computers and Peripherals; and/or CPU Boards and Power Supplies used with Class B Personal Computers We Located at Tel : EPSON AMERICA, INC. : 3840 Kilroy Airport Way MS: 3-13 Long Beach, CA 90806 : 562 - 290- 5254 Declare under sole responsibility that the product identified herein, complies with 47CFR Part 2 and 15 of the FCC rules as a Class B digital device.
FCC Compliance Statement For United States Users This equipment has been tested and found to comply with the limits for a Class B digital device, pursuant to Part 15 of the FCC Rules. These limits are designed to provide reasonable protection against harmful interference in a residential installation. This equipment generates, uses, and can radiate radio frequency energy and, if not installed and used in accordance with the instructions, may cause harmful interference to radio or television reception.
All rights reserved. No part of this publication may be reproduced, stored in a retrieval system, or transmitted in any form or by any means, electronic, mechanical, photocopying, recording, or otherwise, without the prior written permission of SEIKO EPSON CORPORATION. No patent liability is assumed with respect to the use of the information contained herein. Neither is any liability assumed for damages resulting from the use of the information contained herein.
E Printed on 100% recycled paper. Printed in Japan 402168002 (9002466) 02.03-.