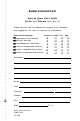
Reader Comment Card Apex by Epson User’s Guide for the Apex Plus and Apex Plus 20 Please use this card to evaluate this manual. Your comments and suggestions will help us improve our publications. Please rate the following: Excellent Good Fair Organization of this manual Technical accuracy Completeness of instructions Clarity of concepts and wording Quality of examples and pictures Quantity of examples and pictures Comments : Name: Title: Company: Address: City: State: Please cut out and mail in.
IMPORTANT NOTICE DISCLAIMER OF WARRANTY Epson America makes no representations or warranties, either express or implied, by or with respect to anything in this manual, and shall not be liable for any implied warranties of merchantability and fitness for a particular purpose or for any indirect, special, or consequential damages. Some states do not allow the exclusion of incidental or consequential damages, so this exclusion may not apply to you. COPYRIGHT NOTICE All rights reserved.
FCC COMPLIANCE STATEMENT FOR AMERICAN USERS This equipment generates and uses radio frequency energy and if not installed and used properly, that is, in strict accordance with the manufacturer’s instructions, may cause interference to radio and television reception.
iv
Contents Introduction . . . . . . . . . . . . . . . . . . . . . . . . . . . . . . . . . . . . . . . . . . . . How to Use This Manual. . . . . . . . . . . . . . . . . . . . . . . . . . . . . . . . . . Where to Get Help . . . . . . . . . . . . . . . . . . . . . . . . . . . . . . . . . . . . . . 1 3 4 Chapter 1 Setting Up your System . . . . . . . . . . . . . . . . . . . . . . . . . . . . . . . . 1-1 l Unpacking. . . . . . . . . . . . . . . . . . . . . . . . . . . . . . . . . . . . . . . . .
Chapter 2 Using Your Apex. . . . . . . . . . . . . . . . . . . . . . . . . . . . . . . . . . . . . . 2-1 Special Keys on the Apex Keyboard . . . . . . . . . . . . . . . . . . . . . . . 2-1 Selecting Execution Speed . . . . . . . . . . . . . . . . . . . . . . . . . . . . . . . 2-4 Stopping a Command or Program . . . . . . . . . . . . . . . . . . . . . . . . . 2-5 Resetting the Computer . . . . . . . . . . . . . . . . . . . . . . . . . . . . . . . . . 2-5 Turning Off the Computer. . . . . . . . . . . . . . .
Copying Data . . . . . . . . . . . . . . . . . . . . . . . . . . . . . . . . . . . . . . . . 3-15 Using the DISKCOPY command . . . . . . . . . . . . . . . . . . . . 3-16 Using DISKCOPY with an Apex Plus . . . . . . . . . . . . . . . . 3-16 Using DISKCOPY with an Apex Plus 20 . . . . . . . . . . . . . . 3-18 Using the COPY command . . . . . . . . . . . . . . . . . . . . . . . . . 3-19 Using the BACKUP command . . . . . . . . . . . . . . . . . . . . . . 3-21 The HELP Utility . . . . . . . . . . . . . . . . .
Appendixes Appendix A Setting the DIP Switches. . . . . . . . . . . . . . . . . . . . . . . . . . . . . . . Switch 1 (serial port) . . . . . . . . . . . . . . . . . . . . . . . . . . . . . . . . . . Switch 2 (parallel port) . . . . . . . . . . . . . . . . . . . . . . . . . . . . . . . . . Switches 3 and 4 (monitor and adapter type). . . . . . . . . . . . . . . . A-1 A-2 A-3 A-3 Appendix B Preparing a Hard Disk for Use . . . . . . . . . . . . . . . . . . . . . . . . . . Using HDFMTALL . . . . . . . . . . .
Introduction TM ® Your Apex by Epson personal computer comes in two versions: the Apex Plus with two 360 KB (kilobyte) diskette drives, and the Apex Plus 20 with one 360 KB diskette drive and one 20 MB (megabyte) hard disk drive. Both versions have 512 KB of internal memory, called random access memory or RAM. RAM determines the size of software programs you can run and the data files you can create. With 512 KB of RAM, you can run most large programs and create large data files.
Your Apex includes built-in parallel and serial interfaces that let you connect almost any peripheral device to the computer. A peripheral device is one that you attach to your computer, such as a printer, mouse, or modem. You can use the parallel interface to connect an Epson printer or plotter or any other parallel printer. You can use the serial interface to connect a serial printer or a mouse. Your computer comes with version 3.
How to Use This Manual This manual describes how to set up and care for your computer. It also introduces the basics of using MS-DOS and shows you how to install option cards so you can connect optional devices. You may not need to read everything in this manual; some sections may describe a particular option or accessory you don’t have. The information in this manual applies to both the Apex Plus and the Apex Plus 20 computers unless indicated otherwise.
Appendix B describes how to prepare an unformatted hard disk for use. Appendix C lists the hardware specifications, operating requirements, and options of your computer. The glossary defines the computer terms used in this manual. Where to Get Help For warranty repairs and technical assistance for your Apex computer, call toll-free 1-800-922-8911 (24 hours a day, seven days a week) for the location of your nearest Epson Customer Care Center.
Chapter 1 Setting Up Your System Setting up your Apex personal computer is easy - just follow the steps in this chapter and you’ll be on your way. You can also check the “Read This First” sheet included with your computer. 1 Unpacking Inspect each component as you remove it from its carton. If you discover any missing or damaged items, contact the place of purchase to obtain the missing items or an exchange.
You’ll also find a registration card with your Apex; fill out this card now and mail it to Epson. With this registration card on file, Epson can send you update information. Removing the disk drive protector cards A protector card occupies each diskette drive in your computer. This card is inserted at the factory to protect the disk drive heads that read from and write to diskettes, Be sure to remove the card from each diskette drive before you turn on the computer.
Save these cards to use whenever you move the computer. Also, if you don’t intend to use your computer for a week or more, insert the cards to help prevent dust from entering the drives. 2 Choosing a Location Before you set up your Apex, it’s important to choose the right location. Make sure it provides the following: A large, sturdy area and surface, such as a desk or table, that can easily support the weight of your Apex and all its components. A flat, hard surface.
No electromagnetic interference. Choose a spot for your computer away from any device that generates an electromagnetic field (like a telephone). Arranging the components Decide how you want to arrange your system components. The illustration below shows a typical setup. The monitor is on top of the main unit and the keyboard is directly in front. This leaves enough space for you to insert diskettes into the disk drives.
The front panel On the front panel you see the power light, the power switch, and the keyboard cable socket. If you are using an Apex Plus, your computer has two diskette drives. If you are using an Apex Plus 20, your computer has one diskette drive and one hard disk drive. Here’s how the front panel components work: Power switch. Press this switch to turn the main unit on and off. Power light. This light is on when the power is on. Your Apex computer can operate at two different speeds.
Diskette drives. In the Apex Plus, both the top and bottom diskette drives use 5 l/4-inch, 360 KB diskettes. In the Apex Plus 20, the diskette drive also uses 5 l/4-inch, 360 KB diskettes. Disk lock/release latch. After you insert a diskette, turn this latch down until it is vertical. To remove a diskette, turn it up until it is horizontal. Diskette drive light. This green light is on when the drive is in use.
The back panel Take a look at the back panel and note the power inlet, the universal power supply, the DIP switches, the built-in input/output ports, and the option card access slots. WARNING Do not connect the power cord until you have connected the printer and any other optional devices. Always check to see that the power switch is off before you connect or disconnect the printer. The back panel components are: AC input.
configuration. Do not change them unless you are adding option cards that require different settings. Appendix A describes how to set these switches if you change your system configuration. Parallel port. Lets you connect any printer or plotter with a parallel interface. Serial port. Lets you connect any serial device, such as a serial printer or a mouse. Option card access slots. The Apex has space for five option cards to control any peripheral devices you add.
3 Connecting the Monitor It is easiest to connect the monitor cable if the backs of the monitor and the main unit are facing you. Your Apex comes with an installed multi-graphics adapter (MGA) card. You can connect an RGB color graphics monitor or a TTL monochrome monitor to the port on this card. The way you connect your monitor depends on the type you have, so check your monitor manual for instructions, or follow these guidelines: 1. If necessary, connect the monitor cable to your monitor.
3. Tighten the screws (if any) on the plug with a screwdriver. 4. Plug the monitor’s power cable into an electrical outlet. 5. Set the color/mono switch on the back panel for the type of monitor you are using.
6. Make sure the DIP switch settings are correct for the type of monitor you are using. The Apex computer is set at the factory to 80x25 color, for a color graphics monitor. If you are connecting a monochrome monitor, you need to change the DIP switch settings. See Appendix A for more information. If you are using a monitor other than a color graphics or TTL monochrome unit, you’ll need to install another video card in your computer. See Chapter 4, “Installing Option Cards,” for instructions.
4 Connecting the Keyboard Follow these steps to connect the keyboard: 1. Insert the keyboard connector into the keyboard socket on the front panel of your Apex. Do not force the connector, but make sure you completely insert it. 2. If you would like to adjust the angle of the keyboard, turn the keyboard over and lift each leg upward until it locks into place.
You can lock each leg in a 15 degree position or an 11 degree position. To lock a leg into the 11 degree position, lift up the entire leg and then push the portion marked 15” back until it snaps into the keyboard. 5 Connecting a Printer Follow the steps in this section to connect your printer to either the parallel or serial interface. Parallel interface Your Apex computer has a parallel interface to which you can connect a printer.
3. Connect the printer cable connector to the parallel port on the back panel of the main unit. If the connector has retaining screws, tighten them with a small screwdriver. 4. Connect the other cable connector to the printer. Secure the cable by pressing together the squeeze locks from the printer port and pushing them into each side of the connector. 5. Plug the printer’s power cord into an electrical outlet.
Serial interface If you have a printer (or another peripheral such as a modem) with a serial interface, connect it to the serial (RS-232C) port on the back panel. The Apex uses a DB-25P connector, so be sure you have an XT-compatible cable. To connect a serial device, follow the same steps as for connecting a parallel printer. You need to ensure the serial port is set up so it functions properly.
7 Turning On the Computer and Loading MS-DOS Before you turn on the computer, be sure to read the safety rules. Safety rules Follow these rules to avoid accidentally damaging your computer or injuring yourself: Never turn the computer on with a disk drive protector card in the disk drive. Do not attempt to dismantle any part of the computer. If there is a hardware problem you cannot solve after reading Chapter 5 on troubleshooting, contact your Authorized Epson Customer Care Center.
System startup Now you’re ready to turn on your Apex. Follow these steps: 1. Make sure one end of the power cord is securely plugged into the power inlet (AC input) on the back panel of the main unit and the other end is plugged into a 3-prong, 120-volt, grounded electrical outlet. 2. Turn on the monitor so you can see messages that appear as your computer starts up. If you have a printer, turn it on. 3.
Initial screen display Before the self test begins, a message similar to this displays: Phoenix 8088 ROM BIOS Ver. 1.00 Copyright (c) 1984, 1985, 1987 Phoenix Technologies Ltd All Rights Reserved. Then the computer immediately begins to test the memory. The Apex computer checks each kilobyte of memory twice, counting from 0 to 512 and then starting over again. It displays this message as it performs the test: RAM Testing . . . XXXKB The test takes about 45 seconds to complete.
If you have an Apex Plus 20, your computer automatically loads MS-DOS version 3.2 from the hard disk drive. The MS-DOS command prompt C> displays. Continue with the section called “The command prompt.” Loading MS-DOS on the Apex Plus Before you can use a software program designed to run on the MS-DOS operating system, MS-DOS must be running in the computer’s memory (this is also called booting the system).
2. Turn the latch down until it locks in the vertical position. For a complete description of inserting diskettes, see Chapter 2, “Using Diskettes and Diskette Drives.” 3. Press any key to begin. Your computer begins loading MS-DOS into memory. If you did not insert your system diskette, or you inserted another diskette by mistake, you see these messages: Non-System disk or disk error Insert system diskette in drive A: and strike any key when ready 4.
5. You can enter the correct date or leave it unchanged by pressing Enter. For now, press Enter to leave the date unchanged. 6. After accepting the date, MS-DOS displays the time prompt: Current time is hh:mm:ss Enter new time: You can enter the correct time or bypass the prompt by pressing Enter. For now, press Enter to bypass the prompt. The system now displays the MS-DOS command prompt, A>, which is your starting point for putting MS-DOS to work.
That’s because Epson changed the prompt by adding a command in a file named AUTOEXEC.BAT. This file contains a series of commands that your computer automatically runs when you turn it on. One of these commands is PROMPT $P $G, which modifies the prompt to display your directory location on the disk. For simplicity, all of the examples in this manual show the default command prompt, A> or C>. For more information about the AUTOEXEC.BAT file, see “Using an AUTOEXEC.
2. Type: DISKCOPY A: B: and press Enter. The screen displays these prompts: Insert SOURCE diskette in drive A: Insert TARGET diskette in drive B: Press any key when ready... 3. Insert the MS-DOS system diskette you want to copy (the source) into drive A. 4. Insert a blank 5 l/4-inch, 360 KB diskette (the target) in drive B, the bottom disk drive, and close the diskette drive latch. 5. Press any key to begin the copy process.
7. Press N to return to the MS-DOS command prompt. 8. Store the original system diskettes in a safe place. 9. Properly label the working copies you just created. Copying diskettes on the Apex Plus 20 1. The C> prompt should be displayed on the screen. If it is not, type C : and press Enter. 2. Type: DISKCOPY and press Enter. The screen displays the following prompts: Insert SOURCE diskette in drive A: Press any key when ready... 3.
If the diskette in drive A is not formatted, the DISKCOPY program formats it. Then the program copies the data from the computer’s memory to the formatted diskette. When the copy is complete, you see this prompt: Copy another diskette (Y/N)? 6. Press Y so you can make a copy of the GW-BASIC diskette. Follow the instructions above and the prompts on the screen to make the copy. When the copy is complete, this prompt displays again: Copy another diskette? (Y/N) 9 7.
To set the real time clock, follow these steps: 1. If you are using the Apex Plus, insert the GW-BASIC diskette into drive A. At the command prompt, type the following and press Enter: SETRTC /I The screen displays a prompt similar to this: Set Real Time Clock Ver. 1.00 Current Time is 12:05:31 Enter New Time: 2. Using a 24 hour format, type the new time and press Enter. Use colons to separate the hours, minutes, and seconds. It’s not necessary to type the seconds.
Chapter 2 Using Your Apex This chapter covers these basic procedures for using your Apex computer and keyboard: Using the special keys on the keyboard Changing your computer’s operating speed Interrupting a command or program Resetting and turning off your computer Using diskettes, diskette drives, and hard disk drives. Special Keys on the Apex Keyboard Some of the keys on your keyboard serve special functions when your computer is running application programs.
Take a look at the special keys and their functions: Key Name Purpose Perform special functions within application programs. Moves the cursor to the right in normal mode (and to the left in shift mode in some application programs). Works with other keys to perform special control functions, such as editing operations in MS-DOS and GW-BASIC. Produces uppercase characters or symbols when used with the main character keys. Produces lowercase characters when Caps Lock is on.
Key Name Purpose Changes the function of the keys on the keypad from numeric entry to cursor movement; changes when pressed again. Controls scrolling in some applications. When you hold down the Ctrl key and press this key, it sends a break signal to the computer to terminate the current operation. Prints the screen display on a dotmatrix printer. Within application programs, these keys control cursor movement. Turns the insert function on and off. Deletes characters to the right of the cursor position.
Selecting Execution Speed The Apex can operate at two speeds: 4.77MHz or 9.54MHz. At 9.54MHz, the Apex performs all tasks faster. Certain applications may have specific timing requirements and only operate at the slower speed. See the application program manual to determine the best operating speed. When you turn on the computer, it runs at 4.77MHz. An orange power light indicates the system is set at the slower speed.
NOTE If you want to set your computer to run at 9.54MHz every time you turn on or reset the computer, insert a SPEED command in your AUTOEXEC.BAT file. See “Using an AUTOEXEC.BAT File” in Chapter 3 or your MS-DOS reference manual for more information. Stopping a Command or Program You may need to stop a command or program while it is running. To stop the operation of an MS-DOS command, hold down Ctrl and press C or hold down Ctrl and press Break.
WARNING Do not reset the computer simply to exit a program. Some application programs classify and store new data when you exit the program. If you reset the computer without properly exiting the program, you may lose data. To reset the computer, hold down Ctrl and Alt and press Del (on the numeric keypad at the right of the keyboard). The screen is blank for a moment, then MS-DOS is loaded from the diskette in drive A or from drive C.
Using Diskettes and Diskette Drives The disk drives in your computer let you store your work and programs for use at any time. Apex Plus systems have two 360 KB diskette drives. Apex Plus 20 systems have one 360 KB diskette drive and one 20 MB hard disk drive. Read the following sections to learn how diskettes work and how to do the following: Choose diskettes Care for your diskettes and disk drives Cl Insert and remove diskettes Write-protect diskettes Cl Make backup copies of your diskettes.
A small read/write head in the computer’s disk drive interprets the magnetic patterns. When you put a diskette in a drive, the read/write head is directly over the large oval hole. The hole allows read/write head access to the diskette so you can store, retrieve, and delete data. The data is stored magnetically so you can retrieve it, record over it, and erase it - just as you play, record, and erase music on cassette tapes.
new blank diskettes or diskettes that contain data you want to erase. See Chapter 3 (or your MS-DOS reference manual) for instructions on how to format diskettes. Caring for your diskettes and diskette drives Follow these basic precautions to protect your diskettes and help you avoid losing data: Keep your diskettes away from dust and dirt. Small particles of dust or dirt can scratch the magnetic surface and destroy data. Dust can also ruin the read/write head in the disk drive.
Do not place anything on top of your diskettes, and do not bend them. A diskette does not rotate properly in the drive if it has been damaged. Never wipe, brush, or try to clean diskettes in any way. Carefully label diskettes. Attach the label firmly but gently, and only along the top of the diskette (next to the manufacturer’s label). Do not stick several labels on top of one another; too many labels can prevent the diskette from spinning freely in the disk drive.
When the diskette is all the way in, turn the latch down until it locks into the vertical position. This keeps the diskette in place and lets the read/write heads in the disk drive access the diskette. To remove the diskette, turn the latch up until it is horizontal. Carefully pull out the diskette, place it in its protective envelope, and store it properly. Keep your diskettes in a special diskette container. WARNING Never remove a diskette or turn off the computer while the drive indicator light is on.
Write-protecting diskettes You can write-protect a diskette to prevent its data from being altered. When a diskette is write-protected, you can read data from it, but you cannot store new data on the diskette or delete any files it contains. If you try to change data stored on a writeprotected diskette, the computer displays an error message. To write-protect a diskette, cover the small, rectangular notch with an adhesive write-protect tab.
Copy your data diskettes regularly (preferably every day, or every few hours if you’re creating a lot of data) to keep your backup data current, then store the backup copies away from your originals. Chapter 1 describes how to use DISKCOPY to copy your MS-DOS system diskettes. To make backups of other MS-DOS diskettes, use the DISKCOPY command or the DU (Disk Utility) program. See your MS-DOS reference manual for instructions on using DISKCOPY and DU.
The 20 MB hard disk can store as much data as 55 360 KB diskettes. Your computer can read from and write to a hard disk faster than when using a diskette. You can store all your frequently used programs and data files on the hard disk, reducing the amount of time you spend swapping between diskettes with different information on them. The added storage capacity makes it easy to move back and forth between different programs and data files.
insert another diskette and copies from memory to the new diskette. When copying is complete, you see a prompt to insert the original diskette. Because you may often swap diskettes this way, it is important to remember which diskette is which. One way to avoid accidentally losing data is to hold the diskette for one drive in your left hand and the diskette for the other drive in your right. You can also write-protect your source diskette.
2-16 Using Your Apex
Chapter 3 Using MS-DOS with Your Apex In this chapter, you’ll learn the basics of using MS-DOS with your Apex. The MS-DOS operating system manages the routine work of your system, such as keeping the computer’s memory organized, controlling the monitor display, accepting keyboard input, and directing external communication. Introducing MS-DOS Your application software cannot communicate with your Apex hardware without instructions from MS-DOS.
Starting and Exiting MS-DOS Before you can run an MS-DOS application program, MS-DOS must be running in memory. Follow these steps to load MS-DOS: 1. Turn on your monitor and any peripherals, such as the printer. 2. Turn on the computer. 3. If you have an Apex Plus, insert your MS-DOS system diskette into the top drive and press any key. NOTE If you are using an Apex Plus 20, your system is set to boot MS-DOS automatically from the hard disk when you turn on or reset the computer.
Changing the Default Drive When you see the A> prompt, you know that MS-DOS is operating from drive A. If you want to run a program or find a file on a different drive, however, you must specify that drive. You can do this by including the drive identifier with the filename or by logging on to that drive. The drive identifier is the letter of the disk drive followed by a colon. For example, to log on to drive B (the bottom diskette drive), type B : and press Enter. Your screen now displays the B> prompt.
You can enter command names and parameters in either uppercase or lowercase letters. However, you must separate command names and parameters with delimiters; most commands require spaces or commas as delimiters. If you make a mistake when typing a command and you notice it before pressing Enter, you can do one of two things: Use the backspace key to back up and correct the error Press E SC to cancel the command line.
Naming a File Each file requires a unique filename. The filename consists of two parts: the file’s name and the file’s extension. You can use up to eight characters in a filename. Create a name that identifies the information the file contains. The name can contain any characters or numbers except for blank spaces and the following symbols: * \ / { } : I < > + = ; . ? The file extension is optional and can be up to three characters long.
Creating and Using Directories MS-DOS stores the names of the files in directories. This makes it easy for you to organize and find your files. A directory contains specific information about each file such as its name, size, and the date and time you last updated the file. As you create more and more files within a directory, you may find it difficult to quickly locate files. You may want to create subdirectories within your main directory so you can group files more efficiently.
The directory you are working in is called the cm-rent directory. Usually, when you first load the operating system, the root directory is the current directory. To list the files in the root directory, type DIR and press Enter.
Creating directories Use the MKDIR command to create a directory. For example, to create the LEDGER directory under the root directory, type the following and press Enter: MKDIR \LEDGER You can abbreviate the name of this command to MD. For example, to create the SALES directory under LEDGER, type the following and press Enter: MD \LEDGER\SALES To check that the LEDGER directory is in the root directory, type DIR and press Enter.
`The backslash identifies the new directory LEDGER as a subdirectory of the root directory. Once you are in the directory, you can directly access any files it contains. To change to a subdirectory of the current directory, you do not need to enter the backslash.
For example, if you are in the LEDGER directory and want to access a file named MICHELLE under the PERSONAL directory, you would type the following pathname and press Enter: \WORDPROC/PERSONAL/MICHELLE The pathname \ WORDPROC\PERSONAL\MICHELLE is the full pathname for the file MICHELLE. You can use it no matter what directory you are in (as long as it is on the same disk). The first backslash (for root directory) signifies that the path to the file starts in the root directory.
Copying from one directory to another You use the COPY command to copy files from one directory to another. Specify the pathname of the file you want to copy, then specify the directory where you want to place the copy. For example, if you are in the WORDPROC directory and want to copy MICHELLE from the PERSONAL subdirectory to the BUSINESS subdirectory, type the following and press Enter: COPY PERSONAL\MICHELLE BUSINESS Be sure to type a space between the filename and the new pathname.
Displaying a list of directories The TREE command lets you display a list of all the directories on the specified drive.
Removing a directory If you no longer need a directory, you can remove it with the RMDIR (remove directory) command. To remove a directory, first delete any files it contains or move them to another directory. You cannot remove a directory that is not empty. To remove an empty directory, such as the WEST directory under LEDGER, type the following and press Enter: RMDIR \LEDGER\WEST You must give the complete pathname when removing a directory.
2. When you see the A> prompt, type: FORMAT B: and press Enter. You see this prompt: Insert diskette for drive B: and strike ENTER when ready 3. Insert the diskette you want to format into drive B and press Enter. MS-DOS displays the head and cylinder numbers as it formats each cylinder of the diskette: Head: n Cylinder: nn 4.
3. When you see the C> prompt, type: FORMAT A: and press Enter. You see this prompt: Insert new diskette for drive A: and strike ENTER when ready 4. Insert the diskette you want to format into drive A and press Enter. MS-DOS displays the head and cylinder numbers as it formats each cylinder of the diskette: Head: n Cylinder: nn 5.
Using the DISKCOPY command The DISKCOPY command lets you copy all the files on a diskette to another diskette. Epson also provides a disk utility called DU to copy diskettes; this utility is described in your MS-DOS reference manual. The procedure for copying diskettes depends on whether you are using an Apex Plus or an Apex Plus 20. Follow the appropriate procedure for the computer you are using.
3. At the A> prompt, type: DISKCOPY A: B: and press Enter. 4. MS-DOS prompts you to insert your diskettes. You see these messages: Insert SOURCE diskette in drive A: Insert TARGET diskette in drive B: Press any key when ready ... 5. Insert the diskette you want to copy from (the source) in drive A and the diskette you want to copy to (the target) in drive B. Then press any key. DISKCOPY checks to see if the destination diskette is formatted. If it is not, DISKCOPY formats the diskette.
Using DISKCOPY with an Apex Plus 20 1. Make sure your original diskette is write protected (see Chapter 2 for instructions). 2. If necessary, type C : to log onto drive C. 3. At the C> prompt, type: DISKCOPY and press Enter. MS-DOS displays these messages: Insert SOURCE diskette in drive A: Press any key when ready ... 4. Insert the diskette you want to copy from in the diskette drive and press any key. DISKCOPY copies the contents of the diskette to the computer’s memory.
5. Remove the diskette from drive A and insert the blank diskette in the drive. DISKCOPY checks to see if the new diskette is formatted. If not, it formats the diskette. You see this message: Formatting while copying The copy operation begins when the format is complete. You see these messages: Copying 40 tracks 9 sectors/track, 2 side(s) When the copy is complete, you see this message: Copy another diskette (Y/N)? 6. Press Y to perform another copy or N to end the DISKCOPY command.
A few simple rules apply when copying files: You must tell MS-DOS where to find the source file and where to write the target file. You cannot create a new file with the same name as an existing file. If a file on the target diskette has the same name as a file on the source diskette, the copy automatically replaces the file on the target diskette. There is no warning that the file on the target diskette is being replaced, so be careful that you do not accidentally erase a file you want to keep.
To copy all the files on the diskette in drive A to the diskette in drive B, type: COPY A:*.* B: To copy all the files on drive A whose names begin with the four letters “MEMO” and end with any single character to drive B, type: COPY A:MEMO? B: Another task you can perform with the COPY command is combine a number of files into one file. Use this format: COPY REPORT + FACTS + MEMO DATA When you use the COPY command this way it copies the file REPORT, then FACTS, and then MEMO into the new file, DATA.
You can also completely back up all your files and then tell BACKUP to add only those files that have been modified since the last time you ran BACKUP. This process, called an incremental backup, makes regular backups faster to perform. Be sure you have enough formatted diskettes to back up the data on your hard disk drive. It can take about 50 360KB diskettes to copy a 20MB hard disk drive that is completely full (although it is rare that you would store this many files on a hard disk).
Use the cursor keys to highlight a command name and press Enter to display the help screens for this one command. If there is more than one page of text, you see the prompt PgUp on the top of the screen. Press PgUp to display the rest of the text. After reading the help information, press ESC to return to the menu. If you type HELP and one or more command names on the command line, the help information for the first command is displayed. Press ESC to see the help information for the next command.
Messages command not found You may have misspelled the command name. Press Enter to return to the command prompt and try again. Failed to open HELP.TXT HELP could not find the HELP.TXT file. HELP.COM and HELP.TXT must be in the same directory, or use APPEND to locate the directory that contains HELP.TXT. The XTREE Utility Epson has included the XTREE program with MS-DOS to make it easier for you to manage files and run other MS-DOS programs. It is located on the GW-BASIC diskette.
Move a file, or files, from one directory to another on the current disk Display and change the attributes of any file; attributes are special switches, which you use to designate files as readonly, hidden, system, or archived Display data in both ASCII and hexadecimal format Execute programs Display how much space is available on your disks Modify screen parameters. Using XTREE To run XTREE, move to the directory where XTREE is located. Type XTREE at the command prompt, and press Enter.
The XTREE display shows you: PATH Provides the current location as an MS-DOS style pathname. \ Provides a tree diagram of the directory structure of the disk. This window currently shows the disk only has a root directory (\). FILE Shows you the files XTREE is set to display. This window shows that XTREE is set to display all files matching the DOS specification *.*, in other words, all files. DISK Shows the name of the disk being displayed and the number of free bytes.
Cursor keys move the pointer. To select a file, use the arrow keys to highlight the file and directory names within the Directory and File windows. Press Enter to move the cursor from the Directory window to the File window and back again. Character keys execute an XTREE command. The available XTREE commands appear on the DIR/COMMANDS or FILE/COMMANDS line at the bottom of your screen. The highlighted letter of the word (D in Delete, for example) indicates the key you press to execute the command.
Cautions With a utility as powerful and as fast as XTREE, you must always be aware of the danger of accidentally erasing important files. Follow these guidelines to protect your files: You can cancel commands, even commands in progress, by pressing F3. This stops any function. Use Ctrl A (the attributes command) to give read-only status to all the files in the directories. Then, in order to erase a file, you must first remove its protection.
1. At the MS-DOS command prompt, type XTREE and press Enter. You see the XTREE menu: Path:\ I FILE:'.
3. Now you can copy files into this directory. Press Enter to move the cursor from the root directory to the files window. 4. Press T to tag a few files. A diamond appears next to each file you tag. Copying duplicate files uses up space quickly. It is a good idea to always check the total of Tagged Bytes in the DIRECTORY Statistics box to make sure you don’t tag more bytes than the Available Bytes (shown in the DISK box). 5. Press Ctrl C to copy all tagged files in the directory.
7. Press Enter twice to return the cursor to the root directory; then move the cursor to the new directory. Your display should look like this: Path:\ FILE:*.
Starting Your Application Program Once you have loaded MS-DOS, you can start using your application program. Remove your MS-DOS diskette from drive A and insert your application program diskette. Once you start using your application program, you see the prompts and screen displays that are unique to the application program. See your application manuals for more information. Using an AUTOEXEC.BAT File You may find that there are some commands you want to run every time you turn on your computer.
third line changes the command prompt to display the current directory as well as the current drive, and the fourth line clears the screen. Here are some other suggestions for commands you can include in an AUTOEXEC.BAT file: Modify the PATH command to include the directories containing other software programs you commonly use. Add the XTREE command to the end of the list of commands so that you start each session within XTREE. Add the SPEED command so your computer is running at fast speed at startup.
3-34 Using MS-DOS with Your Apex
Chapter 4 Installing Option Cards You can use your Apex in many additional ways by adding option cards to its present configuration. Option cards are accessories that provide extra capabilities to your Apex. For example, you may want to install an internal modem so you can communicate with another computer over the telephone, or a video card that allows you to use an EGA monitor.
Removing the Cover To remove the cover, you’ll need a cross-head screwdriver. Follow these steps: WARNING Never open the cover of the Apex while it is plugged into an electrical outlet. Turn off the power switch to the computer, then turn off any other peripheral devices connected to it. Wait for a few seconds, then unplug the power cord before removing the cover. 1. If your monitor is on top of the computer, disconnect it and move it to one side.
4. Now tilt the cover up slightly from the back and push it away from you and the computer. 5. Set the cover aside for now. Inserting the Option Card Now that the cover is off, you can place the option card in any of the open option slots. Even though option cards are designed to fit only one way, it is a good idea to examine the card first and follow the instructions closely.
1. Touch the power supply cover inside the computer to discharge any static electricity that may be on your clothes or body. 2. Decide which option slot you want to use, then remove the retaining screw from the metal cover plate at the back of the slot. Lift out the metal cover and keep it in a safe place to use later if you remove the option card. Keep the screw close by; you’ll need it to secure the option card to the computer.
3. Next, unpack the option card and read all instructions that come with it. Adjust any switches or jumper connections on the option card if necessary. NOTE Pay special attention to the warnings in your option card instructions. Some devices have delicate CMOS chips that you should not touch. When you handle the card, be careful not to touch any of the contacts on the circuit board, especially along the gold edge connections.
5. Now, insert the card straight down into the slot. Slide the tab at the bottom of the retaining bracket between the back panel and the green main circuit board. 6. Once you have the connector pins sitting in the connector slot, push down firmly (but carefully) to fully insert the card. If you feel that the connector isn’t going in smoothly, do not force it; pull it all the way out and try again. Be sure to keep it straight. 7.
Replacing the Cover After you have installed the card, all you need to do is replace the cover of the computer: 1. With the back of the computer still facing you, position the cover over the computer with the front edge pointing slightly downward. 2. Lower the cover onto the computer making sure that the edges fit around the back panel. 3. Secure the cover by replacing the screw on the back of the computer and the four screws on the sides of the top cover. 4.
Post-installation Setup With the option card in place, your Apex may need a few adjustments to accommodate its new configuration. If you have already replaced the computer’s cover and reconnected the power cord, you may now need to change your DIP switch settings to reflect the new configuration. For example, if you add an extra parallel interface, you need to change switch 2 so the computer recognizes the additional interface. See Appendix A for more information on DIP switch settings.
and out of the connector to avoid damaging it. When the card is removed, rewrap it (using the original packing materials) and place it inside the packing box for safe storage. Next, replace the metal access slot cover, and finally replace the computer’s cover. When you have reassembled the computer, remember that you may need to reset the computer’s DIP switches to properly configure your system.
4-10 Installing Option Cards
Chapter 5 Trobleshooting You should not encounter any serious difficulties as you set up and use your Apex. But if anything out of the ordinary happens, check this chapter for a solution. You can usually correct most problems by adjusting a cable connection, repeating a software procedure, or resetting the computer. Use the suggestions in this chapter to help you solve most of the problems that you may encounter.
The Computer Fails to Start Up If your computer does not start up when you turn on the power switch, follow these steps to find a solution: 1. First, check to see if the power light on the front panel of the main unit is on. If it is not, remove any diskettes you have in the drives and turn off the power. Wait five seconds, then turn the power back on. 2. If the light still does not come on, turn off the power switch again.
2. If the display doesn’t appear on the screen, use the controls on the monitor to adjust the brightness and contrast of the display. 3. Check DIP switches 3 and 4 on the back panel of the main unit to make sure they are set correctly for your video card. If you need to adjust a DIP switch, turn off your computer, make the adjustment, and then turn on the power. 4. Remove any diskettes you have in your disk drives, then turn off the computer.
2. If the computer remains locked up after you’ve allowed a reasonable amount of time, follow the steps in Chapter 2 under “Resetting the Computer.” Diskette Problems If you have trouble with one of your diskettes, read the following questions to see if they apply to the problem: 1. Is the diskette damaged? To find out, copy the diskette and repeat the operation that caused the problem using the copy you just made. (If you have trouble copying the entire diskette, some of the sectors may be bad.
Hard Disk Problems If you have problems with your hard disk when you first start to use it, make sure it has been set up properly. First check to see if you can boot from the hard disk. 1. Can you boot from your hard disk? You may be missing one of the MS-DOS system files needed to boot from the hard disk. Turn off your computer. Insert a working copy of the MS-DOS system diskette into drive A and turn your computer on to boot from the diskette.
4. If reformatting the hard disk using FORMAT or SELECT doesn’t work, you can try to prepare the hard disk as if it were a new, unformatted hard disk using the HDFMTALL program. See Appendix B, “Preparing a Hard Disk For Use,” for instructions. As a last resort, have an Authorized Epson Customer Care Center check your hard disk. Never open the airtight container that encloses the recording disk.
Printer Problems Your printer manual describes methods to solve most of your printer problems. However, if your printer does not work correctly right after you install it, check to make sure the printer has power and is properly connected to the computer. If you need additional help, the printer manual gives detailed instructions on how to connect your printer. If you have printing problems, check the printer manual for the printer’s correct DIP switch settings.
5. Did you perform any necessary post-installation setup procedures for the operating system? If you did, check your MS-DOS reference manual to see that you properly followed the instructions in your option card manual. Expanding Your System Q: Can I use other types of diskette drives with the Apex? A: Half-height, 720KB 3 l/2-inch diskette drives and 1.2MB 5 l/4-inch high-density diskette drives are not supported.
Composite monochrome monitors can be used if a composite video board is installed (available from computer dealers). The multi-graphics adapter card supplied with the Apex does not support composite monitors. A standard television set cannot be used with the Apex, although there are some new TV sets being manufactured that can also be used as computer monitors with the proper interface card. Check with your dealer.
Q: What kind of joystick can I use with the Apex? Where do I connect it? A: There are many IBM-compatible joysticks and some have different types of connectors. Make sure the joystick connector matches the connector type on the board you are using. An IBM-compatible joystick such as the Kraft® Premium III Joystick with a 15 pin IBM compatible connector must be used with the connector on the multi-graphics adapter card.
Appendix A Setting the DIP Switches The DIP switch settings on the Apex provide your computer with information about its configuration. Each time you turn on your Apex, it checks the settings to determine the type of monitor and the type of interfaces in use. The DIP switches are located on the back panel of your main unit: These switches are preset for you by the manufacturer.
This table lists functions controlled by each DIP switch: Function 1 Serial (RS232-C) port COM1 primary * OFF COM2 secondary ON Parallel port LPT1 primary l LPT2 secondary Video type 40x25 color 80x25 color l 80x25 mono Special settings 2 3 4 ON OFF OFF ON OFF ON OFF ON OFF ON *Factory setting Switch 1 (serial port) Switch 1 tells the computer how to access the built-in serial port, as follows: The built-in serial port functions as either the primary or secondary serial port.
Switch 2 (parallel port) Switch 2 tells the computer how to access the built-in parallel port, as follows: The built-in parallel port functions as either the primary or secondary parallel port. You may decide to install an option card that has its own parallel port. Make sure you set the DIP switch or jumper on the option card as well as the DIP switch on the Apex so that there is no conflict between the built-in parallel port and the added card.
NOTE The Apex computer can automatically detect the correct video mode for the connected monitor and make the appropriate adjustments regardless of the current DIP switch settings. However, to ensure complete compatibility between your computer, video card, and monitor, you should set the computer’s DIP switches for the correct monitor.
Appendix B Preparing a Hard Disk For Use The Apex Plus 20 comes with a preformatted hard disk that has MS-DOS and GW-BASIC already loaded and ready to use. You do not need to format this hard disk drive unless you have a serious problem with it. If you encounter signs of a hard disk problem when booting MS-DOS, run the Non-destructive surface analysis test (option 4 on the HARD DISK FORMAT MENU) to make sure that formatting is absolutely necessary.
MKDIR and COPY let you move the files on your hard disk into the recommended arrangement. COPY lets you create an AUTOEXEC.BAT file to automatically execute the PATH command so you can keep the MS-DOS commands and the GW-BASIC program in a separate directory from the rest of your program and data files. Using HDFMTALL To format or check the integrity of the hard disk, run the MS-DOS HDFMTALL command. After you install a new hard disk drive, run HDFMTALL and choose option 1, Conditional format (Normal).
You see a menu of formatting and checking options: HARD DISK FORMAT MENU 1 - Conditional format (Normal) 2 - Unconditional format 3 - Destructive surface analysis 4 - Non-destructive surface analysis 0 - Exit Enter selection number: The first two options format a hard disk. Normally, you use option 1, Conditional format (Normal). This option automatically locates any bad tracks that are flagged by the manufacturer and marks them so that they cannot be used.
provided by the drive manufacturer contains bad tracks that the analysis does not detect, you can use the Unconditional format option to flag all the bad tracks manually. When you select an option from the HARD DISK FORMAT MENU, the program determines the number of hard disk drives installed in your computer. If you have more than one drive, each time you select an option you see this prompt: Enter drive letter (C/D)? Press C or D, and then press Enter.
When the scan is complete, the program displays information about the condition of the disk. For a 20MB hard disk with no bad tracks, the display looks like this: Scanning Count of Count of Count of finished.
When formatting is complete, any bad tracks are flagged, and you see a series of messages like these: Format finished Flagging bad tracks... Cylinder is xxxx, head is yy Format completed. Press ENTER to return to the menu. Flagged tracks are identified by xxxx and yy. At this point, press Enter to return to the HARD DISK FORMAT MENU. If there are any tracks with other errors, scanning stops and you see these messages: Scanning cancelled. Warning: This drive has an unflagged error(s), or is unformatted.
Unconditional format You can also use this option to format your hard disk. The difference between unconditional and conditional formatting is how bad tracks are identified. The unconditional format requires you to enter a list of bad tracks before formatting begins. To start the Unconditional format, press 2 and then Enter. You are first given the option to change the interleave factor for formatting from the default value of three.
To add a bad track, follow these steps: 1. Press A. You see this prompt: Enter cylinder number (1 - xxxx) 2. Type the number of the cylinder containing the missing bad track, and press Enter. You see this prompt: Enter head number (0 - yy): 3. Type the head number for the bad track, and press Enter. The maximum valid cylinder and head numbers (xxxx and yy) vary according to the type of hard disk. To cancel this operation, press Enter without entering a value. You see this message: Table unchanged.
Destructive surface analysis Use this option to accurately locate any bad tracks on a hard disk, and to flag any bad tracks that are not flagged. WARNING If any errors occur during this check, all data on the track that produces the error is destroyed. For this reason, if you think that an unflagged bad track is causing trouble, first run option 4, Non-destructive surface analysis, to check the disk surface.
If the program finds one bad track that is not flagged, the summary above shows one track with a write, read error, and only 2458 good tracks. The report is then followed by a table like this: Cylinder Head Write, Road Error Trackn - - - - - - - - - - - - - - - - - Cylinder Head Cylinder Head Cylinder Head 237 2 Confirm to register the tracks in the Write, Read Error Track Table as bad tracks.
As each track is checked, the current cylinder is displayed. The cylinder number counts down to zero as the disk is checked. When the analysis is complete, the program displays a summary of the status of the disk. This summary lists these counts: Flagged bad tracks Tracks with read, verify errors Good tracks. If no errors occur, you see this message: No read, verify error was detected. If errors are found, the program displays a table of the tracks that produced errors.
3. Press 1 and then Enter to select the Create DOS Partition option. The screen displays: Create DOS Partition Do you wish to use the entire fixed disk for DOS (Y/N) . . . . . . . . . . . .?[Y] 4. Press Y and Enter. The system creates the MS-DOS partition. The screen displays the following message: System will now restart Insert DOS diskette in drive A: Press any key when ready... 5. Press any key to restart the system.
Using SELECT SELECT formats your hard disk and copies the files on your MS-DOS system diskette to it. You’ll tell SELECT that you want to copy the MS-DOS files to a directory called DOS. Follow these steps to use SELECT: 1. If you have not already done so, insert your MS-DOS system diskette into the top drive. Press Enter. The MS-DOS system prompt displays: A> 2.
Besides formatting the hard disk partition, SELECT also creates a directory named DOS and copies the operating system files to the hard disk. When the procedure is complete, the screen displays: Format complete System transferred Volume label (11 characters, ENTER for none)? 5. To name the hard disk (or, as the prompt says, give it a volume label), type in an 11-character string. If you do not want to name the hard disk, do not enter any characters; just press Enter.
Follow these steps to complete your installation: 1. Insert the working copy of the GW-BASIC diskette into drive A. At the A> prompt, type the following and press Enter: COPY *.* C:\DOS This copies all the files from the diskette into the directory called DOS on the hard disk drive. The computer displays the name of each file it copies, and then tells you how many files it copied. The A> prompt redisplays. 2.
6. Next, you’ll create a file called AUTOEXEC.BAT. Type the following and press Enter at the end of each line: COPY CON: C:\AUTOEXEC.BAT ECHO OFF PATH C:\;\DOS;\BASIC PROMPT $P$G CLS 7. Press F6 and then Enter. The computer displays this message: 1 File(s) copied and the A> prompt redisplays. 8. Remove the GW-BASIC diskette from drive A. To reset the computer, hold down Ctrl and Alt and press Del. You have completed formatting your hard disk and installing MS-DOS and GW-BASIC.
Appendix C Specifications Main Unit 8-bit CPU 8088-1 microprocessor; 4.77MHz or 9.54MHz clock rate; keyboard selectable Main. memory 512 KB; expandable to 640 KB Math coprocessor 8087-1 microprocessor (optional)-for use at 4.77M/9.54Hz 8087-2 microprocessor (optional)--for use at 4.
Mass Storage Two internal drives maximum Standard Two 5 l/4-inch, half-height diskette drives; double-sided, double-density, 360 KB storage capacity Optional One 5 l/4-inch, half-height diskette drive; double-sided, double-density, 360 KB storage capacity; one 20 MB internal hard disk drive Power Requirements 88W switching mode power supply 115/230 VAC switch selectable +5 VDC, +12 VDC, -5 VDC, -12VDC; 50/60 Hz Environmental Requirements Temperature Operating range: 59° to 95° F (15° to 35° C) Non-
Video and Display Options Standard Multi-graphics video card; switchselectable; installed in option slot; game port included Supports Epson and IBM-compatible monochrome monitor: monochrome text, 80-character x 25-line display, 9 x 14-character block Supports Epson and IBM-compatible color monitor: color graphics, 40-character x 25-line display (lowresolution text), 80-character x 25-line display (high-resolution text), 640 x 200 (high-resolution graphics), 320 x 200, four colors; 160 x 200, eight colors,
Printers and printer accessories ActionPrinters by Epson Apex80 9-pin, 80-column, dot-matrix printer; (180 cps draft/30 cps near letter quality) (U110) Black ribbon (8750) Single bin cut sheet feeder (7341A) T-750 9-pin, 136-column, dot-matrix printer; (240 cps draft/48 cps near letter quality) Black ribbon (8755) L-1000 24-pin, 80-column, dot-matrix printer; (180 cps draft/60 cps near letter quality) Black ribbon (7753) Single bin cut sheet feeder (7341A) Optional letter quality font modules: Courier (740
Computer accessories Internal 300/1200 baud modem card (C203A-A) External 300/l200 baud modem (C202A-A) Specifications C-5
C-6 Specifications
Glossary Application program A software program designed to perform a specific task, such as a word processing or spreadsheet program. ASCII American Standard Code for Information Interchange. A standardized coding system for representing characters, such as numbers, letters, and graphic symbols. An ASCII character occupies one byte of storage. Files transmitted in ASCII code can be used by many different computers, printers, and programs.
Boot To load a program or an operating system. Byte A sequence or group of eight bits that represents one character. CGA Color/graphics adapter. A type of color monitor that can display up to 25 lines of text with 80 characters on each line, or monochrome graphics with a 640 x 200 resolution. The monitor can display four-color graphics at 320 x 200 resolution and eight-color graphics at 160 x 200 resolution. Character Anything that can print in a single space on the page or the screen.
Control code A command (generated when you hold down Ctrl and press another key on the keyboard) that instructs the computer to perform a specific function. CPU Central Processing Unit. The piece of hardware that interprets instructions, performs the tasks you indicate, keeps track of stored data, and controls all input and output operations. Current directory The directory you are working in. Cursor The highlighted marker that shows your position on the screen and moves as you enter and delete data.
Device A piece of equipment that is part of a computer system and performs a specific task, such as a disk drive, a monitor, or a printer. DIP switches Small switches on a piece of hardware such as the computer, an option card, or a printer. DIP switch settings control various functions and provide a system with information about itself. DIP stands for Dual In-line Package. Directory A list of the files stored on a disk or a part of a disk. Disk The collective term for diskettes and hard disks.
EGA Enhanced Graphics Adapter. A type of high-resolution color monitor. It can display up to 25 lines of text with 80 characters on each line. It can also display monochrome or 16-color graphics at 640 x 350 resolution. Execution speed See Operating speed. Extension A suffix of up to three characters that can be added to a file name to better identify it. File A group of related pieces of information called records, or entries, stored together on a disk. Text files consist of words and sentences.
Hard disk The enclosed unit used to store data permanently. Unlike a diskette, it is fixed in place. It can process data more rapidly and store many more files than a diskette. Hardware Any physical component of a computer system, such as a monitor, printer, keyboard, or CPU. Hexadecimal A base 16 numbering system frequently used by programmers. Any decimal number between 0 and 255 can be represented by a two-digit hexadecimal number.
LED Light Emitting Diode. A substance that illuminates when electricity passes through it, like the indicator lights above the Apex’s keyboard. Main unit The Apex computer. Megabyte (MB) A unit used to measure storage space (in a computer’s memory or on a disk). One megabyte equals 1,048,576 bytes. Megahertz (MHz) A unit used to measure oscillation frequency (of a computer’s internal timing clock). A megahertz is one million cycles per second. The Apex computer operates at 4.77 MHz and 9.54 MHz.
Monochrome monitor A monitor that displays in only one color, such as green or amber, as opposed to a color monitor which can display in several colors. Mouse A hand-held pointing device, usually with buttons. When you slide the mouse over a flat surface in a certain direction, the cursor moves in the same direction on the screen. MS-DOS An operating system from Microsoft. See DOS, Operating system. Numeric keypad The number keys grouped on the right side of the keyboard.
Parity Data signals sent during communications to detect errors in transmitting or receiving data. Partition To divide a hard disk drive into separate sections for use by different operating systems. Pathname The list of directories and subdirectories you need to travel through to locate a file. For example, the pathname for the file sales which is located in the subdirectory business of the root directory ( \ ) is \ business \ sales.
Read To copy data from one area to another. For example, when you open a text file stored on disk, the computer reads the data from the disk and displays it on the screen. Read/write head The physical device inside a disk drive that reads and records data on the magnetic surface of a disk. Real time clock A battery powered clock in the computer that keeps track of the current time and date even when the computer’s power is turned off.
Self test The initial diagnostics procedures a system performs to check its hardware. Serial The type of interface that transmits data one bit at a time. See Interface, Parallel. Software The programs that enable the computer to perform the tasks and functions you indicate. Source diskette The diskette that you are reading or copying data from during a copy or backup operation. Stop bit A signal sent in serial communications to mark the end of a character.
Track ball A pointing device that consists of a ball in a socket mounted over motion sensors. When you roll the ball in a certain direction, the cursor moves in that direction on the screen. Tracks Addressable, concentric circles on a diskette, resembling the grooves on a record, which help to divide the diskette into separate accessible areas. There are 40 tracks on each side of a double-sided 360KB diskette. TTL Transistor to Transistor Logic. A type of integrated circuit logic that accepts digital input.
Index A AC input, 1-7 Adjusting the keyboard angle, 1-12 - 13 APPEND command, 3-10 AUTOEXEC.
D Date prompt, 1-20, 1-26 DB-25P connector, 1-15 Default drive, 3-3 Delimiters, 3-4 Destructive surface analysis test (hard disk), B-1, B-3, B-9 DIP switches, Intro-3, 1-8, 1-11, 4-8, 5-3, 5-7, A-1-4 Directories, 2-14, 3-6 - 13 DISKCOPY command, 1-23, 2-13, 3-15 - 19 Diskettes, caring for, 2-9 - 10 choosing, 2-8 compatibility, 2-8 copying, 2-12 - 13 formatting, 2-8 - 9, 3-13 - 15 inserting, 2-10 - 11 labeling, 2-10 problem solving, 5-4 removing, 2-10 storing, 2-9 write-protecting, 2-12, 5-4 Display options,
E Enhanced graphics adapter (EGA) monitor, Intro-1, 4-1, 5-8 Entering commands, 3-3 Environmental requirements, C-2 Execution speed, 1-5, 2-4 - 5, 5-6 Expanding the system, 5-8 - 10 Expansion slots, C-1 F FDISK command, 5-5, B-1, B-11 Files, creating, 3-4 naming, 3-5 FORMAT command, 5-5 Formatting, diskettes, 2-8 - 9 hard disk, B-2 Front panel, 1-5 - 6 Function keys, 2-2, C-1 G Game port, Intro-1, 1-8 GM-BASIC, Intro-2 H Hard disk, controller card, 1-8, 4-1, C-1 directories, 2-14 FORMAT MENU, B-3 formatt
HDFMTALL program, 5-6, B-1 - 2 HDSIT program, 2-6, 2-13 - 14 Head, read/write, 2-8 HELP command, 3-22 - 24 Hidden files, 5-5 I IBMBIO.COM, 5-5 IBMDOS.
Mouse compatibility, 5-9 Mouse, Intro-2 Moving the computer, 2-15 MS-DOS, exiting, 3-2 loading, 1-19 starting, 3-2 Multi-graphics adapter card, Intro-1, 1-8 - 9, 5-8, 5-10, C-3 Multifunction boards, 4-1 N Naming files, 3-15 Non-destructive surface analysis test (hard disk), B-1, B-3, B-10 Numeric/cursor pad, C-1 O Operating speed, 1-5, 2-4 - 5, 5-6 Option card, Intro-2, 1-8, 1-11, 4-1, 4-3, 5-7 - 8 slots, Intro-1, 1-8, C-1 P Parallel, DIP switch settings, A-3 interface, Intro-2, 1-8, 1-13, C-1 port, 1-8
requirements, C-2 sources, 1-3 strip, 1-3 switch, 1-5, 5-9 voltage, 5-9 Power-on self test, 1-17 Printer, Intro-2, 1-13 - 15, 5-7, C-3 Problem solving, 5-1 - 8 PROMPT command, 1-22 Protector cards, 1-2 R RAM (random access memory), Intro-1 Removing diskettes, 2-10 Removing option cards, 4-8 - 9 Removing the computer’s cover, 4-2 - 3 Resetting the computer, 2-5 - 6 RGB color graphics monitor, Intro-1, 1-8 - 9, 5-8, C-3 RMDIR command, 3-13 Root directory, 3-6 RS232-C port, 1-15 S Safety rules, 1-16 Screen d
Starting the system, normal startup, 1- 17 problem solving, 5-2 Stopping a command or program, 2-5 Storage capacity, C-2 Storing diskettes, 2-9 SUBST command, 3-10 Switches, 3-3 SYS command, 5-5 T Target diskette, 1-23 - 24 Television set, 5-9 Time prompt, 1-21, 1-26 Track ball, 1-8 TREE command, 3-12 Tree-structured directories, 3-6 Troubleshooting, 5-1 - 8 TTL monochrome monitor, Intro-1, 1-8 - 9, 1-11, 5-8, C-3 Turning off the computer, 2-6 Turning on the computer, 1-17 U Unconditional format (hard dis
X XTREE, Intro-3, 2-14, 3-24 - 32 Index 8