
Owner's Manual
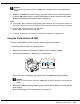

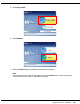
Table Of Contents
- Front Matter
- Contents
- Safety Instructions
- Using Your Software
- Paper Handling
- Basic Printing
- Printing with Special Layout Options
- Using the Control Panel
- Installing Options
- Replacing Consumables
- Maintaining Your Printer
- Using the Printer on a Network
- Troubleshooting
- Where To Get Help
- Product Information
- Operating System Versions
- Index

Maintaining Your Printer 144
3. Access the EPSON Printer Utility3 dialog.
& See “Accessing the Printer Driver for Mac OS X” on page 15.
4. Click the Print Head Alignment button in the Utility dialog.
5. Follow the on-screen instructions to align the print head.
Using the Control Panel (B-500DN)
Follow the steps below to align the print head using the control panel.
1. Make sure that letter/A4 size plain paper is loaded in the front paper cassette.
2. Make sure that READY appears on the LCD screen, and then press the r Right button.
Menu appears on the LCD screen.
3. Press the d Down or u Up button to select MAINTENANCE, and then press the OK or
r Right button.
4. Press the d Down or u Up button to select HEAD ALIGNMENT, and then press the OK or
r Right button.
5. Press the OK button to print the alignment pattern.
6. Look at the alignment patterns and find the square without any visible bands in sets #1
through #4.
7. Press the d Down or u Up button to select the number that corresponds to the square
for sets #1 through #4.
8. Press the OK button to register your selection.
Cleaning Your Printer
To keep your printer operating at its best, clean it thoroughly several times a year.
w
Warning:
Be careful not to touch the parts inside the printer.