EPSON® ™ Equity I User’s Guide
IMPORTANT NOTICE DISCLAIMER OF WARRANTY Epson Corporation makes no representations or warranties, either express or implied, by or with respect to anything in this manual, and shall not be liable for any implied warranties of merchantability and fitness for a particular purpose or for any indirect, special or consequential damages. Some states do not allow the exclusion of incidental or consequential damages, so this exclusion may not apply to you. COPYRIGHT NOTICE All rights reserved.
FCC COMPLIANCE STATEMENT FOR AMERICAN USERS This equipment generates and uses radio frequency energy and if not installed and used properly, that is, in strict accordance with the manufacturer’s instructions, may cause interference to radio and television reception.
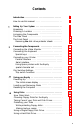
Contents Introduction . . . . . . . . . . . . . . . . . . . . . . . . . . . . . . . . . . 1 How to use this manual . . . . . . . . . . . . . . . . . . . . . . . . 2 Setting Up Your System . . . . . . . . . . . . . . . . . . . . . . . . Unpacking . . . . . . . . . . . . . . . . . . . . . . . . . . . . . . . . . . . Choosing a Location . . . . . . . . . . . . . . . . . . . . . . . . . . . Arranging the Components . . . . . . . . . . . . . . . . . . . . . The Rear Panel . . . . . . . . . . . . . . . . . .
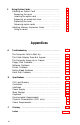
5 Using Option Cards . . . . . . . . . . . . . . . . . . . . . . . . . . . . Installing an Option Card . . . . . . . . . . . . . . . . . . . . . . . Removing the cover . . . . . . . . . . . . . . . . . . . . . . . . . . Inserting the option card . . . . . . . . . . . . . . . . . . . . . . Removing an access slot cover . . . . . . . . . . . . . . . . . Replacing the cover . . . . . . . . . . . . . . . . . . . . . . . . . . Removing option cards . . . . . . . . . . . . . . . . . . . . . . .
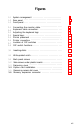
Figures 1-1 System arrangement . . . . . . . . . . . . . . . . . . . . . . . . . . . 1-2 Rear panel . . . . . . . . . . . . . . . . . . . . . . . . . . . . . . . . . . . 1-3 Front panel . . . . . . . . . . . . . . . . . . . . . . . . . . . . . . . . . . . 5 6 8 Connecting the monitor cable . . . . . . . . . . . . . . . . . . . . Keyboard cable connection . . . . . . . . . . . . . . . . . . . . . . Adjusting the keyboard legs . . . . . . . . . . . . . . . . . . . . . Special keys . . . . . . . . . . . . .
Introduction Your Epson® Equity’” personal computer is a versatile, expandable, and economical system which offers you a wide variety of choices. Its flexibility lets you create your own system; first you choose from three models of the Equity main unit, then you select the accessories you want to use with it to assemble the configuration that does the most for you.
How to Use this Manual This user’s guide provides the basic information you need to set up and care for your Equity. It also describes how to connect optional equipment and start using your operating system. Although this book contains a lot of information, it won’t take you long to set up your system and get started. Follow the instructions in Chapter 1 to unpack and set up your system. Then connect the various components as Chapter 2 describes.
Chapter 1 Setting Up Your System It won’t take you long to get your Epson Equity personal computer up and running. This chapter shows you how to set up the computer and peripherals and make any necessary adjustments. Unpacking When you unpack your Equity, you should find the following items: The main unit and power cord The keyboard with cable An MS-DOS operating system disk with an MS-DOS manual A GW-BASIC programming language disk with a GW-BASIC manual This Equity I User’s Guide.
Choosing a Location An important part of setting up your Equity is deciding where to locate it. Whether you use your computer at home or in the office, you want to choose a comfortable, convenient location. Before you set up your system, be sure the location you’ve selected provides the following: A large, sturdy desk or table. Make sure the surface you select for your system is sturdy enough to easily support the weight of all its components. A flat, hard surface.
Arranging the Components First decide how you want to arrange the different parts of your system. The most common setup, shown in Figure l-l, is to lay the main unit flat and set the video monitor on top of it with the keyboard directly in front (leaving enough space to insert disks into the disk drives). Figure 1-1. System arrangement Of course, if you have special computer furniture or want to customize your setup, you can arrange your Equity components to suit your own particular needs.
The Rear Panel Before you connect your system components, take a quick look at the rear panel to familiarize yourself with the locations of the various Equity input/output ports. Figure 1-2 shows where you connect the various peripheral devices. WARNING: Do not connect the power cord until you have connected all peripheral devices. Once you connect the power cord, always check to see that the power switch is OFF whenever you connect or disconnect any peripheral devices.
Here are brief descriptions of each of the ports: AC outlet. Auxiliary power outlet. Power consumption should not exceed 65 watts. Power cord. Supplies electrical power to the computer. Always turn the power switch OFF before you plug the power cord into an outlet. RS-232C serial port. Allows you to connect an external device with a serial interface, such as a modem, another computer or a printer with a serial interface. Parallel printer port.
Disk lock/release button Optional / disk drive slot / RESET button Disk drive LED lamps \ DIP switches Power LED lamp \ Keyboard cable socket Figure 1-3. Front panel The front panel components work as follows: Disk lock/release button. Press to lock a diskette in place. Press again to eject it. Disk drive LED lamps. A red light indicates that the drive is being accessed. Slot for optional disk drives, You can insert a second floppy disk drive or a hard disk drive in this optional slot.
Removing the disk drive protector sheets A cardboard sheet occupies the disk slot in the floppy-disk drive. This sheet is inserted at the factory to protect the recording heads. Remove the sheet before you connect any cable. Press the button labelled PUSH on the left side of the drive. The button pops out when you press it, along with the edge of the protector sheet. Carefully pull out this sheet.
Chapter 2 Connecting the Components Once you set up the various components of your system, you need to connect the necessary cables. If you follow the instructions and refer to the figures in this section, you should have no trouble. Connecting the Video Monitor The video monitor should be on top of or near the Equity main unit. It is easier to connect the cable if the back of the monitor and the main unit are facing you. This may not be possible, however, if your system is set up on computer furniture.
Figure 2-l gives you an idea of how to connect the monitor, Figure 2-1. Connecting the monitor cable 4. When you check the DIP switch settings later in this chapter, be sure they are set correctly for the type of monitor you have. 5. If you have trouble getting a display, check that the brightness and contrast controls on the monitor are set correctly. Monitors usually have their own power switch. Make sure it is ON.
With the front of the main unit facing you, open the cover at the lower right front corner. Insert the keyboard connector as shown in Figure 2-2. Do not force the connector, but make sure you insert it all the way See that the cable exits to the right of the main unit. Gently push the cable into the retaining clip, and close the cover. Figure 2-2. Keyboard cable connection You can use the keyboard at different angles such as laying it flat on a desk or placing it on your lap.
Figure 2-3. Adjusting the keyboard legs To disconnect the keyboard, open the cover on the main unit and press down on the retaining clip to release the cable. Lift the tab on the connector, and pull it straight out from the main unit. Special keys The dark gray keys have special functions and are used in various ways by applications programs. Some of the more important keys are shown in Figure 2-4 and described below: Figure 2-4.
Key Purpose I+ -4 Moves the cursor to the right in normal mode and to the left in Shift mode. Referred to as the tab key. Ctrl Works with others keys to perform special (control) functions such as editing functions in MS-DOS and GW-BASIC. Alt Lets you input alternate character codes not otherwise available. Shift Produces uppercase characters or symbols when used with the main character keys. Produces lowercase characters if Caps Lock is on.
To connect your printer to a parallel interface: 1. Place the printer in a convenient location next to your system so that the power and data cables do not interfere with the paper. See Figure 2-5. Figure 2-5. Printer placement 2. Before connecting any cables, make sure the power switches to both the main unit and the monitor are switched OFF. If you are not sure which cable you need, consult your dealer. 3. One end of the printer cable has a 25-pin male D-connector.
Figure 2-6. Printer connection 5. Plug the printer’s power cable into a separate electrical outlet. Serial Interface If you have a device, such as a modem, that has a serial interface, connect it to the port marked SERIAL at the back of the main unit. If your cable is the non-standard type, with a male D-connector at both ends, you need an adapter to connect it to the computer. To connect your serial device, follow the same steps above for connecting a parallel device.
DIP Switch Settings When you first turn on your system, it checks the DIP switch settings to determine the memory size, the monitor type, the number of floppy disk drives, and the built-in interfaces being used. Your dealer should have set these switches for you. However, read the descriptions carefully and make sure the switches are set to meet your system requirements. If you upgrade your system at a later date-by adding a second disk drive for example-you may need to alter the switch settings.
DIP switch functions Inside the DIP switch cover is a label that identifies each of the DIP switches and shows the different ways they can be set (see Figure 2-8). The paragraphs below describe the various possible settings for your DIP switches.
If you are not sure how much memory your computer has, set these switches after you turn the computer ON for the first time. The initial messages on the screen tell you the memory size. You can then set the switches accordingly. Before you change the switch settings, however, turn the computer OFF. Switches 6-7 (monitor type)-tell your system what type of monitor you are using. Set them accordingly.
Chapter 3 Using Your Equity Once you have connected the monitor, keyboard, and peripheral devices to your computer, you are ready to turn your computer on. Plug the power cord into an electrical outlet. But, before you turn on the computer, read the following safety rules which help you avoid accidental damage to the computer, or injury to yourself. 1. Never turn the computer ON or OFF with the disk drive protector sheets in the disk drives. 2. Do not attempt to dismantle any part of the computer.
panel, and turn on the power switch without a system disk inserted. The red indicator next to the power switch lights up, and the cooling fan inside the main unit starts. The computer then begins performing an internal self-diagnostic test. The initial screen display As the system performs its self-test, you see a message similar to the one: ROM Rev. X.
To load an operating system, turn on the computer, then insert the system disk you want to use, as described below. Refer to the appropriate operating system manual for details on how to use the system. Note: It is good practice to use a backup copy of the system disk for daily use and keep the original in a safe place. See the operating system manual for details of how to make a backup copy.
Resetting the Computer You may occasionally need to reset the computer, either to load a different operating system, or because a program has failed and the computer does not respond to your keyboard commands. However, resetting the computer causes all data in memory to be lost, so if you have a problem, you should reset the computer only as a last resort. There are three ways to reset, and you should use them in this order: 1.
Chapter 4 Using Disks The disk drives in your computer let you store your work and programs on removable floppy disks for future use. All Equity systems have at least one floppy disk drive; others may also have a hard disk drive, either built-in or as an external unit. The disk you insert in the floppy disk drive is a round piece of flexible plastic covered with a magnetic coating. It is enclosed in a square protective jacket with holes to allow the disk drive to read and write to it.
Because the data is stored magnetically, you can read it, write to it, and erase it many times like a magnetic tape. The tracks on a disk are arranged so any item of data can be reached very quickly. Although the processes involved in controlling the disk drives are complex, you do not need to worry about them because the disk operating system looks after all the details.
Be careful when you place labels on your disks. Attach labels firmly but gently, and only along the top of the disk (next to the manufactuer’s label). Avoid placing several labels on top of one other. They may prevent the disk from spinning freely in the disk drive. It is best to write on the label before placing it on the disk. Use only soft-tip pens, not ballpoint pens or pencils, to write on a label that is already attached to a disk. Keep disks away from magnetic fields.
Write-protecting floppy disks The right edge of a floppy disk has a small, rectangular notch as shown in Figure 4-1. If this notch is not covered, you can write new data to the disk. If it is covered with an adhesive write-protect tab, you can read data on the disk but you can not write new information to it or delete any files. If you try to change the information on a write-protected disk, an error message usually displays a warning that the disk is writeprotected.
Using a Single Floppy Disk Drive Some versions of the Equity have only one floppy disk drive. There is a DIP switch (switch SW1-8) under the flap beneath the disk drives which tells the computer how many floppy disk drives you have. This switch should be DOWN (OFF) if you have two drives or UP (ON) if you have just one drive. If you have only one floppy disk drive, make sure this switch is UP correctly so the operating system can help you perform those operations that normally require two drives.
Although it has a lot of storage space, you should keep only the files you use regularly on the hard disk, to make sure you always have plenty of space available. Store your other files on floppy disks (you can use the ARCHIVE utility in MS-DOS to back up your hard disk files). It is very important to back up all your hard disk files on floppy disks. The hard disk is very reliable, but you should always have backup copies in case you lose any of your data from the hard disk.
Chapter 5 Using Option Cards Option cards are accessories that can be added to the computer to provide extra capabilities. Examples of option cards you may want to purchase are: l Memory expansion card . Auto-dial modem l Mouse card. Up to three option cards can be installed in the Equity at one time, but one position is always occupied by the color or monochrome video card that operates your monitor. Option cards are available from Epson and several other vendors.
2. The back panel is secured with three screws as shown in Figure 5-l. Remove the screws with a Phillips screwdriver, and put them to one Screws Figure 5-1. Back panel screws 3. The top cover is secured by two screws on each side of the computer as shown in Figure 5-2. With the back of the unit facing you, the two screws on the left side of the unit are covered by small plastic inserts. Gently remove the inserts with a small screwdriver, then remove the screws on both sides of the computer.
4. Figure 5-3 shows how to tilt the cover up slightly and move it away from the main unit. Set the cover aside for now. I Figure 5-3. Removing cover Inserting the option card Most option cards can be placed into any of the three option slots. Some cards may need to be installed in a specific slot. Check the option card manual to find out if the option card has to be in a specific slot.
3. Grip the card firmly by the top corners and position it as shown. The contact pins should be pointing down and the components should be facing toward the inside of the main unit. 4. Slide the card into the slot as shown in Figure 5-4, placing the tab at the bottom of the retaining bracket into the corresponding notch at the back of the computer. Figure 5-4. Option card installation 5. Once the connector pins are sitting in the connector slot, push firmly (but carefully) to fully insert the card.
Removing an access slot cover If the option card has an external device connection, such as your video monitor, remove the access slot cover that corresponds to the position of the option card. 1. Hold the back panel of the computer with the inside facing you. The individual access slot covers are held in position by a tab at the bottom and a clip at the top. 2. Remove the appropriate cover by pushing down on the clip and pushing out. See Figure 5-5. Figure 5-5.
edge beneath the top edge of the front panel. Finally, lower the back of the cover so that it is in position. 3. Secure the cover by replacing the two screws on both sides of the main unit. Replace the plastic inserts in the side feet by snapping them into place. 4. Replace the back panel and the three screws along the top edge. 5. Return the computer to its original position and reconnect it to the monitor, the keyboard, and any other peripherals you have. 6.
You install a memory option card the same way you install other option cards. Installing an option card is described at the beginning of this chapter. The procedure to install the Epson 256K expansion card is as follows: 1. Remove the main unit cover as described earlier in this chapter. 2. The memory expansion connector is located at the front of the main unit, to the left of the disk drives, as shown in Figure 5-6. 1 Memory expansion connector Figure 5-6. Memory expansion connector 3.
6. Adjust the DIP switches under the panel beneath the disk drives to tell the computer how much memory is available. 7. Turn ON the computer. You should see a message confirming the amount of memory in the machine. If this is not correct, check the DIP switch settings and reset the computer. If it is still incorrect, check that the board is installed properly. Using a mouse The mouse is an accessory which is used with special software to allow you to manipulate data on the screen.
Appendix A Troubleshooting You should not encounter any serious difficulties with the Equity, but if anything out of the ordinary happens, this section should help. Usually, such a situation requires nothing more than repeating a software procedure, correcting an operating system error (see the operating system manuals), or resetting the computer. Most of the minor difficulties you might encounter can be resolved by one of the suggestions below.
3. Check to see that the power indicator on the monitor is lit. If it is not, turn the power OFF, wait 5 seconds, then turn the power back ON. Wait to see if the display screen appears. 4. Remove any disks, then turn the monitor and main unit power switches OFF. Check that the monitor power cable is securely connected to the electrical outlet, and that the monitor cable is properly connected to both the monitor and the main unit. Turn both power switches ON again. 5.
3. Is the disk write-protected? A write-protect tab may be placed over the notch on the side of the disk. Think twice before removing it. It might be a new disk, but it might also be a disk with information you do not want to change or lose. Check the disk directory to determine what files it contains. The operating system manual gives the proper directory command.
If you have a serial printer, or if you have problems with paper feeding, you may also need to check the printer manual for the correct DIP switch settings. The DIP switches on a printer help it communicate properly with the computer. Option Card Problems If you have installed an option card and get unexpected results, double-check the following points: 1. Is the option card installed correctly? 2.
Appendix B Specifications CPU and Memory %-bit CPU Main memory ROM 8088 microprocessor, 4.
Power Supply Switching type, fan-cooled, -5 VDC, +5VDC, + 12 VDC, -12 VDC, 115 VAC, 55 w Mass Storage Single/Dual 51/4-in. floppy disks, double-sided, double-density, multiple format 360K per disk Capacity Optional 5% in.
Appendix C Glossary ASCII American Standard Code for Information Interchange. A standard way of assigning numerical codes to characters and control codes. The character set on the Equity is based on the US ASCII code system, with the addition of a large number of international and graphics characters. Backup copy A copy of a disk or file kept in case your working copy is damaged.
CPU The unit inside a microcomputer that processes data and performs calculations. Device A piece of equipment forming part of a computer system such as disk drives, monitor, printer and so on. DIP switch One switch on a set of small switches (on the front panel of the computer) which give the system information about itself. DIP stands for Dual In-line Package. Disk A device that stores information for future use.
Operating system A set of software routines which control the way programs run on a computer, and supervise all input and output to and from the system. Parallel A method of organizing communications between two pieces of computer equipment in which the signals that make up each character are sent simultaneously. Partitioning Dividing a hard-disk drive into sections for use by different operating systems. Port A connector for one of the computer’s interfaces.
Software The programs you run on your computer. System disk A disk containing the files which make up the operating system for the computer.
INDEX AC outlet 7 Alt 15, 24 Air circulation 4 Application programs 24 ARCHIVE utility 30 Arranging components 5 ASCII C-l Auto-dial modems 31 Auxiliary outlet 7, 11 Back panel screws 32 Backup copies 23, 30, C-1 daily 23 making 27-28 Baud rate C-1 Backspace key 15 Bit C-1 Booting C-1 Brightness control, monitor A-1 Button, PUSH 23 Byte C-1 Cable 36 connections 11-18, 31, 35 keyboard 13-14 parallel 15-16 serial 17 video monitor 11-12 Caps lock key 15 Centronics compatible connector 15 Character C-1 Chip C-1
Controllers Control/Timer B-1 Disk B-1 DMA B-1 Interrupt B-1 Printer I/O B-1 Serial I/O B-1 Video/Graphic B-1 Cooling fan, main unit 22 Copying files 29 Cover, main unit 31-33, 35-36 CP/M-86 22 CPU B-1, C-2 Ctrl Alt Del 24 Ctrl key 15, 24 Cursor 15 Data 26-27, 30 DB-25 16 Del key 15, 24 Device C-2 DIP switch settings 12, 18-20 DIP switches 8, 36-37, C-2 built-in interfaces 18, 20 floppy disk drives 18-20, 29 functions 18-20 label 19 location of 18 memory size 18-19 memory table 19 monitor type 18-19, A-1, A
Disk drive 25, C-2 hard See Hard disk drive inserting floppy into 23 LED lamps 8 protector sheets 9, 21 single floppy 29 slot 8 DISKCOPY 28 Disk lock/release button 8 Display, monitor See Monitor DOS 22 DU 28 Electromagnetic interference 4 Enter key 15 Environmental conditions 4 Environmental requirements humidity B-2 temperature B-2 Epson printers 1 Equity cable connections 11-18 components, arranging the 5 disk drive See Disk drive disk See Disk electromagnetic interference 4 environmental conditions 4 fr
Floppy disk drive 21, 26, 29 problems A-2 Format floppy disk 23 hard disk 30 Formatting C-2 Front panel, Equity 7-8 GW-BASIC 15 Hard copy C-2 Hard disk drive 21-22, 25, 36 care of 27 internal 29-30 partition 30 problems A-4 Hardware C-2 HDFMTALL 30 HDFORMAT 30 HDPART 30 HDSIT 27 IBM-PC 1 character set 17 diskette format, compatibility 26 Initial system testing message 22 Input/output ports 6-7 Inserting and removing disks See Disk Interfaces C-2 Option slots B-1 Parallel 1, 7, 15-16, 20 Printer B-l Serial 1
Labels, disk 27 Magnetic fields 27 Magnetic surface of diskette 26 Main memory B-1 Main unit, Equity 1, 11, 22, 34-37 arrangement of 5 cover, removing the 31-33 cover, replacing the 35-36 power switch 22, 31 Mass storage capacity B-2 Memory expansion card 1, 31 connector for 37 installing 36-38 MODE 17 Modem 17 auto-dial 31 Moderate environment, for disks 27 Monitor 1, 21, 31, A-1 arranging 5 brightness and contrast A-1 cable A-2 color, RGB 1, 3 connecting the 11-12 display 12, 21, 24, A-1 Epson 3 external
installing 31-34 long 34 metal cover plate 33 panel, back 31-32, 35-36 problems A-4 retaining bracket 34 retaining screw 33-34 removing 26 slots 33 washer 33-34 Outlet 17, 31, A-1-A-2 AC 6-7 Auxiliary 7, 11 grounded 4 Packing materials 3 Parallel C-3 cable 16 interface 1, 7, 15-16, 20 printer port 6-7, 16 Partitioning C-3 Peripherals 2, 21, 31 devices 6 Physical chracteristics, Equity depth B-2 height B-2 weight B-2 width B-2 Plastic inserts 32, 36 Port C-3 Power LED lamp 8 requirements B-2 supply B-2 Power
RAM 22, C-3 Read-write head 25-27 Rear panel, Equity 6-7 Registration cards 3 Reset button 8, 24 Resetting the computer 8, 24, C-3 Retaining screws 17 ROM B-1, C-3 RS-232C serial port 7, 15, C-3 Screws back panel 32 retaining 33 top cover 32, 36 Self-diagnostic test, Equity internal 22 Serial C-3 cable 5-2 interface 1, 15, 17, 20, B-1 port, RS-232C 17 Software C-4 Software problems A-3 Special character set 17 Special keys, Equity 14-15 Squeeze locks 17 System arrangement 5 disk C-4 testing message 22 Tab k
EPSON AMERICA, INC. LIMITED WARRANTY What Is Covered: Epson America, Inc. warrants that the Epson product enclosed with this Limited Warranty conforms to the manufacturer’s specifications and is free from defects in workmanship and material for a period of one year from the date of original purchase made in the United States.