Snap. Print. Enjoy. Using PictureMate Without a Computer CPD-19731 Printed in XXXXXX XX.
PictureMateR.book Page 1 Tuesday, May 17, 2005 10:17 AM Contents Welcome! . . . . . . . . . . . . . . . . . . . . . . . . . . . . . . . . . . . . . . . . . . . . . . . . . . . . . . . . . . . . . . . . . . . . . . . . . 2 Prepare to Print and Use the Wizard . . . . . . . . . . . . . . . . . . . . . . . . . . . . . . . . . . . . . . . . . . . . . . . . . . . 5 Choose Photos and Page Layouts . . . . . . . . . . . . . . . . . . . . . . . . . . . . . . . . . . . . . . . . . . . . . . . . . . . .
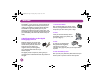
PictureMateR.book Page 2 Tuesday, May 17, 2005 10:17 AM Welcome! PictureMate® is your easy-to-use, personal photo lab. Just insert a digital camera memory card and you’re ready to print brilliant, long-lasting photos. Because PictureMate is light and portable, you can print whenever and wherever you take pictures. Plus, your PictureMate photos are archival; generations from now your PictureMate prints will be as vibrant as they are today.
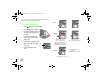
PictureMateR.book Page 3 Tuesday, May 17, 2005 10:17 AM Special Features Printing with your PictureMate becomes even easier with these special features: Main Menu Crop DPOF From the PictureMate Main Menu, you can print all your photos by pressing Print. Or you can select just the ones you want. (See page 12.) If you have a Bluetooth®-enabled PDA, cell phone, or computer, you can send photos wirelessly to PictureMate for printing. You just need the optional Epson® Bluetooth Photo Print Adapter.
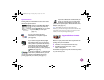
PictureMateR.book Page 4 Tuesday, May 17, 2005 10:17 AM Where to Find Information See your Start Here poster to unpack, set up, and use your PictureMate. The on-screen User’s Guide on the CD provides comprehensive information and instructions for using PictureMate. Where to Get Ink and Paper Using PictureMate Without a Computer (this book) explains how to print photos directly from your camera’s memory card.
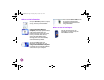
PictureMateR.book Page 5 Tuesday, May 17, 2005 10:17 AM Prepare to Print and Use the Wizard Before you can print, you need to load paper and insert your memory card in PictureMate. 2 Slide the top part of the paper support up gently until it clicks into place. 3 Place your paper against the right edge, with the glossy side up. Load Paper Follow these steps to load PictureMate Photo Paper: Caution: Don’t load plain paper; this may damage PictureMate. 1 Move the handle to the back and down.
PictureMateR.book Page 6 Tuesday, May 17, 2005 10:17 AM Note: When you need more paper, order a PictureMate Print Pack. See page 34 for more information. Top: Insert Your Memory Card 1 Press 2 Open the memory card door. 3 Insert the memory card into the correct slot, as shown on the right. On to turn on PictureMate. Insert just one card at a time.
PictureMateR.book Page 7 Tuesday, May 17, 2005 10:17 AM Now you can do one of the following: ● ● Print a proof sheet of all the photos on your card using the PictureMate Wizard (as described on the right). Choose photos and layouts for printing from the Main Menu (see page 11). Removing Your Memory Card When you are ready to remove a memory card, make sure the card light is not flashing, then pull the card straight out of the slot.
PictureMateR.book Page 8 Tuesday, May 17, 2005 10:17 AM Press Print to print your proof sheet. Note: You should print a proof sheet if you’ve deleted photos or taken new photos since the last time you printed one, as the photo numbering may have changed. Your proof sheet includes up to 20 photos per sheet, so it might require several sheets of paper, depending on the number of photos on your card.
PictureMateR.book Page 9 Tuesday, May 17, 2005 10:17 AM All Photos Press Print to start printing all your photos as borderless, 4 × 6-inch prints. Some Photos 1 Press OK. 2 Press or to highlight the number of the photo you want to print (from the proof sheet), then press OK to choose it. Note: If your card has more than 20 photos, you will need to reload paper while printing. Load a maximum of 20 sheets at a time.
PictureMateR.book Page 10 Tuesday, May 17, 2005 10:17 AM 4 Repeat steps 2 and 3 for each additional photo you want to print. The screen shows the selected photos and the number of copies for each. (You may need to press or to see all your selected photos.) Note: If Print Confirmation is off, you will not see the screen Print once to start printing. above and only need to press If you print more than 20 photos, you’ll need to load more paper when you see the message “Try loading paper again.
PictureMateR.book Page 11 Tuesday, May 17, 2005 10:17 AM Choose Photos and Page Layouts PictureMate’s Main Menu gives you lots of choices for printing. For example, you can select a range of photos to print (such as a group of photos you took at a special event), and choose additional page layouts, such as wallet-size photos and photos with borders. Additionally, through the More Options menu you can crop your photos, print in black and white or sepia, or add the time or date. (See page 19.
PictureMateR.book Page 12 Tuesday, May 17, 2005 10:17 AM Select the Photos You Want to Print The Select Photo option lets you choose which photos to print. All Photos: print all the photos on your card. This is the default setting on the Main Menu and lets you print borderless 4 x 6-inch photos. Make sure your memory card is inserted in PictureMate and the Main Menu is on the screen, then follow the steps below for the option you want. All Photos 1 Press or press OK.
PictureMateR.book Page 13 Tuesday, May 17, 2005 10:17 AM One Photo Several Photos 1 Press or press OK. to highlight Select Photo, then 1 Press or press OK. to highlight Select Photo, then 2 Press or press OK. to highlight One Photo, then 2 Press or press OK. to highlight Several, then 3 Press or to highlight the photo you want to print, then press OK. 3 Press or to highlight the photo number, then press OK. 4 Go to page 16 to select the number of copies.
PictureMateR.book Page 14 Tuesday, May 17, 2005 10:17 AM Tip: Hold down or to scroll quickly. 6 Note: If you press OK too many times, you will deselect the photo. 4 5 If you want to choose a layout, press Back and go to page 17. If you don’t need to choose a layout, go to page 18 to confirm your selections and print your photos. Press or to choose the number of copies to print for that photo (up to 10), then press OK. Repeat steps 3 and 4 for additional photos.
PictureMateR.book Page 15 Tuesday, May 17, 2005 10:17 AM 2 3 Press or Camera-Selected DPOF Photos to highlight Range, then press OK. Press or to choose the first photo under From. (Make sure you choose the smaller number in your range first.) Then press OK. If your camera supports DPOF (Digital Print Order Format), you can use it to pre-select which photos and how many copies you want to print.
PictureMateR.book Page 16 Tuesday, May 17, 2005 10:17 AM 2 Deselect DPOF Press or to highlight DPOF, then press OK. If DPOF is selected and you want to choose other photos to print, press or to highlight Select Photo and press OK. Then choose a different option. Note: If you always want to print with the Wizard, turn off DPOF in your camera and deselect photos that are already selected for printing. Note: DPOF appears only if you chose images for printing while the memory card was in your camera.
PictureMateR.book Page 17 Tuesday, May 17, 2005 10:17 AM 1 2 After selecting photos on the Main Menu, press or to highlight Copies, then press OK. Press or to choose the number of copies to print for each photo (up to 100), then press OK. Choose a Layout 1 On the Main Menu, press Layout, then press OK. 2 Press or to highlight the layout setting you want for your photo(s), then press OK. To change the layout for your photo(s), see the next section.
PictureMateR.book Page 18 Tuesday, May 17, 2005 10:17 AM Note: To print two wallet-sized photos on one sheet, select multiple copies or multiple photos. Confirm and Print Once you have selected all the basic print settings, you are ready to print. Note: Before printing, you may want to select other options for your photos, like adding the date or time or printing in black and white; see page 19 for details.
PictureMateR.book Page 19 Tuesday, May 17, 2005 10:17 AM Do More With Your Photos The More Options menu on PictureMate lets you modify your prints, as follows: only the print(s) you make at that time. These settings don’t appear in the Print Confirmation screen. Print photos in black and white or a sepia tone Crop and print only part of a photo Print Photos in Black and White or Sepia You can print your photo in black and white or in a sepia tone without changing the original photo.
PictureMateR.book Page 20 Tuesday, May 17, 2005 10:17 AM 3 4 Press or press OK. to highlight Color Effects, then Press or to choose Black and White or Sepia, then press OK. 6 Check the selected photos, number of copies, and layout setting on the Print Confirmation screen. (Press or to check more photos.) ● If the list is correct, press print your photo(s). ● To make changes, press Cancel to go back.
PictureMateR.book Page 21 Tuesday, May 17, 2005 10:17 AM 2 On the Main Menu, press or More Options, then press OK. 3 Press or to highlight Print Crop Template, then press OK. to highlight 4 Press Print to print the template. Your photo prints with a preview of the cropping options. Crop numbers Tip: The cropping areas are the same for each portrait- or landscape-oriented photo. You can print one template for each photo orientation to use as a reference for all your photos.
PictureMateR.book Page 22 Tuesday, May 17, 2005 10:17 AM 6 Press or to highlight Crop, then press OK. 9 If you don’t need to change any other settings, press Print. 10 Check your selections on the Print Confirmation screen and press Print again. Note: See page 25 for more information about the Print Confirmation screen. 7 Press or to select the crop number you chose from the template, then press OK.
PictureMateR.book Page 23 Tuesday, May 17, 2005 10:17 AM 3 4 Press or press OK. Press or to highlight Auto Correct, then 5 Press OK. Note: This setting remains in effect until you press Cancel for 3 seconds or turn PictureMate off. 6 If you don’t need to change any other settings, press Print. 7 Check your selections on the Print Confirmation screen and press Print again. to choose one of the settings. Note: See page 25 for more information about the Print Confirmation screen.
PictureMateR.book Page 24 Tuesday, May 17, 2005 10:17 AM 3 To print the date, press Stamp, then press OK. 4 Press 5 or or to highlight Date to choose one of the settings: ● None (default, turns off the date stamp) ● yyyy.mm.dd (2005.09.01) ● mmm.dd.yyyy (Sep.01.2005) ● dd.mmm.yyyy (01.Sep.2005) 6 To print the time, press or Time Stamp, then press OK.
PictureMateR.book Page 25 Tuesday, May 17, 2005 10:17 AM Note: See below for more information about the Print Confirmation screen. Confirm and Print After selecting your print settings, you’re ready to print. 1 Press 2 Check the selected photos, number of copies, and layout setting on the Print Confirmation screen. (Press or to check more photos.) If you print more than 20 photos, you will need to reload paper while printing. Load a maximum of 20 sheets.
PictureMateR.book Page 26 Tuesday, May 17, 2005 10:17 AM Save Your Photos to a Computer or an External Device You can save photo files on your memory card to a computer when you connect it to PictureMate with a USB cable. You can also save photos to an external device that you connect directly to PictureMate. Save Photos to a Computer You can connect PictureMate to your computer and view, copy, or print files on the memory card as if it were a drive on your computer.
PictureMateR.book Page 27 Tuesday, May 17, 2005 10:17 AM 3 If you are using a CD-R/RW drive or Zip drive, plug it into an electrical outlet if required. 4 Connect the drive to PictureMate: ● ● For a flash memory drive, plug it into the EXT/IF port on the back of PictureMate. Note: If you insert a blank CD-R in the drive before inserting a memory card in PictureMate, you may see an error message. Eject the CD-R from the drive to clear the error, insert your memory card, then re-insert the CD-R.
PictureMateR.book Page 28 Tuesday, May 17, 2005 10:17 AM Caution: Don’t remove the drive or memory card while the photos are being saved, or you may lose photos on your card or drive. If you need to stop the backup, press the Cancel button. When your photos are saved, you see this message. 8 Press OK. You can save photos multiple times to the same disk or drive until it is full. Each time you save photos on the same disk or drive, they are saved in a new folder.
PictureMateR.book Page 29 Tuesday, May 17, 2005 10:17 AM Print From a Computer or an External Device PictureMate can print stored photos on a computer or on another device such as an external hard drive, a Bluetooth-enabled device, or a digital camera. Printing From a Computer You can connect PictureMate directly to your computer with a USB cable, then print photos that are stored on your computer.
PictureMateR.book Page 30 Tuesday, May 17, 2005 10:17 AM You can also print photos from a CD that you get from a photo processing lab. (Images should be in JPEG file format. Some CDs may not work.) 1 Make sure PictureMate is on. 2 Make sure there are no memory cards in PictureMate’s memory card slots. The card light should be off. Note: If a memory card is inserted, the printer will read photos from the card, not from an external drive.
PictureMateR.book Page 31 Tuesday, May 17, 2005 10:17 AM Press or to choose the folder where your photos are stored, then press OK. The most recently saved folder has the largest number. PictureMate counts the photos on your drive, then shows one of the following screens: ● If you see this message, print your photos from the PictureMate Wizard (see page 7).
PictureMateR.book Page 32 Tuesday, May 17, 2005 10:17 AM 4 Use your camera’s controls to print photos on PictureMate. (See your camera manual.) 3 Plug the adapter into the EXT/IF port on the back of PictureMate. Print From a Bluetooth Device You can print photos wirelessly from your Bluetoothenabled PDA, cell phone, or computer when you use the optional Epson Bluetooth Photo Print Adapter. The adapter (part# C12C824142) is available from the Epson StoreSM (see the inside back cover for details).
PictureMateR.book Page 33 Tuesday, May 17, 2005 10:17 AM 5 Send your photo to PictureMate as follows: Disconnecting the Adapter ● For Windows, send photos directly to PictureMate with your Bluetooth file sharing program. See the documentation included with your computer’s Bluetooth adapter for details on setting up Bluetooth file sharing and sending files. Make sure PictureMate isn’t printing, then pull the adapter out of the EXT/IF port.
PictureMateR.book Page 34 Tuesday, May 17, 2005 10:17 AM Replace Ink and Paper When PictureMate is low on ink or you are out of paper, it’s time to buy a PictureMate Print Pack, which contains a new photo cartridge and photo paper. This section tells you where to buy one and how to replace the used photo cartridge.
PictureMateR.book Page 35 Tuesday, May 17, 2005 10:17 AM Remove the Used Photo Cartridge 2 Open the cartridge door on the back of PictureMate. 3 Move the lever to the Release position by sliding it in the direction shown. This releases the cartridge. Make sure you have a new PictureMate Photo Cartridge before you begin. Once you start replacing a cartridge, you must complete all the steps in one session.
PictureMateR.book Page 36 Tuesday, May 17, 2005 10:17 AM 4 Carefully pull out the cartridge and dispose of it properly. (For appropriate disposal, check local resources for recycling guidelines.) Insert the New Photo Cartridge 1 Shake the cartridge four or five times while it is still in its package. Then unwrap the cartridge. Caution: Don’t touch the green circuit board. Install the photo cartridge immediately after you remove it from its package.
PictureMateR.book Page 37 Tuesday, May 17, 2005 10:17 AM 3 Slide the cartridge straight into the slot, label side up, until it is fully inserted. Push in both sides evenly to make sure it is not crooked. 4 Caution: If the cartridge is not inserted correctly, ink may leak out. If either side is sticking out, remove the cartridge and reinsert it so it is straight. 5 Wrong Move the lever right to the Lock position. If it does not lock in place, the cartridge is crooked; remove it and try again.
PictureMateR.book Page 38 Tuesday, May 17, 2005 10:17 AM If the door does not close completely, the cartridge is not installed correctly. Remove it and try again. 6 2 Press or press OK. to highlight Maintenance, then 3 Press or press OK. to highlight Cartridge Status, then Move the handle over to the back. Check the Photo Cartridge Status (Ink Level) You can check the approximate ink level in your photo cartridge at any time. 1 38 On the Main Menu, press or More Options, then press OK.
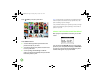
PictureMateR.book Page 39 Tuesday, May 17, 2005 10:17 AM If the status (ink level) is down to only one bar, you should buy a new PictureMate Print Pack. (See page 34.) Display Your Prints ● Let prints sit for 24 hours before framing. ● To ensure prints will last as long as possible, display them under glass in frames or in photo albums. Store and Display Your PictureMate Prints ● Photos printed on PictureMate Photo Paper are beautiful, long-lasting images.
PictureMateR.book Page 40 Tuesday, May 17, 2005 10:17 AM Take Your PictureMate With You PictureMate’s handle makes it easy to carry short distances. If your PictureMate is going to travel a longer distance, you should pack it carefully to protect it from getting damaged. 5 Disconnect the power cord and any connected USB cable from the back of PictureMate. 6 Pack PictureMate along with its power cable and adapter in the box that PictureMate came in, or in the optional Carrying Case.
PictureMateR.book Page 41 Tuesday, May 17, 2005 10:17 AM Set PictureMate Preferences You can change these settings (preferences) on PictureMate: ● Turn Print Confirmation Off or On (below) When Print Confirmation is Off and you press Print, PictureMate does not display this screen before printing. ● Turn the PictureMate Wizard Off or On (page 42) 1 ● Adjust the LCD Screen Contrast (page 43) On the Main Menu, press or More Options, then press OK.
PictureMateR.book Page 42 Tuesday, May 17, 2005 10:17 AM 3 Press or press OK. to choose On or Off, then Tip: If you usually print all the photos on your memory card, turn off the PictureMate Wizard. Then whenever you insert your Print to get one borderless, memory card, you can press 4 × 6-inch print of each photo on the card. 1 On the Main Menu, press or More Options, then press OK. 2 Press or press OK. to highlight Print Wizard, then 3 Press or press OK.
PictureMateR.book Page 43 Tuesday, May 17, 2005 10:17 AM Note: See page 7 to print from the PictureMate Wizard or page 12 to print from the Main Menu. 3 Press or press OK. 4 When you see this message, press OK to continue. 5 Press OK. to highlight LCD Contrast, then The Wizard setting remains in effect until you change it again or reset the default preferences. (See page 44.) Adjust the LCD Screen Contrast If the LCD screen is difficult to read, you can adjust the contrast.
PictureMateR.book Page 44 Tuesday, May 17, 2005 10:17 AM Reset the Factory Default Preferences You can reset the PictureMate preferences (Print Wizard, Print Confirmation and LCD Contrast settings) to the original, factory default settings. Press and hold Cancel for 3 seconds. You see this screen: Press OK to reset all the print settings. Note: This will also reset the defaults for other print settings you have changed (such as the date or time stamp, or crop settings).
PictureMateR.
PictureMateR.book Page 46 Tuesday, May 17, 2005 10:17 AM 3 Press or to highlight Clean Print Head, then press OK. 6 To make sure the nozzles are clean, load a sheet of photo paper, then press OK to print the nozzle check. If you don’t want to print a nozzle check, press Cancel to go back to the Main Menu. 7 4 When you see this message, press OK to begin cleaning the print head. Check the pattern to see if there are any gaps in the lines.
PictureMateR.book Page 47 Tuesday, May 17, 2005 10:17 AM Align the Print Head 4 Press or press OK. 5 Press 6 Look at the printed squares to determine which one in each set is the most even, with the lightest lines. (You may need to use a magnifying glass.) If you have moved PictureMate and print quality is not as good as it was before—for example, your prints look fuzzy or have light or dark horizontal lines running through them—you may need to align the print head. 1 Load a sheet of photo paper.
PictureMateR.book Page 48 Tuesday, May 17, 2005 10:17 AM 7 Press or to highlight the number for the best square (1 to 9) in set #1, then press OK. 8 Press or to highlight the number for the best square (1 to 9) in set #2, then press OK. 9 Press OK to exit the alignment screen. The Main Menu appears on the screen. PictureMate Error Messages If your PictureMate has any problems, you can check the screen for a message.
PictureMateR.book Page 49 Tuesday, May 17, 2005 10:17 AM Message What to Do Use a compatible memory card containing supported photo files, and make sure the files are not corrupted. Format the card with your camera, not a computer. See the supported card types on page 6 and the supported file types on page 3. Disconnect the adapter, then reconnect it to the printer. (See page 32.) Turn off PictureMate, wait a few seconds, then turn it on again.
PictureMateR.book Page 50 Tuesday, May 17, 2005 10:17 AM Your memory card does not work correctly. ● Make sure you are using a compatible memory card. (See page 6.) ● Make sure only one card is inserted at a time. PictureMate does not read from multiple cards at once. Photo Quality Problems You see banding (light lines) in your prints. ● The print head nozzles may need cleaning. (See page 45.) ● Make sure the glossy side of the paper is face up.
PictureMateR.book Page 51 Tuesday, May 17, 2005 10:17 AM Your printout is faint or has gaps in the image. Problems With Paper Feeding ● The print head nozzles may need cleaning. (See page 45.) ● The photo cartridge may be old or low on ink. Replace the photo cartridge. (See page 34.) If it’s wrinkled when it ejects, the paper may be damp. ● Make sure your paper isn’t damaged, old, dirty, or loaded face down. If it is, load a new stack of paper with the glossy side up.
PictureMateR.book Page 52 Tuesday, May 17, 2005 10:17 AM ● Don’t load plain paper; this may damage PictureMate. ● Make sure you are using only PictureMate Photo Paper or Epson Premium photo paper. (See page 34.) Store paper flat to help prevent curling. borders) which may be causing part of your image to be cut off. The wrong photo is printed. ● The photo numbering on the proof sheet may not match the numbering in your camera. First print a proof sheet to identify your photos by number.
PictureMateR.book Page 53 Tuesday, May 17, 2005 10:17 AM Where to Get Help Toll or long distance charges may apply. Epson provides technical assistance 24 hours a day through the electronic support services and automated telephone services listed below. Before you call, please have the following information ready: Service World Wide Web Automated Telephone Services Access From the Internet, you can reach Epson Support at www.MyPictureMate.com/ support.
PictureMateR.book Page 54 Tuesday, May 17, 2005 10:17 AM Notices Important Safety Instructions Before using your PictureMate, read the following safety instructions to make sure you use it safely and effectively: ● The methods for using memory cards vary according to card type. Be sure to refer to the documentation packaged with your memory card for details. ● Use only memory cards compatible with the printer.
PictureMateR.book Page 55 Tuesday, May 17, 2005 10:17 AM ● Place the AC adapter near a wall outlet where the plug can be easily unplugged. ● Do not place or store the printer or the AC adapter outdoors. ● Do not block or cover the vents and openings in the printer. ● Power supply cords should be placed to avoid abrasions, cuts, fraying, crimping, and kinking. Do not place objects on top of power-supply cords and do not allow the AC adapter or power-supply cords to be stepped on or run over.
PictureMateR.book Page 56 Tuesday, May 17, 2005 10:17 AM Photo Cartridge Safety Instructions ● Keep photo cartridges out of the reach of children and do not drink the ink. ● Do not shake the photo cartridge after removing it from the bag; this can cause leakage. ● Be careful when you handle used photo cartridges, as there may be some ink remaining around the ink supply ports. If ink gets onto your skin, wash the area thoroughly with soap and water.
PictureMateR.book Page 57 Tuesday, May 17, 2005 10:17 AM LCD Safety Instructions ● The LCD panel contains a few small bright or dark spots. These are normal and do not mean that the LCD monitor is damaged in any way. ● Only use a dry, soft cloth to clean the LCD panel. Do not use liquid or chemical cleansers. ● If the LCD panel on your printer’s control panel is damaged, contact your dealer. If the liquid crystal solution gets on your hands, wash them thoroughly with soap and water.
PictureMateR.book Page 58 Tuesday, May 17, 2005 10:17 AM What This Warranty Does Not Cover: This warranty does not apply to refurbished or reconditioned products. This warranty covers only normal use in the United States and Canada. Using this product for continuous production or similar high duty purposes is not considered normal use; damage, maintenance or service from such use will not be covered under this warranty. This warranty is not transferable.
PictureMateR.book Page 59 Tuesday, May 17, 2005 10:17 AM How many photos will I get from a PictureMate Print Pack? Epson has conveniently packaged the PictureMate Photo Cartridge with PictureMate Photo Paper, so that purchasing supplies for PictureMate is simple and saves time. The PictureMate Print Pack provides both supplies together, so replacing both the PictureMate Photo Cartridge and paper with a new PictureMate Print Pack is convenient and affordable.
PictureMateR.book Page 60 Tuesday, May 17, 2005 10:17 AM FCC Compliance Statement For United States Users This equipment has been tested and found to comply with the limits for a Class B digital device, pursuant to Part 15 of the FCC Rules. These limits are designed to provide reasonable protection against harmful interference in a residential installation.
PictureMateR.book Page 61 Tuesday, May 17, 2005 10:17 AM not cause harmful interference, and (2) this device must accept any interference received, including interference that may cause undesired operation. Trade Name: Epson Type of Product: Ink Jet Printer Model: B271A ENERGY STAR Compliance As an ENERGY STAR® Partner, Epson has determined that this product meets the ENERGY STAR guidelines for energy efficiency.
PictureMateR.book Page 62 Tuesday, May 17, 2005 10:17 AM A Note Concerning the Responsible Use of Copyrighted Materials Ink jet printers, like photocopiers, cameras, and scanners, can be misused by improper copying and reprinting of copyrighted material. While some countries’ laws permit limited copying of copyrighted material in certain circumstances, those circumstances may not be as broad as some people assume.
PictureMateR.
PictureMateR.
PictureMateR.
PictureMateR.
PictureMateR.
PictureMateR.
PictureMateR.
PictureMateR.
Get to Know Your PictureMate Need a new photo cartridge and paper? LCD menu screen You can get the PictureMate Print Pack (part# T5570) with everything you need to print in one box: 100 sheets of PictureMate Photo Paper and a PictureMate Photo Cartridge.
Get to Know Your PictureMate Need a new photo cartridge and paper? LCD menu screen You can get the PictureMate Print Pack (part# T5570) with everything you need to print in one box: 100 sheets of PictureMate Photo Paper and a PictureMate Photo Cartridge.
Snap. Print. Enjoy. Using PictureMate Without a Computer CPD-19731 Printed in XXXXXX XX.