PriorityFax™ 3000 Update Notice Following is some additional information not covered in your PriorityFax Owner ‘S Manual. p. 2-2 When a Fax Back Message cannot be sent or you do not lift the handset after hearing the ring, the fax machine automatically prints a communication error report even if the document is sent. p. 2-13 The PriorityFax can receive documents automatically when the date and time are displayed and when delayed sending or polling is waiting. p.
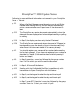
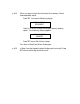
p. 4-33 When you want to send the document from memory, follow these steps after step 6: Press SET. You see the following display: DELAY SEND DOCUMENT Use the * or # key to select the delayed memory sending option. The following display appears: DELAY SEND MEMORY Press SET twice. Dial the fax number. You return to Step 8 and follow those steps. p. 4-35 In Step 9, use the keypad to select the day and time to poll. Press SET once to set the day and time to poll.
FCC COMPLIANCE STATEMENT FOR AMERICAN USERS This equipment generates and uses radio frequency energy and if not installed and used properly, that is, in strict accordance with the manufacturer's instructions, may cause interference to radio and television reception.
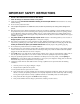
IMPORTANT SAFETY INSTRUCTIONS 1. Read all of these instructions and save them for later reference. 2. Follow all warnings and instructions marked on the product. 3. Unplug this product from the wall outlet before cleaning. Do not use liquid cleaners or aerosol cleaners. Use a damp cloth for cleaning. 4. Do not use this product near water. 5. Do not place this product on an unstable cart, stand, or table. The product may fall, causing serious damage to the 5. product. 6.
TELEPHONE INFORMATION is equipment complies with Part 68 of the FCC Rules. On the rear panel of this equipment is a label that contains, among other information, the FCC Registration number and Ringer Equivalence Number (REN) for this equipment. You must, upon request, provide this information to your telephone company. Ask your telephone company or installer to install the jack suitable for your device if such is available.
Contents Introduction Features . . . . . . . . . . . . . . . . . . . . . . . . . . . . . . . . . . . . . . . . . . . . . . . . . . About This Manual . . . . . . . . . . . . . . . . . . . . . . . . . . . . . . . . . . . . . . . . . Conventions Used in This Manual . . . . . . . . . . . . . . . . . . . . . . . Where to Get Help.. . . . . . . . . . . . . . . . . . . . . . . . . . . . . . . . . . . . . . . . 1 2 2 3 1 Setting Up the PriorityFax Unpacking the Fax Machine . . . . . . . . . . . . . . . . . . . .
PriorityFax 3000 Manual 3 Using the PriorityFax as a Telephone The Control Panels . . . . . . . . . . . . . . . . . . . . . . . . . . . . . . . . . . . . . . . 3-l The Top Control Panel . . . . . . . . . . . . . . . . . . . . . . . , . . . . . . . . . 3-l The Back Control Panel . . . . . . . . . . . . . . . . . . . . . . . . . . . . . . . . 3-4 Adjusting the Handset Volume and Ringer Switches.. . . . . . . . . 3-4 using standard Dialing . . . . . . . . . . . . . . . . . . . . . . . . . . . . . . . . . . .
Contents 5 Troubleshooting Problems and Solutions.. . . . . . . . . . . . . . . . . . . . . . . . . . . . . . . . . .5-l sending. . . . . . . . . . . . . . . . . . . . . . . . . . . . . . . . . . . . . . . . . . . . . . 5-l Document jam . . . . . . . . . . . . . . . . . . . . . . . . . . . . . . . . . . . . . 5-l Document doesn‘t enter the feeder properly. . . . . . . . . . . 5-1 Documents cannot be fed into the fax machine . . . . . . . .5-2 Password security documents cannot be sent.. . . . . . . . .
PriorityFax 3000 Manual Index viii
Introduction The Epson PriorityFax™ 3000 is an advanced desktop facsimile machine and telephone that combines high speed and quality with a wide range of features. Features In addition to its compact design and ease of operation, this fax machine offers the following.
PriorityFax 3000 Manuals About This Manual This manual provides step-by-step instructions for setting up and operating the fax machine. Chapter 1 contains information on unpacking, setting up, connecting and testing the fax machine. Chapter 2 provides basic information on using the fax machine, including using one-touch and speed dialing. Chapter 3 explains using the fax machine as a telephone. Chapter 4 tells how to use all the advanced features of the fax machine.
Introduction Where to Get Help Customer service for Epson products is provided by a network of authorized Epson Customer Care Centers throughout the United states. Call the Epson Consumer Information Center at l-800-922-8911 for the following: Customer Care Center referrals Technical support referrals Information on Epson User Groups. To locate or purchase accessories or supplies, contact your nearest Epson dealer or call 1-800-873-7766.
1 Setting Up the PriorityFax This chapter takes you through the steps of unpacking, assembling, and testing the fax machine. Unpacking the Fax Machine As you unpack the fax machine, check that you have all the items shown below and none have been damaged during transportation.
PriorityFax 3000 Manual WARNING Lift the fax machine by its body, never by the telephone handset or cradle. Choosing a Place for the Fax Machine When you select a location for your fax machine, keep the following in mind.: • Place the fax machine on a flat, stable surface • Select a vibration-free area • Locate the unit near a telephone wall jack and a standard grounded outlet WARNING • Avoid locations that are subject to direct sunlight, excessive heat, moisture, or dust.
Setting Up the PriorityFax Connecting the Handset The first step in assembling the fax machine is attaching the handset to the unit. Locate the insert opening on the left side of the telephone cradle and plug in the curled handset cord. Push firmly to be sure it is locked.
PriorityFax 3000 Manual Plug the other end into your modular telephone wall jack (USOC RJ11C). Make sure both ends of the cord click securely into place. If you have the older 4-prong telephone wall jack, you must use a modular 4-prong adapter (USOC RJA1X). Plug the adapter into the wall jack and then plug the telephone cord into the adapter, as shown in the illustration below. Installing a multi-line telephone connection Most offices have key systems or PBXs.
Setting Up the PriorityFax Installing the Output Tray and Paper Rest There are two types of paper holders for the PriorityFax: the output tray for holding documents sent to or copied by you, and the paper rest for holding documents you have just sent to others. Installing the output tray The larger of the two paper holders, the output tray, receives incoming and copied documents.
PriorityFax 3000 Manual Place the fax machine at the edge of the table and locate the two notches on the front underside of the fax machine. Holding the output tray base level, press the tabs extending from the output tray base into the notches on the front of the fax machine, as shown in the following illustration. Place the output tray in front of you and insert each of the two wire paper holders into the holes at the edge of the output tray, as shown below.
Setting Up the PriorityFax To attach the output tray to the output tray base, locate the holes on either side of the output tray base. Then insert the pegs on either side of the output tray into these holes, as shown below. Rear Front This tray can be used in a horizontal position instead of the vertical position shown on the next page. If you plan to use the tray in the horizontal position, insert the pegs into the rear slots instead of the front holes.
PriorityFax 3000 Manual When the output tray is installed, it hangs over the edge of the fax machine operating surface to catch your incoming or copied documents, as shown below. installing the paper rest The smaller of the paper holders, the paper rest, is used to hold documents that you have just faxed to others. To install the paper rest, follow these steps: Locate the grooves at the back of the fax machine, right below the back control panel.
Setting Up the PriorityFax Holding the paper rest at about a 45° angle to the fax machine, press the tabs extending from one end of the rest into the grooves, as shown in the following illustration. If you wish, you can also install the paper rest wire as shown below. Do not use the paper rest wire with legal-sized documents. Make sure that the tray fits evenly and securely.
PriorityFax 3000 Manual Plugging in the Fax Machine The fax machine can be plugged into any standard power outlet. Make sure that the outlet is grounded and that it is not on the same line as large appliances or office machine that tend to draw a lot of power in a very short period of time, such as refrigerators and copiers. The fax machine power requirements can be found in Technical Specifications, Chapter 7. Plug the power cord into a properly grounded electrical outlet.
Setting Up the PriorityFax Unwrap the paper roll. Hold the roll so that the free end of the paper points toward you from the top of the roll, as shown. Note Be sure not to insert the paper roll upside down. If the paper roll is inserted upside down, the fax machine cannot produce an image.
PriorityFax 3000 Manual Place the paper into the machine. Then pull approximately five inches (15 cm) of paper from the top of the roll and carefully insert the end of the paper under the paper cutter guide, as shown in the illustration below. (Paper loading instructions are also printed inside the fax machine.) If you’ve inserted the paper correctly, it comes out through the front of the machine. Make sure that approximately four inches (10 cm) of paper protrudes from the unit.
Setting Up the PriorityFax WARNING Always use the proper type of recording paper in this fax machine. Epson PriorityFax paper is recommended. Reloading Paper The LCD lets you know when to replace the paper roll. When approximately 4 inches (10 cm) of paper is left, the ADD PAPER message appears on the LCD. When you see this message, remove the old roll and follow the instructions above to insert the new roll. Running a Copy Test A quick test of your PriorityFax is the convenience copy function.
PriorityFax 3000 Manual The ready display appears: FAX/COPY READY STD NORMAL START/COPY Press START. The fax machine draws the original document through the machine, and the copy begins to emerge from the slot at the front of the unit. Once copying is complete, the automatic cutter cuts off the page and the unit beeps. Now the copy can be removed from the output tray. WARNING Do not pull on the paper while copying. You may ruin the copied image.
2 Using the PriorityFax This chapter covers the control panels, sending and receiving documents, and the basic special features, such as one-touch and speed dial faxing, and setting the date and time. The Control Panels The buttons and switches on the top and back control panels let you control many of the fax machine’s settings. The Top Control Panel The top control panel has a Liquid Crystal Display (LCD) and many buttons.
PriorityFax 3000 Manual Buttons SPKR CALL RSRV SPKR (Speaker). Pressing this button allows you to dial without lifting the handset. CALL RSRV (Call Reservation). Pressing this button during fax transmission allows you to talk to the receiving party after the document is sent. After the fax machine has finished sending the document, both your telephone and the telephone you called ring, and you can talk to the other party.
Using the PriorityFax START/COPY START. After dialing, press this button to begin sending the document. If Automatic Answering is off, pressing this button starts document receiving. This button is also used for polling. See chapter 4. COPY. Pressing this button starts copying (as with a photocopy machine) if you insert a document and do not dial a number. KEYPAD. Use these buttons for dialing, speed dialing, and for some customizing functions Chapters 2, 3, and 4). ONE-TOUCH.
PriorityFax 3000 Manual AUTO ANS ON Off RING DELAY AUTO ANS (Automatic Answering). When this is turned on, fax reception begins after the telephone rings the number of times set by the RING DELAY switch. Also when this is on, a hyphen appears opposite the AUTO ANS label in the last space of the LCD. When off, fax reception begins if the telephone handset is not picked up within ten rings. RING DELAY. This switch is effective only when Automatic Answering is on.
Using the PriorityFax Complete the information on the PriorityFax Test Sheet. Then insert the Test Sheet face down in the fax machine as shown below. The display changes from date/time to the following: FAX/COPY READY NORMAL STD For automatic sending, simply dial the number of the receiving fax machine. Otherwise, lift the handset (or press SPKR) and dial the number of the receiving fax machine when you hear the dial tone. When you hear the fax tone, press START.
PriorityFax 3000 Manual Document Sending Cautions Whenever you send any documents, keep these cautions in mind. Never put more than five pages in the feeder at a time. Do not send documents on any of the following types of paper: • Thick paper (over 0.12 mm thick) • Very thin paper such as tissue, tracing, or carbon paper • Wet, wrinkled, tom, curled, or slippery-surfaced paper • Paper with tape or staples.
Using the PriorityFax Document Sending Enhancements Each time you send a document, you can, if you wish, choose one or more of the following enhancement options: • Fax Back Message. With this option, the fax machine automatically sends a message asking for a reply after it sends your document. • Resolution. You can change this from standard to fine or photo. • Contrast. You can change this from normal to light or dark for sending documents that are unusually light or dark. • Lead Sheet.
PriorityFax 3000 Manual Fax back message When you choose this option, a message like the one below is sent after your document. If you have not registered the receiver’s name as described later in this chapter, or if you dial without using the one-touch button or the speed dial buttons, only the number, not the name, of the recipient appears in the fax back message.
Using the PriorityFax Remember that this turns Fax Back on for only one document. To send a Fax Back Message without sending a document see page 4-l. Resolution With this option, you can change the resolution from standard to either fine or photo. Standard is for typewritten or typeset text and line drawings; fine is for newsprint and detailed drawings; and photo is for photographs.
PriorityFax 3000 Manual You can use this feature in certain cases if the document you are sending is unusually dark or light. If the document is light, choose light; if the documentis dark, choose dark. Use this procedure only with fine resolution. In standard resolution, the PriorityFax automatically adjusts the contrast, and in photo resolution, the contrast cannot be adjusted. To select dark or light, follow the steps below: Insert the document face down in the feeder. The ready display appears.
Using the PriorityFax Lead sheet When you choose this option, a message like the one below is sent after your document. As you can see, it includes the number and name of both the sender and the recipient. You need to register the recipient’s name as well as your number and name as described later in this chapter. If you choose the number of pages option, as described in the following procedure, the lead sheet also includes the total number of pages.
PriorityFax 3000 Manual Press 6. You see the following display: Press either cursor key. The following display appears: TOTAL PAGES 0 0 Use the keypad to enter the total number of pages in the document you are sending. If the number is less than 10, enter a 0 before it. For example, enter 03 for a three-page document. S. DIAL Press SET twice to return to the ready display. Send the document. Remember that you can turn on the Lead Sheet for only one document.
Using the PriorityFax As the pages are fed into the fax machine, notice when there is only one page left. Then place the next four pages face down on top of the page that is still in the feeder and push them gently in as far as they will go. Continue performing step 3 as often as necessary until the entire document has been sent.
PriorityFax 3000 Manual If the other party is telephoning you and not trying to send a fax, simply use the PriorityFax as an ordinary telephone, but if the other party wants to send you a fax or if you hear a constant tone from the other party when you lift the handset press START and hang up. The document you are receiving begins appearing from the paper slot at the front of the fax machine; the automatic cutter cuts off each page as it is received; and the machine beeps once when transmission is complete.
Using the PriorityFax Use the keypad to enter the correct numbers in the display. Ignore the slashes and the colon. They appear automatically. If you make a mistake, use the l cursor key to move the cursor to the incorrect digit, and enter the correct one. When the date and time are correct, press SET twice. Now the new date and time are registered and appear on the display.
Enter your fax number using the keypad. You can enter up to 22 digits, but the display can show only the last 15 entered (16 when you enter 22 digits). If you make a mistake, see Erasing Numbers and Names on page 2-25. REDIAL When your fax number is entered, press NEXT so you can enter a name, such as your own name or your company’s name. You see the following on the display. Enter your name using the method explained below.
Using the PriorityFax Character Code Table char Space code Char Code @ A 32 B C D E F 07 G 34 35 36 37 38 08 09 10 11 12 13 14 15 16 17 18 H I J 40 41 42 K L 43 44 M N O P Q R 19 S T U 45 46 47 48 49 50 51 52 00 01 02 03 04 05 06 0 1 2 3 4 5 6 7 8 9 20 21 22 23 24 25 26 27 28 29 30 31 V W X Y Z [ Not used ] A - 33 39 53 54 55 56 57 58 59 60 61 62 63 For example, to enter the name Epson, you first find E on the chart and see that its code is 37. Then press the 3 and the 7 keys.
PriorityFax 3000 Manual As you enter your name, you see each character appear on the display. If you want to enter a space, enter 00. If you make a mistake, use the * cursor key to move the cursor to the incorrect digit, and enter the correct one. You also use this same method and chart for registering names for one-touch and speed dial numbers, which are explained in the next section. Press SET three times to return to the date/time display.
Using the PriorityFax Make sure no document is in the machine. Press FUNCTION. Press 1 to enter the register mode Press 3 to choose the one-touch fax number mode. Then press the top on&ouch button. You see the following display: FAX ONE TOUCH FX1:_ Enter the first fax number using the keypad. You can enter up to 22 digits, but the display can show only the last entered (16 15 when you enter 22 digits).
PriorityFax 3000 Manual Press NEXT. The following display appears: MUTE/NEXT Enter the name of the person or company associated with the fax number, using the instructions on entering letters on page 2-17. When the name is correct, press NEXT. You see the following display: ONE TOUCH GROUP: *00 If you do not want to assign this number to a group, press NEXT to return to the fax number display. If you do want to assign this number to a group, enter the group number and press NEXT.
Using the PriorityFax Press FUNCTION. Press 2. Press the # cursor key until you see the following display: PRINT FAX ONE TOUCH # Press START. The list begins printing. Using one-touch faxing After you have registered the one-touch numbers, you can send a fax to any of those numbers in just three steps: Insert the document in the feeder. The ready display appears: FAX/COPY READY NORMAL STD Press the one-touch button for the number you want to use; then press START.
PriorityFax 3000 Manual Speed dial faxing You can access up to 30 numbers for dialing frequently-called fax numbers by pressing S. DIAL and two number keys. First you must register the fax numbers. Speed dial may be used for telephone numbers as well as faxnumbers. Registering speed dial fax numbers To register the speed dial fax numbers, follow the steps below: Note You can assign any one-touch or speed dial number to one of five groups, numbered from 1 through 5.
Using the PriorityFax You can enter up to 30 speed dial fax numbers, numbered 01 through 30. The underline is the cursor. The two digits before the colon are the speed dial number. Use the # cursor key to move the cursor to the right of the colon. Enter the first fax number using the keypad. You can enter up to 22 digits, but the display can show only the last 15 entered (16 when you enter 22 digits).
Now your display shows #0l and the first 12 digits of the number you just registered. To register another number make sure the cursor is under the first digit after the # sign, enter 02 and repeat the process until you have registered all the speed dial numbers you need, up to a total of 30. When you are through registering numbers, press SET three times to return to the date/time display. Write the names corresponding to the speed dial numbers on the label under the handset.
Using the PriorityFax Using speed dial faxing After you have registered the speed dial numbers, you can send a fax to any of those numbers in just three steps: Insert the document face down in the feeder. The ready display appears. Press S. DIAL Press the two numbers on the keypad corresponding to the number you want to use and press START. If you have not registered a number for the button you pressed, the message NOT REGISTERED appears.
PriorityFax 3000 Manual Erasing Names To erase a name, follow these steps: If not already shown, bring up the name on the display. Make sure the cursor is under the first letter of the name you wish to erase. Press 0 twice to erase the name. You may now enter a new name. If you would rather return to the date/time display without entering a new name, press SET three times. The STOP button does not operate during most of the registration modes described in this chapter.
Using the PriorityFax Activity Reports Every 12 hours your PriorityFax automatically prints an activity report. This report includes the following information for each fax: date, time, whether sent (TX) or received (RX), destination, mode, and result (OK means that it was successfully sent or received). If you have sent and received 45 faxes before the 12-hour interval is over, the message PLS PRINT REPORT appears on the LCD. When this happens, perform the following steps.
PriorityFax 3000 Manual Automatic Sending and Manual Sending Automatic Sending Automatic sending is transmission without pressing SPKR or picking up the handset. In this transmission, you need not wait for the fax tone from the receiver’s fax machine. You simply press START after dialing setting.
3 Using the PriorityFax as a Telephone The PriorityFax offers you sophisticated, yet easy-to-use telephone capabilities. You can use this fax machine for voice conversation even when it is set to automatic fax reception mode. This chapter covers operating the control panels, standard dialing, redialing, and one-touch telephone dialing. The Control Panels This section describes the PriorityFax telephone controls on the top and back panels.
PriorityFax 3000 Manual The four buttons to the right of the keypad and just below the Liquid Crystal Display (LCD) are used (from left to right) as follows: Before dialing, the buttons function as SPKR (Speaker), REDIAL, and S. DIAL (Speed Dial). After you dial, the four buttons function as CALL RSRV (Call Reservation, used for faxing only), MUTE, HOLD, and FLASH. After the FUNCTION button has been pressed, the buttons act as NEXT, SET, and PAUSE.
Using the PriorityFax as a Telephone MUTE. Pressing this button when you are in the middle of a telephone call silences your conversation momentarily. Press MUTE again to reenter the conversation. Hanging up the handset when MUTE is on breaks the telephone connection. HOLD. Pressing this button stops the transmission of sound to and from the other party. The connection is not broken even if the handset is returned to the telephone cradle while HOLD is on.
PriorityFax 3000 Manual The Back Control Panel The back control panel has only two controls that have telephone uses. SPEAKER (volume). Moving this dial on the back control panel of the fax machine allows you to adjust the speaker sound from low to high (left to right) or back. This dial controls the speaker volume of the fax machine, not the handset (listening) volume. TONE/PULSE. Set this switch to match the type of telephone line you have.
Using the PriorityFax as a Telephone Move the switch left to H for higher volume and right to N for lower (normal) volume. To adjust the ringer switch Locate the RINGER switch on the left side of the telephone cradle to the right of the HANDSET switch. Move the switch left to H for high, center to L for low, or right to OFF for no ringing. Using Standard Dialing There are two ways to start dialing a telephone call: lifting the handset or pressing the SPKR button.
PriorityFax 3000 Manual When you receive a busy signal, you can use redialing to save time by pushing just two buttons to try the number again. Using Manual Redialing There are two redial methods: manual, which is mainly for telephone redialing, and automatic for fax number redialing. See Chapter 2 for information on automatic redialing. To use manual redialing: When you receive a busy signal, either press SPKR or hang up.
using the PriorityFax as a Telephone Registering One-touch Telephone Numbers To register the one-touch telephone numbers: Make sure nodocument is in the machine. Press FUNCTION. Press 1 to choose the register mode. REGISTER (1-9)? Press 2 to choose the one-touch telephone number mode. Then press the top one-touch button. You see the following display: Enter the first telephone number using the keypad.
PriorityFax 3000 Manual To register a number to dial out on a PBX or an international access code, enter the number or code, press PAUSE, and then enter the telephone number. The pause appears as a P in the display. For example, if your telephone system requires you to dial 9 before dialing a number, you could enter the following: 9 PAUSE 5551212. The following would appear on the LCD TL1:9P5551212 Write the name corresponding to the one-touch number beside the button to the left of the keypad. Press NEXT.
Using the PriorityFax as a Telephone Using One-touch Telephone Dialing SPKR After you have registered the one-touch numbers, you can call any of those telephone numbers in just two steps: Press SPKR or lift the handset and wait for a dial tone. CALL RSRV Press the one-touch button for the number that you wish to call. If you pressed SPKR, lift the handset when the call begins ringing. If you have not registered a number for the button you pressed, the message NOT REGISTERED appears.
4 Using the PriorityFax Advanced Features Your PriorityFax has expanded capabilities to afford enhanced document transmission and security. The following list allows you to easily select those features appropriate to your faxing needs. Page No. Feature Fax BackMessage . . . . . . . . . . . . . . . . . . . . . . . . . . . . . . . Resolution . . . . . . . . . . . . . . . . . . . . . . . . . . . . . . . . . . . . . . Contrast . . . . . . . . . . . . . . . . . . . . . . . . . . . . . . . . . . . . . . . .
PriorityFax 3000 Manual If you have not registered the receiver’s name as described in Chapter 2 or if you dial without using the one-touch button or the speed dial buttons, only the number, not the name, of the recipient appears in the fax back message. Make sure nodocument is in the machine. Press FUNCTION. The following display appears: FUNCTION (0-8)? Press 0 to enter the fax back message mode. FAX BACK MSG ON Press SET. FAX: Dial the fax number and press START.
Using the PriorityFax Advanced Features Note The fine and photo modes give more detail, but they are slower than the standard mode; therefore, use the photo mode only for photographs and the fine mode only when necessary. Make sure no document is in the machine. Press FUNCTION. Press 7 to select user-definable switches. You see this display. Press 1. The following display appears: Press the * or # cursor keys to select from the standard, fine, or photo options. S.
PriorityFax 3000 Manual Setting the Contrast Your fax machine has three contrast settings: normal, light, and dark. While you can change contrast on a case-by-case basis as described in Chapter 2, this procedure allows you to set a contrast other than the normal setting that will remain in effect unless you change it. Use this procedure only if you are using fine resolution.
Using the PriorityFax Advanced Features Setting the Beeper If you do not want the beeper to sound, use the following steps to turn the beeper off. Make sure no document is in the machine. Press FUNCTION. Press 7 to select the user-definable switches. USER SW (1-9)? Press 3 to select beeper. BEEPER ON Press the * or # cursor key to choose the off option. Press SET three times to register your selection and return to the date and time display.
PriorityFax 3000 Manual XMT VERIFICATION 12/04/89 06:55 DESTINATION : JGS COMMUNICATIONS MODE : G3 STANDARD PAGE (S) .. 01 RESULT .. OK PRIORITYFAX 3000 Make sure no document is in the machine. Press FUNCTION. Press 7 to select the user-definable switches. USER SW (1-9)? Press 5 to select transmission verification. Press the * or # cursor key to turn the option on. Press SET three times to register your selection and return to the date/time display.
Using the PriorityFax Advanced Features Changing Automatic Redial Settings lf you are using automatic sending and the fax number you dial is busy, the fax machine automatically enters the automatic redial mode. This feature leaves you free to continue with other work without neglecting to send out that important fax document.
PriorityFax 3000 Manual Enter the number of minutes you would like the automatic redial feature to wait between tries of the fax number in the event of a busy signal. Use a zero before a single-digit entry, such as 03 for three minutes. Press SET three times to return to the date/time display. Using Broadcasting Broadcasting allows you to send the same document to several different fax machines in one operation.
Using the PriorityFax Advanced Features Press the * cursor key followed by the group number from 1 to 5 that you wish to poll and then press START. SEND Press START. Your document is sent automatically to the fax machines in the group chosen in Step 6. The displayshows the names or numbers of the receivers.
PriorityFax 3000 Manual Press SET twice. Dial the fax number in automatic sending mode and press START. FAX: Note Using the Message Center • When sending to Group 2 fax machines, you cannot use the following functions: Fax Back Message Resolution Polling Confidential Mail Box Call Reservation Lead Sheet Broad casting • Some old Group 2 machines may not receive your document. Your fax machine allows you to record a message, such as the one below, that callers hear before they send you a fax.
Using the PriorityFax Advanced Features Press the * or # cursor key to select one of these three options: record, play, or erase. First select RECORD to record an outgoing message, the following message appears: Recording MSG CENTER OGM:RECORD START/COPY When you press START, recoding begins and you see the following message: Read your message into the microphone (MIC), located under the START/COPY button on the top control panel. You can record up to 32 seconds.
If you do not want to change the message, press SET three times to return to the date/time display. If you want to change the message, you do not need to erase the old one. Record a new message as described above. Erasing You can erase your outgoing message, but in normal operation you do not need to do so. Erasing your OGM automatically turns off the message center function.
Using the PriorityFax Advanced Features Press 9 to select the message center function. MSG CENTER OFF Press the # cursor key to turn the function on. Press SET three times to return to the date/time display. Printing Lists To see what settings you have made, what numbers you have registered, or what faxes you have sent and received, you can use the Print function of the PriorityFax to print lists.
Press 2. You see the following display: PRINT ACTIVITY REPORT Use the * or # cursor key to select one of the options listed above. When you see the option you want, press START. The fax machine begins printing the list or lists. After printing is over, press SET twice to return to the date/time display. Activity Report Timing Ordinarily the PriorityFax automatically prints an activity report every 12 hours.
Using the PriorityFax Advanced Features S. DIAL Using the Confidential Mail Box Press SET twice to return to the date/time display. When you want to send or receive a document that should be seen only by those with an access ID or code, you can use the confidential mail box feature. Establish a number for the confidential mail box by agreeing on a 4-digit number with the other party. If you send a document with that confidential ID number, the recipient must use the same number to print it.
PriorityFax 3000 Manual S. DIAL Press SET twice. The following display appears: I Dial the fax number. Press START to send the confidential document. The display shows the recipient’s fax number, and the documentis sent to the receiving machine. The receiving party must input the confidential ID code to print out the confidential document. Receiving a Confidential Document When you receive a the confidentialdocument, your fax machine prints out the first page of a condensed version of the document.
Using the PriorityFax Advanced Features Press 5 to enter the confidential mail box mode. CONF MAIL SIZE 1/8 Use the * or # cursor key to select from the 1/1, 1/2, 1/4, or 1/8 options. S. DIAL Printing (retrieving) a confidential document Press SET three times to register your choice and to return to the date/time display. A condensed printout from your fax machine means that a confidential document is waiting.
PriorityFax 3000 Manual Press SET. The following display appears while the document is printing PRINTING After the document has been printed, it is erased from the fax machine’s memory. The LCD returns to the date/time display. Unknown confidential ID number If you receive a confidential documen t and do not know and cannot find out the confidential ID number, you cannot print out the confidentialdocument. In this case you should erase the confidential document.
Using the PriorityFax Advanced Features Using Delayed Send The Delayed Send feature allows you to send documents when you are out of the office and when telephone rates are lower. To use Delayed send, follow these steps: Insert a document face down into the feeder. Press FUNCTION. Press 3 for Delayed Send. Press the # cursor key to turn delayed sending on: DELAYED SENDING ON Press SET. DELAY TIME 0 00:00 Use the keypad to select the day and time to send.
PriorityFax 3000 Manual Now you can choose either Document or Memory. If you choose Memory, the document to be sent is stored in your fax machine’s memory until the delay time is reached. When PriorityFax is waiting for delayed sending, you can only use manual sending and automatic reception. If you choose Document, the document to be sent remains physically in the feeder of your machine until the delay time is reached.
Using the PriorityFax Advanced Features Using Password Security Using a password can help insure confidentiality of fax machine communication and prevent an influx of fax “junk mail.” WARNING Do not use passwords casually. Only people who have Epson PriorityFax machines, who know your password, and who know how to use passwords can send and receive documents to and from your fax machine. When the password is activated, a hyphen appears in the LCD next to the label PASSWORD.
PriorityFax 3000 Manual HOLD/SET Press SET three times to register your selection and return to the date/time display. Activating the Password WARNING • After you activate the password, all the documents you send have this password. Therefore, only people who have Epson PriorityFax machines with the password feature, who know the password, and who know how to use the password can receive documents from your fax machine.
Using the PriorityFax Advanced Features Press the # cursor key to select the on option. Press SET three times to register your selection and to return to the date/time display.
PriorityFax 3000 Manual Called-side Polling The two called-side polling types are standard and secure. If you expect to be polled, follow the steps below for the type of polling you expect. Setting standard polling If you expect to be polled, you must follow these steps: Insert adocument face down into the feeder. The ready display appears. Press FUNCTION. Press 4 to enter polling. POLLING OFF Use the # cursor key to select standard. Press SET twice.
Using the PriorityFax Advanced Features Setting secure polling If you expect to be polled by someone using secure polling, which requires a polling ID, perform the following steps. Note If the polling ID number has already been registered, steps 1 through 6 are not necessary. FUNCTlON Make sure no document is in the feeder and press FUNCTION. Press 1. Press 6. The following display appears: PASSWORD 0000 Press NEXT.
PriorityFax 3000 Manual Press FUNCTION. Then press 4 to enter polling. POLLING OFF Use the # cursor key to select secure. Press SET twice. The following display appears: POLLING WRITING Once thedocument has been polled by the calling side, the display returns to the date and time. Should you change your mind about polling, press FUNCTION and “4”, select POLLING OFF, press SET twice, and then STOP. Now the document can be removed.
Using the PriorityFax Advanced Features Use the # cursor key to select the standard option. The following display appears POLLING STD S. DIAL Press SET. FAX: Dial the fix number and press START. Once the polled document is received, the display returns to the date and time. Setting sequential polling When you want to request documents from several fax machines, use sequential polling.
Use the # cursor key to select the sequential option. The following display appears: POLLING SEQUENTIAL Press SET. You see the following display: FAX: I Press the * cursor key followed by the group number from 1 to 5 that you wish to poll and then press START. Once the polled documents are received, the display returns to the date and time.
Using the PriorityFax Advanced Features S. DIAL Press SET twice. HOLD/SET Dial the fax number and press START. Once your fax machine sends your document and receives the polled document from the other party, the display returns to the date and time. Setting secure polling To use secure polling you must register a polling password ID number to be used by both calling and called side. Follow the steps below: Note If the polling ID number has already been registered, steps 1 through 6 are not necessary.
PriorityFax 3000 Manual Using the keypad, enter a four-digit polling password ID number. Be sure the called party knows this number. Press SET three times to return to the date/time display. Make sure no document is in the feeder and press FUNCTION. Press 4 to enter polling. POLLING OFF Use the # cursor key to select secure polling. r POLLING SECURE Press SET. The following display appears: START/COPY Dial the fax number and press START.
Using the PriorityFax Advanced Features Setting delayed standard polling To poll a single fax machine at a later time follow these steps: Make sure no document is in the machine. Press 3 to enter delayed polling. DELAYED POLLING OFF Use the # cursory key to select the standard option. The following display appears: S. DIAL Press SET. HOLD/SET DELAY TIME 0 00:00 Use the keypad to select the day and time to poll.
PriorityFax 3000 Manual Setting delayed sequential polling For delayed sequential polling follow these steps: Make sure no document is in the machine. Press FUNCTION. Press 3 to enter delayed polling. DELAYED POLLING OFF Use the # cursor key to select the sequential option. The following display appears: DELAYED POLLING SEQUENTIAL S. DIAL Press SET. You see the following display: Use the keypad to select the day and time to send.
Using the PriorityFax Advanced Features Setting delayed turnaround polling If you want to send a document at a later time and then receive a document back automatically in return, follow these steps: Insert adocument face down into the feeder. The ready display appears. Press FUNCTION. Press 3. DELAYED SENDING OFF Use the # cursor key to select the delayed polling turnaround option. The following display appears: DELAYED POLLING TURNAROUND Press SET.
PriorityFax 3000 Manual Setting delayed secure polling To use delayed secure polling you must register a polling password ID number to be used by both calling and called side. Follow the steps below. If the polling ID number has already been registered, steps 1 through 6 are not necessary. FUNCTION Make sure no document is in the machine and then press FUNCTION. Press 1. Press 6. The following display appears: Press NEXT.
Using the PriorityFax Advanced Features FUNCTION Then make sure no document is in the feeder and press FUNCTION. Press 3 to enter delayed polling. DELAYED POLLING OFF Use the # cursor key to select delayed secure polling. DELAYED POLLING SECURE Press SET. DELAY TIME 0 00:00 Use the keypad to select the day and time to send. For 0 (day), enter a number from 0 to 7, where 0 is today, 1 is tomorrow, 4 is four days from now, etc.
5 Troubleshooting This chapter discusses problems you may encounter and their likely solutions. Problems and Solutions This section includes five categories: sending receiving, copying, telephoning, and LCD error messages. Sending Document jam. • Push down on the cover release button to open up the fax machine. Remove the jammed document. Push the cover back in place until you hear a click Make a copy of the jammed document, and send the copy. Document doesn’t enter the feeder properly.
PriorityFax 3000 Manual Sending (continued) Documents cannot be fed into the fax machine. • You may be trying to feed the documents from the back of the fax machine. Make sure you insert documents from the front aide where the Face Down icon appears. Password security documents cannot be sent. • The password switch of the receiving fax machine is set to the off position; the two passwords do not match; or the receiver’s fax machine does not have a password feature.
Troubleshooting Sending (continued) Documents you sent are received blank. • Be sure you sent the document through the fax machine face down. Resend the document, being careful to place the document in the feeder face down. One-touch or speed dial faxing does not work. Receiving • You may have used a one-touch or speed dial number that is a telephone number, not a fax number. Check to be sure the number you are dialing is a fax number, and try again.
PriorityFax 3000 Manual Receiving (continued) The telephone rings continuously. • Be sure that the recording paper roll is inserted. If not, load in a roll of thermal recording paper as described in Chapter 1. • When the AUTO ANS switch on the back control panel is turned off, the telephone rings ten times before reception begins. Turn on the AUTO ANS switch. • The paper cover may not be closed securely. Push the cover shut until you hear a click.
Troubleshooting Copying Nothing comes out of the paper slot. • The paper roll may not be inserted properly. See Chapter 1. • The recording paper may be jammed. Push down on the paper cover button to open the fax machine. Pull out the jammed recording paper. Use scissors to make a clean edge on the end of the paper roll. Reinsert the paper according to the instructions in Chapter 1. No image appears on the paper. • The paper roll may be inserted upside down. See Chapter 1.
PriorityFax 3000 Manual Telephone One-touch and speed dialing don’t work. • Check to be sure the power cord is plugged in. • The one-touch and speed dialing numbers are not registered properly. see Chapter 3. Call reservation does not work. • The receiver may not have a call reservation feature. Check with the receiving party. • The receiving party left the fax machine area. • The call reservation feature is set improperly. See Chapter 2. The telephone does not ring. • The ringer switch is off.
Troubleshooting LCD Error Messages (continued) COMM ERROR • Press STOP. • Documents may not have been fed correctly. Resend the documents (up to five pages at a time). • The procedure for sending a document was improper. See Chapter 2 and try sending the document again. • The receiving party may have a problem during transmission. Call the receiver. • The document was removed from the fax machine during the Redial function. Insert the document and begin the sending procedure again.
PriorityFax 3000 Manual LCD Error Messages (continued) COVER OPEN • The cover is open. Close the cover. MACHINE ERROR PRINTER ERROR SCANNER ERROR J • These messages indicate a problem with your fax machine. Press STOP and try the operation again, ad if the error occurs again, write down the error message and take the fax machine to an authorized Epson Customer Care Center. To find the location of ‘the nearest Customer Care Center, call 1-800-922-8911.
6 Maintenance TO maintain optimum printing quality, clean your PriorityFax after every three or four rolls of recording paper you use. Cleaning the Interior of the Fax Machine To clean the interior of the fax machine, follow these steps: WARNING Unplug the machine before cleaning it to avoid electric shock. When you unplug the machine, most of the items in memory are not affected.
PriorityFax 2000 Manual WARNING Do not use organic solvents, such as benzene or thinner. Use a dry cloth to gently wipe off any excess alcohol from the newly cleaned interior. Replace the recording paper roll as described in Chapter 1. Cleaning the Exterior of the Fax Machine To clean the exterior of the fax machine, use a dry cloth to gently wipe off any dirt from the surface. WARNING Do not use water, alcohol, thinner, or any other organic solvent on the exterior of the machine.
7 Technical Specifications Type Desktop facsimile transceiver Transmission Mode Compatibility CCITT Groups 2 and 3 Coding System Modified Huffman (MH) Transmission Speed V.27 ter and a V.29 modem Transmission Time 15 seconds with 9,600 bps Document input Size 8.5” (width) Recording Paper Roll Size CORE SIZE Recording Paper Roll Type 8.5” x 98’ (30m) 15MM Thermal Effective Scanning Width 8.
Operating Environment 41 - 95 degrees F, 10 - 75% humidity Dimensions (Including Handset) 16.5” W x 11” D x 4.7" H Weight (Including Handset) 13.2 lbs Specifications are subject to change without notice.
Glossary Groups 2 & 3 Standards for facsimile transmission established by the CCITT (Consultative Committee of International Telegraph and Telephone). Broadcasting A special feature by which a document can be automatically sent to many preset destinations. Convenience copier A copier used to make occasional, temporary reproductions of documents.
PriorityFax 3000 Manual Tone/pulse Types of dialing; pulse is the rotary method, where the phone system counts pulses (clicks) to determine the number you are dialing. Tone is the audio method where the system listens to the tones to determine the number you are dialing.
Index A Activity reports, 2-27 intend, setting the activity report, 4-14, 6-l printing, 2-27, 4-13 timing, 4-14 Adapter, 4-prong, 1-4 ADD PAPER message, 1-13, 2-26, 5-6 Assembling the fax machine, l-2-9 AUTO ANS switch, 2-4, 2-13—14 Automatic answering, 2-4 Automatic fax back message, 4-12 Automatic reception, 2-13—14 Automatic redialing, 2-6, 4-7 Automatic redial settings, changing, 4-7 Automatic sending, 2-4, 2-28 B Back control panel for fax uses, 2-3-I Back control panel for telephone uses, 3-4 Beepe
PriorityFax 3000 Manual Contrast, 2-7, 2-10, 4-4 dark, 4-4 light, 4-4 normal, 4-4 setting for one document, 2-10 setting permanently, 4-4 Control panels back control panel for fax uses, 2-3-d back control panel for telephone uses, 3-4 top control panel for fax uses, 2-l-3 top control panel for telephone uses, 3-l-3 COPY button, 2-3 Copying a document as a test, l-13 Copying problems, 5-5 blank copies, 5-5 no copies come out, 5-5 print quality, 5-5 COVER OPEN Message, 5-8 Curled page problems, 5-1, 5-4 Custo
Index Erasing, 2-25-26 names, 2-25, 2-26 numbers, 2-25 Error messages, 5-6—8 ADD PAPER, l-13, 2-26, 5-6 COMM ERROR 5-7 COVER OPEN, 5-8 MACHINE ERROR, 5-8 MEMORY FULL, 5-7 NOT REGISTERED, 2-21, 2-25, 3-9, 5-7 PAPER JAM, 5-7 POWER INTERRUPT, 5-8 PRINTER ERROR, 5-8 REDIAL CANCELLED, 5-7 SCANNER ERROR, 5-8 Exterior of fax machine, cleaning, 6-2 F Fax back message, 2-7-9 automatic, 4-1—2 for the document you are sending, 2-8 Feeder, 2-6, 2-12—13, 7-l Feeding document problems, 5-2 Five pages in feeder, more tha
PriorityFax 3000 Manual J Index - 4 Image quality problems, 5-2, 5-4, 5-5 Interior of fax machine, cleaning, 6-l-2 International access code, 2-19, 2-23 Interval, activity report, 4-14, 6-1 K Keypad, 2-3, 3-2 Key system, connecting the fax machine to a, 1-4 L LCD (Liquid crystal Display), 2-1, 3-2, 5-6 Lead sheet (for one document), 2-7, 2-11—12 Letters, entering, 2-16—18 Liquid Crystal Display (LCD), 2-1, 3-2, 5-6 Location, choosing for the fax machine, 1-2 M MACHINE ERROR message, 5-8 Maintenance,
Index One-touch telephone numbers, 3-6—9 printing a list of, 3-8 registering, 3-7—8 using, 3-9 Operating environment, 7-2 OGM, 4-10—12 Outgoing message, 4-10-12 output tray, l-5, 1-8 installing, 1-5—8 parts, 1-1 Output tray base, installing, 1-5-6 P Paper cover button, 1-10 Paper cutter, 1-12—13, 7-1 PAPER JAM message, 5-7 Paper jam problems, 5-3, 5-5 Paper, reloading 1-13 Paper rest, 1-1, 1-5 Paper rest, installing, l-8-9 Paper roll, inserting, 1-10—13 Paper roll size, 7-1 Paper roll type, 7-l Paper, thic
PriorityFax 3000 Manual standard delayed, 4-31 turnaround calling-side, 4-28—29 turnaround delayed, 4-33 using, 4-23—35 Power consumption, 7-1 Power source, 7-1 PRINTER ERROR message, 5-8 Printing activity report, 4-13 lists, 4-13 one-touch fax numbers registered, 2-20—21, 4-13 one-touch telephone numbers registered, 3-8 speed dial numbers registered, 2-24, 4-13 switch settings, 4-13 Print quality problems, 5-2, 5-4, 5-5 Problems and solutions, see Copying problems, Error messages, Receiving problems, Sendi
Index Registering one-touch fax numbers, 2-18—20 one-touch telephone numbers, 3-7 speed dial fax numbers, 2-22—24 your number and name, 2-15—18 Resolution, 2-7, 4-2-3, 7-l fine, 2-9, 2-10, 4-2—3 photo, 2-9, 4-2—3 setting for one document, 2-9 setting permanently, 4-2-3 standard, 2-9, 4-2 RING DELAY switch, 2-4, 2-13 Ringer switch, adjusting, 3-5 Ringing problems, 5-4, 5-6 S SCANNER ERROR message, 5-8 Scanner method, 7-1 Scanning width, effective, 7-1 S.
PriorityFax 3000 Manual Speed dial faxing, 2-4, 2-7, 2-18, 2-22—25 Speed dial faxing problems, 5-3 Speed dial fax numbers, printing a list of, 2-24, 4-13 registering, 2-22-24 using, 2-25 Speed dialing problems, 5-6 Speed dial telephone numbers, 2-22 SPKR button, 2-2, 2-4, 2-5, 2-28, 3-2, 3-5 SPKR button problems, 5-6 Standard polling, 4-24, 4-26 calling-side, 4-26-35 delayed, 4-31-35 START button, 1-14, 2-3, 2-5, 2-12, 2-14 START/COPY button, 2-3 station memory, 7-l STOP button, 2-2, 2-26 T Index - 8 Tec
I n d e x Transmission speed, 7-1 Transmission time, 7-1 Transmission verification, setting, 4-5—6 Troubleshooting, see problems and solutions Turnaround polling, 4-28—29 calling-side, 4-28—29 delayed, 4-33 U Unpacking the fax machine, l-l-2 W Wall jack, telephone, l-4 Weight, 7-2 Index - 9