® EPSON Stylus C80WN Setup and Installation
Copyright Notice All rights reserved. No part of this publication may be reproduced, stored in a retrieval system, or transmitted in any form or by any means, electronic, mechanical, photocopying, recording, or otherwise, without the prior written permission of SEIKO EPSON CORPORATION. The information contained herein is designed only for use with this EPSON printer. EPSON is not responsible for any use of this information as applied to other printers.
Contents INTRODUCTION . . . . . . . . . . . . . . . . . . . . . . . . . . . . . . . . . . . . . Two Ways to Use the Printer . . . . . . . . . . . . . . . . . . . . . . . . . . . . . . . . . . . . . . Windows System Requirements . . . . . . . . . . . . . . . . . . . . . . . . . . . . . . . . . . . . Macintosh System Requirements . . . . . . . . . . . . . . . . . . . . . . . . . . . . . . . . . . . . Where to Get Information . . . . . . . . . . . . . . . . . . . . . . . . . . . . . . . . . . . . . . . .
SOLVING WIRELESS PRINTING PROBLEMS . . . . . . . . . . . . . Problems and Solutions . . . . . . . . . . . . . . . . . . . . . . . . . . . . . . . . . . . . . . . . . . . Uninstalling the Software . . . . . . . . . . . . . . . . . . . . . . . . . . . . . . . . . . . . . . . . . Windows . . . . . . . . . . . . . . . . . . . . . . . . . . . . . . . . . . . . . . . . . . . . . . . . . . . Macintosh . . . . . . . . . . . . . . . . . . . . . . . . . . . . . . . . . . . . . . . . . . . . . . . . . .
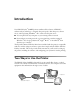
Introduction Your EPSON Stylus® C80WN printer combines all the features of EPSON’s exclusive ink jet technology—extremely fast print speeds, ultra-sharp text, vibrant colors, and long-lasting DuraBrite™ ink—with a wireless print server. ■ You can print from any computer on your existing wireless network. ■ Even without an existing network, you can print from a wireless-equipped Windows® PC or laptop, Macintosh,® Apple® iBook,™ or PowerBook,® from distances up to 120 feet. The EpsonNet 802.
With a wireless network, you share information between computers and printers using radio waves, similar to the technology used in cordless phones. You can place the EPSON Stylus C80WN in a convenient location and print to it without having to connect it to your computer or an existing wired network. You can add the EPSON Stylus C80WN to your network either with or without a wireless access point (or AirPort™ Base Station).
Before you can set up your EPSON Stylus C80WN, you need to decide how you will use it: either with an access point (in infrastructure mode), or without an access point (in ad hoc mode, also called ad hoc 802.11b, computer-to-computer, and peer-to-peer).
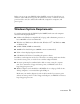
Macintosh System Requirements For wireless printing with the EPSON Stylus C80WN, make sure each Macintosh meets the following requirements: ■ An Apple iBook, iMac,™ PowerBook G3 or G4, Power Mac G4 Cube, or Power Mac G3 or G4 ■ Mac® OS 8.6 through 9.2 (Mac OS 9.2 recommended) If you are using Mac OS X, check the EPSON website for driver updates and support information. Connect to the Internet, then go to http://support.epson.com.
Where to Get Information Use this booklet to set up and configure your EPSON Stylus C80WN for wireless network printing. Please follow these guidelines: Warnings must be followed carefully to avoid bodily injury. Cautions must be observed to avoid damage to your equipment. Notes contain important information about your printer.
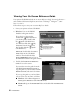
Viewing Your On-Screen Reference Guide Your printer CD-ROM includes an on-screen Reference Guide. You need a browser— such as Microsoft Internet Explorer 3.0 or later or Netscape™ Navigator™ 3.0 or later—to view it. Follow these steps to view your on-screen Reference Guide: 1. Insert your printer software CD-ROM. 2. Windows: You see the EPSON Installation Program window. If you don’t see this window, My Computer on double-click your desktop, then double-click Epson CD-ROM icon.
Setting Up Your Printer This chapter describes how to unpack and set up your printer and print server. You can locate the printer and print server anywhere in your home or office. However, keep in mind that walls and ceilings will weaken the signal between your print server, computer(s), and access point, and that the print server must be within 120 feet of your other equipment. Make sure you choose a location away from high temperatures, direct sunlight, humidity, and dust.
Unpacking the Printer Follow these steps to unpack the printer, remove the packaging material, and attach the paper support: 1. Take everything out of the box. Make sure you have all the items shown here: paper support printer software CD-ROM print server power supply Setup and Installation Printer Basics ink cartridges print server base parallel cable print server printer power cord 2. Remove all the tape and packing material from the printer, as shown.
4. Open the cover and remove the tape and protective paper. Make sure you follow all the Safety Instructions listed in the Printer Basics book. 5. Locate the paper support slots at the back of the printer. Position the paper support as shown, then slide it into the slots. (Make sure you don’t place the paper support in the paper feeder.
Installing the Ink Cartridges Follow these steps to plug in the printer, turn it on, and install the ink cartridges: 1. Plug the printer’s power cord into the AC inlet on the back of the printer. Then plug the other end into a grounded electrical outlet. power light 2. Press the P power button to turn on the printer. The green P power light flashes and the ink cartridge holders begin to move. Always use the P power button to turn the printer on or off.
5. Wait for the ink cartridge holders to move into loading position. Then lower each ink cartridge into its holder. The color of the cartridge label should match the sticker on the holder. Install all four ink cartridges, and leave them installed for all types of printing, or the printer won’t work. 6. Gently push each cartridge down until it clicks into place. 7. Press the H ink button and close the printer cover. Ink charging takes about 90 seconds.
Loading Paper 1. Load a few sheets of paper against the right edge of the paper feeder. 2. Slide the left edge guide against the paper. Don’t load paper above the arrow inside the left edge guide. Make sure the paper lies flat against the paper support. 3. Pull out the output tray extensions.
Running a Printer Check Before you connect the printer, print a test page to make sure the printer is working properly. Make sure letter-size or larger paper is loaded in the printer. 1. Press the P power button to turn off the printer. 2. Hold down the m paper button as you press and release the P power button. 3. Continue holding down the m paper button until the P power light starts flashing, then release it.
3. Locate the parallel cable included with the printer. Connect the larger end of the cable to the printer’s parallel port. Then secure it with the wire clips. 4. Connect the other end of the cable to the parallel port on the print server and secure it as necessary. 5. Connect the power supply to the print server. 6. Plug the AC adapter into an electrical outlet. Both the green and yellow lights come on for a moment and then go out.
8. To test the connection between the print server and printer, press the test button for one second and release it. If you hold the test button down, you may reset the print server. If you do this, wait for the print server’s lights to go out, then press the button again and release it immediately to print the status page. ■ If the print server status page prints, you’re ready to install the software and configure your system for wireless printing. See the next section for instructions.
16 Setting Up Your Printer
Installing Software and Configuring the Print Server This chapter explains how to install the software you need to configure the EpsonNet 802.11b Wireless Print Server and use it on a Windows or AppleTalk network. It also explains how to set up additional computers to use the printer on a wireless network. Your printer CD-ROM includes the following software: ■ EPSON Stylus C80WN printer driver You must install the printer driver on every computer that uses the EPSON Stylus C80 printer.
Setting Up Printing From Windows This section explains how to install the software on your first computer and configure the print server for use on your wireless network. It also explains how to set up additional Windows computers to use the network.
If your access point only allows WEP-enabled clients to connect to it, you may have to set your computer’s wireless mode to 802.11b Ad Hoc (or your adapter’s wireless ad hoc mode) before you configure the print server. If your computer’s wireless mode was originally set to Infrastructure, you can set it back to Infrastructure when you’re done. ■ Note your computer’s IP address. (For instructions on viewing your computer’s IP address, see “IP Address” on page 52.
Installing the Printer Driver Follow these steps to install the printer driver on the first computer: 1. Insert your printer CD-ROM in the drive. You see the EPSON Installation Program window. If you don’t see this window, My Computer on double-click your desktop, then double-click the Epson CD-ROM icon. (For My Computer Windows XP, click from the Start menu, then Epson double-click the CD-ROM icon.) 2. Double-click Install EPSON Stylus C80WN Printer Driver. 3.
6. When you see the Product Registration screen, follow the instructions to register your printer. At the last screen, click Done or close your browser. Installing WP-Admin Once the printer driver is installed, you’re ready to install WP-Admin. Follow these steps: You can use the procedure below to install XAdmin32, if you want. Just select XAdmin32 in step 4. See the on-screen help for XAdmin32 for configuration instructions. 1.
4. Follow the instructions on the screen. When you see this window, click Next. To install XAdmin32, select the XAdmin32 checkbox. Configuring the Print Server and Finishing Installation Now you’re ready to establish a connection to the print server and configure it for your wireless network. If you’re running Windows Me, 98, or 95, you also need to install EpsonNet Direct Print if you want to use the printer. 1.
If WP-Admin fails to pick up a signal from the print server, try holding down the print server’s test button for at least five seconds to reset it. The lights go out, then both the green and yellow lights come on briefly. The yellow light remains on when your network has a connection to the print server. If it still fails to pick up a signal, check the solutions beginning on page 42. 2.
4. When you see a message asking for a password, click OK (the default password is null, or blank). The print server automatically detects the settings for your wireless network. You see the Wireless Server Configuration screen: For descriptions of all the settings on the Wireless Server Configuration screen, see Appendix A. 5. Optionally, change the Server Name to something that is easy to remember, or enter a password to limit access to the Wireless Server Configuration screen.
6. For Boot Method, select STATIC. If your network supports DHCP, you can leave the Boot Method set to AUTO or change it to DHCP. (If any IP address other than the print server’s default, 192.0.0.192, appears in the IP Address box, your network supports DHCP.) If your Boot Method is AUTO or DHCP, it’s recommended that you leave the print server turned on. If you turn the print server off and then turn it on again later, DHCP may assign it another IP address.
8. If you want to enable WEP encryption, do the following: ■ Select either 64BIT or 128BIT in the WEP Key box, depending on which version of WEP your network supports. ■ Enter your WEP key in either the 128Bit Key 1 box or the 64Bit Key 1 box. You can enter up to four WEP keys on the screen. (Changing your WEP key periodically adds to network security.) To communicate, every node on the network must use the same WEP key.
10. When you see this screen, click Finish. 11. If you’re running Windows Me, 98, or 95, double-click Install EpsonNet Direct Print Utility on the EPSON Installation Program screen and follow the instructions on the screen to install the utility and restart your computer. Now that you’ve installed WP-Admin, you can change the print server’s configuration at any time. To start WP-Admin from the Windows Start menu, click Programs or All Programs > Epson Printers > EpsonNet Wireless > WP-Admin.
Setting Up Additional Computers To set up additional computers, you need to install the EPSON Stylus C80WN printer driver and configure a network port on every computer using the printer. Before you begin, do the following: ■ Make sure your computer’s wireless mode is set to either Infrastructure, if you are connecting to the printer through an access point, or 802.11b Ad Hoc if you are connecting without an access point. If your wireless adapter doesn’t include an 802.
Setting Up a Network Port To finish setting up the printer on the wireless network, you need to set up a network port on each computer that will use the printer. Follow the instructions for your operating system. Setting Up a Network Port on Windows XP Before you begin, run WP-Admin and note the IP address of your print server. Then follow these steps to set up a network port on a computer running Windows XP: 1. From the Start menu, click Control Panel. 2. Click Printers and Other Hardware. 3.
13. If the test page prints, click OK to close the Properties window. If it fails to print, try the following: ■ Make sure that the printer and print server are connected and that both are on. ■ Check WP-Admin to make sure you have a signal (see page 22). ■ Make sure you’ve entered the correct IP address in step 8. ■ Make sure you clicked Apply in step 11. Now you’re ready to start printing. For instructions, see Printer Basics.
10. To test the connection, select the General tab and click Print Test Page. 11. If the test page prints, click OK to close the Properties window. If it fails to print, try the following: ■ Make sure that the printer and print server are connected and that both are on. ■ Check WP-Admin to make sure you have a signal (see page 22). ■ Make sure you’ve entered the correct IP address in step 6. ■ Make sure you clicked Apply in step 9. Now you’re ready to start printing.
Setting Up a Network Port on Windows Me, 98, or 95 Before you begin, run WP-Admin and note the IP address of your print server. Then follow these steps to set up a network port: 1. From the Start menu, click Settings > Printers. 2. Right-click the EPSON Stylus C80 Series printer icon, and then click Properties. 3. Click Add Port on the Details tab. 4. On the Add Port window, make sure Network is selected, then click Browse.
5. Expand the network path, as shown, and select the Stylus C80 printer icon. (Make sure the IP address matches the print server’s IP address.) 6. Click OK, then click OK again. 7. Click Apply on the Details tab. 8. To test the connection, click the General tab and click Print Test Page. Wait for the page to print. 9. Click Yes if the test page prints, then click OK to close the Properties window.
3. On the Port tab, click Add Port. You see the Printer Ports window: 4. Select LPR Port and click New Port. 5. On the next window, enter the server’s IP address in the Name or address of server providing lpd box, and the server name in the Name of printer or print queue on that server box. Then click OK. 6. Click Close to close the Printer Ports window. 7. Click OK to close the Properties window. 8. Right-click the EPSON Stylus C80 Series printer icon in the Printers window and click Properties. 9.
Setting Up Printing on a Macintosh This section explains how to install the software and configure the print server from a Macintosh. Once the print server is configured, you can select the Stylus C80 Series printer icon in the Chooser of any Macintosh on your wireless network that has the printer driver installed. Preparing for Installation Follow the instructions beginning on page 7 to set up the printer, connect it to the print server, and test the connection.
■ If you want your AirPort network to be password protected, you need to change your password to a hexadecimal value. Follow the instructions beginning on page 46 to install and configure your software. If Your Macintosh Has a Non-AirPort Wireless Adapter Do the following if your Macintosh has a non-AirPort wireless adapter: ■ Make sure your Macintosh computer’s wireless mode is set correctly. Set it to Infrastructure if you are connecting through an access point, or 802.
3. Double-click the program. Stylus C80WN Driver Installer icon to start the installation 4. Click Continue, then click Install on the installer screen. 5. Follow the instructions on the screen to install the printer driver and restart your Macintosh. Installing and Configuring the Print Server Software 1. Double-click the Install Utility folder, then double-click the icon. Utility Installer You may see a message that you have an older version of the Java Runtime Environment on your Macintosh.
If WP-Admin fails to pick up a signal from the print server, try holding down the print server’s test button for five seconds to reset it. The lights go out, then both the green and yellow lights on the print server come on briefly. The yellow light remains on when your network has a connection to the print server. If it still fails to pick up a signal, check the solutions beginning on page 42. 6.
For descriptions of all the settings on the Wireless Server Configuration screen, see Appendix A. 9. Optionally, change the Server Name to something that is easy to remember, or enter a password to limit access to the Wireless Server Configuration screen. This password does not affect access to your AirPort network. To enable password protection on your network, see page 46. You can enter up to 32 characters in the Server Name field, and up to 16 characters in the Password field. 10.
Setting Up Additional Macintosh Computers Once the print server is configured on your wireless network, just install the EPSON Stylus C80 printer driver on each Macintosh that needs to use the printer. Make sure your Macintosh is set up to use the wireless network, as explained on page 35. Follow these steps to install the printer driver: 1. Insert the printer CD-ROM in your drive. 2. Double-click the Printer Driver Installer folder in your EPSON window.
Solving Wireless Printing Problems This chapter gives you information on solving problems with print server setup and wireless printing. If you have a problem with print quality or paper feeding, see Printer Basics for help. If you need to clean or align the print head, follow the instructions in Printer Basics to run the appropriate utilities. These programs work on your wireless network the same as they do when the printer is connected directly to a computer.
Problems and Solutions Here are some troubleshooting tips if you are having trouble setting up your print server or printing over your wireless network. When you start WP-Admin, you see a message that Javaw.exe was not found. You must have the Java Runtime Environment installed on your computer to run WP-Admin. Uninstall the print server software, as described on page 48, then reinstall it as described in the instructions starting on page 20. You’re having trouble connecting to the print server.
■ Hold down the test button on the back of the print server for at least five seconds to reset the print server to its factory defaults. The print server’s green and yellow lights come on briefly when the print server resets. If you’ve already configured the print server, you need to run WP-Admin again to reconfigure it. ■ Try restarting your computer. ■ Make sure your computer, print server, and access point (if you have one) are within range (up to 120 feet without obstructions).
■ If you’ve set the Boot Method in WP-Admin to AUTO or DHCP and you’ve turned the print server off and then on again, DHCP may have assigned another IP address to the print server. To check the IP address, press the test button on the print server for one second to print a status sheet. Then make sure the IP address for your computer is on the same network segment. See “IP Address” on page 52 for instructions on accessing the computer’s IP address.
■ Make sure you’re connecting to the correct print server. Check the MAC address printed on the back of the print server against the MAC address that appears in the WP-Admin Wireless Server Search window. ■ Check the printer’s lights to see if there is a problem with the printer. See Printer Basics for details. You are using AirPort in computer-to-computer (ad hoc) mode, and you are unable to see the printer port in the Chooser.
You want to use a password on your AirPort network. Because AirPort uses passwords that do not follow the standard for WEP encryption, you need to change your network password to a hexadecimal value. Follow these steps: 1. Create a computer-to-computer network without password protection on the Macintosh computer that you use to configure the print server. 2. Follow the steps beginning on page 36 to install the printer driver and WP-Admin, and to establish a connection to the print server. 3.
6. To use the printer in computer-to-computer mode, do the following: ■ Create a computer-to-computer network. ■ When prompted, enter as your password the hexadecimal value you entered in the 64Bit Key 1 box on the Wireless Server Configuration screen. This value must be preceded by the number zero (0) and lowercase letter x. For example: 0x62B91F2A98. 7. Open the Chooser from the Apple menu. Select the C80 Series icon, then click the EPSON Stylus C80 printer port icon.
Uninstalling the Software You may need to uninstall and then reinstall the software for your printer. For example, this might be necessary if you upgrade your computer operating system. Windows Follow these steps to uninstall the WP-Admin utility and EpsonNet Direct Print: 1. Click Start > Settings > Control Panel (for Windows XP, click Start > Control Panel). 2. Double-click Add/Remove Programs (or Add or Remove Programs). 3. Select EpsonNet 802.
Macintosh Follow these steps to uninstall the WP-Admin utility: 1. Drag the EpsonNet folder on your hard drive to the trash. 2. If you’ve created a desktop alias for WP-Admin, drag it to the trash. 3. Restart your Macintosh. Follow these steps to uninstall the EPSON Stylus C80 printer driver: 1. Insert the printer CD-ROM in your drive. 2. Double-click the Printer Driver Installer folder in the EPSON window. (You may EPSON icon if the window doesn’t open have to double-click the automatically.) 3.
Where To Get Help If you need help with your printer or print server, see the contact information below. If you need help using non-EPSON software with your printer, see the documentation for that software for technical support information. EPSON provides technical assistance 24 hours a day through the electronic support services and automated telephone services listed below: Service Access World Wide Web From the Internet, you can reach EPSON Support at http://support.epson.com.
Appendix A: Configuration Settings The Wireless Server Configuration screen includes both fields that display information and fields that allow you to modify print server settings. Since most of the settings are configured automatically based on your existing network, you don’t need to change these settings for the typical wireless network. Some settings, such as the Server Name or Password, you may want to change for convenience or security.
IP Address Address used to identify a node on a network supporting the TCP/IP protocol. The format for IP (Internet Protocol) addresses is a set of four bytes or segments, separated by periods. Each byte can have any value from zero (0) to 254. If you need to enter an address, make sure it conforms to the addressing scheme for your network and that it does not conflict with the IP address for any other node on your network. The print server’s default IP address is 192.0.0.192.
Boot Method Method the print server uses to obtain an IP address. For most networks, change this setting to STATIC, which prevents the IP address from changing when you unplug the print server and plug it in again later. AUTO attempts to detect your IP address through DHCP, BOOTP, and RARP. If unable to detect an IP address automatically, it uses the default IP address: 192.0.0.192.
SSID Name that identifies your wireless network. When you configure the print server in WP-Admin, it automatically detects the SSID (Service Set Identifier) for the wireless network. The SSID must match for all nodes on the network for them to communicate. The maximum number of characters that you can use in this field is 32. Wireless Mode Mode used by computers on a wireless network to communicate with the print server.
WEP Key Index Lets you to choose between four WEP keys for either 64-bit or 128-bit WEP. For details about WEP, see the documentation for your wireless adapter or access point. 128 Bit / 64 Bit WEP Key Fields for entering the WEP key(s) used on your network. To communicate, all nodes on the network must be set to the same WEP key. See the documentation for your wireless adapter or access point for more information about WEP.
56 Appendix A: Configuration Settings
Appendix B: Specifications and Notices Print Server Specifications Printer Connection Parallel (IEEE-1284) Serial (9 pin; factory diagnostics only) Operating Systems Windows 95/98/Me/NT 4/2000/XP NetWare (2 through 5 with NDS) Mac OS 7 through 9.x Dimensions 6 inches (15.2 cm) Width: 1.25 inches (3.2 cm) Depth: 4.25 inches (10.8 cm ) Height: Electrical Input Power: 1 A @ 5 VDC External Power Supply: 115 VAC Wireless Communication Variable Data Rates: 11, 5.5, 2, 1 Mbps Frequency Band: 2.
Epson America, Inc. Limited Warranty What Is Covered: Epson America, Inc. (“Epson”) warrants to the first retail purchaser that the EPSON printer and included printer server (the “Product”) covered by this limited warranty statement, if purchased and used in the United States or Canada, conform to the manufacturer’s specifications and will be free from defects in workmanship and materials for a period of one (1) year from the date of original purchase.
PURPOSE. SOME LAWS DO NOT ALLOW THE EXCLUSION OF IMPLIED WARRANTIES. IF THESE LAWS APPLY, THEN ALL EXPRESS AND IMPLIED WARRANTIES ARE LIMITED TO THE WARRANTY PERIOD IDENTIFIED ABOVE. UNLESS STATED HEREIN, ANY STATEMENT OR REPRESENTATIONS MADE BY ANY OTHER PERSON OR FIRM ARE VOID. EXCEPT AS PROVIDED IN THIS WRITTEN WARRANTY, NEITHER EPSON AMERICA, INC.
FCC Compliance Statement For United States Users This equipment has been tested and found to comply with the limits for a Class B digital device, pursuant to Part 15 of the FCC Rules. These limits are designed to provide reasonable protection against harmful interference in a residential installation. This equipment generates, uses, and can radiate radio frequency energy and, if not installed and used in accordance with the instructions, may cause harmful interference to radio or television reception.
Index Numerics 128 Bit/ 64 Bit WEP Key setting, 55 802.
Ink cartridges installing, 10 to 11 ordering, 50 Ink counter, 13 Installing ink cartridges, 10 to 11 Macintosh software, 36 to 40 printer driver, 20 to 21, 36 to 37, 40 Windows software, 20 to 28 WP-Admin, 21 to 22, 37 IP Address setting accessing the computer’s IP address, 52 default print server IP address, 52 network requirements, 25, 43 J Java Runtime Environment, 21, 42 L LEDs, 14, 42, 45 Loading paper, 12 to 13 M MAC Address setting, 53 Macintosh computer-to-computer mode, 35 installing and configu
Problems communication error, 45 connecting to print server, 42 to 44 Java Runtime Environment, 42 no signal, 23, 42 to 44 setting up network port, 30, 31, 33, 34 setting up password on AirPort, 46 to 47 setting up WEP on Windows, 44 signal strength, 23 slow printing, 45 unable to print, 41, 44 to 45 wrong IP address, 44 Protocols supported, 57 Pseudo Ad Hoc mode, 54 T R Warranty, 58 to 59 WEP, 18, 44 setting up on AirPort, 36, 46 to 47 setting up on Windows, 18 to 19 WEP Key Index setting, 55 WEP Key se