® ® EPSON Stylus Color 580 Printer Basics Informations de base sur I’imprimante CPD-10843
Insdfrt.fm Page 53 Wednesday, August 9, 2000 10:36 AM How To Order EPSON Ink and Paper To order EPSON ink cartridges and paper, contact your dealer or call EPSON at (800) 873-7766. You can also visit the EPSON Store™ at www.epson.com (U.S. sales only). In Canada, please call (800) 873-7766 for dealer referral. Ink Cartridges: Black T013201 (U.S.) or T013311 (Canada and Latin America) Color T014201 (U.S.
Pbasics.book Page i Wednesday, August 9, 2000 10:26 AM This manual is divided into two sections: English and French. The English manual begins on the next page. The French manual begins on the page labelled “Français.” Ce manuel est divisé en deux sections, l’une contenant le manuel anglais et l’autre le manuel français. Le manuel anglais commence à la page suivante. Le manuel français commence à la page marquée “Français.
Pbasics.book Page i Wednesday, August 9, 2000 10:26 AM Printed on recycled paper.
Pbasics.book Page ii Wednesday, August 9, 2000 10:26 AM Copyright Notice All rights reserved. No part of this publication may be reproduced, stored in a retrieval system, or transmitted in any form or by any means, electronic, mechanical, photocopying, recording, or otherwise, without the prior written permission of SEIKO EPSON CORPORATION. The information contained herein is designed only for use with this EPSON printer.
Pbasics.
Pbasics.
Pbasics.book Page 1 Wednesday, August 9, 2000 10:26 AM Welcome! Your EPSON Stylus® Color 580 is a user-friendly, photo quality printer that’s perfect for printing all your home projects—from homework assignments and envelopes to full-color greeting cards and banners.
Pbasics.book Page 2 Wednesday, August 9, 2000 10:26 AM About Your Documentation To set up your printer and install its software, see the Start Here sheet. This book contains system requirements, important safety information, and instructions on: ■ Viewing your electronic printer manual ■ Printing with Windows® or on a Macintosh® ■ Using special papers ■ Maintaining the printer ■ Solving basic problems You’ll find your product warranty on page 48.
Pbasics.book Page 3 Wednesday, August 9, 2000 10:26 AM Viewing Your Electronic Printer Manual Your printer software CD-ROM includes an electronic Reference Guide for your printer. The manual is in HTML format, so you need a browser—such as Internet Explorer or Netscape Navigator, version 3.0 or later—to view it. If you are using a different browser, the pages may not display correctly. (A browser is not included on the printer software CD-ROM.
Pbasics.book Page 4 Wednesday, August 9, 2000 10:26 AM Navigating Your Electronic Printer Manual When you first open the Reference Guide, you see this screen: Click here to expand the table of contents Click a topic on the left to expand the table of contents. After expanding the table of contents, you can click on the topic you want to view. If there’s a right arrow , click it to view subtopics, then click on a topic to go to it. Click the down arrow to close a subtopic list.
Pbasics.book Page 5 Wednesday, August 9, 2000 10:26 AM Printing from Start to Finish Here’s what to do to print a basic document—such as a memo, newsletter, or photograph—from loading the paper to selecting print settings to controlling the print job. Follow the instructions in “Printing with Windows” below or “Printing on a Macintosh” on page 10. If you’re already familiar with EPSON ink jet printing, you can skip ahead to “Using PhotoEnhance, Custom, and Advanced Settings” on page 14.
Pbasics.book Page 6 Wednesday, August 9, 2000 10:26 AM Keep the following in mind when loading paper: ■ Load the printable side face up. It’s usually whiter or brighter than the other side. ■ Load letterhead or preprinted paper into the printer top edge first. ■ Don’t load paper above the arrow on the left edge guide. If you’re printing on envelopes or other special paper sizes or types, see page 16 for loading instructions.
Pbasics.book Page 7 Wednesday, August 9, 2000 10:26 AM Make the following selections on the Print dialog box: ■ Make sure EPSON Stylus COLOR 580 is selected. ■ Click the Properties button. (If you see a Setup, Printer, or Options button, click it. Then click Properties on the next screen.) If you click the print icon on your application’s tool bar instead of selecting Print from the File menu, you may not get the option to change the printer software settings before printing.
Pbasics.book Page 8 Wednesday, August 9, 2000 10:26 AM Make the following settings on the Properties dialog box: ■ Choose the Media Type you’re printing on (click the arrow button to scroll through the list). If you’re not sure which setting to select, see page 19. ■ Set the Ink option to Color unless you’re printing in black only. ■ Set the Mode option to Automatic. This lets the printer software determine the best settings for your print job.
Pbasics.book Page 9 Wednesday, August 9, 2000 10:26 AM Controlling Printing At the Print dialog box, click OK (or maybe Print) to start printing. Click to start printing After a moment, the Progress Meter appears and shows the progress of your print job. You can use the buttons to cancel, pause, or restart printing. You can also see how much ink you have left and view printing tips.
Pbasics.book Page 10 Wednesday, August 9, 2000 10:26 AM Printing on a Macintosh This section describes these basic steps for printing on a Macintosh: ■ Loading paper below ■ “Opening the Printer Software” on page 11 ■ “Selecting Printer Software Settings” on page 12 ■ “Controlling Printing” on page 13 (To print with Windows, see page 5.) Loading Paper Make sure your printer and computer are turned on.
Pbasics.book Page 11 Wednesday, August 9, 2000 10:26 AM Opening the Printer Software After you open your application program and create your document, you’re ready to select your page setup and other printer software settings. From the File menu, click Page Setup.
Pbasics.book Page 12 Wednesday, August 9, 2000 10:26 AM Selecting Printer Software Settings Now open the File menu and click Print. You see the main printer settings dialog box for your application (yours may look slightly different): Select the type of paper you loaded Select the ink color Select Automatic mode Select high-quality printing, faster printing, or in-between The most important thing to remember is to set the correct Media Type for the paper you’re using.
Pbasics.book Page 13 Wednesday, August 9, 2000 10:26 AM Controlling Printing Once you’ve clicked Print, your printer begins printing. If you turned on background printing in the Chooser, you can use EPSON Monitor3 to check the progress of your print job. Select EPSON Monitor3 from the Application menu at the right side of the menu bar.
Pbasics.book Page 14 Wednesday, August 9, 2000 10:26 AM Using PhotoEnhance, Custom, and Advanced Settings When you’re printing special projects, you can customize your printer software settings, as described in these sections: ■ “Using PhotoEnhance” below ■ “Using Custom Settings” on page 15 ■ “Using Advanced Settings” on page 15 For additional information on these settings, see the electronic Reference Guide, as described on page 3.
Pbasics.book Page 15 Wednesday, August 9, 2000 10:26 AM Using Custom Settings Your printer software includes custom project types with preset printing options. This lets you quickly select a color-matching method for your project. You can select from these project types: ■ ICM (Image Color Matching; Windows only): For printing documents created in an ICM compatible application.
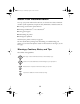
Pbasics.book Page 16 Wednesday, August 9, 2000 10:26 AM Using Special Papers How can you get the best-looking photos, most vivid colors, and sharpest text? Always use EPSON’s special ink jet papers. Instructions for printing on EPSON Photo Paper and on envelopes are given in the following sections. For instructions on loading and using other EPSON special ink jet papers, see your electronic Reference Guide, as described on page 3.
Pbasics.book Page 17 Wednesday, August 9, 2000 10:26 AM 4 × 6-inch Photo Paper EPSON 4 × 6-inch Photo Paper is micro-perforated around the edges so you can trim your printouts and “bleed” the photo—extend it to the edge of the paper— on all sides. 1. Load the paper against the right edge of the sheet feeder with the glossy side facing up and the perforated margins positioned as shown. Then slide the left edge guide against the paper.
Pbasics.book Page 18 Wednesday, August 9, 2000 10:26 AM Panoramic Photo Paper 1. Load one sheet of Panoramic paper, glossy side up. Support the paper as it feeds into the printer Support the paper as it ejects from the printer so it doesn’t fall onto the floor 2. Choose Photo Paper as the Media Type setting and Panoramic 210 × 594 mm as the Paper Size setting in your printer software. 3. Send your print job, then hold up the paper’s top edge as it begins feeding into the printer.
Pbasics.book Page 19 Wednesday, August 9, 2000 10:26 AM Selecting the Correct Media Type Before printing, always check the Media Type setting in your printer software. The printer uses the Media Type setting to adjust the ink coverage for the type of paper you are using. The Media Type setting for your paper may not be the same name as your paper. To be sure you are using the correct setting, see the table below or the instructions that came with your paper. For this paper . . . Select this Media Type . .
Pbasics.book Page 20 Wednesday, August 9, 2000 10:26 AM Maintaining Your Printer This section describes maintenance procedures to keep your printer working at its best and preparation steps for moving your printer.
Pbasics.book Page 21 Wednesday, August 9, 2000 10:26 AM Printing a Nozzle Check Follow these steps for your operating system to run the Nozzle Check utility: 1. Make sure the printer is plugged in but not printing. 2. Windows: Right-click the Status Monitor 3 icon on your Windows taskbar, then select Nozzle Check in the menu that appears. To right-click, place your cursor on the click the right mouse button.
Pbasics.book Page 22 Wednesday, August 9, 2000 10:26 AM 5. Examine the nozzle check pattern you print. Each staggered horizontal and straight vertical line should be complete, with no gaps in the dot pattern. If your printout looks okay, click Finish. If any dots are missing, as shown here, click Clean and follow the instructions on the screen to clean the print head again. (The actual test prints the lower pattern in color.
Pbasics.book Page 23 Wednesday, August 9, 2000 10:26 AM 3. When the utility starts, you see this window: Windows Macintosh Click Next Click Start 4. Click Start (Windows) or Next (Macintosh) to start cleaning. Cleaning takes about 30 seconds, during which the print head moves and the printer makes some noise. Never unplug the printer while it’s cleaning the print head. 5. When cleaning is finished, run a nozzle check to confirm the print head nozzles are clean.
Pbasics.book Page 24 Wednesday, August 9, 2000 10:26 AM 6. Make sure letter-size or larger paper is loaded in the printer and click Print Nozzle Check Pattern (Windows) or Confirmation (Macintosh). Then follow the instructions on the screen. 7. See page 22 for details on examining the nozzle check pattern. If the nozzle check pattern isn’t missing any dots, click Finish. If any dots are missing, click Clean and follow the instructions on the screen to clean the print head again.
Pbasics.book Page 25 Wednesday, August 9, 2000 10:26 AM Or, if you have an application running, you can also run the utility by accessing the printer settings dialog box as described on page 6. Click the Utility tab, then click the Print Head Alignment button. Macintosh: Access the printer settings dialog box as described on page 11. Utility button, then click the Print Head Alignment button. Click the 3. Click Next to print an alignment page. You see this window: 4.
Pbasics.book Page 26 Wednesday, August 9, 2000 10:26 AM Replacing an Ink Cartridge When your ink levels are low, Status Monitor 3 (Windows) or StatusMonitor (Macintosh) displays a message on your screen. When you see the message, it’s a good time to make sure you have a new cartridge or replace it right away. When an ink cartridge is empty, Status Monitor 3 (Windows) or StatusMonitor (Macintosh) displays another message and you must replace the cartridge to resume printing.
Pbasics.book Page 27 Wednesday, August 9, 2000 10:26 AM Ink Cartridge Precautions Before you replace an ink cartridge, follow these precautions: Keep ink cartridges out of the reach of children and do not drink the ink. If ink gets on your hands, wash them thoroughly with soap and water. If ink gets into your eyes, flush them immediately with water. To avoid damaging the printer, never move the print head by hand. Don’t open the clamp or remove a cartridge except to replace it with a new one.
Pbasics.book Page 28 Wednesday, August 9, 2000 10:26 AM Replacing an Outdated Ink Cartridge If you need to replace an ink cartridge before you see a Status Monitor 3 (Windows) or StatusMonitor (Macintosh) message, follow the steps here to use the Ink Cartridge Replacement utility. Before you begin, make sure you’ve read the ink cartridge precautions on page 27. For Windows, you can only access the Ink Cartridge Replacement utility from the Windows Printers utility, as described in the steps below.
Pbasics.book Page 29 Wednesday, August 9, 2000 10:26 AM 3. Click the Utility tab (Windows) or the Utility button (Macintosh), then click the Ink Cartridge Replacement button. 4. Follow the instructions on the screen to replace the ink cartridge. 5. After you’ve installed the cartridge, the printer begins charging ink for several minutes. Wait until you see a message telling you that charging is complete before resuming printing. Never unplug the printer while it’s charging ink.
Pbasics.book Page 30 Wednesday, August 9, 2000 10:26 AM Transporting the Printer If you move your printer some distance, you need to prepare it for transportation in its original box or one of a similar size. Follow these steps: To avoid damage, always leave the ink cartridges installed when transporting the printer. Be sure to remove the tape used in step 4 after installing the printer in its new location. 1.
Pbasics.book Page 31 Wednesday, August 9, 2000 10:26 AM Problem Solving Because your printer constantly monitors its status, it will report to you if it has a problem such as jammed paper or low ink levels. It does this by displaying an EPSON Status Monitor 3 (Windows) or StatusMonitor (Macintosh) message on your screen telling you what the problem is and guiding you through the solution steps. Windows Macintosh If you see a status monitor window, follow the on-screen instructions.
Pbasics.
Pbasics.book Page 33 Wednesday, August 9, 2000 10:26 AM Problems and Solutions Here are some basic troubleshooting tips if you have any problems setting up your printer, installing software, getting good print quality, feeding paper, or other miscellaneous problems. For additional tips, see your electronic Reference Guide as described on page 3. Problems Setting Up the Printer or Installing Software The printer started making noise after ink cartridge installation.
Pbasics.book Page 34 Wednesday, August 9, 2000 10:26 AM Problems with Printing The printer is plugged in and connected, but nothing prints. If your computer can’t send the print job successfully, you may see a communication error window on your screen. Click the Stop button, then try the following: ■ Make sure the printer cable is connected securely and that the cable meets the system requirements on page 43 or page 44. If the cable doesn’t meet the specifications or is inoperable, try a different cable.
Pbasics.book Page 35 Wednesday, August 9, 2000 10:26 AM You may also need to: ■ Clear space on your hard disk or run a defragmentation utility. ■ Close open applications that you’re not using. ■ Increase your system’s memory (RAM). For the fastest printing, try the following: ■ Choose Black ink if your document doesn’t include color. ■ Set the Quality/Speed slider to Speed. ■ In the printer software’s Advanced dialog box, turn MicroWeave off and turn High Speed on.
Pbasics.book Page 36 Wednesday, August 9, 2000 10:26 AM ■ Run the Print Head Alignment utility using EPSON ink jet paper. See page 24 for instructions. ■ Turn off High Speed printing in the Advanced dialog box. Your printout is blurry or smeared. ■ Make sure your paper isn’t damp, curled, or loaded face down (the printable side should be loaded face up). If it’s damp or curled, load new paper. ■ Use a support sheet with special paper or try loading your paper one sheet at a time.
Pbasics.book Page 37 Wednesday, August 9, 2000 10:26 AM You see wrong or missing colors. ■ Make sure you selected the Color ink setting and your application is set for color printing. ■ Make sure the print head nozzles are not clogged. To clean the print head, see page 20. ■ If you’re low on ink, you’ll see a low ink error window. Click How To and follow the on-screen instructions to install a new cartridge.
Pbasics.book Page 38 Wednesday, August 9, 2000 10:26 AM Problems with Paper Feeding Too many copies are printing. Make sure the Copies settings in the printer software and your application aren’t both set for multiple copies. Paper doesn’t eject fully or is wrinkled. ■ If the paper doesn’t eject fully, you may see a paper jam error window on your screen. Click the Eject button to eject the paper. If it doesn’t eject, follow the on-screen instructions to remove jammed paper.
Pbasics.book Page 39 Wednesday, August 9, 2000 10:26 AM If your paper jams frequently: ■ Use smooth, high-quality paper, loaded printable side up (the whiter or shinier side on special ink jet paper). ■ Fan the stack and then even the edges before loading it. ■ Don’t load paper above the arrow mark on the left edge guide. ■ Always load the correct size paper for your print job. ■ Place the paper against the right edge of the sheet feeder and slide the left edge guide against your paper.
Pbasics.book Page 40 Wednesday, August 9, 2000 10:26 AM The printer prints blank pages. ■ Make sure the paper settings in the printer software are correct for your paper size. See your electronic Reference Guide for instructions. ■ Make sure the print head nozzles are not clogged. To clean the print head, see page 20. ■ If you recently replaced an ink cartridge, make sure the replacement cartridge was new. Uninstalling and Reinstalling Printer Software Windows 1.
Pbasics.book Page 41 Wednesday, August 9, 2000 10:26 AM Where To Get Help If you need help with your printer or its software, see the contact information below. For help with the bonus software that came on your printer software CD-ROM, see page 42 for contact information. If you need help using other software with an EPSON product, see the documentation for that software for technical support information.
Pbasics.book Page 42 Wednesday, August 9, 2000 10:26 AM EPSON Accessories When you need new ink cartridges, contact your dealer or call EPSON at (800) 873-7766. You can also visit the EPSON Store™ at www.epson.com (U.S. sales only). In Canada, please call (800) 873-7766 for dealer referral. Bonus Software Technical Support Before contacting technical support, know the type of computer and operating system you have, and make a note of the problem you’re having, including any on-screen messages.
Pbasics.
Pbasics.book Page 44 Wednesday, August 9, 2000 10:26 AM Macintosh To use your printer and its software, your system should have: ■ An Apple® iMac™ series or Power Macintosh® G3 with USB port ■ For iMac: Mac® OS 8.1 or later (Mac OS 8.5.1 or later recommended) For Power Macintosh G3: Mac OS 8.5.1 or later If your iMac is running OS 8.1, you’ll need to upgrade your operating system to OS 8.5.1, or later, before connecting the printer to your computer.
Pbasics.book Page 45 Wednesday, August 9, 2000 10:26 AM Important Safety Instructions Before using your printer, read the following safety instructions to make sure you use the printer safely and effectively: ■ Be sure to follow all warnings and instructions marked on the printer. ■ Use only the type of power source indicated on the printer’s label. ■ Connect all equipment to properly grounded power outlets.
Pbasics.book Page 46 Wednesday, August 9, 2000 10:26 AM ■ Unplug the printer before cleaning. Clean with a damp cloth only. Do not spill liquid on the printer. ■ Except as specifically explained in this manual, do not attempt to service the printer yourself. ■ Unplug the printer and refer to your warranty on page 48 for service instructions. Ink Cartridge Safety Instructions ■ Keep ink cartridges out of the reach of children and do not drink the ink.
Pbasics.book Page 47 Wednesday, August 9, 2000 10:26 AM FCC Compliance Statement For United States Users This equipment has been tested and found to comply with the limits for a Class B digital device, pursuant to Part 15 of the FCC Rules. These limits are designed to provide reasonable protection against harmful interference in a residential installation.
Pbasics.book Page 48 Wednesday, August 9, 2000 10:26 AM Limited Warranty What is Covered: Epson America, Inc. (“Epson”) warrants to the first retail purchaser that the Epson printer covered by this limited warranty statement, if purchased and used in the United States or Canada, conforms to the manufacturer’s specifications and will be free from defects in workmanship and materials for a period of one (1) year from the date of original purchase.
Pbasics.
Pbasics.
Pbasics.
Pbasics.