L R4CD180 Setup Guide COVER1.FM 12/18/03 Rev. C A5 size Proof Sign-off: KOW N.Mizuno S.Koide H.Kimura NOC K.
L R4CD180 Setup Guide COVER2.FM 12/18/03 Rev. C A5 size Proof Sign-off: KOW N.Mizuno S.Koide H.Kimura NOC K. Lee Where to Find Information Setup Guide (this document) Describes how to set up the scanner, install the scanner software, and use the scanner to perform basic scanning. It also covers how to install options. Online Reference Guide The CD-ROM shipped with your scanner includes the following guide as well as the scanner driver. Provides basic information about scanning.
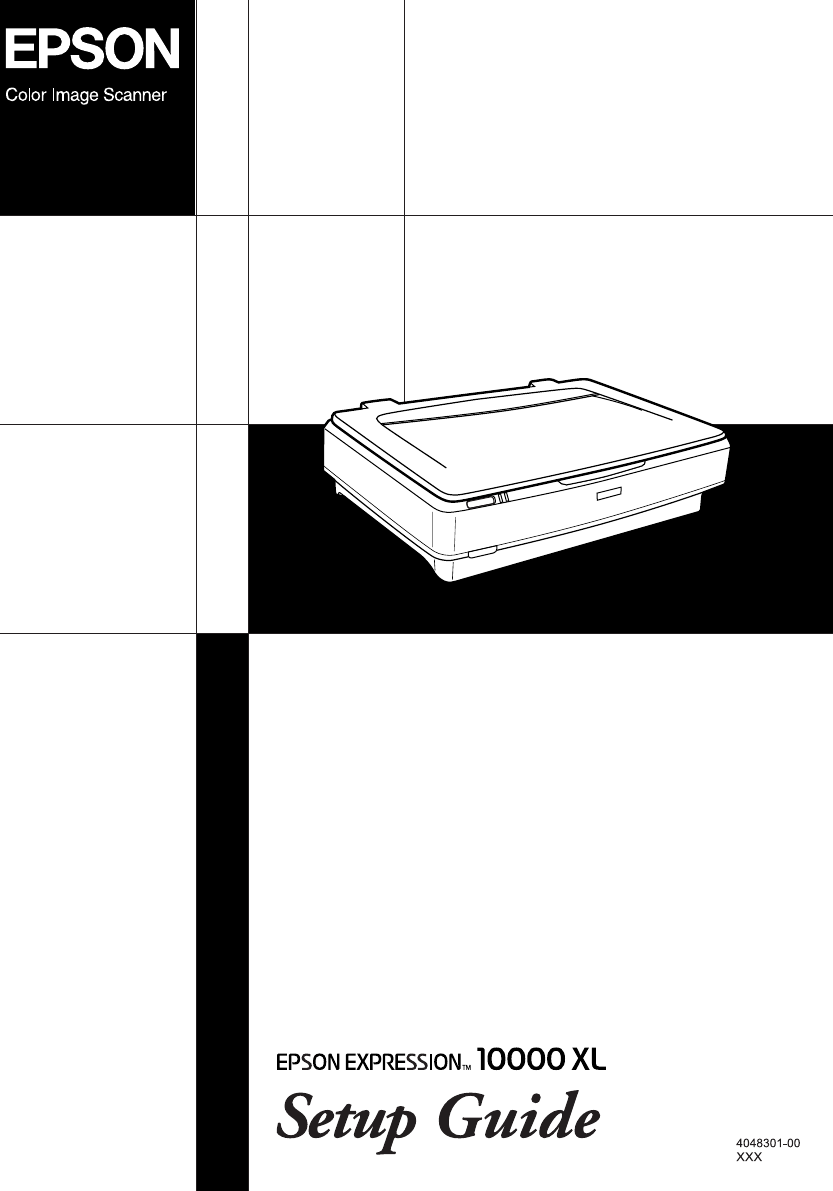
R4CD180 Setup Guide Proof Sign-off: KOW N.Mizuno S.Koide H.Kimura NOC K. Lee FRONT.FM 12/18/03 Rev. C A5 size ® Color Image Scanner Setup Guide 1 Safety Instructions . . . . . . . . . . . . . . . . . . . . 1 2 Getting to Know Your Scanner . . . . . . . . . 3 3 Installing the Software. . . . . . . . . . . . . . . . . 5 4 Setting Up the Scanner. . . . . . . . . . . . . . . . 8 5 Using Your Scanner . . . . . . . . . . . . . . . . . . 14 6 Options . . . . . . . . . . . . . . . . . . . . . . . . . . . .
L R4CD180 Setup Guide FRONT.FM 12/18/03 Rev. C A5 size Proof Sign-off: KOW N.Mizuno S.Koide H.Kimura NOC K. Lee All rights reserved. No part of this publication may be reproduced, stored in a retrieval system, or transmitted in any form or by any means, electronic, mechanical, photocopying, recording, or otherwise, without the prior written permission of Seiko Epson Corporation. No patent liability is assumed with respect to the use of the information contained herein.
Proof Sign-off: KOW N.Mizuno S.Koide H.Kimura NOC K. Lee 1 R4CD180 Setup Guide SETUP.FM 12/18/03 Rev. C A5 size Safety Instructions Important Safety Instructions Read all these instructions, and save them for later reference. Follow all warnings and instructions marked on the scanner. ❏ Unplug the scanner before cleaning. Clean with a damp cloth only. Do not spill liquid on the scanner. ❏ Do not place the scanner on an unstable surface, or near a radiator or heat source.
L R4CD180 Setup Guide SETUP.FM 12/18/03 Rev. C A5 size Proof Sign-off: KOW N.Mizuno S.Koide H.Kimura NOC K. Lee ❏ Except as specifically explained in this Setup Guide and the Online Reference Guide, do not attempt to service the scanner yourself. ❏ Unplug the scanner and refer servicing to qualified service personnel under the following conditions: ❏ If the power cord or plug is damaged. ❏ If liquid has entered the scanner. ❏ If the scanner has been dropped or the case damaged.
Proof Sign-off: KOW N.Mizuno S.Koide H.Kimura NOC K. Lee 2 R4CD180 Setup Guide Rev. C SETUP.FM 12/18/03 A5 size Getting to Know Your Scanner Unpacking the Scanner Your EPSON Expression 10000XL comes shipped with CD-ROMs that include driver software to run your scanner, and some additional items. The contents may vary in certain locations.
L R4CD180 Setup Guide SETUP.FM 12/18/03 Rev. C A5 size Proof Sign-off: KOW N.Mizuno S.Koide H.Kimura NOC K. Lee Options The following options are available to expand the versatility of your scanner. For detailed information on the use of these options, see “Options” on page 18. Note: Some options are not available in some areas. A3 Transparency Unit (B81336✽) Allows you to scan transparent materials primarily 35 mm slides and filmstrips.
Proof Sign-off: KOW N.Mizuno S.Koide H.Kimura NOC K. Lee 3 R4CD180 Setup Guide SETUP.FM 12/18/03 Rev. C A5 size Installing the Software The software CD contains the scanner software and the Online Reference Guide. You must install the software BEFORE connecting the scanner to your computer. Note: ❏ For Windows XP and Windows 2000, you need the administrative privilege to install the software. ❏ EPSON Scan does not support the UNIX File System (UFS) for Mac OS X.
L R4CD180 Setup Guide SETUP.FM 12/18/03 Rev. C A5 size Proof Sign-off: KOW N.Mizuno S.Koide H.Kimura NOC K. Lee 5. On the Software Installation screen, click Install Reference Guide. Follow the on-screen instruction until all of the software is installed. 6. When a message appears to indicate that installation is complete, click Exit. Note: If you do not have Adobe Photoshop Elements and LaserSoft SilverFast on your computer yet, install them from the CD-ROM included with your scanner.
Proof Sign-off: KOW N.Mizuno S.Koide H.Kimura NOC K. Lee R4CD180 Setup Guide SETUP.FM 12/18/03 Rev. C A5 size Installing Reference Guide 1. For Mac OS X users: Double-click the EPSON CD-ROM icon on your desk top, and then double-click the Manual folder in the EPSON folder. For Mac OS 9 users: Double-click the Manual icon in the EPSON folder. If the EPSON Scan folder does not open automatically, double-click the EPSON CD-ROM icon. 2.
L R4CD180 Setup Guide SETUP.FM 12/18/03 4 Rev. C A5 size Proof Sign-off: KOW N.Mizuno S.Koide H.Kimura NOC K. Lee Setting Up the Scanner Choosing a Place for the Scanner Follow the guidelines below when selecting a location for your scanner. ❏ Place the scanner on a flat, stable surface. The scanner does not operate properly if it is tilted at an angle. ❏ Place the scanner close enough to the computer for the interface cable to reach it easily.
R4CD180 Setup Guide Proof Sign-off: KOW N.Mizuno S.Koide H.Kimura NOC K. Lee SETUP.FM 12/18/03 Rev. C A5 size ❏ Allow space behind the scanner for the cables, and space above the scanner so that you can fully raise the document cover.
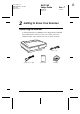
L R4CD180 Setup Guide SETUP.FM 12/18/03 Rev. C A5 size Proof Sign-off: KOW N.Mizuno S.Koide H.Kimura NOC K. Lee Setting Up You must install the software BEFORE connecting the scanner to your computer. 1. Make sure that the scanner is turned off. The scanner is off when the . Power button is raised. . Power button 2. Connect the power cord to the AC inlet on the back of the scanner, and then plug the other end into an electrical outlet.
Proof Sign-off: KOW N.Mizuno S.Koide H.Kimura NOC K. Lee R4CD180 Setup Guide SETUP.FM 12/18/03 Rev. C A5 size 3. Turn on the scanner by pressing the . Power button. Ready light .Power button The scanner turns on and starts initialization. The Ready light flashes in green until the scanner finishes initialization; it then stops flashing and stays green. This indicates that the scanner is ready for use. c Caution: Whenever you turn off the scanner, wait at least 10 seconds before turning it back on.
L R4CD180 Setup Guide SETUP.FM 12/18/03 Rev. C A5 size Proof Sign-off: KOW N.Mizuno S.Koide H.Kimura NOC K. Lee Connecting the scanner using the USB interface cable Note: The USB 2.0 Hi-speed connection is not supported by Windows 98, Windows Me, and Mac OS 9. Connect one end of the supplied USB interface cable to the USB port on the back of the scanner, and the other end to an USB hub or the USB port on your computer. USB interface connector Note: ❏ For USB 2.0 Hi-speed connection, make sure USB 2.
Proof Sign-off: KOW N.Mizuno S.Koide H.Kimura NOC K. Lee R4CD180 Setup Guide SETUP.FM 12/18/03 Rev. C A5 size Connecting the scanner using an IEEE 1394 interface cable Note: ❏ IEEE 1394 interface connection is not supported by Windows 98. ❏ Prepare an IEEE 1394 interface cable before performing this operation. 1. Connect one end of an IEEE 1394 interface cable to the IEEE 1394 port on the back of the scanner. 2.
L R4CD180 Setup Guide SETUP.FM 12/18/03 Rev. C A5 size 5 Proof Sign-off: KOW N.Mizuno S.Koide H.Kimura NOC K. Lee Using Your Scanner Placing a Document 1. Make sure the scanner is turned on. 2. Open the document cover and place the document face down on the document table. corner of the document Note: An area of 1±0.5 mm from the horizontal and the vertical edges of the document table glass cannot be scanned. 3. Close the document cover. Note: ❏ Do not place heavy objects on the top of the scanner.
Proof Sign-off: KOW N.Mizuno S.Koide H.Kimura NOC K. Lee R4CD180 Setup Guide SETUP.FM 12/18/03 Rev. C A5 size Scanning Your Document Using EPSON Scan EPSON Scan provides three modes for you to modify any scanning settings: Home Mode, Office Mode, and Professional Mode. This section describes how to start EPSON Scan from Photoshop Elements in the Home Mode. The Home Mode lets you scan images using the basic settings. For more details, see your Online Reference Guide and Software online help.
L R4CD180 Setup Guide SETUP.FM 12/18/03 Rev. C A5 size Proof Sign-off: KOW N.Mizuno S.Koide H.Kimura NOC K. Lee 2. Select Import from the File menu, and then choose EPSON Expression 10000XL. EPSON Scan starts. Note for Windows XP users: Do not choose WIA-EPSON Expression10000XL from the menu to select the scanner. If you select it, you cannot use the Epson scanner functions fully. 3. Specify the Document Type, Image Type, and Destination settings to match your images. 4.
Proof Sign-off: KOW N.Mizuno S.Koide H.Kimura NOC K. Lee R4CD180 Setup Guide SETUP.FM 12/18/03 Rev. C A5 size 6. Click Scan. EPSON Scan starts scanning. 7. The scanned image is sent to Adobe Photoshop Elements. Click Close to finish EPSON Scan, if necessary. 8. Select Save As from the File menu in Adobe Photoshop Elements. 9. Type a file name, select a file format, and then click Save.
L R4CD180 Setup Guide SETUP.FM 12/18/03 6 Proof Sign-off: KOW N.Mizuno S.Koide H.Kimura NOC K. Lee Rev. C A5 size Options Using the Transparency Unit The optional A3 Transparency Unit (B81336✽) makes it possible to scan films and slides, in full color. Once you install the Transparency Unit, you can leave it in place even when you want to return to scanning reflective (paper) documents.
Proof Sign-off: KOW N.Mizuno S.Koide H.Kimura NOC K. Lee R4CD180 Setup Guide Rev. C SETUP.FM 12/18/03 A5 size Unlocking the transportation lock Before you install the Transparency Unit, you need to unlock the transportation lock. 1. Turn the unit so that the glass side faces up. 2. Use a coin to unlock the transportation lock by turning it counterclockwise one-quarter. Note: ❏ Before transporting the scanner, lock its transportation lock to prevent any damage.
L R4CD180 Setup Guide SETUP.FM 12/18/03 Rev. C A5 size Proof Sign-off: KOW N.Mizuno S.Koide H.Kimura NOC K. Lee Installing the Transparency Unit Follow the steps below to install the Transparency Unit. 1. Make sure the scanner is turned off, and then unplug the power cord from the scanner. 2. Open the scanner's document cover, and then remove it by lifting the back of the cover straight up. 3.
Proof Sign-off: KOW N.Mizuno S.Koide H.Kimura NOC K. Lee R4CD180 Setup Guide Rev. C SETUP.FM 12/18/03 A5 size 5. Place the transparency guide on the scanner’s document table as shown below. 6. Close the Transparency Unit. 7. Connect the Transparency Unit’s connector to the option connector at the back of the scanner.
L R4CD180 Setup Guide Rev. C SETUP.FM 12/18/03 A5 size c Proof Sign-off: KOW N.Mizuno S.Koide H.Kimura NOC K. Lee Caution: Do not put heavy objects on the Transparency Unit; otherwise the unit may be damaged. To scan slides or strips of negative or positive film, see the Online Reference Guide. Note: If you do not have the Online Reference Guide on your computer, see “Installing the Software” on page 5 to install it from the CD-ROM.
Proof Sign-off: KOW N.Mizuno S.Koide H.Kimura NOC K. Lee R4CD180 Setup Guide Rev. C SETUP.FM 12/18/03 A5 size Installing the Automatic Document Feeder Before installing the Automatic Document Feeder, be aware that: ❏ The Automatic Document Feeder is heavy, so you may need to have someone help you lift it. ❏ The Automatic Document Feeder is large, so you should clear sufficient space around the scanner. Follow the steps below to install the Automatic Document Feeder on your Epson scanner. 1.
L R4CD180 Setup Guide SETUP.FM 12/18/03 Rev. C A5 size Proof Sign-off: KOW N.Mizuno S.Koide H.Kimura NOC K. Lee Note: When removing the feet, turn and remove them as shown below. 4. Insert the installation screws into the holes on the back of the scanner, and then secure them using the included screwdriver. 5. Align the installation screws with the holes in the Automatic Document Feeder. Slide so that the holes are over the installation screws.
Proof Sign-off: KOW N.Mizuno S.Koide H.Kimura NOC K. Lee R4CD180 Setup Guide Rev. C SETUP.FM 12/18/03 A5 size 6. Secure the knobs to the ends of the installation screws using the included screwdriver. 7. Attach the Automatic Document Feeder’s connector to the scanner’s option interface. 8. Close the Automatic Document Feeder. For details on how to use the Automatic Document Feeder, see the Online Reference Guide.
L R4CD180 Setup Guide SETUP.FM 12/18/03 Rev. C A5 size Proof Sign-off: KOW N.Mizuno S.Koide H.Kimura NOC K. Lee Using the Optional Network Image Express Card The EPSON Network Image Express Card (B80839✽) enables an Epson scanner supporting network functions to be used on a network. This is an alternative to having the scanner connected to a server PC. For information on how to use it, refer to the documentation supplied with EPSON Network Image Express Card.
R4CD180 Setup Guide Proof Sign-off: KOW N.Mizuno S.Koide H.Kimura NOC K. Lee Rev. C SETUP.FM 12/18/03 A5 size Installing the Network Image Express Card Install the Network Image Express Card in your scanner by following the steps below. 1. Turn off the scanner. Unplug any power cords, and then disconnect all cables from the back panel of your scanner. 2. Remove the two screws using a cross-head screwdriver, and then remove the plate.
L R4CD180 Setup Guide SETUP.FM 12/18/03 Rev. C A5 size Proof Sign-off: KOW N.Mizuno S.Koide H.Kimura NOC K. Lee 6. Connect an Ethernet cable (Category 5 shielded twisted-pair cable) to the RJ-45 connector on the Network Image Express Card, and then connect its other end to the network. c Caution: ❏ You must use a Category 5 shielded twisted-pair cable to connect the Network Image Express Card to prevent malfunction. ❏ Do not connect the Network Image Express Card and the computer directly.
Proof Sign-off: KOW N.Mizuno S.Koide H.Kimura NOC K. Lee 7 R4CD180 Setup Guide Rev. C SETUP.FM 12/18/03 A5 size Problems? Checking the lights on the scanner First, check the indicator light on the scanner. Indicator light Description Flashing green The scanner is warming up or scanning. Green The scanner is ready to scan. Flashing red Try restarting your computer and turning the scanner off, and then on again. If the red light is still flashing, contact your dealer.
L R4CD180 Setup Guide SETUP.FM 12/18/03 Rev. C A5 size The corner of your photo is not scanned. Proof Sign-off: KOW N.Mizuno S.Koide H.Kimura NOC K. Lee Move your photo at least 1.5 mm away from the top and right edges of the document table. Getting more information about your scanner Additional information is available in the following sources. ❏ Double-click the Exp10000XL Reference Guide icon on your desktop. You must have Microsoft Internet Explorer or Netscape Navigator (versions 5.
R4CD180 Setup Guide Proof Sign-off: KOW N.Mizuno S.Koide H.Kimura NOC K. Lee Rev. C COVER3.FM 12/18/03 A5 size EPSON OVERSEAS MARKETING LOCATIONS Epson America, Inc. EPSON UK LTD. 3840 Kilroy Airport Way Long Beach, CA 90806 Phone: (562) 981-3840 Fax: (562) 290-5220 Campus 100, Maylands Avenue, Hemel Hempstead, Herts, HP2 7TJ, U.K. Phone: (+44) 01442 261144 Fax: (+44) 01442 227227 EPSON DEUTSCHLAND GmbH EPSON FRANCE S.A.
L R4CD180 Setup Guide COVER4.FM 12/18/03 Rev. C A5 size Proof Sign-off: KOW N.Mizuno S.Koide H.Kimura NOC K.