
User`s guide


instructions.
Top
A Line or Line of Dots Always Appears in Your Scanned Images
The document table or transparency unit window may need cleaning. See Cleaning the Scanner.
If you still have the problem, the document table or transparency unit window may be scratched. Contact Epson.
Top
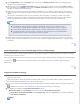
Straight Lines in Your Image Come Out Crooked
Make sure the document lies perfectly straight on the document table.
Top
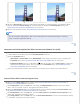
Your Image Is Blurred
Make sure the document or photo lies flat on the document table. Also make sure your document or photo is not
wrinkled or warped.
Make sure you do not move the document or photo, or your scanner while scanning.
Make sure the scanner is placed on a flat, stable surface.
Select Unsharp Mask check box in Office Mode or Professional Mode window. See Adjusting the Color and Other
Image Settings for instructions.
Adjust the Auto Exposure setting in Professional Mode window. See Adjusting the Color and Other Image
Settings for instructions.
Click Configuration, select the Color tab, and select Color Control and Continuous auto exposure. See
Epson Scan Help for details.
Click Configuration, select the Color tab, and click Recommended Value to return the Auto Exposure setting
to the default. See Epson Scan Help for details.
Increase the resolution setting. See Selecting the Scan Resolution for instructions.
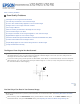
If you are not satisfied with the quality of scanned film images after trying all the solutions above, you can adjust the
height between the film holder and the document table. See the instructions below to increase or decrease the space
between the film holder and document table. The default height between the film holder and document table is 0.12 inch
(3 mm).
Remove and rotate the film height adjusters on the back of the film holder so that the arrow on the adjusters
face the + symbol on the bottom of the film holder. This increases the height between the film holder and
document table to 0.14 inch (3.5 mm).