
Operation Manual


Stitching Panoramas 13-2
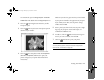
Thumbnails of your photos appear to the right.
3
Click the images you want to stitch, then click the
down arrow to add them. To select multiple images,
hold down the
Ctrl
or
Shift
key. To remove an image,
click the up arrow.
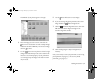
4
Use the buttons to move photos to the left or right.
(Images should be lined up in the correct order for the
software to stitch them properly.) If your panorama is
two rows high, keep the images in the order in which
they are saved.
5
Use the Rotate All button to rotate images.
6
If you are creating a big plane panorama, select a base
image and click the Set Base Image button.
7
Click the Automatic Alignment button, then click
OK
. Panorama Stitcher aligns the images in the
automatic alignment window.
8
Click and drag images to adjust the alignment, if
necessary.
Now you are ready to create your panorama: to stitch a big
plane panorama, see page 13-3. To stitch a cylinder
panorama, go to page 13-5.