SERVICE MANUAL Digital Still Camera EPSON PhotoPC 3100Z ® SEDC00003
Notice All rights reserved. No part of this manual may be reproduced, stored in a retrieval system, or transmitted in any form or by any means electronic, mechanical, photocopying, or otherwise, without the prior written permission of SEIKO EPSON CORPORATION. All effort have been made to ensure the accuracy of the contents of this manual. However, should any errors be detected, SEIKO EPSON would greatly appreciate being informed of them. The contents of this manual are subject to change without notice.
PRECAUTIONS Precautionary notations throughout the text are categorized relative to 1)Personal injury and 2) damage to equipment. DANGER Signals a precaution which, if ignored, could result in serious or fatal personal injury. Great caution should be exercised in performing procedures preceded by DANGER Headings. WARNING Signals a precaution which, if ignored, could result in damage to equipment.
About This Manual This manual describes basic functions, theory of electrical and mechanical operations, maintenance and repair procedures of the printer. The instructions and procedures included herein are intended for the experienced repair technicians, and attention should be given to the precautions on the preceding page. Manual Configuration This manual consists of six chapters and Appendix. CHAPTER 1. PRODUCT DESCRIPTIONS Provides a general overview and specifications of the product. CHAPTER 2.
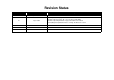
Revision Status Revision Issued Date A April 12, 2001 First Release July 17,2003 "AWB Adjustment" on page -86 : Add the CAUTION "Firmware Upload" on page -95 : error correction in CAUTION "Firmware Upload By CF Card" on page -96: Add the new method “Re-installing the Expanded Functions“ on PAge -96: Delete the section.
CONTENTS Chapter 1 PRODUCT DESCRIPTION 1.1 Features ............................................................................................................. 10 1.1.1 Exterior View ............................................................................................. 11 1.2 Functional Specification ................................................................................... 1.2.1 Image Data ................................................................................................. 1.
1.10.2 Display check after changing the setting ................................................. 35 1.11 Inhibitions and Cautions ................................................................................ 36 1.12 Optional items and specifications .................................................................. 37 1.12.1 optional items ........................................................................................... 37 1.12.2 Option .........................................................
5.4.8.3 LCD Gain Adjustment ....................................................................... 5.4.8.4 LCD Blue Brightness Adjustment ..................................................... 5.4.8.5 LCD Red Brightness Adjustment ...................................................... 5.4.9 Firmware Upload ....................................................................................... 5.4.9.1 Firmware Upload By Adjustment program ....................................... 5.4.9.
CHAPTER 1 PRODUCT DESCRIPTION
PhotoPC 3100Z Revision A 1.1 Features Manual shooting (Full Auto, Aperture priority auto, Shutter speed priority auto, Full Manual) Major features of EPSON PhotoPC 3100Z are as follows. Exposure adjustment, ISO sensitivity change and White Balance (Auto, Fix, Custom) . High Picture Quality Continuous shooting, Interval shooting, Seamless Digital zoom, Macro, and Monochrome mode. 3.34 Mega pixel color CCD Hypict output equivalent to 4.84 Mega pixels Switching function.
PhotoPC 3100Z Panorama Boutique Light EP (for stitching process) Revision A 1.1.1 Exterior View Card monitor User I/F WEIGHT AND DIMENSION GUI is further improved from Photo PC3000Z. Dimension: 108mm x 89 x 65mm (without some parts of protrusions.) Weight: 358g (body only) Easy to understand and easy to use. External I/F Tripod mounting holes: USB Video output (NTSC/PAL can be switched by menu.) JIS B7103 1/4 compliant APPEARANCE Hot shoe (for the connection with the external flash).
PhotoPC 3100Z Revision A 1.2 Functional Specification Focusing range: 0.2-0.5m (Macro mode) Provided; 0.06-0.5m at the wide most range. Basic specifications of PhotoPC 3100Z is as follows. Shutter: Electric iris with mechanical shutter 1.2.
PhotoPC 3100Z Revision A White balance Table 1-1. Quick Shooting TTL auto white balance After shooting indication Fixed mode available (only under the sun light, color temperature: 5200K) User record setting mode available LCD shooting Transferring method Indicating confirming image (2 sec) It indicates freeze image for 2 sec. and performs CF transfer. Then it indicates through image which means the camera is ready to take pictures.
PhotoPC 3100Z Revision A Continuous shooting is available up to the file size of 3732 KB of usable buffer memory. NOTE 1:Flash is set Off forcibly. NOTE 2: H Auto exposure Exposure adjustment (0.2EV step), Photometry method, ISO sensitivity, W/B setting and Focus (AF or manual) are selectable. mode is prohibited. Digital Zoom 1.1x to 2 x zooming ( 0.1x step) by Seamless Digital zoom is available. It stores images, adjusting the image quality to the image size of each recording mode.
PhotoPC 3100Z Revision A 1.2.5 Set Up Mode Magnification display Magnify an image x1.1 to x3 to display. Language selection Japanese, English, French, German, Italian, Portuguese, Spanish, Chinese Smooth scrolling available. The main image is displayed during the magnification process. (The magnification process can be cancelled by the W button during the data reading.) Deletion 1 image deletion and all images deletion are selectable. Lock Selected images can be locked.
PhotoPC 3100Z Revision A 1.2.6 Video Recording Mode Filter function setting When each filter is set and an image is printed out by a specified EPSON printer, the following image processing is available. Recording Maximum 35 seconds continuous shooting (Up to 25 seconds with the sound recording.) Sharpness (Hi / Low) Brightness (Hi / Low) When the video recording is enabled, by pressing the shutter button, the shooting will be started.
PhotoPC 3100Z Revision A 1.2.11 Internal Clock Internal flash Auto (pre-flash method auto tone adjustment) / Off / Forced flash / Red eye reduction / Slow synchro (for night view. user can select either trailing or leading flash.) Internal clock Internal clock is built-in Effective flash range Record the shooting date and time on the image (Month / Day / Year, Hour / Minute / Second) Normal mode: 0.5 - 4.2m Date and time are held by lithium ion secondary battery.
PhotoPC 3100Z Revision A 1.3 Indication Self timer mark Flash mode 1.3.1 Overview Battery warning mark View Finder (VF) side lamp LCD monitor 1.8 type low temperature poly-silicon TFT color LCD 3 modes indication : green signal ON / Blink / Off 1.1 M pixels: 512 x 218 pixels 3 modes indication : red signal On / Blink / Off A visual field covers more than 98% of the capturing image field. Displaying taken images at the playback mode: 100% of an image field is displayed.
PhotoPC 3100Z Revision A 1.3.2 LCD Panel Indication Table 1-3. Icons Icon The Panel indication is explained below. ISO sensitivity Flash Image quality White Balance Battery low warning Image quality Indicates image quality (resolution). Hyper / TIFF Hypict mode or TIFF Monochrome Indicated at the monochrome mode. Self timer Indicated at the self timer shooting mode. Flash Indicates the strobe setting. 3 digits 7 segments • Indicates the number of pictures more can be taken.
PhotoPC 3100Z Revision A 1.3.2.1 3 Digits 7 Segments -- Specification During video recording Indicates how long you can record more. (seconds) STILL IMAGE SHOOTING (VF, LCD, CONTINUOUS SHOOTING) While writing into the compact flash memory. Indication is the same as still image shooting. Indicates the number of pictures more can be taken on the current image quality (resolution). Indicates shutter speed on half-shutter. (Not applicable for full auto.
PhotoPC 3100Z Revision A 1.3.2.2 ISO Sensitivity 1.3.2.5 Exposure Adjustment The following is the ISO sensitivity indication. FULL AUTO SHOOTING Standard : No indication. Fine : PROGRAM / MANUAL SHOOTING Super fine : Indicates exposure adjustment value. Figure 1-8. ISO Sensitivity Only at half shutter, indicates aperture. 1.3.2.3 White Balance OTHER SITUATIONS STILL IMAGE SHOOTING / VIDEO RECORDING No indication.
PhotoPC 3100Z Revision A 1.3.2.8 Self Timer Other situations No indication. Press the self timer button on the shooting mode to set the self timer. Self timer icon will be indicated. Press the shutter button. The self timer icon will be blinking for 10 seconds. Other modes (not shooting mode) No indication Press the self timer button while the self timer icon is on. Self timer icon will be off. 1.3.2.9 Flash Press the flash button on the shooting mode. The icon will be switched as shown below.
PhotoPC 3100Z Revision A 1.3.3 LED Condition 1.3.4 LCD Monitor See the table below for the LED condition. LCD monitor has the color frames indication according to respective functions and these frames are indicated only on the LCD shooting mode and on the special continuous shooting mode. Table 1-4. LED Condition Shooting LED Red Shooting LED Green Ready to shoot ON Focusing Blinking (0.2 sec) Focus lock ON CF is full Blinking (0.5 sec) Battery Low Blinking (1.
PhotoPC 3100Z Revision A 1.4 Operation Table 1-6. Switch / Button List Switch / Button Indication 1.4.
PhotoPC 3100Z Revision A 1.4.2 Sinking Lens Control Various settings on the SETUP mode Not including the setting command. CONDITIONS TO MOVE THE LENS FORWARD Photometry method When the camera is set ready to take picture with the lens sunk. (When powering ON the camera or when mode is switched by dial switch.) Values on manual Shutter speed / Aperture / Focus When the camera received the command from the PC to move the lens forward.
PhotoPC 3100Z Revision A 1.4.4 Processing Time 1.4.5.2 Average Number of Pictures Saved into CF Card Table 1-9. Number of Pictures Saved in CF Card (Reference) Table 1-7. Processing Time Time required for writing into CF memory Quality setting (include the time to write into CF in case of TIFF.) Standard Quality setting Playback processing time 0.5 sec Fine about 1.0 sec 0.5 sec Super fine about 1.0 sec 0.5 sec H Hyper H Approx.
PhotoPC 3100Z Revision A 1.5 Interface 1.5.1 External Connection The external connectors for PhotoPC 3100Z are as follows. USB connector Figure 1-13. Connection Diagram A/V output AC adapter AC ADAPTER INPUT Compact Flash AC adapter exclusive DC input terminal (7.0V) Polarity: USB INTERFACE EIAJ Type2 φ4.4 mm Table 1-10. Connector Pin Configuration I/O Center plus AC Adapter: Explanation EU-40, 7V2.
PhotoPC 3100Z Revision A 1.5.2 Exclusive Cable 1.5.2.2 A/V Cable Table 1-13. A/V Cable Specification This section explains the connection information of cables exclusive for PhotoPC 3100Z. Specification Length 1.5.2.1 USB Cable Connector This USB cable is exclusive for PhotoPC 3100Z. 1.5mm • Camera side: φ3.5, Stereo plug • Video side: PCA plug (video: yellow, sound: white) Table 1-12. USB Cable Specification Specification Length Connector 1.
PhotoPC 3100Z Revision A 1.6 Communication Command Specification Only MOV file is recognized (count the number of sheet) in Root\MOVIE folder on CFM. All others are ignored. 1.6.1 Application Unlike still images, voice memo (WAV file) can not be attached. Even WAV file of the same file number will be ignored. Matters which are not described in this section should conform to the conventional specification. Serial communication is not handled.
PhotoPC 3100Z Revision A 1.7 Power Supply 1.7.2 Battery Life Table 1-14. Battery Life 1.7.1 Battery Battery Alkaline Battery Ni-HM Battery (1500mAH) 155 180 LCD Shooting BATTERY SPECIFICATION AA Size: VF Shooting 4 AA size batteries are needed Ni-HM charging battery / Ni-Cd charging battery / Alkaline battery / Lithium battery NOTE: Mangan batteries must not be used. AC ADAPTER Playback 210 min 240 min NOTE: The figures above are estimated on our measurement conditions.
PhotoPC 3100Z Revision A Energy saving mode: 5 minutes Shut down after 5 minutes PLAYBACK MODE Shut down after 5 minutes not depending on energy saving mode. SLIDE SHOW Always shut down by after one-round of slide show when AC adapter is using. When using batteries, it does not shut down until the battery runs out. When all image is selected, it does not shut down until the battery runs out. RECOVER When shooting pictures: Recover by half shutter or re-powering the camera.
PhotoPC 3100Z Revision A 1.8 Environment Condition 1.8.1 Performing Environment & Storing Environment TEMPERATURE Performing 5 to 35 °C Storing -20 to 60 °C HUMIDITY Performing 30 to 80% (without condensation) Storing 10 to 80% (without condensation) 1.8.
PhotoPC 3100Z 1.9 Safety Standard & Reliability Revision A 1.9.2 Reliability Standards 1.9.1 EMI, Safety Standard USA FCC part15 subpart B class B Canada CSA C108.8 class B Europe EMC Directive 89 / 336 / EEC EN55022 Class B (CE - marking) EN61000-3-2 (when AC adapter is used.) EN61000-3-3 (when AC adapter is used.) EN50082-1 IEC801-2 IEC801-3 IEC801-4 Europe EN55022 (CISPR Pub.
PhotoPC 3100Z Revision A 1.10 Ex-factory Setting CHANGE PROCESS B : CHANGE INTO THE PAL / NO LANGUAGE SETTING. With a special setting mode, the setting of camera is changeable depending on the destination as well as PhotoPC 3000Z. The setting is the same as that for PhotoPC 3000Z. Start from the language selection menu at the initial power on process. 1. Push POWER button (the center of dial button) to turn the power on while pushing 1.10.1 Change process of camera setting (Self timer) button. 2.
PhotoPC 3100Z Revision A 1.10.2 Display check after changing the setting AT THE END OF THE CHANGE PROCESS B The described number at the right of “Version :” in the following examples of display is the description of firmware. Confirm that the “PAL / SEL” is indicated at the lower left of screen. AT THE END OF THE CHANGE PROCESS A Only at the change of setting into the “PAL / SEL”, the display will automatically changed into the below example a few seconds after changing.
PhotoPC 3100Z Revision A 1.11 Inhibitions and Cautions Never see the sun through the view finder Never use any AC adapters other than approved one. Never use any batteries other than approved one. Never insert batteries with incorrect polarity. Remove batteries, if the camera is not used for a long time.
PhotoPC 3100Z Revision A 1.12 Optional items and specifications Ni-MH battery charger Model name : EU-38 (compatible use for Photo PC3000Z) Input voltage : AC 100-240 V ± 50-60 Hz 10 VA 1.12.1 optional items Output voltage : DC 1.2 V 490 mA x4 AV cable Mini-jack w/ RCA core (1 core turn type) Charge time : 2.5 hours (to charge 4 pcs.) 4 AA Alkaline batteries (by Matsushita) NOTE: Battery charge is sold with 4 Ni-MH batteries in a set.
CHAPTER 2 OPERATING PRINCIPLES
PhotoPC 3100Z Revision A 2.1 Board Component Table 2-1. Function of each board The main component of this product is the electric circuit boards and lens assembly. The main components are shown in the figure below. Board CA1 CA2 Composed of RISC-CPU, ASIC, 16M bit Flash-ROM, 64M bit SDRAM. • Control lens assembly. • γ correction. • Generate color signal • USB control • LCD driver • Audio AMP etc.
PhotoPC 3100Z Revision A 2.2 Circuit The figure below is the circuit block diagram of PhotoPC 3100Z. Figure 2-2.
PhotoPC 3100Z Revision A 2.2.1 CA1 Circuit Description The figure below is the CA1 circuit block diagram. Figure 2-3.
PhotoPC 3100Z Revision A 2.2.1.1 Configuration The CA1 board is mainly composed of the following ICs. IC903 (ICX252AK-B) : CCD imager IC902 (74ACT04MTC) : H driver IC904 (CXD3400N) : V driver IC905 (AD9842JST) : CDS, AGC, A/D converter 2.2.1.
PhotoPC 3100Z Revision A Table 2-2. CCD Pins Explanation Pin No. Symbol Pin Description Waveform Voltage 1 V φ4 Vertical resister transfer clock -7.5V, 0V 2, 3 V φ3A, V φ3B Vertical resister transfer clock -7.5V, 0V, 15V 4 V φ2 Vertical resister transfer clock -7.5V, 0V 5, 6 V φ1A, V φ1B Vertical resister transfer clock -7.
PhotoPC 3100Z Revision A 2.2.1.3 IC902 (H Driver) and IC904 (V Driver) 2.2.1.4 IC905 (CDS, AGC Circuit and A/D Converter) An H driver (IC902) and V driver (IC904) are necessary in order to generate the clocks (vertical transfer clock, horizontal transfer clock and electronic shutter clock) which drives the CCD. The video signal which is output from the CCD is input to Pins (30) of IC905.
PhotoPC 3100Z Revision A 2.2.1.5 Transfer of Electric Charge by the Horizontal CCD Thus, the potential of the floating diffusion changes in proportion to the quantity of transferred electric charge, and becomes CCD output after being received by the source follower. The equivalent circuit for the output circuit is shown in Figure 2-9. The transfer system for the horizontal CCD employs a 2-phase drive method.
PhotoPC 3100Z Revision A 2.2.2 CA2 Circuit Description The figure below is the CA2 Circuit Block Diagram. Figure 2-10.
PhotoPC 3100Z Revision A 2.2.2.1 Circuit Description TG/SG Timing generated for 3 million pixel CCD control. DIGITAL CLAMP Digital encoder It generates chroma signal from color difference signal. Extracting the average value of the optical black section of the CCD from the subsequent data makes the black level of the CCD output data uniform for each line.
PhotoPC 3100Z Revision A 2.2.2.3 LCD Block During monitoring, YUV conversion is carried out for the 10-bit CCD data which is input from the A/D conversion block to the ASIC and is then transferred to the DRAM so that the CCD data can be displayed on the LCD. The data which has accumulated in the DRAM is passed through the NTSC encoder, and after D/A conversion is carried out to change the data into a Y/C signal, the data is sent to the LCD panel and displayed.
PhotoPC 3100Z 2.2.2.4 Lens Drive Block The figure below is the lens drive block diagram. Revision A IRIS AND SHUTTER DRIVE The iris stepping motor drive signals (IIN1, IIN2, IIN3 and IIN4) which are output from the ASIC expansion port (IC108) are used to drive by the motor driver (IC951), and are then used to drive the iris steps. It can be increased iris steps by IENA control.
PhotoPC 3100Z Revision A 2.2.3 PW1 Circuit Description 2.2.3.1 Circuit Description OVERVIEW The power circuit is mainly composed of the following blocks. Switching controller (IC501) Digital 5 V and analog system power output (T5001, Q5001) Digital 2.5 V system power supply (Q5007) Digital 3.35 V system power supply (Q5018) LCD system power supply (Q5008, T5002) Backlight power supply output (Q5013, T5003) The figure below is the PW1 electric circuit block diagram. Figure 2-12.
PhotoPC 3100Z Revision A SWITCHING CONTROLLER (IC501) SWITCHING CONTROLLER (IC503) This is the basic circuit which is necessary for controlling the power supply for a PWM-type switching regulator, and is provided with four built-in channels, only CH1 (digital 5 V, analog system), CH3 (LCD system), CH2 (digital 2.5 V) and CH4 (digital 3.35) are used. Feedback from 5 V (D) (CH1), 2.5 V (D) (CH2), 5.3 V (L) (CH3) and 3.
PhotoPC 3100Z Revision A 2.2.3.2 Strobe CIrcuit Description OSCILLATION CIRCUIT The figure below is the strobe circuit block diagram. This circuit generates an AC voltage (pulse) in order to increase the UNREG power supply voltage when drops in current occur. This circuit generates a drive pulse with a frequency of approximately 50-100 kHz. Because self-excited light omission is used, the oscillation frequency changes according to the drive conditions.
PhotoPC 3100Z Revision A TRIGGER CIRCUIT 2.2.4 SY 1 Circuit Description When a TRIG signal is input to the trigger circuit, D5405 switches on, a high-voltage pulse of several kilo volts is generated inside the trigger circuit, and this pulse is then applied to the light emitting part. 2.2.4.1 Configuration and Functions For the overall configuration of the SY1 circuit board, refer to the block diagram below.
PhotoPC 3100Z Revision A Table 2-3. 8bit Micro Processor Pin Configuration Table 2-3.
PhotoPC 3100Z Revision A 2.2.4.3 Power Supply Control Table 2-3. 8bit Micro Processor Pin Configuration Pin Signal I/O Outline 96 ASIC TEST O ASIC reset control signal 97 ASIC RESET O ASIC reset signal L: Reset output 98 MAIN RESET O SPARC reset signal L: Reset output 99 AVSS - A/D converter GND power terminal 100 BATTERY I Battery voltage input (analog input) The 8-bit microprocessor controls the power supply for the overall system.
PhotoPC 3100Z Revision A Table 2-4. Camera Mode (Battery Operation) Power ON SPARC Lite ASIC memory CCD 8bit CPU MODE LCD LCD MONITOR Supply voltage 3.3V 3.3V 5V(A), +15V, -9V 3.2V (ALWAYS) 3.2V (ALWAYS) 5V(L) +12V etc.
CHAPTER 3 TROUBLESHOOTING
PhotoPC 3100Z Revision A 3.1.1 LED Indication on Various Conditions 3.1 Overview PhotoPC 3100Z does not have error indication such as LCD and LED. Perform the following repairing method according to the symptoms. Even when the symptoms look the same, there are various reasons for the trouble. Check the troubleshooting points described in this chapter and perform the best repairing method. W A R N IN G Before disassembling the camera, remove the battery and plug off the AC adapter.
PhotoPC 3100Z Revision A 3.2.1 Check and remedy when the power cannot apply 3.2 Troubleshooting This section describes how to check the defective unit and parts according to its symptoms. After installing the battery or installing the AC adapter, if LCD is not indicated or if the red LED continues blinking and does not move on to the standby condition, see the following tables that give you checking points and solutions.See the following flow charts.
PhotoPC 3100Z Revision A 3.2.2 Check and remedy when the shooting picture is impossible 3.2.3 Check and remedy when the taking in pictures is impossible CLK(72MHz) INPUT TO IC102-286 (CLK IN 1) Press the shutter button. YES Note: A clock to control the system. NO IC301-7, 58 (SCAN IN3) Pulse input NO Check flexible print circuit (FPC) including shutter SW and CN301, R3007, R3009 and D3004.
CHAPTER 4 DISASSEMBLY AND ASSEMBLY
PhotoPC 3100Z Revision A 4.1.1 Precautions 4.1 Overview This section describes procedures for disassembling the main components of the product. Unless otherwise specified, disassembly units or components can be reassembled by reversing the disassembly procedure. Things, if not strictly observed, that could result in injury or loss of life are described under the heading “Warning”. Precautions for any disassembly or assembly procedures are described under the heading “CAUTION”.
PhotoPC 3100Z Revision A 4.1.2 Discharging Electrolytic Capacitor W A R N IN G C A U T IO N To protect sensitive microprocessors and circuitry, use static discharge equipment, such as anti-static wrist straps, when accessing internal components. The electrolytic capacitor (C5412) mounted on PW1 board is for flash strobe and set to be charged automatically whenever the power is ON. Due to this, it may cause electric shock during the service procedure.
PhotoPC 3100Z Revision A 4.1.3 Tools Table 4-2. Ref. No. The following tables explain the tools needed for repairing service. Table 4-1. Tools No. Name Note 1 Color Viewer 5100 K x 103058400 2 DscCal V122 adjustment program x Issued with this manual. 3 Fine driver (+) 4 Siemens star chart x Screw Type / Specification 103 SCR S-TPG PAN PCS 1.7X5 104 SPECIAL SCREW-2.0X4.1 Attached on this manual appendix.
PhotoPC 3100Z Revision A 4.1.5 Overview Table 4-3. 1st / 2nd Level Maintenance (at Board Replacement) No. Replacing Parts 1 2 Replacing Parts CA1 Board CA2 Board Adjustment Items 1. Initial operation 2. Lens adjustment 3. AWB adjustment 4. Color matrix adjustment 5. CCD defect detect adjustment 6. LCD panel adjustment Note: Observe the order. LCD (monitor) 1st maintenance SY1 Board Note: When replacing the terminals on SY1 board, perform the following adjustment.
PhotoPC 3100Z Revision A 4.2 Disassembly The flowchart below shows the disassembling procedure. START W A R N IN G The electrolytic capacitor (C5412) mounted on PW1 board is for flash strobe and set to be charged automatically whenever the power is ON. Due to this, it may cause electric shock during the service procedure. When repairing, be sure to discharge the camera, using the cement resistance.
PhotoPC 3100Z Revision A 4.2.1 Cabinet Back / Front, TB2/3, ST1 Board Removal This section explains the disassembling of the cabinet (front / back), TB2/3 board and ST1 board. Disassembling procedure should follow numbers indicated in the figure below. 4. S-TP PAN PCS 1.7x5 0.18±0.02N·m (1.8±0.2kg·cm) 4. S-TP PAN PCS 1.7x5 0.18±0.02N·m/(1.8±0.2kg·cm) 13. S-TP PAN PCS 1.7x5 0.18±0.02N·m (1.8±0.2kg·cm) The blue oblique letters in the figure show the tightening torque. 18.
PhotoPC 3100Z Revision A 4.2.2 Removal of SY1 and LCD The following is the discharging process of SY1 and LCD. Disassembling procedure should follow numbers indicated in the figure below. Backup battery The blue oblique letters in the figure show the tightening torque. C A U T IO N C H E C K P O IN T Since the date backup battery is adhered to SY1 board, it is impossible to replace independently. (must be replaced as SY1 board) 1. PAN PCS 1.7x4 0.18±0.02N·m (1.8±0.2kg·cm) 2. S-TP PAN PCS 1.7x5 0.
PhotoPC 3100Z Revision A 4.2.3 Removal of CA1/2 Board and Lens Assembly 1. S-TP PAN PCS 1.7x5 0.18±0.02N·m (1.8±0.2kg·cm) 8. CA2 board The following is the discharging process of CA1 Board, CA2 Board and Lens assembly. Disassembling procedure should follow numbers indicated in the figure below. 2. PAN PCS 1.7x4 0.18±0.02N·m (1.8±0.2kg·cm) 3.S-TP PAN PCS 1.7x5 0.18±0.02N·m (1.8±0.2kg·cm) The blue oblique letters in the figure show the tightening torque. 4. Connector 7.
PhotoPC 3100Z Revision A 4.2.4 Removal of Holder Battery and PW1 Board The following is the discharging process of holder battery and PW1 board. Disassembling procedure should follow numbers indicated in the figure below. 1. PAN PCS 1.7x4 0.18±0.02N·m (1.8±0.2kg·cm) The blue oblique letters in the figure show the tightening torque. 8.TB1 board A D J U S T M E N T R E Q U IR E D When replacing the PW1 Board, perform adjustment. (See Ch5.) 9. S-TP PAN PCS 1.7x5 0.16±0.02N·m/(1.6±0.2kg·cm) 13.
PhotoPC 3100Z Revision A 4.3 Assembly PAD(10) 4.3.1 Assembling the Lens Assembly 1. Check if there is no dust or scratch on the surface of the Optical Filter (2) and install it toe the LENS ASSY (1). C A U T IO N Attaching position Never disassemble Optical assembly which must be replaced by a unit. Be careful at the direction when installing the Filter. PAD(10) Attaching position 2. Insert the SPACER (3). 3.
PhotoPC 3100Z Revision A 4.3.2 Installing the SY1 Board CN301 1. Insert the connector of ASSY, WIRE (2) to the SY1 board (1). 2. Connect the connector CN303 of SY1 board to the connector CN106 of the CA2 board. Secure it with 2 screws (1.7x5). 3. Connect the harness from the TB1 board to the connector CN301 of the SY1 board.
PhotoPC 3100Z Revision A 4.3.3 Installing the CABINET TOP 1. Install the ST1 board (1) to the CABINET TOP and secure it with 1 screw (2) (2.0x5). 2. Connect the pin to ST1 board. pin C H E C K P O IN T 3. Hold the pin when soldering the pin so that the pin does not get off. (See Figure 4-11.) When soldering the pin, be sure that the soldering part is shorter than the length of pin. (See Figure 4-11.) Solder the pin within the length of the pin.
PhotoPC 3100Z Revision A 4.3.4 Installing the TB1 Board 1. Install the TB3 board (2) to the HOLDER SW(1) and secure it with a screw (3) (1.7x3). C H E C K P O IN T Install the HOLDER SW to the CABINET FRONT so that the lever part of the LEVER SW goes between the HOLDER SW and TB3 board. Insert the end of the HOLDER SW. 2. Install the HOLDER SW to the CABINET FRONT and secure it with a screw (4) (1.7x5). 3. Connect the ASSY. WIRE (5) to the connector CN545 of the ST1 board. Looked from point A.
PhotoPC 3100Z Revision A 4.3.5 Installing the Board Unit Harness from the ST1 board 1. Install the STAND (1) to the board unit and secure it with 1 screw (2) (1.5x5). 2. Connect the harness from the SY1 board to the connector of the TB3. 3. Install the board unit to the CABINET FRONT. 4. Connect the harness of the ST1 board to the connector CN104 of the CA2 board. 5. Secure the HOLDER LENS to the CABINET FRONT with 3 screws (3) (1.7x5).
PhotoPC 3100Z Revision A 4.3.6 Installing the CABINET BACK 1. Install the LENS FPC to the CA2 board. 2. Connect the FPC from the CABINET BACK to the connector CN116 of the CA2 board and install the CABINET BACK to the CABINET FRONT. 3. Secure the CABINET BACK with 2 screws (1) (1.7x5). C H E C K P O IN T Be careful not to bite the LCD lead wires (white / pink) near the tripod screw hole when assembling Cabinet back. Figure 4-14.
CHAPTER 5 ADJUSTMENT
PhotoPC 3100Z Revision B 5.1 Overview Table 5-1. 1st / 2nd Level Maintenance (at Board Replacement) No. This chapter describes various adjustments required for PhotoPC 3100Z. Refer to the table below and perform the appropriate adjustment whenever needed. C A U T IO N For this product, there are two repair levels; first maintenance and 2nd maintenance. The service for second maintenance is allowed to be done only by the service center equipped with special instruments for adjustment.
PhotoPC 3100Z Revision B 5.2 Tools Table 5-3. Tools The following tables explain the tools needed for repairing service. No. Table 5-2. Equipment Name Note Oscilloscope 100MHz or more Digital multi meter -- Host computer Windows Me or Windows 2000 Professional environment Following devices are required. • CD-ROM drive • 3.5 inch FD drive • RAM: 40MB or more • HDD drive: 15 MB or more • VGA or AVGA monitor with at least 256-color display.
PhotoPC 3100Z Revision B 5.3 Preparation for Adjustment This section describes how to set up the camera and PC before adjustment. Follow the procedures below and complete setting up. Prepare PC with Windows2000 Me, Windows2000 Professional or later. (See the caution below.) W A R N IN G To USB port Remove the battery and plug off the AC adapter before disassembling the camera.
PhotoPC 3100Z C A U T IO N Revision B If you try to boot the program with the camera off, the program indicates “Camera is not connected.” and becomes error condition. To stabilize the brightness, let the color viewer alone for 30 minutes (idling) before usage after power is turned on. Figure 5-2.
PhotoPC 3100Z Revision B 5.4 Adjustment 4. mark on the camera, which indicates the resolution selection, moves for 20 seconds. (This period may vary according to the image data size currently stored. The timing that the mark on the camera starts moving lags behind the timing that the program indicates its completion. When the program indicates it is completed, you can take off AC cable and USB communication cable.) 5. Click OK on the screen. 5.4.
PhotoPC 3100Z Revision B 5.4.2 PW1 Board Adjustment 5.4.2.2 IC501 Oscillation Frequency Adjustment Adjustment is necessary when you replaced certain parts on the PW1 board, which is described in this section, but not required when you replaced PW1 board. SETTING 5.4.2.1 PW1 Board Measurement / Adjustment Points Measuring point: CL501 or CL502 Measuring equipment: Frequency counter Adjustment location: VR501 Adjustment value: 200 ± 1kHz ADJUSTMENT METHOD Adjust with VR501 to 200 ± 1 kHz.
PhotoPC 3100Z Revision B 5.4.2.4 12.4V (L) Voltage Adjustment This is LCD panel voltage adjustment. SETTING Measuring point: C5053 Measuring equipment: Digital voltmeter Adjustment location: VR504 Adjustment value: 12.40 ± 0.05V ADJUSTMENT METHOD Adjust with VR504 to 12.40 ± 0.05 V. NOTE: 15.5V(L) and 3.7V(L) are also adjusted at the same time.
PhotoPC 3100Z Revision B 5.4.3 Lens Adjustment ADJUSTMENT METHOD PREPARATION 1. Set the siemens star chart 150 cm ± 3 cm so that it becomes center of the screen. 2. Double-click on the Dsc Calibration. 3. Click the “Focus”, and Click the “Yes”. Power switch: ON Dial switch: Communication mode USB Cable Camera 150cm ± 3cm Figure 5-7. Lens Adjustment Button Location Siemens Star Chart 4. Figure 5-6. Lens Adjustment Adjustment level STD.AFOPS=0 ADJUSTMENT CONDITION Error: If STD.
PhotoPC 3100Z Revision B 5.4.4 AWB Adjustment 3. Click the “AWB”, and click the “Yes”. PREPARATION Power switch: ON Dial switch: Communication mode Figure 5-9. AWB Adjustment Button Location 4. AWB adjustment value will appear on the screen. WC=Y, U, V Camera Adjustment Value Y=128 ± 20 Color Viewer (5100K) U=128 ± 20 V=140 ± 20 Figure 5-8. AWB Adjustment 5. Click the OK. ADJUSTMENT METHOD 1.
PhotoPC 3100Z Revision B 5.4.5 Color Matrix Adjustment 4. Click the “UV Matrix”, and Click the “Yes”. When adjusting the color matrix, it is also checking the aperture operation. PREPARATION Power switch: ON Dial switch: Communication mode Figure 5-11. Color Matrix Adjustment Button Location 5. Matrix adjustment values will appear on the screen. UD=A, B, C, D Adjustment level Camera When all of A, B, C, D show 3 digit figure, it is OK.
PhotoPC 3100Z Revision B 5.4.6 CCD Defect Detect Adjustment 3. After the adjustment is completed, if there is any defection, at most 512 defection is indicated x, y matrix.) PREPARATION Power switch: ON Dial switch: Communication mode Lens cover switch: Closed ADJUSTMENT METHOD 1. Double-click on the Dsc Calibration. 2. Click the “CCD Defect Detection”, and click the “Yes”. Figure 5-13. CCD Defect Detect Adjustment Result C H E C K P O IN T Figure 5-12.
PhotoPC 3100Z Revision B 5.4.7 CCD Black Defect Adjustment 3. Click the “CCD Black” in the pull down menu of TEST and click the “Yes (Y)”. PREPARATION Power switch: ON Dial switch: Communication mode Figure 5-15. Location of CCD Black Defect Adjustment adjust button. Camera 4. Color Viewer (5100K) After the adjustment is completed, the number of defects detected is indicated. C H E C K P O IN T Figure 5-14. CCD Black Defect Adjustment ADJUSTMENT METHOD 1.
PhotoPC 3100Z Revision B 5.4.8 LCD Panel Adjustment This adjustment is required when replacing LCD. The measurement / adjustment points of CA2 board is shown below. Figure 5-17. LCD H AFC Adjustment Button Location 3. While looking at the LCD monitor, adjust “H AFC” so that the edge of the LCD adjustment frame are the same distance from the left and right edge of the LCD screen. (A= B) Figure 5-16. Measurement / Adjustment Points 5.4.8.
PhotoPC 3100Z Revision B 5.4.8.2 LCD RGB Offset Adjustment ADJUSTMENT METHOD PREPARATION Adjust LCD “RGB Offset” so that the amplitude of the CL423 waveform becomes 7.2V±0.15Vp-p. Power switch: ON Dial switch: Communication mode ADJUSTMENT METHOD 1. Double-click on the Dsc Calibration. 2. Select “0” on the LCD “RGB Offset”. 7.2V ± 0.15Vp-p CL423 waveform Figure 5-20. RGB Offset Adjustment Figure 5-19.
PhotoPC 3100Z Revision B 5.4.8.3 LCD Gain Adjustment ADJUSTMENT METHOD PREPARATION Adjust LCD “Gain” so that the amplitude of the CL423 waveform becomes 4.0V±0.1Vp-p. Power switch: ON Dial switch: Communication mode ADJUSTMENT METHOD 1. Double-click on the Dsc Calibration. 2. Select “0” on the LCD “Gain”. 4.0V ± 0.1Vp-p CL423 waveform Figure 5-22. Gain Adjustment C A U T IO N LCD Gain adjustment always must be done after 5.4.8.2 LCD RGB Offset adjustment.
PhotoPC 3100Z Revision B 5.4.8.4 LCD Blue Brightness Adjustment ADJUSTMENT METHOD PREPARATION Adjust LCD “B Bright” so that the amplitude of the CL423 waveform is VG ± 0.1 Vpp with respect to the CL423 (VG) waveform. Power switch: ON Dial switch: Communication mode ADJUSTMENT METHOD 1. Double-click on the Dsc Calibration. 2. Select “0” on the LCD “B Brightness”. VG CL423 waveform VG ± 0.1Vp-p CL421 waveform Figure 5-24. Blue Brightness Adjustment Figure 5-23.
PhotoPC 3100Z Revision B 5.4.8.5 LCD Red Brightness Adjustment ADJUSTMENT METHOD PREPARATION Adjust LCD “R Bright” so that the amplitude of the CL422 waveform becomes VG ± 0.1 Vp-p with respect to the CL423 (VG) waveform. Power switch: ON Dial switch: Communication mode ADJUSTMENT METHOD 1. Double-click on the Dsc Calibration. 2. Select “0” on the LCD “R Brightness”. VG CL423 waveform VG ± 0.1Vp-p CL423 waveform Figure 5-26. Red Brightness Adjustment Figure 5-25.
PhotoPC 3100Z Revision B 5.4.9 Firmware Upload 5.4.9.1 Firmware Upload By Adjustment program 6. Select the latest firmware and click “open”. 7. LED on the front side of the camera will blink for 20 seconds and notifies you that the upload is being normally performed. (You cannot check this LED when you removed SY1 board.) It is possible to update the firmware of camera using the Upload function of DscCalibration. The procedure is as follows. 1. Complete the setup for the adjustment.
PhotoPC 3100Z Revision B 5.4.9.2 Firmware Upload By CF Card It is possible to update the firmware of camera using the CF card,but not depending on PC. The procedure is as follows. 1. Create “firmware” folder on the PC desktop. (PC must have PCMCIA card slot.) 2. Put the firmware file in this folder. 3. Insert the PCMCIA adapter with PCMCIA CF card inserted. Adapter is defined as the removal disk. 4. Copy “firmware” folder to the root of the PCMCIA adapter, using explore. 5.
PhotoPC 3100Z Revision B 5.5 USB Storage Information Registration The USB storage information is an important information for connecting the camera with your PC by the USB interface. If the USB storage information was wrong or missed, the USB rejects the connection. Be sure to check the USB storage information and register. PREPARATION Power switch: ON ADJUSTMENT METHOD 1. Complete the setup for the adjustment. (See 5.3 Preparation for Adjustment (p80).) 2. Double-click on the DscCalDi126. 3.
CHAPTER 6 MAINTENANCE
PhotoPC 3100Z Revision A 6.1 Overview Table 6-2. Check Items PhotoPC 3100Z requires no specific maintenance (lubrication / adhesion / cleaning). No. Check Item OK / NG Camera should be cleaned according to its necessity, however, such as for dust incoming at the repairing service or fingerprint. The following table lists the check items before sending the camera back to users. 1 Check the lens viewer inside / outside if it is dirty with fingerprints etc.
CHAPTER19 7 APPENDIX
PhotoPC 3100Z Revision A 7.1 Circuit Board Connection Diagram The next page is the circuit board connection diagram.
PhotoPC 3100Z Revision A 7.2 Circuit Board Component Layout This section shows the following circuit board component layout for PhotoPC 3100Z.
PhotoPC 3100Z Revision A 7.3 Circuit Diagram This section shows the following circuit diagrams for PhotoPC 3100Z.
PhotoPC 3100Z Revision A 7.4 Exploded Diagram This section shows the following exploded diagrams.
CABINET 1 39 26 30 102 31 41 40 101 101 32 27 43 101 29 28 42 38 33 102 37 104 A 36 34 105 108 20 101 23 25 19 103 18 101 22 21 106 35 24 4 5 11 102 15 14 13 16 102 2 10 107 101 101 101 101 6 9 102 101 101 8 17 101 12 102 44 102 5 4 103 7 102 2 A 1 3 CP-920Z / PhotoPC 3100Z (1/2) 103
CABINET 2 107 101 20 21 107 101 23 107 24 26 101 101 25 107 27 101 28 22 101 19 101 101 17 107 10 101 107 101 101 15 16 107 107 14 13 29 101 9 12 101 101 11 109 107 6 101 8 110 5 109 7 110 2 3 101 4 101 1 CP-920Z / PhotoPC 3100Z (2/2) 18
PhotoPC 3100Z Revision A Table 7-1. ASP List 7.5 ASP List Ref No. Table 7-1. ASP List Ref No.
PhotoPC 3100Z Revision A Table 7-1. ASP List Ref No. Appendix Table 7-1. ASP List Description Ref No. Description 1-6 "UNIT,DIAL" 2-25 "COMPL PWB,SY-1" 1-7 "COMPL PWB,TB-2" 2-26 "COMPL PWB,TB-1" 1-8 BUTTON BACK A-SX322/JEP 2-27 HOLDER BATT.A SX321/JEP 1-9 BUTTON BACK B-SX322/JEP 2-28 HOLDER BATT. B SX321/JEP 2-1 LENZ(ASSY) 2-29 HOLDER BATT. C SX321/JEP 2-10 HOLDER CHASSIS-SX321/JEP 2-3 SPACER 2-101 SCR S-TP PAN PCS1.7X5.0 2-4 IC ICX252AK-B 2-107 SCR PAN PCS1.
PhotoPC 3100Z Revision A 7.6 Siemens Star Chart The next page is the siemens star chart used for adjustment.