Popfm.
Popinsb.fm Page B Tuesday, August 26, 1997 5:22 PM EPSON AMERICA, INC. LIMITED WARRANTY What is Covered: Epson America, Inc. (“Epson”) warrants to the first end-user customer of the EPSON PhotoPC 600 Digital Camera enclosed with this limited warranty statement, if purchased and used in the United States or Canada, conforms to the manufacturer’s specifications and will be free from defects in workmanship and materials for a period of one year from the date of original purchase.
Popfm.fm5 Page ii Tuesday, August 26, 1997 5:21 PM IMPORTANT NOTICE DISCLAIMER OF WARRANTY Epson America makes no representations or warranties, either express or implied, by or with respect to anything in this manual, and shall not be liable for any implied warranties of merchantability and fitness for a particular purpose or for any indirect, special, or consequential damages. Some states do not allow the exclusion of incidental or consequential damages, so this exclusion may not apply to you.
Poppytoc.fm Page iii Tuesday, August 26, 1997 5:34 PM Contents Attaching the Hand Strap Installing Your PhotoPC 600 Software Installing for Windows 95 or Windows NT 4.0 Installing for Windows 3.1x or Windows NT 3.
Poppytoc.
Poppytoc.
Poppytoc.
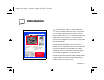
Popint.fm5 Page 1 Tuesday, August 26, 1997 5:25 PM Introduction CONTINENTAL REALTY 3521 Ojai Way Sun Park, WE 9999 (999) 888-888 NEW LISTING... ω 4 Bedroom/3 Bathroom ω Original Owner ω Dinning Room ω Excellent location ω Pool ω 2 Car Garage ω Competitive price − Near schools and park Contact Monica for an Appointment 999-888-8888 our new EPSON PhotoPC™ 600 is an advanced, easy-to-use digital camera with a built-in LCD screen.
Popint.
Popint.fm5 Page 3 Tuesday, August 26, 1997 5:25 PM Optional Accessories Minimum System Requirements EPSON offers these accessories for the PhotoPC 600: To transfer images to your computer and edit them, make sure your system meets these minimum requirements: ◗ AC adapter for use with any electrical outlet ◗ EPSON Stylus Photo Direct Print kit that allows you to print directly from the camera to the EPSON Stylus Photo printer (Check EPSON’s website for availability.
Popint.fm5 Page 4 Tuesday, August 26, 1997 5:25 PM Macintosh Systems Electronic support services (continued) ◗ Macintosh 68040 or higher or PowerPC processor ◗ ™ Service Access System Software Version 7.1 or later (System 7.5 or later is required to access optional CompactFlash card memory directly from the Macintosh.) EPSON Internet FTP Site If you have Internet FTP capability, use your Web browser (or other software for FTP downloading) to log onto ftp.epson.
Popint.fm5 Page 5 Tuesday, August 26, 1997 5:25 PM EPSON also provides technical support and information on Software Support the installation, configuration, and operation of EPSON products. Dial (800) 922-8911, (310) 782-2600 (U.S.), or (905) 709-9475 (Canada), 6 A.M. to 6 P.M., Pacific Time, Monday through Friday.
Popint.fm5 Page 6 Tuesday, August 26, 1997 5:25 PM Safety Instructions ◗ Read all of these instructions before using your camera and battery charger. Also follow all warnings and instructions marked on the camera, battery charger, and batteries. If the battery charger shows unusual signs such as noise, odor, or smoke, unplug it immediately. ◗ To avoid damage to the optics of the camera, do not expose the lens to direct sunlight for extended periods of time. ◗ Do not use the charger near water.
Popint.fm5 Page 7 Tuesday, August 26, 1997 5:25 PM ◗ Do not store the camera near sources of bright light, direct sunlight, high humidity, heat, excessive dirt or dust, or where it will be exposed to strong vibrations or magnetic fields. ◗ To prevent possible eye injury, do not take flash pictures of faces at close range. ◗ Avoid sudden temperature changes, which can cause moisture to condense on the camera. Keep the camera in a case or bag if you need to move it from a cold environment to a warm one.
Popch1.fm5 Page 1 Tuesday, August 26, 1997 4:46 PM 1 . Getting Started 1 his chapter helps you get ready to use your new PhotoPC 600.
Popch1.
Popch1.
Popch1.fm5 Page 4 Tuesday, August 26, 1997 4:46 PM Using Rechargeable NiMH Batteries Note the following when charging batteries: To help lower the cost of ownership, your PhotoPC 600 comes with four rechargeable NiMH batteries and a charger. Before you install the batteries in your camera, you may need to charge them two or three times so they are fully charged. The instructions in the following sections tell you how to charge, install, and handle batteries. ◗ Do not insert batteries backwards.
Popch1.fm5 Page 5 Tuesday, August 26, 1997 4:46 PM Follow these steps to charge your batteries: Turn the charger over and flip the two prongs out of their compartment. 3 Plug the charger into an electrical outlet. Lift up the cover of the charger and insert all four batteries, positioning the + and – ends as shown. Then close the cover firmly. + + + + 1 2 Both lights turn red, indicating that the charger is working.
Popch1.fm5 Page 6 Tuesday, August 26, 1997 4:46 PM NOTE NOTE The charger lights flash to indicate changes in battery Keep the charger terminals clean by wiping them with a dry cloth. temperature and voltage. If the charger lights continue to Make sure you charge all four batteries before you use them. If flash for more than half an hour, the batteries may be you find that your batteries run out faster after you recharge them damaged or worn out, and should be replaced.
Popch1.fm5 Page 7 Tuesday, August 26, 1997 4:46 PM 2 Push the battery cover lock down. While holding the lock, slide the battery cover to the left to open it. 3 Insert all four batteries into the compartment, positioning the + and - ends as shown below: 1 + + 4 Close the battery cover and slide it to the right until it snaps into place.
Popch1.fm5 Page 8 Tuesday, August 26, 1997 4:46 PM Handling Batteries ◗ If you need to replace your rechargeable NiMH batteries, the camera can also accept the following: Use the batteries that came with your camera only in EPSON digital cameras. ◗ Do not use manganese batteries. ◗ Rechargeable AA NiCad batteries ◗ Replace all four batteries at the same time.
Popch1.fm5 Page 9 Tuesday, August 26, 1997 4:46 PM ◗ ◗ When the camera is not used for long periods of time, remove the batteries and store them at a low temperature in a dry location. Store away from the reach of children. To avoid fire or electric shock, do not use batteries that are leaking or damaged in any way. ◗ If battery acid gets in your eyes or on your skin, immediately rinse the area with water and seek medical treatment. If a battery is swallowed, seek medical treatment immediately.
Popch1.fm5 Page 10 Tuesday, August 26, 1997 4:46 PM Installing Your PhotoPC 600 Software PhotoPC 600 comes with everything you need to transfer your pictures from the camera to your computer, organize, enhance, and share your images, and insert them into documents. You can also upload pictures and presentations into your camera.
Popch1.fm5 Page 11 Tuesday, August 26, 1997 4:46 PM Installing for Windows 3.1x or Windows NT 3.51 Follow these steps: 1 Insert the CD-ROM in your drive. 2 In the Program Manager, select Run from the File menu. 3 Type D:\SETUP. If your CD-ROM drive is not drive D, substitute the correct letter. 4 Click OK and follow the instructions on the screen. Making Software Installation Diskettes 1 You can create Image Expert installation diskettes from the CD-ROM, following the instructions below.
Popch1.fm5 Page 12 Tuesday, August 26, 1997 4:46 PM Making Macintosh Diskettes Before you start, make sure you have 8 blank, formatted diskettes. You can use either the Disk Copy 6.2 utility (you can download it from the Apple website if you don’t have it), or the DropImage program on the PhotoPC 600 CD-ROM. To use Disk Copy 6.2, double-click the file named Make Floppies and follow the instructions on the screen. The Image Expert disk image files are located in the Disk Images folder on the CD-ROM.
Popch1.fm5 Page 13 Tuesday, August 26, 1997 4:46 PM You see a message asking you to select your language. 2 Press the SELECT button. You see the Language Setting menu: 1 NOTE You can also set the camera’s clock through your computer. See Chapter 4 for instructions on connecting the camera to your computer, and page 8-6 for instructions on setting the date and time. Follow these steps to set the camera’s clock: 3 Press the SELECT button until English is highlighted.
Popch1.fm5 Page 14 Tuesday, August 26, 1997 4:46 PM 4 Press the SELECT button. The year setting is saved and the month setting is highlighted. 5 Adjust the month, day, hour, and minute settings as described above until the date and time are correctly adjusted and saved. After you finish setting the clock and press the SELECT button, your screen returns to playback mode. 6 Slide the screen switch OFF.
Popch2.fm5 Page 1 Tuesday, August 26, 1997 4:50 PM . 2 2 Taking Pictures aking pictures with PhotoPC 600 is similar to using a traditional “point and shoot” camera.
Popch2.fm5 Page 2 Tuesday, August 26, 1997 4:50 PM Getting Ready to Take Pictures Before you can take pictures with PhotoPC 600, you need to turn on the camera and check the display panel. It’s important to be aware of the camera’s power-saving features and the status of your batteries. . display panel On Turning the Camera On and Off To turn the camera on, rotate the lens cover counterclockwise.
Popch2.fm5 Page 3 Tuesday, August 26, 1997 4:50 PM Using the Display Panel The display panel shows the status of your batteries, the camera’s current settings, and the number of pictures remaining. Several factors can affect battery life, including the surrounding temperature and the type of batteries you use. Low temperatures—especially below 50 °F (10 °C)—drain your batteries faster. See page 1-4 for battery use instructions. 2 .
Popch2.fm5 Page 4 Tuesday, August 26, 1997 4:50 PM 2 Turn the camera on and wait until the status light turns green. status light viewfinder shutter button 5 Press the shutter button the rest of the way down to take the picture. 6 Hold the camera still until it beeps and the status light starts flashing red. The flashing red light indicates that the camera has captured the image and is processing it.
Popch2.fm5 Page 5 Tuesday, August 26, 1997 4:50 PM Taking Pictures With the LCD Screen The LCD screen displays the picture you took with an icon on the screen until the camera is finished processing. The screen may then be blank for a few moments before it returns to live preview. The LCD screen lets you see a live preview of what the camera’s lens sees at any moment. You can take accurate close-ups and special format pictures using the screen.
Popch2.fm5 Page 6 Tuesday, August 26, 1997 4:50 PM Using Macro Mode to Take Close-ups 3 Press the shutter button to capture the image. With the LCD screen, you can use the camera’s macro mode to take pictures as close as 8 inches (20 cm). Follow these steps: 4 To turn off macro mode, press the macro button again or turn off the camera or LCD screen. 1 2 Turn the camera on and slide the screen switch to the View position. You see a live preview on the LCD screen.
Popch2.fm5 Page 7 Tuesday, August 26, 1997 4:50 PM Forced Flash The flash goes off with every picture you take. Use this setting to compensate for backlighting; for example, when you are facing a light source. After you take a flash picture, the icon blinks until the flash is fully recharged. Your flash setting remains in effect even after you turn off the camera. Follow these steps to take a picture with the timer: 1 Secure the camera on a flat surface or on a tripod.
Popch2.fm5 Page 8 Tuesday, August 26, 1997 4:50 PM Setting Image Quality and Color Mode PhotoPC 600 has several image quality (resolution) settings: three for color pictures and two for black and white pictures. Press the image quality button on top of the camera to cycle from one setting to the other. The image quality icons appear on the display panel as shown below. Fine Produces color images at 1024 × 768 pixels, with moderate compression.
Popch2.fm5 Page 9 Tuesday, August 26, 1997 4:50 PM NOTE 2 You can switch freely between the settings and mix pictures of varying quality in the camera. The camera’s image capacity will vary accordingly. Depending on the content of your pictures, your camera may hold more than the numbers shown on page 2-8. As long as the display panel shows a number other than zero, you can continue taking pictures. The following examples show the same image captured at standard, fine, and super fine quality.
Popch2.fm5 Page 10 Tuesday, August 26, 1997 4:50 PM Taking Special Format Pictures You can take three types of special format pictures with PhotoPC 600: digital zoom, panorama, and multi-frame. To shoot these types of pictures, you use the LCD screen and the buttons around the screen, as shown: TIP You can use macro mode in combination with any of these special formats. Digital Zoom Digital zoom pictures are captured at standard image quality (640 × 480 pixels).
Popch2.fm5 Page 11 Tuesday, August 26, 1997 4:50 PM You can increase the zoom magnification rate as follows: Press … To increase the zoom rate to … Once 1.3 × Twice 1.6 × Three times 2× Four times 2.5 × Five times 3× Panorama Images in the panorama format are long and narrow, although they are not captured at a wider angle than normal images.
Popch2.fm5 Page 12 Tuesday, August 26, 1997 4:50 PM Multi-frame When you use this format, the shutter releases 9 times in rapid sequence, producing a single image composed of 9 stop-action mini pictures or frames. You can capture a complex motion, such as your golf swing, in a series of easy-to-see steps. Since each frame is low in resolution, multi-frame images are primarily for computer display. The camera captures 9 frames in a period of half a second.
Popch3.fm5 Page 1 Tuesday, August 26, 1997 4:56 PM . 3 Playing Back Photos 3 he LCD screen lets you play back your pictures oneby-one or in groups of nine at a time. In playback mode, you can also erase selected pictures and customize playback features through the LCD screen menus. You can view your pictures on a television just as easily as on the camera’s screen.
Popch3.fm5 Page 2 Tuesday, August 26, 1997 4:56 PM Using the Playback Mode The settings for this menu are displayed on the screen, as shown: When you use the LCD screen’s playback mode, you don’t have to have the camera’s lens turned on. You can save battery power by turning off the lens before you switch to playback mode. Follow these steps: 1 Slide the screen mode switch to Playback. The last photo you took appears on the LCD screen.
Popch3.fm5 Page 3 Tuesday, August 26, 1997 4:56 PM Playback Mode (one at a time or groups of 9 images). See page 3-4 for instructions. Erase Photo (erase the currently displayed picture). See page 3-6 for instructions. Photo Control (erase, lock, display memory information, or work with flash memory cards). See pages 3-6 to 3-11 and Chapter 10 for instructions. 5 When you’re finished with playback mode, slide the screen switch OFF.
Popch3.fm5 Page 4 Tuesday, August 26, 1997 4:56 PM Playing Back Multiple Pictures Thumbnail images of the last photos you took appear on the screen, with the currently selected image framed in white. You can play back your pictures in Multi mode to view small “thumbnail” versions of nine pictures at once. Make sure the screen switch is set to Playback, and follow these steps: 1 Press the SELECT button to display the screen menus.
Popch3.fm5 Page 5 Tuesday, August 26, 1997 4:56 PM 5 To switch back to displaying one picture at a time, follow steps 2 through 4 again, but choose the Normal setting on the Playback Mode menu. To move forward or back through the photos manually, press the or button. To pause the slide show at a particular photo, press the SELECT button. Press SELECT again to resume the slide show. Playing Your Pictures as a Slide Show 4 You can use the LCD screen to display your pictures automatically.
Popch3.fm5 Page 6 Tuesday, August 26, 1997 4:56 PM 2 Press the or Information menu. button until you see the You can also erase photos through your software when the camera is connected to your computer. For instructions, see Chapters 4 and 5. Erasing the Currently Displayed Picture 3 Press the SELECT button to turn information OFF. You can press it again to turn information back on. 4 To save your setting, press the BACK button. You can also turn off information displayed in View mode.
Popch3.fm5 Page 7 Tuesday, August 26, 1997 4:56 PM NOTE If you try to erase a locked photo , you see a warning message. Press the BACK button to exit the Erase Image menu. See pages 3-9 to 3-11 for instructions on locking and unlocking Make sure the LCD screen is set to Playback, and follow these steps to erase pictures: 1 Press the SELECT button to display the LCD screen menus.
Popch3.fm5 Page 8 Tuesday, August 26, 1997 4:56 PM 4 Press the or or Erase All. ◗ ◗ 5 6 button to choose Select Photo If you chose Erase All, press the SELECT button. A message appears asking you to confirm that you want to erase the photos. Press the SELECT button to erase the photos; or press the BACK button to return to the Photo Control menu without erasing the photos. NOTE To cancel the selection of a photo, simply press the SELECT button again.
Popch3.fm5 Page 9 Tuesday, August 26, 1997 4:56 PM Locking Photos 3 The lock feature allows you to keep your photos from being accidentally erased. You can lock selected photos or all the photos in the camera. Press the button until the Lock mode is highlighted in orange, then press the SELECT button to enter the Lock mode.
Popch3.fm5 Page 10 Tuesday, August 26, 1997 4:56 PM 6 Press the SELECT button. A lock icon appears next to the frame number. If you want to lock other photos, use the or button to display them, then press the SELECT button to select them. Unlocking Photos After you have locked some of your pictures, you can unlock selected photos or all the photos in the camera.
Popch3.fm5 Page 11 Tuesday, August 26, 1997 4:56 PM 3 Press the button until the Lock mode is highlighted in orange, then press the SELECT button to enter the Lock mode. The following menu is displayed: 6 Press the SELECT button. The lock icon disappears from the screen. If you want to unlock other photos at the same time, use the or button to display them, then press the SELECT button to select them. 3 NOTE To cancel the selection of a photo, press the SELECT button again.
Popch3.fm5 Page 12 Tuesday, August 26, 1997 4:56 PM Playing Back Pictures on TV 3 Connect the yellow end of the cable to the video input port on the television or VCR: 4 Turn on the TV (and VCR) and switch to the correct video mode. 5 Slide the screen switch on your camera to Playback. The last picture you took appears on the TV screen. You can use all of the camera’s playback features when your pictures are displayed on TV.
popch4.fm5 Page 1 Tuesday, August 26, 1997 5:00 PM . 4 Getting Photos Into Your Computer 4 hen you’re finished taking pictures, you can connect the camera to your computer and transfer the images. Then you can use the pictures in your letters, presentations, or just about anything you create on your computer.
popch4.fm5 Page 2 Tuesday, August 26, 1997 5:00 PM ◗ When you connect the camera, make sure your system is not exposed to sources of electromagnetic interference, such as stereo speakers or the base units of cordless telephones. 2 Line up the serial connector on the cable with one of the serial ports on your computer, and insert the connector. Then tighten the screws. 3 Open the connector cover on the side of the camera.
popch4.fm5 Page 3 Tuesday, August 26, 1997 5:00 PM 4 Depending on the type of cable you have, line up either the arrow or the flat side of the cable connector with the mark on the camera’s serial port. Then insert the connector. Connecting to a Macintosh Make sure you have the long serial cable and short Macintosh adapter that came with your camera. Before you start, turn off the camera, LCD screen, and your Macintosh.
popch4.fm5 Page 4 Tuesday, August 26, 1997 5:00 PM 2 Connect the long cable to the short Macintosh adapter cable, then tighten the screws. 4 Open the connector cover on the side of the camera, as shown on page 4-2. 3 With the arrow on the cable facing up, line up the cable connector with the port on your Macintosh. Then insert the connector.
popch4.fm5 Page 5 Tuesday, August 26, 1997 5:00 PM If you’re using a Macintosh or a different version of Windows, skip to step 3. NOTE Although these instructions and the accompanying illustrations show Image Expert running under Windows 95, you can follow the same steps on a Macintosh, Windows 3.1, or Windows NT system. 1 Start Image Expert. Under Windows 95, click Start, and then point to Programs, PhotoPC 600, Image Expert.
popch4.fm5 Page 6 Tuesday, August 26, 1997 5:00 PM 3 Click View Pictures in the Camera. You see a window displaying “filmstrips” of your images. (If you see an error message instead, follow the instructions on page 4-7.) You see a Select Album window like the following: Type here if you want to rename your album. Click to start transferring your photos. Windows 4 Type here if you want to rename your album. Click Get All to transfer all the images. You can also click an individual image to select it.
popch4.fm5 Page 7 Tuesday, August 26, 1997 5:00 PM 5 Image Expert will automatically create an album (folder) for your pictures with the current date as its name. You can type your own name for the album if you want, or choose an existing album. 7 Click Open (or OK on a Macintosh) to begin transferring your pictures. A window like the following appears to show you the progress of each image.
popch4.fm5 Page 8 Tuesday, August 26, 1997 5:00 PM Follow these steps to get your camera connected correctly: 1 2 5 Make sure the camera is turned on and has not shut off automatically. If it has, turn it off and then back on again by closing and opening the lens cover. Check the cable and make sure the connections are secure. Make sure the pins inside the connector are not bent. 3 Make sure your batteries have enough power, or your AC adapter is connected. 4 Click Retry.
popch4.fm5 Page 9 Tuesday, August 26, 1997 5:00 PM Getting Images Into TWAIN Applications If you use Photoshop or other TWAIN-compliant applications, you can transfer your pictures directly into your program from the camera. Follow these steps: 1 Start your application. 2 Choose Import, then Select TWAIN Source (or Acquire, then TWAIN Select Source) from the File menu. 3 Choose PhotoPC 600 as the TWAIN source. 4 Choose Import, then TWAIN (or Acquire, then TWAIN Acquire) from the File menu.
popch4.fm5 Page 10 Tuesday, August 26, 1997 5:00 PM 6 Select the picture you want and click Get Photos to transfer the picture. Or, click Select All to transfer all the pictures. 7 Click Erase Photos if you want to remove the pictures from your camera. 8 If necessary, click Close to exit the Photo!2 screen and return to your application. You see the picture or pictures in the work area.
popch4.fm5 Page 11 Tuesday, August 26, 1997 5:00 PM 2 Click the picture you want, or click Select All. 3 Click the Export Photos button. The Save As dialog box appears: Click if you want to choose a different folder. 5 Click if you want to create a new folder. 6 Select the file type from the pull-down menu. You can choose any of the following formats: ◗ PICT (Macintosh only) ◗ JPEG ◗ Bitmap (BMP) ◗ PCX 4 Click Save. Your pictures are transferred one by one.
popch4.fm5 Page 12 Tuesday, August 26, 1997 5:00 PM 8 Here are some of the additional things you can do with EPSON Photo!2: You can now insert your pictures in documents and other projects. For instructions, see page 5-2. ◗ Select a picture and click Photo Info to display the image’s resolution and other settings, along with the date and time it was captured. What To Do If the Camera Is Not Responding ◗ Select the Folder tab and click Browse to locate and display pictures you have downloaded.
popch4.fm5 Page 13 Tuesday, August 26, 1997 5:00 PM Follow these steps to fix your camera connection: 1 6 Make sure the camera is turned on and has not shut off automatically. If it has, turn it off and then back on again by closing and opening the lens cover. 2 Check the cable and make sure the connections are secure. Make sure the pins inside the connector are not bent. 3 Make sure your batteries have enough power, or your AC adapter is connected. 4 Click Test Connection.
Popch5.fm5 Page 1 Tuesday, August 26, 1997 5:09 PM . 5 Getting Your Photos Into Documents Gardening Monthly November 1998 Cactus Fever - Focus on Echinocatus Large, round or cylindrical cacti with deep accordianlike ribbing and prominent spines comprise this group of Mexican and Southwestern U.S. natives. They vary in size and shape, but all are easy to grow and can reach 10 ft. tall and wide. Spring and summer flowers bloom in pink or yellow in a circle at the plant’s crown.
Popch5.fm5 Page 2 Tuesday, August 26, 1997 5:09 PM NOTE Although most of the instructions and illustrations in this chapter 2 Open the document where you want to use the picture. 3 Select the point where you want to place your picture. 4 Select Picture from the Insert menu. (In some applications you may need to select a different command, such as Import Picture, which is usually in the File menu.) apply to Windows 95, you can follow the same steps on a Macintosh or a different version of Windows.
Popch5.fm5 Page 3 Tuesday, August 26, 1997 5:09 PM 5 6 Locate and select the image you want to insert. In some applications you can see a preview of your picture. Click OK (or Insert, Import, or whatever command your application uses) to insert your picture. The picture appears in your document. NOTE In some applications, you can add a frame around the picture if you want to move it around on the page or resize it. In other applications, you create a frame first, and then place the picture in it.
Popch5.fm5 Page 4 Tuesday, August 26, 1997 5:09 PM Using Drag and Drop From an Album (Windows only) Or, from the Image Expert screen, click the Open Album button or select Open Album from the File menu. You see a dialog box like the following: Once you have transferred your pictures into albums, you can easily drag and drop them into documents or or other projects. NOTE Dragging and dropping an image into a document works only with OLE-2.
Popch5.fm5 Page 5 Tuesday, August 26, 1997 5:09 PM 5 Open the document where you want to use the picture. You should have both the Image Expert album and the document displayed on your screen, as shown: 8 Release the mouse button. The picture appears in your project or document. If you want to edit or modify the picture, just double-click on it to bring up the Image Expert menus and toolbar.
Popch5.fm5 Page 6 Tuesday, August 26, 1997 5:09 PM presentation. (The image will be embedded in your document, and will not be available as a separate file.) First you need to connect the camera to your computer as described in Chapter 4. Then follow these steps: 1 Double-click the camera icon your Windows 95 Taskbar.
Popch5.fm5 Page 7 Tuesday, August 26, 1997 5:09 PM To Drag and Drop a Picture Into a Document Follow these steps if you chose View images in the Camera: 1 Click OK. Your pictures appear in a strip of thumbnail images: 3 Click the picture you want to use. Without releasing the mouse button, drag the picture to your document. When your pointer is over the location where you want the picture to appear, release the mouse button. The picture is downloaded from the camera, and it appears in your document.
Popch5.fm5 Page 8 Tuesday, August 26, 1997 5:09 PM To Transfer Images Before Placing Them Follow these steps if you chose Copy all images: 1 Click OK to copy your pictures to an album named with the current date. Or, type a new name for the album and click OK. Your pictures are transferred one by one. They appear in a strip of thumbnail images, as shown on the previous page. 2 Follow steps 2 and 3 in the previous section to drag and drop a picture into a document or other project.
popch6.fm5 Page 1 Tuesday, August 26, 1997 5:13 PM . 6 Working With Photos and Albums Y Action Travel, Inc. 1357 World Drive, Torrance, CA 90509 Escape On An Affordable Outdoor Adventure! Great Summer Weekend Specials National Park Excursion ou can use Image Expert albums to organize your pictures and display or print them in various ways. On Windows systems, you can also copy an album to diskette, and use your own pictures as your screen saver or desktop wallpaper.
popch6.fm5 Page 2 Tuesday, August 26, 1997 5:13 PM Using Albums Organizing Pictures in Albums Image Expert albums provide a convenient way to access and view your pictures. Although Image Expert initially sorts your pictures by date, you can easily drag and drop images between albums to organize them by subject matter or in any way you want. Click here to change a picture’s name.
popch6.fm5 Page 3 Tuesday, August 26, 1997 5:13 PM 2 3 Select the image or images you want to move or copy. Hold down the Ctrl (Option on Macintosh) or Shift key to select multiple images. To copy images, click inside one of the selected images and hold down the mouse button. To move images, click inside one of the selected images, hold down the mouse button, and hold down the Shift key. 4 While holding down the mouse (and Shift key), drag the image(s) to the other album until it is highlighted.
popch6.fm5 Page 4 Tuesday, August 26, 1997 5:13 PM 3 Click the Camera Settings tab to display information like the following: The Page Setup dialog box appears: Click if you want to reposition your photo. 4 Click another image to view its information, or close the Properties box. Printing an Image You can print your picture enlarged or actual size, and add a title or footer to the page. Follow these steps: 1 Open the image you want to print. 2 Click the Page Setup button Setup from the file menu.
popch6.fm5 Page 5 Tuesday, August 26, 1997 5:13 PM 3 Set any of the following options and click OK: Printing an Album ◗ You can print a contact sheet containing thumbnail images of all the pictures in your album, or you can set the number of pictures printed on each page. You can also add a page title or footer, and print identifying information for each picture. Follow these steps: ◗ Click Fit to Page if you want to stretch your picture to fill the page.
popch6.fm5 Page 6 Tuesday, August 26, 1997 5:13 PM 3 Set any of the following options and click OK: ◗ 4 If you choose Print Images, you can set the number of images you want printed on each page. ◗ Select a label for the images. You can select from combinations of name, date, and time, or select none. ◗ Type in a title for the top of the page. ◗ Choose what you want to appear at the bottom of the page from the Page Footer list.
popch6.fm5 Page 7 Tuesday, August 26, 1997 5:13 PM Displaying Albums as Slide Shows 4 When you display an album as a slide show, you can have it play automatically with various transition effects between images. Follow these steps: 1 Open your album. 2 Click the Slide Show button or select Slide Show from the View menu. If you want to change the appearance of your slide show, click the Options button.
popch6.fm5 Page 8 Tuesday, August 26, 1997 5:13 PM ◗ ◗ To hide the titles of your pictures, click Show Titles to deselect it. ◗ 6 If you only want to include some of your images, select the images you want to add. To select more than one image, hold down the Ctrl or Shift key. To play the slide show only once, click Continuous Repeat to deselect it. 3 Select Save to Floppy from the File menu. You see the following dialog box: 4 Make sure your floppy drive appears in the Copy images to: box.
popch6.fm5 Page 9 Tuesday, August 26, 1997 5:13 PM 6 If you want to copy the whole album click Selected Images Only to deselect it. close stop options play NOTE If your album is too large for one diskette, you can copy it to See page 6-7 for instructions on setting slide show options. multiple diskettes. When you copy the files to another computer, the album will be in one piece again. You can also use Zip™ disks or other large-format storage media.
popch6.fm5 Page 10 Tuesday, August 26, 1997 5:13 PM 3 Click Yes. Windows will play a slide show of your album whenever your system is idle. NOTE The screen saver slide show doesn’t include controls. If you want to change the way your pictures are displayed, you have to use Click to remove existing wallpaper. the screen saver settings in your Control Panel. See your Windows documentation or Help system for more information.
popch6.fm5 Page 11 Tuesday, August 26, 1997 5:13 PM Sending Pictures by E-mail You can send a picture directly from Image Expert if your e-mail application complies with the MAPI (messaging application programming interface) standard. For example, you can use Inbox or Microsoft Exchange. You need to set up Microsoft Exchange to work with your Internet service. Click to configure your Internet service for Microsoft Exchange.
Popch7.fm5 Page 1 Tuesday, August 26, 1997 5:15 PM . 7 Editing Images ou can edit your images to enhance their appearance, crop, rotate, and resize them, or create special effects. This chapter describes the following Image Expert features you can use to modify your images: Y W.C.
Popch7.fm5 Page 2 Tuesday, August 26, 1997 5:15 PM Viewing and Selecting When your image is displayed in an album, you can rotate it or do a quick fix. However, to use any other editing features, you need to open the image by double-clicking it or selecting Open Image from the File menu. Before you edit your image, you may want to use the Zoom and selection tools on the left side of your screen.
Popch7.fm5 Page 3 Tuesday, August 26, 1997 5:15 PM If you don’t like the results, simply select Undo Quick Fix from the Edit menu. (If you Quick Fix an image displayed in an album, you can’t undo it.) Click the tabs at the top of the screen to make these kinds of corrections: ◗ For adjusting the amount of light in your image and the difference between light and dark areas. Correcting To fine-tune an image, click the Corrections tool or choose Corrections from the Image menu.
Popch7.fm5 Page 4 Tuesday, August 26, 1997 5:15 PM The preview window shows your image with the original view on the left and the corrected image on the right. If you want to adjust the division between the original and edited image, click and drag the triangle below the image. You can also zoom in on your image to see more detail. ◗ Click Apply to make your changes on the current “tab.” Your edited image becomes your new original and the slide indicators move to the center of the range.
Popch7.fm5 Page 5 Tuesday, August 26, 1997 5:15 PM Resizing and Changing Resolution You can resize your image in two ways: changing the printed size, or changing the image size in pixels. You can also change the resolution or image quality. Click the tab if you want to change the image size in pixels. You see a dialog box like the following: Choose Resize from the Image menu. You see a dialog box like the following: 7 These settings work together: if you change one, the others also change.
Popch7.fm5 Page 6 Tuesday, August 26, 1997 5:15 PM ◗ To make an image smaller, you can simply change its physical size. The resolution automatically increases. A rectangular outline of your image and an arrow appear, as shown: Rotating You can click the Rotate tool to quickly rotate a picture to the right. (If you rotate an image displayed in an album, you can’t undo it.) For more options, select Rotate from the Image menu.
Popch7.fm5 Page 7 Tuesday, August 26, 1997 5:15 PM Flipping Click the tabs at the top of the screen to add these effects: You can reverse your image by selecting Flip Horizontal from the Image menu. This is useful for printing T-shirt transfers. Select Flip Vertical to turn your image upside down. ◗ For an underwater effect. You can create whirlpool effects or just a slight distortion. ◗ Glass blocks You can change the number and size of the blocks.
Popch7.fm5 Page 8 Tuesday, August 26, 1997 5:15 PM The preview window shows your image with the original view on the left and the distorted image on the right. If you want to adjust the division between the original and filtered image, click and drag the triangle below the image. You can also zoom in on your image to see more detail. Changing the Number of Colors To convert the color format of your image, select Number of Colors from the Image menu.
Popch8.fm5 Page 1 Tuesday, August 26, 1997 5:17 PM . 8 Using Custom and Advanced Features hen the camera is connected to your computer, you can take pictures with a live preview on your computer screen to help you frame each shot. You can also set the camera’s clock and adjust a number of other settings from your computer. To further customize your camera’s operation, you can use the Camera Settings menus on the LCD screen.
Popch8.fm5 Page 2 Tuesday, August 26, 1997 5:17 PM You see a dialog box like the following: NOTE If you have the optional AC adapter, you can save on batteries by using it when you connect the camera to your computer. The AC Click to capture the image you see. adapter should be available where you bought your PhotoPC 600, or you can order it from EPSON. See page A-1 for more information.
Popch8.fm5 Page 3 Tuesday, August 26, 1997 5:17 PM 6 Click Continuous Update to activate the live preview feature. The image you see is updated every 8 to 10 seconds, depending on your connection speed. You may need to move the camera or your subject until you see the image you want to capture. 7 When your shot is ready, click Take Picture. The image is captured and processed. 8 Click Close when you’re finished taking pictures from your computer.
Popch8.fm5 Page 4 Tuesday, August 26, 1997 5:17 PM 2 3 Enter a number for the delay period you want to use. You can set up to a 99-second delay. Click Start/Stop to start the countdown and take the picture. The red timer light on the camera remains on for the delay period you entered. Then the light flashes rapidly for 2 seconds and the shutter is released. The camera beeps and processes your picture. Setting the Shutter Speed Most of the time, PhotoPC 600 adjusts the shutter speed automatically.
Popch8.fm5 Page 5 Tuesday, August 26, 1997 5:17 PM 3 Click Start to display the live preview. You can click the Mode, Flash, Self Timer, and Macro buttons on the screen to adjust these settings just as you would by using the buttons on the camera. For more information, see Chapter 2. 4 5 Adjusting Camera Settings From Your Computer You can use either Image Expert or EPSON Photo!2 to change the following camera settings: ◗ Time When your shot is ready, click Take a Picture.
Popch8.fm5 Page 6 Tuesday, August 26, 1997 5:17 PM 3 Start Image Expert an described on page 4-4. 4 Click the Camera Setup button to display the Camera Setup dialog box, as shown below: ◗ ◗ Enter a new Camera ID if you want to change the default. This might be useful if you have more than one camera and you want to be able to have its ID recorded in your picture data. Type in the Computer Time and Camera Time boxes to change the time and date of either one.
Popch8.fm5 Page 7 Tuesday, August 26, 1997 5:17 PM Changing Settings With EPSON Photo!2 ◗ Select another port if you want to change your connection. In most cases, it is best to leave the Port setting at Auto because EPSON Photo!2 can detect the camera connection automatically. ◗ Select a different communication speed. EPSON Photo!2 automatically chooses the fastest speed that works with your system. This may actually be too fast for the configuration of your port.
Popch8.fm5 Page 8 Tuesday, August 26, 1997 5:17 PM Enter new values for the settings, or click Copy from Computer to have your camera automatically synchronized to your computer. Click OK to return to the Setup dialog box. ◗ ◗ Enter a new Auto Shut-off Time if you want to change this setting. This is the idle period after which the camera turns off automatically when it is not connected to your computer.
Popch8.fm5 Page 9 Tuesday, August 26, 1997 5:17 PM 3 Press the menu: or button until you see the Settings Setting the Camera Clock Follow these steps to set the date (year, month, day) and the time (hour and minute). 1 4 Follow the instructions below for the settings you want to change. 5 When you’re finished adjusting settings, press the BACK button to return to normal playback or view mode. With the Settings menu selected, press the SELECT button.
Popch8.fm5 Page 10 Tuesday, August 26, 1997 5:17 PM 5 6 Press the button to increase the number, or the button to decrease the number, until the item you want to adjust is correct. Then press the BACK button to save the setting. The item turns orange. Repeat steps 3 to 5 until the date and time are correctly adjusted and saved. Press the BACK button again to return to the Camera Settings menu. 3 Press the SELECT button to select ON or OFF. The current selection is highlighted.
Popch8.fm5 Page 11 Tuesday, August 26, 1997 5:17 PM Setting the Multi-frame Shooting Time Uploading Programs into the Camera You can use the Settings menu to adjust the total time the camera takes to shoot nine frames in the multi-frame format. See page 2-12 for more information about this special format. By uploading new programs into the camera, you can add unique functions to your PhotoPC 600.
Popch9.fm5 Page 1 Tuesday, August 26, 1997 5:19 PM . 9 Using Your Camera for Presentations ou can connect your camera to a multimedia projector or television and show not just photos, but also text and graphics. The EPSON Photo File Uploader lets you transfer images from your computer to your camera. Anything you can display on your computer screen can be captured, converted, and uploaded.
Popch9.fm5 Page 2 Tuesday, August 26, 1997 5:19 PM Uploading Existing Images From Your Windows PC Before you start, make sure the camera is connected to your computer, and both the computer and the camera are turned on. Then follow these steps: 1 Start the EPSON Photo File Uploader program. In Windows 95, click Start, and then point to Programs, PhotoPC 600, EPSON Photo File Uploader. You see a screen like the one on the right.
Popch9.fm5 Page 3 Tuesday, August 26, 1997 5:19 PM As you select files, they appear in the Selected Files List in the order they will be uploaded, as shown on page 9-3. This determines the sequence in which you can display the images. 5 ◗ To rearrange the uploading order, select the image you want to reorder, then click the ↑ or ↓ sort arrow. ◗ If you want to change your selection, click the
Popch9.fm5 Page 4 Tuesday, August 26, 1997 5:19 PM 7 Click Select All to select all the images, or select individual images by clicking the thumbnails in the image selection window. 8 Click Upload Photos. The Upload Photos dialog box appears. 9 Click Camera to upload the images to your camera, or click Compact Flash Memory Card to upload to a memory card installed in your computer’s PCMCIA drive; then click OK. The images are uploaded to the destination you selected.
Popch9.fm5 Page 5 Tuesday, August 26, 1997 5:19 PM If you want to preview a selected image and confirm its size, click the Preview checkbox. It takes a few seconds longer to select images with previews displayed. When you finish selecting image files, click Done to close the Select Files dialog box. The selected images appear in the Selected Files List in the order they will be uploaded. This determines the sequence in which you can display the images.
Popch9.fm5 Page 6 Tuesday, August 26, 1997 5:19 PM Converting Presentations 2 If you want to upload a presentation or document that is not saved as a standard image file, you can make a “screen capture” of your computer desktop with the file open. This lets you turn any document or presentation into a series of image files that you can convert and upload to the camera or to a memory card. Click the Screen Capture tab.
Popch9.fm5 Page 7 Tuesday, August 26, 1997 5:19 PM If you need to create a new folder for the images, click the New Folder button. 4 5 6 Specify the key combination you want to use for screen captures in the Hot Key setting box. Click the ALT, CTRL, or SHIFT checkbox, then select a key from the hot key list. The default hot key is F5. Click Start to activate the key combination. When the key combination is activated, the Start button changes to a Stop button.
Popch9.fm5 Page 8 Tuesday, August 26, 1997 5:19 PM Capturing Macintosh Screens NOTE EPSON Photo File Uploader for the Macintosh does not have a screen capture feature. However, you can make screen shots using your Macintosh system software, then use EPSON Photo File Uploader to upload the screen captures to your camera. The procedure may be different depending on your Macintosh. See your computer manual for detailed instructions on making screen shots.
Popch9.fm5 Page 9 Tuesday, August 26, 1997 5:19 PM Projecting Your Presentation You can display the uploaded images on a multimedia projector, television, or other video output device. Use the video cable that came with your PhotoPC 600. Follow these steps: 1 Make sure your camera and video projector are turned off. 2 Open the camera’s connector cover and connect the black end of the video cable to the Video Out port as shown below: 4 Turn on the video projector and switch it to video mode.
Popch10.fm5 Page 1 Tuesday, August 26, 1997 4:47 PM . 10 Using CompactFlash Memory Cards ou can use ATA-compatible CompactFlash memory cards (4MB and up) to increase the storage capacity of your PhotoPC 600 camera. You can copy photos from your camera to the card (and vice versa). Y It’s easy to install and remove memory cards from your camera. If your desktop or laptop computer has a Type II PCMCIA card slot, you can access images directly by using an optional PCMCIA adapter.
Popch10.fm5 Page 2 Tuesday, August 26, 1997 4:47 PM CompactFlash cards increase the camera’s picture storage capacity as shown in the table below. Each card adds the number of pictures shown to the number of pictures in the camera’s internal memory.
Popch10.fm5 Page 3 Tuesday, August 26, 1997 4:47 PM Removing a Memory Card CAUTION Make sure the camera and the LCD screen are turned off. Then follow these steps: Never remove the card while the camera is accessing it. Data in 1 extremely hot or humid. the card may be lost or damaged. Avoid using or storing the card in dusty places, in direct sunlight, or in places that become Slide the switch on the bottom of the camera to eject the memory card.
Popch10.fm5 Page 4 Tuesday, August 26, 1997 4:47 PM Using a PCMCIA Adapter Transferring Photos Follow these steps to use an adapter: Once the adapter and card are installed in your computer’s PCMCIA slot, you can transfer photos by simply copying them to your hard drive. This is the fastest way to get pictures into your computer.
Popch10.fm5 Page 5 Tuesday, August 26, 1997 4:47 PM With the memory card installed in the camera, follow these steps: 1 2 3 Set the screen switch to Playback. If you haven’t used the memory card, you may see the following message: 4 Press the or highlighted. 5 This applies to the memory card only, and does not indicate whether you have photos in the camera’s internal memory. Press the SELECT button.
Popch10.fm5 Page 6 Tuesday, August 26, 1997 4:47 PM Getting Memory Information 3 You can use the Photo Control menu to get information on the number of pictures taken and remaining in your camera’s internal memory and on an installed memory card. Make sure the screen switch is set to Playback and follow these steps: 1 2 10-6 Using CompactFlash Memory Cards total photos you can store at current image quality number of photos you can take Press the SELECT button to display the LCD screen menus.
Popch10.fm5 Page 7 Tuesday, August 26, 1997 4:47 PM Copying to and From a Memory Card 3 Press the or button until Copy is highlighted in orange, then press the SELECT button to enter the Copy mode. The following menu is displayed: 4 Press the or button to copy photos from the camera to the card, or from the card to the camera. 5 Press the SELECT button, then press the or button to move forward or back through the images in the camera until the photo you want to copy appears on the screen.
Popch10.fm5 Page 8 Tuesday, August 26, 1997 4:47 PM NOTE To cancel the selection of a photo, simply press the SELECT button again. If you select more photos than the card or camera can hold, an error message appears. 7 When you have selected all the photos you want to copy, press the BACK button. A message appears asking you to confirm your selections. 8 Press the SELECT button to copy the images and return to the Photo Control menu. 9 Press BACK until you return to playback mode.
Popch11.fm5 Page 1 Tuesday, August 26, 1997 4:48 PM . 11 Maintenance and Troubleshooting our PhotoPC 600 camera is easy to take care of, and any problems you may have are easy to solve. This chapter includes the following sections: Cleaning the Camera and Battery Charger ◗ Y ◗ Use a clean, dry cloth to wipe the camera free of dust. ◗ Use a damp cloth for cleaning the battery charger. Caring for the camera and battery charger ◗ Unplug the battery charger before cleaning.
Popch11.fm5 Page 2 Tuesday, August 26, 1997 4:48 PM ◗ If necessary, clean the battery contacts with a dry cloth. ◗ In areas of excessive dirt or dust ◗ If the LCD screen gets fingerprints or smudges on it, use a soft, damp cloth to lightly wipe the screen. ◗ Where it will be exposed to strong vibrations or magnetic fields Storing the Camera Solving Camera Problems ◗ Keep the lens covered (power turned off) and store the camera in a carrying case or bag when you’re not using it.
Popch11.fm5 Page 3 Tuesday, August 26, 1997 4:48 PM You can’t take a picture with the camera. ◗ The flash may be recharging. Wait until the status light turns green, and try again. ◗ The camera may be full. Check the picture counter on the display panel. Erase some pictures (see Chapter 3), or transfer the pictures to your computer and then erase them (see Chapter 4). Or, install a CompactFlash memory card to store more pictures (see Chapter 10). ◗ The camera may be connected to your computer.
Popch11.fm5 Page 4 Tuesday, August 26, 1997 4:48 PM The “pictures remaining” number on the display panel ◗ Check the port setting in your Windows Control panel. You may need to set your port to a faster speed, lower the FIFO buffer size (advanced serial port configuration), or adjust the speed in your software. See Chapter 8 for more information. ◗ If you’re using a Macintosh and the camera is sharing a serial port with another device, make sure AppleTalk is turned off.
Popch11.fm5 Page 5 Tuesday, August 26, 1997 4:48 PM ◗ Check the serial port settings in your Image Expert or EPSON Photo!2 software. You may need to change the Port and Speed serial connection settings to Auto. ◗ Increase the memory allocation for your word processor or other application. (Select the application and choose Get Info from the File menu.) ◗ Avoid opening or working with other software applications while the camera and computer are communicating.
Popch11.fm5 Page 6 Tuesday, August 26, 1997 4:48 PM You get an error message when you use the Image Expert Your notebook computer can’t access a memory card. Save to Floppy feature. ◗ ◗ Make sure the diskette you’re using is not writeprotected. You get a TWAIN error message when you try to transfer If you’re using an IBM Thinkpad,™ you need to adjust your port setting. In the Windows Control Panel (System Device Manager), change the Global Settings for your PCMCIA port to Auto.
Popch11.fm5 Page 7 Tuesday, August 26, 1997 4:48 PM Solving Picture Problems The colors in your picture don’t look right. If you’re not satisfied with some of the pictures you get from the PhotoPC 600, you may need to adjust some of the camera settings. Read the suggestions below. ◗ Your pictures display poor image quality on the screen or When you take pictures under certain artificial lighting conditions, the colors may be slightly distorted.
Popch11.fm5 Page 8 Tuesday, August 26, 1997 4:48 PM ◗ When you focus on a nearby object, your picture’s background may appear blurry. Try changing your focus. ◗ If you’re facing a bright light source, you may need to shoot your picture from a different angle. ◗ Use Image Expert to adjust the picture’s brightness as described on page 7-3. Your picture is too dark (underexposed). ◗ You may need to use the flash. Make sure the setting is not flash off.
Popch11.fm5 Page 9 Tuesday, August 26, 1997 4:48 PM Your pictures don’t look as good as they used to. ◗ Your camera’s lens may be dirty or dusty. Try cleaning it by following the instructions on page 11-1. The area captured in the photo is different from what you saw in the viewfinder. ◗ Make sure you look straight through the viewfinder. Keep in mind that the area visible through the viewfinder is slightly smaller than the area captured in the photo.
Popapa.fm5 Page 1 Tuesday, August 26, 1997 4:44 PM A Optional Accessories Y ou can use the PhotoPC 600 with a variety of options. To save battery power, you can use the AC adapter. For portraits or other studio photographs, you can attach a tripod to your camera. You can also get replacement NiMH batteries or a replacement NiMH Power Pak. AC adapter, and cable for connecting your camera to the printer.
Popapa.fm5 Page 2 Tuesday, August 26, 1997 4:44 PM Accessory Product code PhotoPC 600 AC adapter B867038 EPSON Stylus Photo Direct Print Kit A883191 NiMH Battery Pak B818061 NiMH Power Pak B818051 Using the AC Adapter To avoid losing any images or settings, make sure the camera is finished processing. Turn the camera off before you connect or disconnect the AC adapter. Then follow these steps: 1 Open the connector cover on the side of the camera.
Popapa.fm5 Page 3 Tuesday, August 26, 1997 4:44 PM Using a Tripod You can use your PhotoPC 600 with any standard tripod. Follow these steps: 1 Assemble and set up the tripod by following the manufacturer’s instructions. Make sure the tripod is well-balanced on a flat surface. 2 Find the opening for the tripod screw on the bottom of your camera. Carefully place the camera on the tripod. Screw the camera on until it is firmly in place. 3 Adjust the tripod to view your subject as desired.
Popspecs.fm5 Page 1 Tuesday, August 26, 1997 5:34 PM B Specifications Camera Power Sources Width 5.6 in (142.5 mm) 4 AA batteries (single-use alkaline or lithium or rechargeable NiCad or NiMH) Height 2.75 in (69.8 mm) Optional AC adapter (B867038) Depth 1.9 in (48.8 mm) Weight 0.
Popspecs.
Popspecs.fm5 Page 3 Tuesday, August 26, 1997 5:34 PM Photographic Lens f = 5 mm F2.
Popspecs.fm5 Page 4 Tuesday, August 26, 1997 5:34 PM NiMH Battery Charger Optional AC Adapter Physical Dimensions Physical Dimensions Width 3.0 inches (76 mm) Width 1.97 inches (50 mm) Height 4.41 inches (112 mm) Height 1.18 inches (30 mm) 1.85 inches (47 mm) including pins Depth 0.87 inches (22 mm) Depth 3.74 inches (95 mm) Weight Approximately .24 lb (110 g) Technical Technical Input 120V AC, 60 Hz Output DC 1.
Poppyix.
Poppyix.
Poppyix.
Poppyix.
Poppyix.
Poppyix.
Poppyix.
Poppyix.