
Specifications


Getting Photos Into Your Computer
4-13
A
B
4
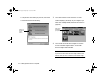
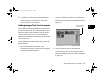
Here are some of the additional things you can do with
EPSON Photo!2:
◗ Select the
Folder
tab and click
Browse
to locate
and display pictures you have downloaded. You can
then select a picture and click
Upload Photos
to
transfer a picture from your computer to the camera
or an optional memory card. See Chapter 9 for
more information.
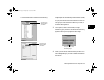
◗ Select the
Controls
tab to change camera settings
or view a live preview and take pictures from your
computer. See page 8-4 for more information.
◗ Set the camera’s date and time from the
Setup
tab,
or change your computer connection settings. See
pages 8-7 to 8-9 for more information.
8 Click
Close
to exit EPSON Photo!2.
You can now insert your exported pictures in documents and
other projects. For instructions, see page 5-2.
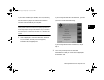
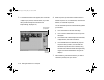
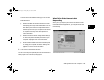
What To Do If the Camera Is Not
Responding
When you try to acquire pictures from the camera or start
the EPSON Photo!2 application, you may see a screen like
the following:
Popch4.fm5 Page 13 Friday, May 15, 1998 2:54 PM