
User`s guide

PowerRIP 2000 Manual
iProof Systems, Inc.
12
Printing to PowerRIP 2000 from most Windows appli-
cations is simple. Select the PowerRIP 2000 printer in
the print dialog of your applications, select settings for
resolution, paper type, etc., and click Print. The appli-
cation builds the PostScript file in the directory that the
PowerRIP 2000 printer specifies. PowerRIP 2000
processes that file and then sends the raster image data
to the queue printer “BGXXx”, which in turn sends it
through the corresponding LPT, network or similar
port.
This section will show you the basics of printing to
PowerRIP 2000. For an in-depth discussion of printing
from applications such as QuarkXPress, PageMaker
etc., refer to the Read Mes on the iProof Systems web
site and/or on your PowerRIP 2000 CD. These files are
all in Acrobat PDF format. You must have Acrobat
Reader installed on your computer to view these files.
For this discussion WordPad will be used since it is
generally found on most Windows systems.
Printing from stand-alone workstation
running Windows 2000
Note: It is assumed that a WordPad file is on the screen
and ready to be printed.
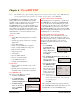
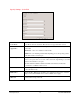
1. Go to File>Print. The Print dialog will display.
2. General tab
Select your PowerRIP printer in the Select Printer
portion of the dialog.
3. Layout tab
Select the appropriate orientation.
4. Paper/Quality tab
Click the Advanced button.
The Advanced Options dialog will display.
Note: The available options are dependent on your
printer. Not all options are available on all
printers.
Advanced Options allows you to select a variety of
options for printing. A complete discussion of all
the options can be found in Chapter 9.
Select the appropriate Resolution or Print Mode
and Paper Type. If a resolution has
xx
x
next to it,
then that resolution is not available for the current
features selected in Advanced Options.
Click OK. Click Print.
PowerRIP 2000 will automatically launch and start
processing the file if it is installed on the startup
drive. If PowerRIP 2000 is installed on a drive
other than the startup drive, you will have to manu-
ally launch PowerRIP 2000.
Printing from stand-alone workstation
running Windows 98
Note: It is assumed that a WordPad file is on the screen
and ready to be printed.
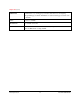
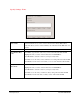
1. Go to File>Print. The Print dialog will display. In
the printer Name field select your printer.
2. Click Properties
Note: The available properties are dependent on
your printer. Not all properties are avail-
able on all printers.
The PowerRIP 2000 Properties dialog will dis-
play. This dialog allows you to select a variety of
options for printing. A complete discussion of all
the options can be found in Chapter 9.
3. Paper tab
Select the appropriate Paper Size and Orientation.
4. Graphic tab
For those printers that use Print Mode skip step 4
and proceed to step 5.
Select the appropriate Resolution. If a resolution
has
x
x
next to it, then that resolution is not avail-
able for the current features selected.
5. Device Options Tab
Device Options allows you to select a variety of
options for printing. A complete discussion of all
the options can be found in Chapter 9.
Select the appropriate Paper Type and Print
Mode.
Click OK. Click OK.
PowerRIP 2000 will automatically launch and start
processing the file if it is installed on the startup
drive. If PowerRIP 2000 is installed on a drive
other then the startup drive, you will have to manu-
ally launch PowerRIP 2000.
Chapter 3 - Printing to PowerRIP 2000