
User`s guide

PowerRIP 2000 Manual
iProof Systems, Inc.
13
Printing from stand-alone workstation
running Windows NT 4
Note: It is assumed that a WordPad file is on the screen
and ready to be printed.
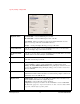
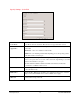
1. Go to File>Print. The Print dialog will display. In
the printer Name field select your printer.
2. Click Properties.
Note: The available properties are dependent on
your printer. Not all properties are available
on all printers
The PowerRIP 2000 Properties dialog will dis-
play. This dialog allows you to select a variety of
options for printing. A complete discussion of all
the options can be found in Chapter 9.
3. Page Setup tab
Select the appropriate orientation.
4. Advanced tab
Select the appropriate Paper Size. Select the appro-
priate Resolution or Print Mode depending on
your printer.
Click OK. Click OK.
PowerRIP 2000 will automatically launch and start
processing the file if it is installed on the startup
drive. If PowerRIP 2000 is installed on a drive
other then the startup drive, you will have to manu-
ally launch PowerRIP 2000.
Printing from a Macintosh Client to a
PowerRIP 2000 PC Server
To print from a Macintosh client to a Windows
PowerRIP 2000 server you must be running under
Windows NT Server 4.0 with Services for Mac
installed or Windows 2000 Server.
Installing PC PPDs on the Macintosh
Note: For the purpose of this discussion it is assumed:
1. That PowerRIP 2000 is installed on the PC server.
2. The PC will hence forth be considered the Server
for this discussion.
3. That the Macintosh and PC are on a network and
that the Macintosh can see the PC in the Chooser.
4. The Macintosh will hence forth be considered the
client for this discussion.
If you are going to print to a PC server from a
Macintosh client you must copy the appropriate
Windows PPD to the Macintosh. If you are using
an NT server, Services for Mac must be installed.
When PowerRIP 2000 is installed on your hard
drive a folder called PPD is also installed in that
folder. To copy the Windows PPD to your
Macintosh Operating System do the following:
1. Go to your Chooser.
2. Highlight AppleShare. The name of your PC serv-
er should display on the right side of the Chooser
dialog under Select a file server:
Note: If you cannot see the server then you can go
no further. Check your network to discover
why you cannot see the server. Check to
make sure you have rights to access the serv-
er. If the server is an NT system make sure
that Services for Mac have been installed.
3. Highlight the server name.
Click OK.
4. The Connect to File Server dialog will display.
Select Registered User. Type the appropriate
Name and Password if applicable.
Click Connect.
5. A dialog will display allowing you to select the
drive that PowerRIP 2000 is installed on.
Highlight the drive and click OK. Close the
Chooser. The drive you selected will be mounted
on the Macintosh desktop.
6. Open the PC hard drive mounted on your
Macintosh. Navigate to the PowerRIP 2000 folder
and open it. Open the PPD folder. Highlight the
appropriate PPD for your printer. Note: Do not
select the SPD.
7. Go to Edit and select Copy.
8. Go to your Macintosh System Folder>
Extensions>Printer Descriptions. Open the
Printer Descriptions folder. Do an Edit> Paste.
The PC PPD will copy to your Printer Description
folder.
You are now ready to print from the Macintosh client to
the PC server. You can use either LaserWriter or
AdobePS to Print to the server.