
User`s guide

PowerRIP 2000 Manual
iProof Systems, Inc.
15
PowerRIP PDF is the ideal utility for creating high
quality, platform independent PDFs. You can take
advantage of all your applications’ various features and
attributes, combined with the feature intensive
PowerRIP 2000, giving you complete flexibility to cre-
ate PDFs that meet your particular needs. These PDFs
being small in size and platform independent can be
viewed on both the Macintosh or PC, can be used as e-
mail attachments, or web site documents, and are
“print-ready” PDFs.
Features
• Creates PDFs using all applications’ document
settings
• Select the appropriate resolution for your high
quality needs
• Creates Mirror Images
• Creates composite PDFs from separations
• Creates separation PDFs from composites
• Embeds fonts in the PDF
• Image Compression
• Auto Rotation
• Preserves OPI Comments
• Preserves Overprint Settings
• Color Calibration Control
• Complete Color Management
Requirements
• At least 1 GB of free hard drive space on the
startup drive.
• Optional Adobe Acrobat Reader 3.0 or later to
view PDFs on PC. Acrobat 4.0 recommended.
PowerRIP PDF Setup
The Setup to create PDFs is as follows:
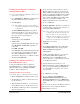
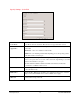
1. Launch PowerRIP 2000.
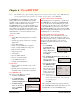
2. Go to Inputs/Folder
Scanners. The Folder
Scanner Configuration dialog will display.
3. In Printer Settings
make sure Destination
Printer is PDF File.
Click OK.
Note: The installation procedure and dialogs displayed are predicated on the revision of PowerRIP PDF, and
your Operating System. Not all features are available on all revisions of PowerRIP PDF.
Creating a PDF using PowerRIP PDF
When printing from your application, you will select
PowerRIP PDF as your printer. PowerRIP 2000 will
process the file and create the PDF using the options
you selected in the Properties portion of the Print dia-
log. The PDF will be created and saved in a folder
called PDFOut. PDFOut was created when PowerRIP
2000 was installed. The PDFOut folder can be found in
the DIGIS folder on your hard drive.
Creating a PDF from a PostScript file
Some applications, such as FreeHand, send header
information along with the PostScript file which can
cause PostScript errors unless you Print to File. For this
discussion a file called jacket.ps was created in
FreeHand using Print to File and saved to a folder
called Print.
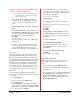
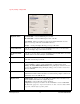
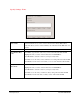
1. Go to File/Print
PostScript File. The
Open dialog box will
display. Highlight the
PostScript file you want to convert to a PDF.
Click Open.
2. The Configure Document Specs dialog will dis-
play. In the Printer
pull-down make sure
that PDF File is selected.
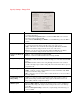
3. Click Specify Settings.
The PDF File Setup
dialog will display.
Select the appropriate
features in the Output,
Images, Color, Fonts,
and Separations tabs.
Note: A description of
all the features in the Output, Images, Color,
Fonts, and Separation tabs can be found on
the following pages.
Click OK.
The Configure Document Specs dialog will redis-
play. Click OK. The PostScript file will process and
the PDF will be saved in the PDFOut folder.
Chapter 4 - PowerRIP PDF