
User`s guide

PowerRIP 2000 Manual
iProof Systems, Inc.
6
Installing PowerRIP 2000 Software (Server/Standalone)
Note: The installation procedure and dialogs displayed are predicated on the printer you are installing, revision of
PowerRIP 2000, and your Operating System. Not all features are available on all printers or on all revi-
sions of PowerRIP 2000.
1. Turn on your computer. If it is already on, check
the TaskBar to make sure that you have no appli-
cations running. If you do, exit them.
2. Insert the PowerRIP 2000 CD into your CD-ROM
drive. If auto-play is enabled, the PowerRIP 2000
Install splash screen will appear. If the splash
screen does not appear, open My Computer on
your Windows Desktop, then open the CD-ROM.
Double-click on the file named “Setup.exe.” Click
once on PowerRIP 2000.
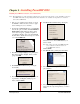
3. The Choose Setup Language dialog will display.
This dialog defaults to English. Select your lan-
guage. Click OK.
4. The Install Shield Wizard dialog will display
momentarily.
5. The Select Location dialog will display. This dia-
log defaults to US English (default page size
Letter). Click Continue.
6. The Please Select Version dialog will display.
Select the revision of PowerRIP 2000 that you
wish to install.
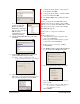
Note: The gold seal on the PowerRIP 2000 CD
sleeve will tell you which revision on
PowerRIP 2000 you have.
Click Continue.
7. The Welcome dialog will display. Click Next.
8. The Software License Agreement dialog will dis-
play. Click Yes.
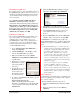
9. The Select Components dialog will display. You
must select the components (printers) you wish to
install.
Chapter 2 - Installing PowerRIP 2000