
User`s guide

32
Create the printer entity
Now that we have the hot folder configured, lets create a
print manager entity wich, when printed to, will deposit
PostScript files into this newly created folder.
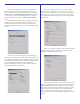
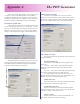
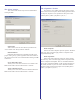
If not already opened, open the “Configure Inputs” dialog
by clicking the “Inputs” button on the main dialog. Click the
“Configure PowerRIP Printer Entities” tab. The dialog will
appear
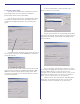
Click Add. A dialog will appear asking you for the name of
the new printer entity. Type “Epson1290Halftones” without the
quotes and click OK.
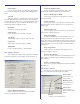
The new entity name will be added to the list and you will
be returned to the Configure PowerRIP Printer Entities in edit
mode. You will notice that the button formerly named “Add”
now reads “Cancel Add” you can click this button at any time to
cancel the add operation.
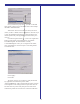
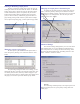
Go to the “Output Folder” section and click on the “...”
button to navigate to our hot folder.
Navigate to the hot folder we created during the hot-folder
setup phase and click OK. This instructs the new printer entity to
deposit its PostScript files into this folder. Your dialog should
now look like this:
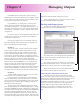
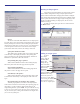
Next we’re going to select the printer driver to use. Since
we’re going to be ripping jobs to the Epson 1290, we need to use
that driver. Note: The driver is really the same for all of
PowerRIP’s devices (Windows PostScript driver version 5) what
differentiates the different drivers on the list is the PPD that is
used... and it is very important to use the right PPD.
Click the “Driver” drop-list and select “PowerRIP Stylus
Photo 1290”. It is imperative that the driver you use has the
“PowerRIP” prefix. You CANNOT use any other drivers.