ActFax Server User’s Manual Sixth Extended Edition ActFax Communication-Software GmbH http://www.actfax.com office@actfax.
Remark Copyright © ActFax Communication-Software GmbH. All rights reserved. This product or parts of it are only allowed to be used or reproduced according to the terms of the license agreement. Every other use of the software is not permitted. No parts of this manual are allowed to be reproduced, transferred, translated or stored on other media without the written declaration of consent of ActFax Communication. Changes of the content of this manual are reserved.
Software License Agreement SOFTWARE LICENSE AGREEMENT PLEASE READ THE FOLLOWING SOFTWARE LICENSE AGREEMENT CAREFULLY BEFORE YOU PROCEED WITH THE INSTALLATION. YOU ARE ONLY AUTHORIZED TO USE THE SOFTWARE WHEN YOU AGREE WITH THE TERMS OF THE FOLLOWING LICENSE AGREEMENT. BY USING THE SOFTWARE YOU PROFESS TO THE TERMS OF THAT AGREEMENT. IF YOU DO NOT AGREE WITH THAT LICENSE AGREEMENT YOU EITHER HAVE TO REMOVE THE SOFTWARE FROM YOUR HARD DISK OR YOU HAVE TO RETURN THE COMPLETE SOFTWARE AND GET BACK THE MONEY.
SOFTWARE WARRANTY WARRANTY PERIOD: The manufacturer guaranties for the time of 6 months that the software will work in a manner that the main use of the software is not impaired. This warranty is only valid if you have installed all of the program files correctly. From the current position it is not possible to guaranty that the software is absolutely free of errors. If the software does not work in the desired manner within that warranty period you can ask for replacement or reparation.
Table of Contents 1. Introduction 9 1.1. Using the Manual...........................................................................9 1.1.1. Help System ........................................................................................ 9 1.1.2. Information Symbols......................................................................... 10 1.2. What is ActiveFax?......................................................................10 1.3. System Requirements..........................................
3.2.2. Establishing a Client Connection ...................................................... 28 3.3. send a fax message from UNIX / Linux...................................... 30 3.3.1. Configuring LPD/LPR Printers in UNIX.......................................... 30 3.3.1.1. IBM RS/6000 (AIX) ...............................................................................30 3.3.1.2. HP-9000 (HP/UX) ..................................................................................30 3.3.1.3.
4.1.1. User Permissions............................................................................... 48 4.1.2. Alias Names ...................................................................................... 49 4.1.3. Predefined Settings ........................................................................... 50 4.1.4. Automatic Printing............................................................................ 50 4.1.5. Fax Forwarding ................................................................
5. Data Fields 79 5.1. Why do I need Data Fields?........................................................ 79 5.2. Syntax of Data Fields.................................................................. 79 5.2.1. Masking Data Fields ......................................................................... 80 5.3. Overview of the Data Fields ....................................................... 80 5.3.1. Sender Fields .....................................................................................
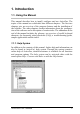
1. Introduction 1.1. Using the Manual This manual describes how to install, configure and use ActiveFax. The topics of the manual are subdivided into different chapters. The first two chapters give an overview of the program features and the installation of the software. The other chapters contain information about the configuration of the software and a description of routine tasks.
1.1.2. Information Symbols This manual uses picture symbols to direct your attention at important text passages. These symbols are used to highlight links to additional information about specific topics, critical settings or other specialties referring to a previously discussed topic. The “Information” symbol is used to direct your attention to additional information of the same topic. This symbol is also used to highlight useful tips simplifying daily work.
1.3. System Requirements When running ActiveFax, it is recommended to use a system with at least the following minimum requirements: The operating system can be Windows 95 / 98 / ME, Windows NT (Server or Workstation) or Windows 2000 / XP / 2003 / Vista / 2008 (32-bit or 64-bit). You also need a fax modem, an ISDN adapter or a fax board from Brooktrout or Intel/Dialogic. To use the software on multiple computers, there also needs to be a network connection (LAN) available.
1.4. Software Concept The primary idea behind ActiveFax is making all tasks as automatically as possible. This has been consequently realized in all parts of the software. The automation already starts at the installation of the software. According to the slogan “unpacking and starting”, all connected hardware is detected and configured fully automatically. Thus there is almost no need for administrative work.
1.4.1. Outgoing Faxes (Sending) Outgoing fax documents can be created in various ways with ActiveFax. The easiest way to create a new fax messages is printing a document from a Windows application (i.e. WinWord). ActiveFax also supports numerous communication services, so fax messages can also be created from UNIX, Linux and other non-Windows operating systems.
version to text format cannot be done, the document is sent as an email attachment in PDF, TIFF or GIF format. Delivery of the emails through the Internet is done fully automatically through a direct connection to an SMTP server (mail server) or a dialup connection with RAS (Remote Access Service). 1.4.3. Incoming Faxes (Receiving) One of the main advantages of a fax server is the capability of routing inbound fax messages to the different users. ActiveFax supports various methods of inbound fax routing.
demand document is either mapped to a specific fax modem (fax number) or when using an ISDN adapter to a direct dial number. The steps required to create fax-on-demand documents are exactly the same as for creating normal fax messages. Beside the possibility of using ActiveFax as a fax-on-demand server, the software can also be used to request documents from other fax-on-demand systems. This means that ActiveFax can be used to receive a fax document by calling the number of a different fax-on-demand system.
The Fax Selection Window is used to select the type of fax message that should be displayed in the faxlist. Beside that, the recycle bin and archive are also included in that window. The User Selection Window is used to select the user or group that should be displayed in the faxlist. The Communication Window displays the status of all communication services controlled by ActiveFax. By double-clicking or with the Communication menu, the settings for the single communication services can be configured.
2. ActiveFax Installation 2.1. Program Overview ActiveFax mainly includes two programs, the fax server and the fax client program. The installation of the fax server needs to be done only once on a single computer; all other computers in the network have the fax client installed to automatically load the fax documents directly from the fax server. The fax client needs to be installed on all computers where fax messages need to be created or processed.
2.2. Running the Setup Before you start with the installation of ActiveFax, you should clarify on which computers you want to install the fax client and which computer should be used for the installation of the fax server. It is recommended to first install the fax server and after that the single fax clients. To perform the installation of ActiveFax, follow these steps: 1) Insert the program CD into the CD-ROM drive and start the Setup program or run the setup from the download file actfax_setup_en.exe.
(server and client), a server-only installation or a client-only installation. Take care that the fax server is normally only installed on a single computer in the network. If the fax server has already been installed, you typically choose a client installation here. 5) Select the program components that should be installed. According to the previously selected installation procedure, the correct settings are already preset here. Make sure there is enough disk space available on the installation drive.
name) and fax number and your area code. This information is displayed in the header of the fax messages. If you plan to also send emails with ActiveFax, you should enter your email address. If there is a dial prefix needed for outgoing calls, specify the dial prefix in the next step. Especially when using phone systems (PBX), you normally have to specify a dial prefix to get an outside line.
Setting Menu Modem Configuration Email Configuration Default Sender Fax Resolution Archive Settings Automatic Printing Fax Title Next Fax ID Number Automatic Startup Communication – Modem Communication – E-Mail Extras – Predefined Settings Extras – Options – Modem Extras – Options – Archive Extras – Options – Printing Extras – Options – Fax Title Extras – Options – General File – Automatic Startup Please note that the above table is only a short summary of the most common configuration settings of Activ
server found by the automatic detection will be displayed and used as the default server.
3. How to ... 3.1. create a new fax message New fax messages can be created in various ways with ActiveFax. The easiest and most common way to create new fax messages is the printing function of a Windows application. Beside that, it would also be possible to create so-called “Instant Fax Messages” with ActiveFax. With Named Pipes or RAW Sockets it is possible to create fax messages without using the Windows printer driver (no GDI interface).
After the document has been “printed” that way, it will be automatically transferred to the fax server. Depending on the preferred transmission time and priority, the fax message is then automatically transmitted as soon as a modem becomes available. 3.1.2. Instant Fax Messages Fax messages often only contain just a few lines of text. If you do not want to create a Word document for such small messages, it is also possible to create the fax as an instant fax messages directly within the fax client program.
3.1.3. File System Another powerful method of sending fax jobs to ActiveFax is the file system method. With that method, the files to be faxed just need to be stored in a predefined directory. ActiveFax automatically scans this directory for new fax jobs and imports them for further processing. When using the file system method, it is also possible to use data fields directly as part of the file name, which makes it very simple to set the recipients fax number.
Take care that named pipes are only available on fax servers running on Windows NT / 2000 / XP / 2003 / Vista / 2008 systems. To use named pipes, a few small modifications have to be done in your application. Follow these steps to integrate the communication with named pipes with your application: The named pipe needs to be configured on the fax server. To do so, choose the menu option Communication / RAW Server and create a new entry for a NetBeui connection.
hFile = CreateFile("\\\\pcjoe\\pipe\\activefax", GENERIC_READ | GENERIC_WRITE, FILE_SHARE_READ | FILE_SHARE_WRITE, NULL, OPEN_EXISTING, 0, NULL); if (hFile == INVALID_HANDLE_VALUE) { dwError = GetLastError(); return 1; } lstrcpy(szFax, "800-123-4567"); wsprintf(szText, "This is a testfax@F211 %s@", szFax); WriteFile(hFile, szText, lstrlen(szText), &dwWritten, NULL); CloseHandle(hFile); return 0; } ActiveFax User’s Manual 27
3.2. display fax messages on other computers The fax client can be used to display and control fax messages from other computers in the network. Through a network connection to the fax server, access to all fax messages is available from any computer with the fax client program installed. 3.2.1. Fax Client Installation The fax client needs be installed on every computer that should be used to display, create or control fax messages.
tify the fax servers in the network. In that case you have to manually enter the IP address or hostname of the fax server. The connection between the fax server and the fax client is established with one of the network protocols TCP/IP or NetBeui (Windows Network). Take care that connections with NetBeui are only possible when the fax server has been installed on Windows NT / 2000 / XP / 2003 / Vista / 2008.
3.3. send a fax message from UNIX / Linux Beside the capability of sending fax messages from Windows applications using the ActiveFax printer driver, it is also possible to create fax messages from other operating systems, like UNIX or Linux. Normally the connection between the UNIX / Linux server and ActiveFax is done through the LPD/LPR (Line Printer Daemon) protocol.
Queue Name can be filled with any queue name (i.e. “fax”). You should also enable the option Remote Printer is on a BSD System. 3.3.1.3. Other UNIX Systems To configure an LPD/LPR printer for other UNIX systems, it is recommended to consult your system documentation. Usually an LPD/LPR printer is created with an entry in the “/etc/printcap” file. Printer entries in the /etc/printcap file are created based to the following scheme: printername:\ :rm=hostname:\ :rp=queuename: fax:\ :rm=89.1.0.
server built-in with ActiveFax. The steps are exactly the same as for copying normal files through FTP or TFTP. More information about FTP and TFTP can be found in the online help of ActiveFax and the documentation of your operating system. When using RAW sockets, a direct TCP/IP connection to the fax server is established on a well-known TCP/IP port. The fax data is sent directly through that connection without any underlying protocol. The fax message is finished by simply closing the TCP/IP connection. 3.
More information about data fields and how to add them to applications can be found in a subsequent chapter of this manual and in the online help of the fax server.
3.4. enter valid fax numbers There is no special format required for fax numbers processed by ActiveFax. It is permitted to use special characters like spaces, slashes, dashes or dots to format a fax number. Such characters are ignored by the fax server and are automatically removed before dialing. In general, fax numbers can be entered in international format as well as in national format.
3.5. select an entry in the faxlist 3.5.1. Selecting Entries Entries in the faxlist can be selected either with the left mouse button or with the arrow keys on the keyboard. To perform a function (i.e. locking or deleting a fax) on more than one faxlist entry, it would be possible to select multiple entries at the same time. The Ctrl key and the Shift key are used to select more than one entry in that case.
tions that help finding fax messages again very quickly. To search for a specific document, follow these steps: Enter a known search term in the search field of the faxlist (i.e. subject, recipient name, fax number, ...). It is also possible to enter multiple search terms, separated with the pipe sign (|). Select the user or group of the owner of the fax message in the user selection window. Select the fax status of the fax message in the fax selection window (i.e. undelivered, sent, ...).
3.6. automatically print fax messages Automatic printing of fax messages can be done in various ways with ActiveFax. Fax messages can be printed either on a specific printer or in dependence of the owner of the fax to individual printers. 3.6.1. Sending Report The automatic printing function can be configured to either print the complete fax message in original format or as a sending report.
3.6.3. General Settings To activate automatic printing of inbound fax messages, follow these steps: Choose the menu Extras / Options. Choose the Printing tab. Enable the option Automatically Print Incoming Fax Messages after Receipt and select the preferred printer. Optionally choose the option Compression to print multiple pages on a single sheet of paper. Optionally activate the selection Print Report to print a sending report instead of the complete fax message. Complete the configuration with OK.
Choose the menu option Extras / User Administrator or use the corresponding button in the toolbar. Select the user entry and press the Modify button. Change to the Automatic Printing tab. Enable the option Use User Settings for Automatic Printing and select the preferred printer. Optionally choose the option Compression to print multiple pages on a single sheet of paper. Optionally activate the selection Print Report to print a sending report instead of the complete fax message.
3.7. protect faxes against unauthorized access Since fax messages often contain sensible information that should not be read by unauthorized users, ActiveFax supports security features to protect privacy of the documents. That way fax messages can be reliably protected against unauthorized access. 3.7.1. User Administrator The foundation of every reliable security concept should be a deliberate user structure.
3.7.2. Security Settings To activate access verification, security settings need to be activated on the fax server. Follow these steps to enable security settings: Choose the menu option Extras / Security Settings or use the corresponding button in the toolbar. Selected the preferred security level for server access and for client access. Complete the configuration with OK. Please note that security settings for the fax server and the fax client can be individually configured.
3.8. use the fax-on-demand server The fax-on-demand capabilities of ActiveFax can be used in two ways. It would be possible to receive documents from other fax-on-demand servers and to also use ActiveFax as a fax-on-demand server to make fax documents available to others. 3.8.1. Fax Polling A fax polling request (this means to receive a fax document from a fax-ondemand server) can be done when you follow these steps: Choose the menu option Communication / Execute Polling (Fax-OnDemand).
dem or extension number (when using ISDN) assigned. Especially when using ISDN adapters the number of documents that can be made available for polling is not limited, since every document is identified by its own direct dial number. To create a new fax-on-demand document, follow these steps: Create the fax-on-demand document with a Windows application of your choice (i.e. WinWord). Choose the printing function of the application (i.e. the menu File / Print in WinWord).
3.9. create a cover page or overlay 3.9.1. What is a Cover Page / Overlay? In general, cover pages and overlays are created exactly the same way with ActiveFax. A cover page is a separate page added as the first page of a fax message. Cover pages normally contain information about the sender, recipient, subject and additional information like date, time and the number of pages of the document. Compared to cover pages, overlays are not added as a separate page at the beginning of a fax message.
3.9.3. Using Cover Pages / Overlays Cover pages and overlays can be added to fax messages in various ways. One method is to choose the cover page or overlay in the fax dialog window of the ActiveFax printer. With the menu Extras / Predefined Settings or Extras / User Administrator / Modify / Predefined Settings it would be possible to configure default cover pages and overlays that are automatically added for new fax messages. Another way to add cover pages and overlays to fax messages is using data fields.
ActiveFax User’s Manual
4. Configuration 4.1. User Administrator The User Administrator of ActiveFax is used to manage the accounts for the single users and to grant individual permissions to different users. Users can also be part of a group; each user can be a member of multiple groups in that case. There are two predefined users in the User Administrator, the Administrator and the Unknown user; these user accounts cannot be deleted. Each entry in the User Administrator is identified by a unique user name.
the absence substitution has full access to all fax messages of the absent user. Permission settings are not transferred when specifying absence substitutions. To clearly set competencies and increase security, it is recommended to only grant those permissions to a user that are absolutely necessary for the work. 4.1.1. User Permissions Permission Description Administrator Permission Enables the user to modify important configuration settings of the fax server.
transmission protocol. Automatic Sending Clearance Enables the user to send fax messages without confirmation of a supervisor. Grant Sending Clearance to other Users Enables the user to grant sending clearance to other users. Permission for International Calls Enables the user to send fax messages to recipients with international fax numbers. Execute Polling (Fax-On-Demand) Enables the user to request fax-ondemand documents from a fax-ondemand server.
4.1.3. Predefined Settings With the Predefined Settings tab it is possible to individually configure different settings for each user. You can decide whether default sender settings or user defined sender settings should be used. Beside that it is also possible to specify default cover pages and overlays to be used for new fax messages. The default sender settings can be configured with the Extras / Predefined Settings menu. 4.1.4.
4.1.5. Fax Forwarding Fax forwarding is used to automatically send inbound fax messages to other fax numbers or email addresses. That way it is possible to forward fax messages received for a specific user to other fax machines or email addresses. To ensure economical forwarding of fax messages to other fax machines, it is possible to automatically set the priority of forwarded faxes to Unimportant. In dependence of the charge optimization settings, fax messages are forwarded during night hours that way.
4.1.6. Routing of Inbound Fax Messages Routing of inbound fax messages can be done in various ways. Depending on the technical capabilities of the modem or ISDN adapter and the phone line, not all routing methods are supported. ActiveFax uses the routing methods in the following order. 4.1.6.1. Routing using Direct Dial Numbers (MSN, DDI, DID, DTMF) This method of inbound fax routing is the most reliable way to route faxes, since every user has its own unique fax number in that case.
identical. Special characters, like spaces, slashes, dashes or dots are ignored when the fax number and CSID are compared. Select the User that should be mapped to the phone book entry. Complete the phone book entry with OK. 4.1.6.3. Routing using Modem When using that way of inbound fax routing, a user is mapped directly to a modem (fax number).
4.1.6.4. Manual Routing Manual routing is used when none of the above routing methods can be used. When using manual routing, the fax document needs to be manually opened on the fax client to find out to which user the fax message belongs. The user has to be manually entered through the fax dialog window in that case. To specify the user for a fax message, follow these steps: Select the fax message with the left mouse button and find out to which user the fax messages belongs.
4.2. Phone Book Phone book entries in ActiveFax can be stored either in a global or local phone book. The central phone book (global) is shared by all users and can be accessed from any client computer in the network. The private phone book is stored directly with a user account and can only be accessed by the owner of the phone book.
4.2.1. Import the Phone Book Phone book entries can be imported in two ways with ActiveFax. One method is to import the phone book entries from an external ASCII file (text file). The other method is to import the phone book entries from an external database using the ODBC standard. 4.2.1.1. Import from ASCII File To import phone book entries from an external ASCII file, follow these steps: Press the Import button. Enter the File Name of the import file or use the Search File button.
4.2.1.2. Import from ODBC Database Another method to import phone book entries is to bind the phone book to an ODBC data source. An external database is automatically checked for new and modified phone book entries in that case. More information about the import of phone book entries from an ODBC data source can be found in the chapter ODBC Database of this manual. 4.2.2. Export the Phone Book Phone book entries can be exported to an ASCII file (text file) with the Export button.
4.3. Transmission Protocol The transmission protocol stores information about all outbound, inbound and fax-on-demand fax transmissions. This includes successful transmissions as well as status information for incomplete or failed transmission attempts. When using ISDN adapters with the ISDN service AOC (Advice of Charge) activated, the transmission protocol also includes charging information. That way it would be possible to calculate the total charges for a user or cost account code.
Print only Selected Entries are printed. Only selected entries of the transmission protocol list are printed. 4.3.1.1. Layout With the Options tab the sort order and layout for the printout of the transmission protocol can be changed. You can change between single-line and double-line layout there. 4.3.1.2. Automatic Printing The transmission protocol can also be automatically printed. Use the Printing tab in the menu Extras / Options to configure automatic printing of the transmission protocol. 4.3.1.3.
4.3.2. Exporting the Transmission Protocol The entries of the transmission protocol can be exported in three different ways. Use one of the methods below to do the export: Use the Export button to export all selected protocol entries to an external ASCII file (text file). Use ODBC data exchange to automatically export the transmission protocol entries to an external database. Use FTP to retrieve the transmission protocol from other computers in the network (i.e. UNIX or Linux). 4.3.3.
4.4. Charge Optimization 4.4.1. Delayed Transmissions Depending on fax volume and the location of the recipients it would be possible to reduce phone charges by using delayed transmissions. When using automatic transmission delays, the best (cheapest) transmission time is automatically calculated based on the priority of a fax message and the phone rates of your phone network provider.
priority level of low-priority fax messages to “unimportant”. As an alternative it would also be possible to manually change the preferred transmission time for a fax message. That way large fax mailings can be sent during night hours or at the weekend. 4.4.2. Least Cost Routing Another way to reduce phone charges is using least cost routing.
To activate least cost routing, follow these steps: Choose the menu Extras / Modem or double-click on the corresponding icon in the communication window. Change to the Least Cost Routing tab. Activate the option Enable Least Cost Routing for Outgoing Calls. Add an entry for each area code / time combination. Enter the area code first, followed by the weekday, time and net access number. Complete the configuration with OK.
4.5. Modem & ISDN ActiveFax supports fax modems of all fax class standards, ISDN adapters compatible with the CAPI 2.0 standard as well as dedicated fax boards from Brooktrout and Intel/Dialogic. See the summary below for an overview of all fax standards supported by ActiveFax. Modem Class Standard Description Fax Class 1 TIA/EIA 578 Fax Class 2 SP-2388, TR-29.2 Fax Class 2.0 TIA/EIA 592 ISDN CAPI 2.
Availability of direct dial numbers (individual fax number for each user). Required ISDN service: MSN (Multiple Subscriber Number) or DDI (Direct Dial In). Recording of the transmission charges. Required ISDN service: AOC (Advice of Charge). Simultaneous fax transmissions on multiple phone lines (channels). When using BRI (Basic Rate Interface) 2 channels are supported by default; when using PRI (Primary Rate Interface) up to 30 channels are available with a single ISDN controller. 4.5.2.
When using an ISDN adapter, it is also recommended to enter at least one MSN (direct dial number) in the MSN field. It is possible to configure up to three MSN here. Additional MSN for the single users can be added with the User Administrator. Please note that ActiveFax answers to all incoming calls (also global calls), if you do not configure at least one valid MSN either in the modem configuration or the User Administrator.
the chapter Charge Optimization of this manual or in the online help of ActiveFax. When using an ISDN adapter, multiple phone lines (B-channels) are available. To avoid that ActiveFax uses all available channels for fax transmissions, the number of channels used for faxing can be limited with the Extended button. Specify the total number of channels and the number of channels used for outgoing calls here. That way it would be possible to keep some channels in spare for other purposes (i.e.
ActiveFax User’s Manual
4.6. E-Mail As an alternative to sending documents by fax, ActiveFax can also be used to send any document by email. Depending on the configuration of the fax server, ActiveFax tries to convert the document to text format whenever possible. If the conversion to text format cannot be done, the document is sent as an email attachment in PDF, TIFF or GIF format. 4.6.1. SMTP Server (Mail Server) Configuration Delivery of emails is done through an SMTP server (Simple Mail Transfer Protocol).
4.6.2. E-Mail Options The settings of the email service can be individually configured to set the default attachment format and other parameters. The option Use individual user names for the “From” field of an EMail is used to specify if the complete user name should be used in the “From” field of the email. If this option is disabled, the Name field (company name) is used instead.
The setting Share Communication Port for Fax and E-Mail has to be activated if you share the same modem for fax transmissions and dialup connections for Internet access. The fax server automatically disconnects the modem connection in that case to give the Windows RAS manager the chance to do a dialup connection to the Internet.
4.7. ODBC Database Using the ODBC data exchange standard, data can be exchanged between ActiveFax and external databases. Since ODBC drivers are available for virtually all database products, ActiveFax can be easily integrated with such databases. ActiveFax supports the automatic import of the phone book data as well as the automatic export of the transmission protocol through ODBC. 4.7.1. Selecting a Data Source To use ODBC data exchange with ActiveFax, a data source has to be selected first.
source for your database, have a look at the manual of your database product. Some ODBC drivers (i.e. some version of INFORMIX CLI) fail to release allocated system resources after a database connection has been closed. To save system resources, it is recommended to disable the option Automatic Disconnect when Idle in that case. The ODBC drivers of some database products are not fully compatible with the ODBC data exchange standard.
Complete the configuration with OK. Please note that conversion of different data types is automatically done by the fax server whenever possible. An alternative way to import phone book entries is to import the phone book data from an external ASCII file (text file). More information about that can be found in the chapter Phone Book of this manual. 4.7.3. Exporting the Transmission Protocol Transmission protocol entries are automatically exported right after a fax transmission completes.
Select the table to be used for the export of the transmission protocol entries. A default table can be created with the Use Default Table button. The default table is created with all fields available in the transmission protocol. Configure the field mapping to set the relationship between the database columns and the transmission protocol fields. Fields not included in the database table are automatically ignored.
4.8. Network Scanners Documents in paper format can be automatically transmitted using special network scanners. ActiveFax supports the scanner models HP Digital Sender 9100C, HP Network ScanJet 5 and Xerox Workcentre. As an alternative it would also be possible to use any other type of scanner (i.e. TWAIN compatible scanners) to send faxes in paper format when you scan the document with a graphics program and print the scanned image to the ActiveFax printer. 4.8.1.
The data exchange directory of the scanner (default directory is hpfscan) is automatically created during the installation of ActiveFax in the ActiveFax base directory (i.e. C:\Program Files\ActiveFax\hpfscan). Take care to configure this directory when you install the network scanner software. The Data Exchange File Format for HP network scanners needs to be configured to PCL5 Packbits. More information about the HP Digital Sender 9100C can be found at Hewlett Packard’s website at http://www.hp.com.
ActiveFax User’s Manual
5. Data Fields 5.1. Why do I need Data Fields? Each parameter of a fax message (i.e. fax number, priority, subject, ...) is stored by the fax server in data fields with unique field numbers. That way it is possible to set the value for such data fields (i.e. the recipients fax number) already from within an application. The user does not need to enter this information again when the fax is created.
5.2.1. Masking Data Fields If the content of a data field contains the @ character, you have to “mask” the @ character with a backslash (\). Otherwise the @ character would be treated as the end of the data field and the content of the data field would be garbled. It is not necessarily required to mask the @ sign for the email data fields @F111 and @F212, since ActiveFax automatically detects the @ sign of the email address. Example: @F203 john.gates\@aol.
Please note that default values for the sender parameters can be specified with the menu Extras / Predefined Settings or with the User Administrator (menu Extras / User Administrator).
5.3.3. Common Fields This group of data fields contains all parameters affecting neither the sender nor the recipient of a fax message.
(0=normal Fax, 1=fax-on-demand document) @F500 Reference File @F501 Automatic Printing @F502 Ignore Pages @F503 Print Fax @F504 Number of Copies @F505 Export Fax @F555 Control Command ActiveFax User’s Manual This file will be evaluated for additional data fields and is deleted then. If you do not use this field, ActiveFax tries to search for data fields in the file Fields.dat in the installation directory (usually C:\Program Files\ActiveFax) No dialog box to enter the recipient is displayed.
@F599 New Fax Job @F600 E-Mail Bitmap Format @F601 @F602 @F603 @F604 @F605 @F606 84 @F555 PRINT Fax-ID [printername]@ @F555 EXPORT Fax-ID [filename]@ Example: @F555 DELETE 1234@ Start a new fax job within the document. This command is used for mail merge letters, when the single pages of a document should be sent to different recipients. Each time you use that field on a page, a new fax job is started at the beginning of that page The email is always sent as an attachment.
@F700 @F701 Accumulated Document This data field creates an accumulated document with the given reference number. If an accumulated document with that reference number already exists, the print job is added. As an optional parameter you can also specify a timeout in seconds after that the accumulated document is automatically terminated. Examples: @F700 1234@, @F700 1234,60@ Accumulated Doc End This data field terminates an accumulated document with the given reference number.
5.4.1. Example 1 Recipient.................. +43 1 1122 3344-12 Subject..................... Purchase Order 123456 @F211 +43 1 1122 3344-12@ @F307 Purchase Order 123456@ 5.4.2. Example 2 Sender...................... Burns & Son Inc., +1 89 112233-25 Recipient.................. Brown Import & Export, 0043 1 9072544 @F101 Burns & Son Inc.@@F110 +1 89 112233-25@ @F201 Brown Import & Export@@F211 0043 1 9072544@ 5.4.3. Example 3 Sender...................... Burns & Son Inc., +1 89 112233-25 Recipient 1.......
maps to a fax message can be found in the following section of this chapter. Yours sincerely @F000 signature.bmp@ 5.5. Embedding Bitmaps with Fax Messages ActiveFax can be used to embed bitmaps at any position of a fax message. That way it would be possible to easily implement individual company logos or signatures. Embedded bitmaps are normally only used for fax messages that have been created on UNIX systems or other non-Windows operating systems.
5.5.1. Example 1 Bitmap with a default resolution of 300 dpi. Yours sincerely @F000 mike.bmp@ 5.5.2. Example 2 Bitmap located in the directory C:\SCAN with a width of 50 mm (height calculated automatically). Yours sincerely @F000 c:\scan\mike.bmp,50@ 5.5.3. Example 3 Bitmap with a width of 50 mm and a height of 30 mm. Yours sincerely @F000 mike.bmp,50,30@ The number of bitmaps that can be embedded into a single fax document is not limited.
Example: Document Name ......Purchase Order Recipient ..................Burns & Co Fax Number .............+49 222 102030 Purchase Order@F201 Burns & Co@@F211 +49 222 102030@ As an alternative it would also be possible to embed data fields directly in the document (i.e. with WinWord). When using this method, it is important to format the data fields with the “ActiveFax” font. If you do not format data fields with that font, the data fields are ignored and printed as visible text on the document.
Word). In that case the data field @F599@ can be used to start a new fax job within a print job. When using the data field @F599@ on a page, a new fax job is started on that page including all following pages up to the next @F599@ data field. This data field is necessarily required when printing mail merge documents from WinWord, since WinWord generates a single huge print job for all fax pages of the mail merge document. 5.6.1.3.
char szText[1024]; lstrcpy(szName, "Burns & Co"); lstrcpy(szFax, "+49 222 102030"); nPriority = 1; lstrcpy(szSubject, "Purchase Order"); wsprintf(szText, "@F201 %s@@F211 %s@@F301 %d@@F307 %s@", szName, szFax, nPriority, szSubject); ..... 5.6.2.2. Example in Programming Language INFORMIX 4GL DEFINE faxdata RECORD name fax priority subject END RECORD CHAR(128), CHAR(128), SMALLINT, CHAR(128) faxdata.name = "Burns & Co" faxdata.fax = "+49 222 102030" faxdata.priority = 1 faxdata.
ActiveFax User’s Manual
6. Appendix 6.1. Glossary 16-bit: The term “16-bit” is used for applications that are designed for the operating system Windows 3.x. 16-bit applications can also be executed on newer Windows version, but they do not fully use the new features of these operating systems. 32-bit: The term “32-bit” is used for applications that are designed for one of the operating systems Windows 95 / 98 / ME, Windows NT / 2000 / XP / 2003 / Vista / 2008.
Broadcast: The term “Broadcast” means a sending method that accesses all devices in a network. Broadcast calls are mainly used to search for resources in a network. CAPI: Abbreviation for “Common ISDN API”. This defacto standard of the German company AVM is defining a programming interface for ISDN adapters of different manufacturers. ISDN adapters, which support at least CAPI version 2.0, can be used for the transmission of fax messages.
Fax-On-Demand: The term “Fax-On-Demand” means, receipt of a document from a so called Fax-On-Demand Server. FTP: Abbreviation for “File Transfer Protocol”. This protocol is mainly used for copying files. The FTP protocol, which was initially only used on UNIX system, is nowadays also used on the Internet. In ActiveFax, the FTP protocol can also be used for the creation of fax messages. G3 Fax Mode: The fax mode usually used for fax transmissions.
NetBeui: The NetBeui protocol, also called Windows Network, is used for the data exchange between two computers. The NetBeui protocol is only compatible with the Windows operating system and can also be used with ActiveFax when the Fax Server has been installed on either Windows NT / 2000 / XP / 2003 / Vista / 2008. ODBC: Abbreviation for “Open Database Connectivity”. This standard is used for the data exchange between applications and database servers.
SMTP: Abbreviation for “Simple Mail Transfer Protocol”. This protocol is used in the Internet for E-Mail transmissions. Stream Socket: A data connection that is based on the TCP/IP network standard. T.4: Standard for the compression of fax data. T.30: Standard for the transmission of fax data. TCP/IP: The TCP/IP protocol is a network protocol which is mainly used on the UNIX operating system and on the Internet. Nowadays TCP/IP is also widely used on Windows systems.
from any location. Web Browsers are used to display the pages of the World Wide Web. WWW: Abbreviation for “World Wide Web”. WYSIWYG: Abbreviation for “What you see is what you get”. This means, that the document displayed on the screen is exactly of the same shape than the printout. XON/XOFF: Software method that is controlling the flow of the data transmission over a serial interface. The XON/XOFF protocol is using the ASCII codes 17 and 19 to control the flow of the transmitted data.
6.2.
ActiveFax User’s Manual
6.3. Frequently Asked Questions - FAQ This part of the manual answers the most frequent questions about ActiveFax. The answers to the questions are kept short, since detailed information about specific topics is also available in the corresponding chapters of this manual and in the online help of ActiveFax.
Answer: Using the Call Repetition tab of the menu option Extras / Options it is possible to specify an individual delay for each transmission attempt. Question: How can I archive a fax message? Answer: Fax messages are normally automatically archived by ActiveFax. Using the Archive tab of menu option Extras / Options, the settings for the archive function can be individually configured. Please note that it is also possible to manually move fax messages to the archive.
Question: Where can I specify the default parameters for the sender of a fax message? Answer: Using the menu option Extras / Predefined Settings the default parameters for the sender of fax messages can be configured. Please note that it is also possible to individually configure different settings for each user with the User Administrator.
ActiveFax User’s Manual
6.4. Problem Solutions Problem: The modem is dialing, but the connection cannot be established. Solution: Check whether tone or pulse dialing has to be used with the phone line. You should also make sure that you do not have to use a dial prefix for outgoing calls. When using a phone system (PBX) you should take care, that the option Wait for Dial Tone before Dialing is turned off. You should also try to dial the number with a different communication program (i.e. HyperTerminal) to check if the modem is ok.
Solution: Close the other application or stop the service of that application. Please note that ActiveFax can also be used to redirect LPD print jobs to local printers. Problem: The printout of fax messages takes very long on laser printers. Solution: Use a maximum resolution of 300 dpi for printing in that case. Especially when using HP laser printers with insufficient memory installed you should disable the option Page Protection in the printer properties to save resources.
Solution: The ISDN adapter ignores the fax parameter for the resolution of the remote fax machine in that case and it is recommended to install the latest version of the ISDN driver (CAPI driver). Problem: I have forgotten the Administrator password and cannot access the fax server anymore.
ActiveFax User’s Manual
6.5. Sample Applications Integration of ActiveFax in other applications is very simple. Using so called data fields, it is possible to specify the fax parameters (i.e. recipients fax number, subject, priority, etc.) already from within an application. Especially applications not running on Windows based operating systems (i.e. UNIX, Linux, DOS, etc.) can take advantage of the support of HPLaserJet and Epson-LQ printer commands for fax formation.
Open the dialog box IDD_MAIN with DialogBox() Initialize the dialog box with WM_INITDIALOG Call the function PrintDocument() in WM_COMMAND Evaluate the dialog box fields with SendDlgItemMessage() Generate the document name for printing (add data fields) Check if we want to print without displaying the fax dialog Open the “ActiveFax” printer with CreateDC() Create a new document with StartDoc() and StartPage() Write the message text with DrawText() Close the document with EndPage() and EndDoc() Close the pri
EndDialog(hWnd, FALSE); break; } break; } return FALSE; } //-----------------------------------------------------------------------------------------// This function is used to print (fax) the message //-----------------------------------------------------------------------------------------BOOL PrintDocument(HWND hWnd) { BYTE szMessageText[1024]; BYTE szDocumentName[512]; BYTE szFaxNumber[128]; BYTE szSubject[128]; int nPriority; BOOL bAuto; RECT rRectText; DOCINFO DocInfo; HDC hDC; HANDLE hFontText; HANDL
// Create and select an object for the font hFontText = CreateFontIndirect(&LogFontText); hFontOrig = SelectObject(hDC, hFontText); // Draw the message text SetRect(&rRectText, 50, 100, 2300, 3000); DrawText(hDC, szMessageText, lstrlen(szMessageText), &rRectText, DT_NOPREFIX | DT_WORDBREAK); // Unselect and delete the font SelectObject(hDC, hFontOrig); DeleteObject(hFontText); // Finish the page EndPage(hDC); // Finish the document EndDoc(hDC); // Close the printer DeleteDC(hDC); return TRUE; } 6.5.2.
Choose the menu option Communication / RAW Server or double-click on the corresponding icon in the communication window. Press the New button. Set the option TCP/IP Connection with Stream Socket and enter the Port Number 3000. Complete the configuration with OK. 6.5.2.1.
// Enter the data printf("Enter the fax number gets(szFaxNumber); printf("Enter the subject gets(szSubject); : "); : "); printf("Text of the fax message: "); gets(szMessageText); printf("\n"); // Create a string for the fax message sprintf(szData, "\033(s5H" "\033&d0D" "%s\n\n" "\033(s10H" "\033&d@" "%s" "@F211 %s@@F307 %s@", szSubject, szMessageText, szFaxNumber, szSubject); // Send the fax message return SendFax(szData); } //-------------------------------------------------------------------------------
return 1; } ActiveFax User’s Manual 115
ActiveFax User’s Manual
6.6. Index A Access Verification .............................................. 41 ActiveFax Installation .......................................... 17 Adjustment the Settings........................................ 20 Alias Names ......................................................... 49 Alternatives to LPD/LPR ..................................... 31 Appendix .............................................................. 93 Automatic Printing ...............................................
Konzeption Faxversand......................................................13 L Least Cost Routing ...................................62, 63, 66 License Agreement .................................................3 License Key ..........................................................18 LPD/LPR ............................................10, 13, 17, 30 M Mail Server ...........................................................69 MSN .....................................................................
Notes ActiveFax User’s Manual 119
Notes 120 ActiveFax User’s Manual