MF1153-03 CMOS 4-BIT SINGLE CHIP MICROCOMPUTER S1C63558 Technical Manual S1C63558 Technical Hardware
NOTICE No part of this material may be reproduced or duplicated in any form or by any means without the written permission of Seiko Epson. Seiko Epson reserves the right to make changes to this material without notice.
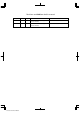
Revisions and Additions for this manual Chapter 2 Section 2.1.2 Page 8 4 4.7.3 49 S1C63557 Technical Manual Item Table 2.1.2.1 LCD drive voltage when generated internally Table 4.7.3.1 LCD drive voltage when generated internally Contents The table was revised. The table was revised.
The information of the product number change Starting April 1, 2001, the product number has been changed as listed below. Please use the new product number when you place an order. For further information, please contact Epson sales representative.
CONTENTS CONTENTS CHAPTER 1 OUTLINE ________________________________________________ 1 1.1 1.2 1.3 1.4 1.5 CHAPTER Features ........................................................................................................ 1 Block Diagram .............................................................................................. 2 Pin Layout Diagram ..................................................................................... 3 Pin Description ..........................................
CONTENTS 4.5.3 High impedance control ............................................................................ 34 4.5.4 Special output ............................................................................................ 34 4.5.5 I/O memory of output ports ....................................................................... 37 4.5.6 Programming notes ................................................................................... 40 4.6 I/O Ports (P00–P03, P10–P13, P20–P23 and P30–P33) .
CONTENTS 4.12.3 Control of buzzer output ......................................................................... 101 4.12.4 Setting of buzzer frequency and sound level .......................................... 102 4.12.5 Digital envelope ..................................................................................... 103 4.12.6 One-shot output ...................................................................................... 104 4.12.7 I/O memory of sound generator .............................
CONTENTS 7.8 Telephone Function Characteristics ........................................................... 166 7.9 Timing Chart ............................................................................................... 166 7.10 Characteristic Curves (reference value) .................................................... 167 CHAPTER 8 PACKAGE _______________________________________________ 169 8.1 8.2 CHAPTER 9 PAD LAYOUT ____________________________________________ 171 9.1 9.
CHAPTER 1: OUTLINE CHAPTER 1 OUTLINE The S1C63558 is a microcomputer which has a high-performance 4-bit CPU S1C63000 as the core CPU, ROM (8,192 words × 13 bits), RAM (5,120 words × 4 bits), serial interface, watchdog timer, programmable timer, time base counters (2 systems), SVD circuit, a dot-matrix LCD driver that can drive a maximum 40 segments × 17 commons, DTMF/DP generator, FSK demodulator and sound generator built-in.
CHAPTER 1: OUTLINE 1.
CHAPTER 1: OUTLINE 1.3 Pin Layout Diagram QFP15-128pin 96 65 64 97 S1C63558 INDEX 33 128 1 32 No. Pin name No. Pin name No. Pin name No. Pin name 1 N.C. 33 SEG4 65 N.C. 97 N.C.
CHAPTER 1: OUTLINE 1.4 Pin Description Table 1.4.1 Pin description Pin name VDD VSS VD1 VC1–VC5 CA–CC OSC1 OSC2 OSC3 OSC4 K00–K03 K10–K13 P00–P03 P10–P13 P20 P21 P22 P23 P30–P33 R00 R01 R02 R03 R10 R11 R12 R13 R20–R23 COM0–COM7 COM8–COM16 (SEG47–SEG40) SEG0–SEG39 SVD DP TONE RESET TEST AVDD AVSS RDIN TIP RING FB BPOUT CDIN RDRC VREF 4 Pin No.
CHAPTER 1: OUTLINE 1.5 Mask Option Mask options shown below are provided for the S1C63558. Several hardware specifications are prepared in each mask option, and one of them can be selected according to the application. The function option generator FOG63558, that has been prepared as the development software tool of S1C63558, is used for this selection. Mask pattern of the IC is finally generated based on the data created by the FOG63558. Refer to the "S5U1C63558D Manual" for the FOG63558.
CHAPTER 1: OUTLINE (8) Output specification of the DP terminal Either complementary output or N-channel open drain output can be selected as the output specification for the DP (dial pulse output) terminal. Refer to Section 4.14.2, "Mask option", for details. (9) Gain of FSK demodulator input amplifier The gain of the FSK demodulator input amplifier can be either fixed at 1 using the internal feedback resistor or varied using external resistors. Refer to Section 4.15.2, "Mask option", for details.
CHAPTER 1: OUTLINE 5. I/O PORT OUTPUT SPECIFICATION • P00 • P01 • P02 • P03 • P10 • P11 • P12 • P13 • P20 • P21 • P22 • P23 • P30 • P31 • P32 • P33 ■ ■ ■ ■ ■ ■ ■ ■ ■ ■ ■ ■ ■ ■ ■ ■ 1. Complementary 1. Complementary 1. Complementary 1. Complementary 1. Complementary 1. Complementary 1. Complementary 1. Complementary 1. Complementary 1. Complementary 1. Complementary 1. Complementary 1. Complementary 1. Complementary 1. Complementary 1. Complementary ■ ■ ■ ■ ■ ■ ■ ■ ■ ■ ■ ■ ■ ■ ■ ■ 2. Nch-OpenDrain 2.
CHAPTER 2: POWER SUPPLY AND INITIAL RESET CHAPTER 2 POWER SUPPLY AND INITIAL RESET 2.1 Power Supply The S1C63558 operating power voltage is as follows: Supply voltage VDD = 2.2 V to 5.5 V The S1C63558 operates by applying a single power supply within the above range between VDD and VSS. The S1C63558 itself generates the voltage necessary for all the internal circuits by the built-in power supply circuits shown in Table 2.1.1. Table 2.1.
CHAPTER 2: POWER SUPPLY AND INITIAL RESET 2.2 Initial Reset To initialize the S1C63558 circuits, initial reset must be executed. There are two ways of doing this. (1) External initial reset by the RESET terminal (2) External initial reset by simultaneous low input to terminals K00–K03 (mask option setting) The circuits are initialized by either (1) or (2). When the power is turned on, be sure to initialize using the reset function.
CHAPTER 2: POWER SUPPLY AND INITIAL RESET 2.2.2 Simultaneous low input to terminals K00–K03 Another way of executing initial reset externally is to input a low signal simultaneously to the input ports (K00–K03) selected with the mask option. Since this initial reset passes through the noise reject circuit, maintain the specified input port terminals at low level for at least 1.5 msec (when the oscillation frequency fOSC1 is 32.768 kHz) during normal operation.
CHAPTER 2: POWER SUPPLY AND INITIAL RESET 2.2.4 Terminal settings at initial resetting The output port (R) terminals and I/O port (P) terminals are shared with special output terminals and input/output terminals of the serial interface. These functions are selected by the software. At initial reset, these terminals are set to the general purpose output port terminals and I/O port terminals. Set them according to the system in the initial routine.
CHAPTER 3: CPU, ROM, RAM CHAPTER 3 CPU, ROM, RAM 3.1 CPU The S1C63558 has a 4-bit core CPU S1C63000 built-in as its CPU part. Refer to the "S1C63000 Core CPU Manual" for the S1C63000. Note: The SLP instruction cannot be used because the SLEEP operation is not assumed in the S1C63558. 3.2 Code ROM The built-in code ROM is a mask ROM for loading programs, and has a capacity of 8,192 steps × 13 bits.
CHAPTER 3: CPU, ROM, RAM (3) Subroutine calls use 4 words (for PC evacuation) in the stack area for 16-bit data (SP1). Interrupts use 4 words (for PC evacuation) in the stack area for 16-bit data (SP1) and 1 word (for F register evacuation) in the stack area for 4-bit data. 0000H 4-bit access area (SP2 stack area) 00FFH 0100H 4/16-bit access area (SP1 stack area) 01FFH 0200H 4-bit access area (Data area) 13FFH 4 bits Fig. 3.3.1 Configuration of data RAM 3.
CHAPTER 4: PERIPHERAL CIRCUITS AND OPERATION (Memory Map) CHAPTER 4 PERIPHERAL CIRCUITS AND OPERATION The peripheral circuits of S1C63558 (timer, I/O, etc.) are interfaced with the CPU in the memory mapped I/O method. Thus, all the peripheral circuits can be controlled by accessing the I/O memory on the memory map using the memory operation instructions. The following sections explain the detailed operation of each peripheral circuit. 4.
CHAPTER 4: PERIPHERAL CIRCUITS AND OPERATION (Memory Map) Table 4.1.
CHAPTER 4: PERIPHERAL CIRCUITS AND OPERATION (Memory Map) Table 4.1.
CHAPTER 4: PERIPHERAL CIRCUITS AND OPERATION (Memory Map) Table 4.1.
CHAPTER 4: PERIPHERAL CIRCUITS AND OPERATION (Memory Map) Table 4.1.
CHAPTER 4: PERIPHERAL CIRCUITS AND OPERATION (Memory Map) Table 4.1.
CHAPTER 4: PERIPHERAL CIRCUITS AND OPERATION (Memory Map) Table 4.1.
CHAPTER 4: PERIPHERAL CIRCUITS AND OPERATION (Memory Map) Table 4.1.
CHAPTER 4: PERIPHERAL CIRCUITS AND OPERATION (Memory Map) Table 4.1.
CHAPTER 4: PERIPHERAL CIRCUITS AND OPERATION (Watchdog Timer) 4.2 Watchdog Timer 4.2.1 Configuration of watchdog timer The S1C63558 has a built-in watchdog timer that operates with a 256 Hz divided clock from the OSC1 as the source clock. The watchdog timer starts operating after initial reset, however, it can be stopped by the software. The watchdog timer must be reset cyclically by the software while it operates.
CHAPTER 4: PERIPHERAL CIRCUITS AND OPERATION (Watchdog Timer) 4.2.3 I/O memory of watchdog timer Table 4.2.3.1 shows the I/O address and control bits for the watchdog timer. Table 4.2.3.
CHAPTER 4: PERIPHERAL CIRCUITS AND OPERATION (Oscillation Circuit) 4.3 Oscillation Circuit 4.3.1 Configuration of oscillation circuit The S1C63558 has two oscillation circuits (OSC1 and OSC3). OSC1 is a crystal oscillation circuit that supplies the operating clock to the CPU and peripheral circuits. OSC3 is a ceramic oscillation circuit. When processing with the S1C63558 requires high-speed operation, the CPU operating clock can be switched from OSC1 to OSC3 by the software. Figure 4.3.1.
CHAPTER 4: PERIPHERAL CIRCUITS AND OPERATION (Oscillation Circuit) 4.3.3 OSC3 oscillation circuit The S1C63558 has built-in the OSC3 oscillation circuit that generates the CPU's sub-clock (3.58 MHz) for high speed operation and the source clock for peripheral circuits needing a high speed clock (programmable timer, FOUT output). To configure a ceramic oscillation circuit, a ceramic oscillator and two capacitors (gate and drain capacitance) are required. Figure 4.3.3.
CHAPTER 4: PERIPHERAL CIRCUITS AND OPERATION (Oscillation Circuit) 4.3.6 I/O memory of oscillation circuit Table 4.3.6.1 shows the I/O address and the control bits for the oscillation circuit. Table 4.3.6.
CHAPTER 4: PERIPHERAL CIRCUITS AND OPERATION (Input Ports) 4.4 Input Ports (K00–K03 and K10–K13) 4.4.1 Configuration of input ports The S1C63558 has eight bits general-purpose input ports. Each of the input port terminals (K00–K03, K10–K13) provides internal pull-up resistor. Pull-up resistor can be selected for each bit with the mask option. Figure 4.4.1.1 shows the configuration of input port. Interrupt request Kxx Data bus VDD Address VSS Mask option Fig. 4.4.1.
CHAPTER 4: PERIPHERAL CIRCUITS AND OPERATION (Input Ports) The interrupt selection register (SIK) and input comparison register (KCP) are individually set for the input ports K00–K03 and K10–K13, and can specify the terminals for generating interrupt and interrupt timing. The interrupt selection registers (SIK00–SIK03, SIK10–SIK13) select what input of K00–K03 and K10–K13 to use for the interrupt.
CHAPTER 4: PERIPHERAL CIRCUITS AND OPERATION (Input Ports) 4.4.4 I/O memory of input ports Table 4.4.4.1 shows the I/O addresses and the control bits for the input ports. Table 4.4.4.
CHAPTER 4: PERIPHERAL CIRCUITS AND OPERATION (Input Ports) SIK00–SIK03: K0 port interrupt selection register (FF20H) SIK10–SIK13: K1 port interrupt selection register (FF24H) Selects the ports to be used for the K00–K03 and K10–K13 input interrupts. When "1" is written: Enable When "0" is written: Disable Reading: Valid Enables the interrupt for the input ports (K00–K03, K10–K13) for which "1" has been written into the interrupt selection registers (SIK00–SIK03, SIK10–SIK13).
CHAPTER 4: PERIPHERAL CIRCUITS AND OPERATION (Input Ports) 4.4.5 Programming notes (1) When input ports are changed from low to high by pull-up resistors, the rise of the waveform is delayed on account of the time constant of the pull-up resistor and input gate capacitance. Hence, when fetching input ports, set an appropriate waiting time. Particular care needs to be taken of the key scan during key matrix configuration.
CHAPTER 4: PERIPHERAL CIRCUITS AND OPERATION (Output Ports) 4.5 Output Ports (R00–R03, R10–R13 and R20–R23) 4.5.1 Configuration of output ports The S1C63558 has 12 bits general output ports. Output specifications of the output ports can be selected individually with the mask option. Two kinds of output specifications are available: complementary output and N-channel open drain output. Figure 4.5.1.1 shows the configuration of the output port.
CHAPTER 4: PERIPHERAL CIRCUITS AND OPERATION (Output Ports) 4.5.3 High impedance control The terminal output status of the output ports can be set to a high impedance status. This control is done using the high impedance control register (RxxHIZ) corresponding to each output port (Rxx). When "1" is written to the high impedance control register, the corresponding output port terminal goes into high impedance status. When "0" is written, the port outputs a signal according to the data register. 4.5.
CHAPTER 4: PERIPHERAL CIRCUITS AND OPERATION (Output Ports) Note: • Be aware that the output terminal is fixed at a low (VSS) level the same as the DC output if "0" is written to the R00–R03 and R10–R13 registers when the special output has been selected. • Be aware that the output terminal shifts into high impedance status when "1" is written to the high impedance control register (R00HIZ–R03HIZ, R10HIZ–R13HIZ). • A hazard may occur when the special output signal is turned ON and OFF by software.
CHAPTER 4: PERIPHERAL CIRCUITS AND OPERATION (Output Ports) R03HIZ register Fix at "0" R03 register Fix at "1" FOUTE register "0" "1" "0" FOUT output Fig. 4.5.4.2 Output waveform of FOUT signal • XTMUTE (R10) The R10 terminal can output an XTMUTE signal. The XTMUTE signal is the transmitter mute signal used for the telephone function.
CHAPTER 4: PERIPHERAL CIRCUITS AND OPERATION (Output Ports) 4.5.5 I/O memory of output ports Table 4.5.5.1 shows the I/O addresses and control bits for the output ports. Table 4.5.5.1 Control bits of output ports Address FF06H FF13H FF30H FF31H FF32H FF33H FF34H FF35H FF65H FFC1H Register Comment 1 0 Name Init ∗1 R03 output selection (R03 should be fixed at "1".
CHAPTER 4: PERIPHERAL CIRCUITS AND OPERATION (Output Ports) R00HIZ–R03HIZ: R0 port high impedance control register (FF30H) R10HIZ–R13HIZ: R1 port high impedance control register (FF32H) R20HIZ–R23HIZ: R2 port high impedance control register (FF34H) Controls high impedance output of the output port.
CHAPTER 4: PERIPHERAL CIRCUITS AND OPERATION (Output Ports) PTOUT: TOUT output control register (FFC1H•D2) Controls the TOUT output. When "1" is written: TOUT output ON When "0" is written: TOUT output OFF Reading: Valid By writing "1" to the PTOUT register when the R02 register has been set to "1" and the R02HIZ register has been set to "0", the TOUT signal is output from the R02 terminal. When "0" is written, the R02 terminal goes high (VDD).
CHAPTER 4: PERIPHERAL CIRCUITS AND OPERATION (Output Ports) CRMO: R11 output selection register (FF13H•D1) Selects the R11 terminal function. When "1" is written: XRMUTE output When "0" is written: General-purpose DC output Reading: Valid When using the R11 terminal for the XRMUTE output, write "1" to this register. Furthermore, fix the R11 register at "1" and the R11HIZ register at "0". Refer to Section 4.14, "Telephone Function", for controlling the XRMUTE output.
CHAPTER 4: PERIPHERAL CIRCUITS AND OPERATION (I/O Ports) 4.6 I/O Ports (P00–P03, P10–P13, P20–P23 and P30–P33) 4.6.1 Configuration of I/O ports The S1C63558 has 16 bits general-purpose I/O ports. Figure 4.6.1.1 shows the configuration of the I/O port. Data bus Address VDD Pull-up control register (PUL) Address Address Data register Address I/O control register (IOC) PXX Mask option Fig. 4.6.1.
CHAPTER 4: PERIPHERAL CIRCUITS AND OPERATION (I/O Ports) 4.6.2 Mask option In the I/O ports, the output specification during output mode can be selected from complementary output and N-channel open drain output by mask option. They are selected in 1-bit units. When N-channel open drain output is selected, do not apply a voltage exceeding the power supply voltage to the port. The mask option also allows selection of whether the pull-up resistor is used or not during input mode.
CHAPTER 4: PERIPHERAL CIRCUITS AND OPERATION (I/O Ports) 4.6.5 Special outputs (CL, FR) The I/O ports P22 and P23 can be used as special output ports that output CL and FR signals by switching the function with software. Since P22 and P23 are set to I/O port (input mode) at initial reset, when using the special outputs, select the special output function using the EXLCDC register.
CHAPTER 4: PERIPHERAL CIRCUITS AND OPERATION (I/O Ports) 4.6.6 I/O memory of I/O ports Tables 4.6.6.1(a) and (b) show the I/O addresses and the control bits for the I/O ports. Table 4.6.6.
CHAPTER 4: PERIPHERAL CIRCUITS AND OPERATION (I/O Ports) Table 4.6.6.
CHAPTER 4: PERIPHERAL CIRCUITS AND OPERATION (I/O Ports) ESIF: Serial interface (1) enable register (FF70H•D0) Selects function for P10–P13. When "1" is written: Serial interface (1) input/output port When "0" is written: I/O port Reading: Valid When using the serial interface (1), write "1" to this register and when P10–P13 are used as the I/O port, write "0".
CHAPTER 4: PERIPHERAL CIRCUITS AND OPERATION (I/O Ports) When the terminal voltage is high (VDD) the port data that can be read is "1", and when the terminal voltage is low (VSS) the data is "0". When "with pull-up resistor" has been selected with the mask option and the PUL register is set to "1", the built-in pull-up resister goes ON during input mode, so that the I/O port terminal is pulled up.
CHAPTER 4: PERIPHERAL CIRCUITS AND OPERATION (I/O Ports) 4.6.7 Programming notes (1) When in the input mode, I/O ports are changed from low to high by pull-up resistor, the rise of the waveform is delayed on account of the time constant of the pull-up resistor and input gate capacitance. Hence, when fetching input ports, set an appropriate wait time. Particular care needs to be taken of the key scan during key matrix configuration.
CHAPTER 4: PERIPHERAL CIRCUITS AND OPERATION (LCD Driver) 4.7 LCD Driver (COM0–COM16, SEG0–SEG39) 4.7.1 Configuration of LCD driver The S1C63558 has 17 common terminals (COM0–COM16) and 40 segment terminals (SEG0–SEG39), so that it can drive a dot matrix type LCD with a maximum of 680 (40 × 17) dots. The driving method is 1/17 duty, 1/16 duty or 1/8 duty dynamic drive with four voltages (1/4 bias), VC1, VC23, VC4 and VC5. LCD display ON/OFF can be controlled by the software. 4.7.
CHAPTER 4: PERIPHERAL CIRCUITS AND OPERATION (LCD Driver) (2) Switching of drive duty In the S1C63558, the drive duty can be set to 1/17, 1/16 or 1/8 by the software. This setting is done using the LDUTY1 and LDUTY0 registers as shown in Table 4.7.4.1. Table 4.7.4.
CHAPTER 4: PERIPHERAL CIRCUITS AND OPERATION (LCD Driver) 4.7.5 Display memory 1/16 duty 1/17 duty The display memory is allocated to F000H–F25EH in the data memory area and the addresses and the data bits correspond to COM and SEG outputs as shown in Figure 4.7.5.1. COM0 COM1 COM2 COM3 COM4 COM5 COM6 COM7 SEG0 ■ D0 ■ D1 F000H ■ D2 ■ D3 ■ D0 ■ D1 F001H ■ D2 ■ D3 SEG1 ■ D0 ■ D1 F002H ■ D2 ■ D3 ■ D0 ■ D1 F003H ■ D2 SEG2 ■ D0 ■ D1 F004H ■ D2 ■ D3 ■ D0 ■ D1 F005H ■ D2 SEG3 ■ D0 ■ D1 F006H . . . . .
CHAPTER 4: PERIPHERAL CIRCUITS AND OPERATION (LCD Driver) COM0 COM1 SEG0 ■ D0 ■ D1 COM2 COM3 COM4 ■ D2 ■ D3 ■ D0 COM5 COM6 COM7 ■ D1 ■ D2 ■ D3 COM0 COM1 ■ D0 ■ D1 LPAGE COM2 COM3 ■ D2 ■ D3 =1 COM4 ■ D0 COM5 COM6 COM7 ■ D1 ■ D2 ■ D3 LPAGE =0 Unused ■ D0 F000H F001H F100H SEG1 SEG2 SEG3 SEG47 ■ D0 ■ D1 ■ D2 ■ D0 ■ D1 ■ D2 ■ D0 ■ D1 ■ D2 ■ D0 ■ D1 ■ D2 ■ D3 ■ D0 ■ D1 ■ D2 ■ D3 ■ D0 ■ D1 ■ D2 F002H F003H F102H ■ D3 ■ D0 F101H F200H ■ D1 ■ D2 ■ D3 ■ D0 ■ D3 ■ D0 ■ D1 ■ D2 ■ D
CHAPTER 4: PERIPHERAL CIRCUITS AND OPERATION (LCD Driver) 4.7.6 LCD contrast adjustment In the S1C63558, the LCD contrast can be adjusted by the software. It is realized by controlling the voltages VC1, VC23, VC4 and VC5 output from the LCD system voltage circuit. When these voltages are supplied to the externally expanded LCD driver, the expanded LCD contrast is adjusted at the same time. The contrast can be adjusted to 16 levels as shown in Table 4.7.6.1. Table 4.7.6.1 LCD contrast No.
CHAPTER 4: PERIPHERAL CIRCUITS AND OPERATION (LCD Driver) 4.7.7 I/O memory of LCD driver Table 4.7.7.1 shows the I/O addresses and the control bits for the LCD driver. Figure 4.7.7.1 shows the display memory map. Table 4.7.7.
CHAPTER 4: PERIPHERAL CIRCUITS AND OPERATION (LCD Driver) LPWR: LCD power control (ON/OFF) register (FF60H•D0) Turns the LCD system voltage circuit ON and OFF. When "1" is written: ON When "0" is written: OFF Reading: Valid When "1" is written to the LPWR register, the LCD system voltage circuit goes ON and generates the LCD drive voltage. When "0" is written, all the LCD drive voltages go to VSS level.
CHAPTER 4: PERIPHERAL CIRCUITS AND OPERATION (LCD Driver) LPAGE: LCD display memory selection register (FF61H•D0) Selects the display memory area at 1/8 duty drive.
CHAPTER 4: PERIPHERAL CIRCUITS AND OPERATION (Clock Timer) 4.8 Clock Timer 4.8.1 Configuration of clock timer The S1C63558 has a built-in clock timer that uses OSC1 (crystal oscillator) as the source oscillator. The clock timer is configured of an 8-bit binary counter that serves as the input clock, fOSC1 divided clock output from the prescaler. Timer data (128–16 Hz and 8–1 Hz) can be read out by the software. Figure 4.8.1.1 is the block diagram for the clock timer.
CHAPTER 4: PERIPHERAL CIRCUITS AND OPERATION (Clock Timer) 4.8.3 Interrupt function The clock timer can cause interrupts at the falling edge of 32 Hz, 8 Hz, 2 Hz and 1 Hz signals. Software can set whether to mask any of these frequencies. Figure 4.8.3.1 is the timing chart of the clock timer.
CHAPTER 4: PERIPHERAL CIRCUITS AND OPERATION (Clock Timer) 4.8.4 I/O memory of clock timer Table 4.8.4.1 shows the I/O addresses and the control bits for the clock timer. Table 4.8.4.
CHAPTER 4: PERIPHERAL CIRCUITS AND OPERATION (Clock Timer) EIT0: 32 Hz interrupt mask register (FFE6H•D0) EIT1: 8 Hz interrupt mask register (FFE6H•D1) EIT2: 2 Hz interrupt mask register (FFE6H•D2) EIT3: 1 Hz interrupt mask register (FFE6H•D3) These registers are used to select whether to mask the clock timer interrupt.
CHAPTER 4: PERIPHERAL CIRCUITS AND OPERATION (Stopwatch Timer) 4.9 Stopwatch Timer 4.9.1 Configuration of stopwatch timer The S1C63558 has 1/100 sec unit and 1/10 sec unit stopwatch timer built-in. The stopwatch timer is configured with a 2 levels 4-bit BCD counter which has an input clock approximating 100 Hz signal (signal divided from OSC1 to the closest 100 Hz) and data can be read in units of 4 bits by software. Figure 4.9.1.1 shows the configuration of the stopwatch timer.
CHAPTER 4: PERIPHERAL CIRCUITS AND OPERATION (Stopwatch Timer) SWD0–SWD3 generates an approximated 10 Hz signal from the basic 256 Hz signal (fOSC1 dividing clock). The count-up intervals are 2/256 sec and 3/256 sec, so that finally two patterns are generated: 25/ 256 sec and 26/256 sec intervals. Consequently, these patterns do not amount to an accurate 1/100 sec.
CHAPTER 4: PERIPHERAL CIRCUITS AND OPERATION (Stopwatch Timer) 4.9.4 I/O memory of stopwatch timer Table 4.9.4.1 shows the I/O addresses and the control bits for the stopwatch timer. Table 4.9.4.
CHAPTER 4: PERIPHERAL CIRCUITS AND OPERATION (Stopwatch Timer) When data of the counter is read at run mode, proper reading may not be obtained due to the carry from low-order digits (SWD0–SWD3) into high-order digits (SWD4–SWD7) (i.e., in case SWD0–SWD3 and SWD4–SWD7 reading span the timing of the carry). To avoid this occurrence, perform the reading after suspending the counter once and then set the SWRUN to "1" again.
CHAPTER 4: PERIPHERAL CIRCUITS AND OPERATION (Programmable Timer) 4.10 Programmable Timer 4.10.1 Configuration of programmable timer The S1C63558 has two 8-bit programmable timer systems (timer 0 and timer 1) built-in. Timer 0 and timer 1 are composed of 8-bit presettable down counters and they can be used as 8-bit × 2 channel programmable timers. Timer 0 also has an event counter function using the K13 input port terminal. Figure 4.10.1.1 shows the configuration of the programmable timer.
CHAPTER 4: PERIPHERAL CIRCUITS AND OPERATION (Programmable Timer) 4.10.2 Setting of initial value and counting down Timers 0 and 1 each have a down counter and reload data register. The reload data registers RLD00–RLD07 (timer 0) and RLD10–RLD17 (timer 1) are used to set the initial value to the down counter. By writing "1" to the timer reset bit PTRST0 (timer 0) or PTRST1 (timer 1), the down counter loads the initial value set in the reload register RLD.
CHAPTER 4: PERIPHERAL CIRCUITS AND OPERATION (Programmable Timer) 4.10.3 Counter mode The programmable timer can operate in two counter modes, timer mode and event counter mode. It can be selected by software. (1) Timer mode The timer mode counts down using the prescaler output as an input clock. In this mode, the programmable timer operates as a periodical timer using the OSC1 or OSC3 oscillation clock as a clock source. Timer 0 can operate in both the timer mode and the event counter mode.
CHAPTER 4: PERIPHERAL CIRCUITS AND OPERATION (Programmable Timer) 2,048 Hz ∗1 K13 input Counter input clock ∗2 Counter data n n-1 n-2 n-3 ∗1 When fOSC1 is 32.768 kHz ∗2 When PLPOL register is set to "0" Fig. 4.10.3.2 Count down timing with noise rejecter The operation of the event counter mode is the same as the timer mode except it uses the K13 input as the clock. Refer to Section 4.10.2, "Setting of initial value and counting down" for basic operation and control. 4.10.
CHAPTER 4: PERIPHERAL CIRCUITS AND OPERATION (Programmable Timer) 4.10.5 Interrupt function The programmable timer can generate an interrupt due to an underflow of the timer 0 and timer 1. See Figure 4.10.2.1 for the interrupt timing. An underflow of timer 0 and timer 1 sets the corresponding interrupt factor flag IPT0 (timer 0) or IPT1 (timer 1) to "1", and generates an interrupt. The interrupt can also be masked by setting the corresponding interrupt mask register EIPT0 (timer 0) or EIPT1 (timer 1).
CHAPTER 4: PERIPHERAL CIRCUITS AND OPERATION (Programmable Timer) 4.10.7 Transfer rate setting for serial interface The signal that is made from underflows of timer 1 by dividing them in 1/2, can be used as the clock source for the serial interface. The programmable timer outputs the clock to the serial interface by setting timer 1 into RUN state (PTRUN = "1"). It is not necessary to control with the PTOUT register. PTRUN1 Timer 1 underflow Source clock for serial I/F Fig. 4.10.7.
CHAPTER 4: PERIPHERAL CIRCUITS AND OPERATION (Programmable Timer) 4.10.8 I/O memory of programmable timer Table 4.10.8.1 shows the I/O addresses and the control bits for the programmable timer. Table 4.10.8.1 Control bits of programmable timer Address FFC0H FFC1H FFC2H FFC3H FFC4H FFC5H FFC6H FFC7H FFC8H FFC9H FFCAH FFCBH FFE2H FFF2H Register Name Init ∗1 1 0 ∗3 – ∗2 0 EVCNT FCSEL PLPOL EVCNT 0 Event ct.
CHAPTER 4: PERIPHERAL CIRCUITS AND OPERATION (Programmable Timer) CKSEL0: Prescaler 0 source clock selection register (FFC1H•D0) CKSEL1: Prescaler 1 source clock selection register (FFC1H•D1) Selects the source clock of the prescaler. When "1" is written: OSC3 clock When "0" is written: OSC1 clock Reading: Valid The source clock for the prescaler is selected from OSC1 or OSC3.
CHAPTER 4: PERIPHERAL CIRCUITS AND OPERATION (Programmable Timer) FCSEL: Timer 0 function selection register (FFC0H•D1) Selects whether the noise rejector of the clock input circuit will be used or not in the event counter mode. When "1" is written: With noise rejecter When "0" is written: Without noise rejecter Reading: Valid When "1" is written to the FCSEL register, the noise rejecter is used and counting is done by an external clock (K13) with 0.98 msec* or more pulse width.
CHAPTER 4: PERIPHERAL CIRCUITS AND OPERATION (Programmable Timer) PTRST0: Timer 0 reset (reload) (FFC2H•D1) PTRST1: Timer 1 reset (reload) (FFC3H•D1) Resets the timer and presets reload data to the counter. When "1" is written: Reset When "0" is written: No operation Reading: Always "0" By writing "1" to PTRST0, the reload data in the reload register PLD00–PLD07 is preset to the counter in timer 0. Similarly, the reload data in PLD10–PLD17 is preset to the counter in timer 1 by PTRST1.
CHAPTER 4: PERIPHERAL CIRCUITS AND OPERATION (Programmable Timer) EIPT0: Timer 0 interrupt mask register (FFE2H•D0) EIPT1: Timer 1 interrupt mask register (FFE2H•D1) These registers are used to select whether to mask the programmable timer interrupt or not. When "1" is written: Enabled When "0" is written: Masked Reading: Valid Timer 0 and timer 1 interrupts can be masked individually by the interrupt mask registers EIPT0 (timer 0) and EIPT1 (timer 1). At initial reset, these registers are set to "0".
CHAPTER 4: PERIPHERAL CIRCUITS AND OPERATION (Programmable Timer) 4.10.9 Programming notes (1) When reading counter data, be sure to read the low-order 4 bits (PTD00–PTD03, PTD10–PTD13) first. Furthermore, the high-order 4 bits (PTD04–PTD07, PTD14–PTD17) should be read within 0.73 msec (when fOSC1 is 32.768 kHz) of reading the low-order 4 bits (PTD00–PTD03, PTD10–PTD13).
CHAPTER 4: PERIPHERAL CIRCUITS AND OPERATION (Serial Interface) 4.11 Serial Interface 4.11.1 Configuration of serial interface The S1C63558 incorporates 2 channels (SIF (1), SIF (2)) of full duplex serial interface circuits (when asynchronous system is selected) that allows the user to select either clock synchronous system or asynchronous system. The data transfer method can be selected in software. When the clock synchronous system is selected, 8-bit data transfer is possible.
CHAPTER 4: PERIPHERAL CIRCUITS AND OPERATION (Serial Interface) Table 4.11.1.1 Configuration of input/output terminals Terminal When serial interface is selected P10 P11 P12 P13 SIN SOUT SCLK SRDY * The terminals used may vary depending on the transfer mode. SIN and SOUT are serial data input and output terminals which function identically in clock synchronous system and asynchronous system.
CHAPTER 4: PERIPHERAL CIRCUITS AND OPERATION (Serial Interface) Clock synchronous master mode In this mode, the internal clock is utilized as a synchronous clock for the built-in shift registers, and 8bit clock synchronous serial transfers can be performed with this serial interface as the master. The synchronous clock is also output from the SCLK terminal which enables control of the external (slave side) serial I/O device.
CHAPTER 4: PERIPHERAL CIRCUITS AND OPERATION (Serial Interface) 4.11.4 Clock source There are four clock sources and selection is made by setting the two bits of the clock source selection register SCS0 and SCS1 as shown in table below. Table 4.11.4.
CHAPTER 4: PERIPHERAL CIRCUITS AND OPERATION (Serial Interface) 4.11.5 Transmit-receive control Below is a description of the registers which handle transmit-receive control. With respect to transmitreceive control procedures and operations, please refer to the following sections in which these are discussed on a mode by mode basis. Shift register and receive data buffer Exclusive shift registers for transmitting and receiving are installed in this serial interface.
CHAPTER 4: PERIPHERAL CIRCUITS AND OPERATION (Serial Interface) In an asynchronous system, RXTRG is used to prepare for next data receiving. After reading the received data from the receive data buffer, write "1" into RXTRG to signify that the receive data buffer is empty. If "1" is not written into RXTRG, the overrun error flag OER will be set to "1" when the next receiving operation is completed.
CHAPTER 4: PERIPHERAL CIRCUITS AND OPERATION (Serial Interface) (4) Clock source selection In the master mode, select the synchronous clock source by writing data to the two bits of the clock source selection registers SCS0 and SCS1. (See Table 4.11.4.1.) This selection is not necessary in the slave mode. The parity enable register EPR is also assigned to this address, however, since parity is not necessary in the clock synchronous mode, parity check will not take place regardless of how they are set.
CHAPTER 4: PERIPHERAL CIRCUITS AND OPERATION (Serial Interface) Data receive procedure The control procedure and operation during receiving is as follows. (1) Write "0" in the receive enable register RXEN and transmit enable register TXEN to reset the serial interface. Data receiving RXEN ← 0, TXEN ← 0 (2) Write "1" in the receive enable register RXEN to set into the receiving enable status.
CHAPTER 4: PERIPHERAL CIRCUITS AND OPERATION (Serial Interface) Transmit/receive ready (SRDY) signal When this serial interface is used in the clock synchronous slave mode (external clock input), an SRDY signal is output to indicate whether or not this serial interface can transmit/receive to the master side (external serial input/output device).
CHAPTER 4: PERIPHERAL CIRCUITS AND OPERATION (Serial Interface) 4.11.7 Operation of asynchronous transfer Asynchronous transfer is a mode that transfers by adding a start bit and a stop bit to the front and the back of each piece of serial converted data.
CHAPTER 4: PERIPHERAL CIRCUITS AND OPERATION (Serial Interface) (4) Parity bit selection When checking and adding parity bits, write "1" into the parity enable register EPR to set to "with parity check". As a result of this setting, in the 7-bit asynchronous mode, it has a 7 bits data + parity bit configuration and in the 8-bit asynchronous mode it has an 8 bits data + parity bit configuration.
CHAPTER 4: PERIPHERAL CIRCUITS AND OPERATION (Serial Interface) Data receive procedure The control procedure and operation during receiving is as follows. (1) Write "0" in the receive enable register RXEN to set the receiving disable status and to reset the respective PER, OER, FER flags that indicate parity, overrun and framing errors. Data receiving RXEN ← 0 Resets error flags (2) Write "1" in the receive enable register RXEN to set into the receiving enable status.
CHAPTER 4: PERIPHERAL CIRCUITS AND OPERATION (Serial Interface) Receive error During receiving the following three types of errors can be detected by an interrupt. (1) Parity error When writing "1" to the EPR register to select "with parity check", a parity check (vertical parity check) is executed during receiving. After each data bit is sent a parity check bit is sent. The parity check bit is a "0" or a "1". Even parity checking will cause the sum of the parity bit and the other bits to be even.
CHAPTER 4: PERIPHERAL CIRCUITS AND OPERATION (Serial Interface) Timing chart Figure 4.11.7.4 show the asynchronous transfer timing chart. TXEN TXTRG(RD) TXTRG(WR) Sumpling clock D0 D1 D2 D3 D4 D5 D6 D7 SOUT (In 8-bit mode/Non parity) Interrupt (a) Transmit timing RXEN RXTRG(RD) RXTRG(WR) Sumpling clock SIN D0 D1 D2 D3 D4 D5 D6 D7 (In 8-bit mode/Non parity) TRXD D0 D1 D2 D3 D4 D5 D6 D7 1st data D0 D1 D2 D3 D4 D5 D6 D7 2st data OER control signal OER Interrupt (b) Receive timing Fig. 4.11.7.
CHAPTER 4: PERIPHERAL CIRCUITS AND OPERATION (Serial Interface) Error generation Address Address Data bus Receive completion Address Address Transmit completion Address Address Interrupt factor flag ISER Interrupt mask register EISER Interrupt factor flag ISRC Interrupt request Interrupt mask register EISRC Interrupt factor flag ISTR Interrupt mask register EISTR Fig. 4.11.8.
CHAPTER 4: PERIPHERAL CIRCUITS AND OPERATION (Serial Interface) 4.11.9 I/O memory of serial interface Tables 4.11.9.1(a) and (b) show the serial interface control bits and their addresses. Table 4.11.9.
CHAPTER 4: PERIPHERAL CIRCUITS AND OPERATION (Serial Interface) Table 4.11.9.
CHAPTER 4: PERIPHERAL CIRCUITS AND OPERATION (Serial Interface) The ESIF is the serial interface (1), the ESIFS is the serial interface (2) enable registers and P10–P13, P30– P33 terminals become serial input/output terminals (SIN, SOUT, SCLK, SRDY) when "1" is written, and they become I/O port terminals when "0" is written. Also, see Table 4.11.3.2 for the terminal settings according to the transfer modes. At initial reset, this register is set to "0".
CHAPTER 4: PERIPHERAL CIRCUITS AND OPERATION (Serial Interface) EPR: Serial interface (1) parity enable register (FF71H•D3) EPRS: Serial interface (2) parity enable register (FF59H•D3) Selects the parity function. When "1" is written: With parity When "0" is written: Non parity Reading: Valid Selects whether or not to check parity of the received data and to add a parity bit to the transmitting data.
CHAPTER 4: PERIPHERAL CIRCUITS AND OPERATION (Serial Interface) RXEN: Serial interface (1) receive enable register (FF72H•D2) RXENS: Serial interface (2) receive enable register (FF5AH•D2) Sets the serial interface to the receive enabled status. When "1" is written: Receive enabled When "0" is written: Receive disabled Reading: Valid When "1" is written to RXEN/RXENS, the serial interface shifts to the receive enabled status and shifts to the receive disabled status when "0" is written.
CHAPTER 4: PERIPHERAL CIRCUITS AND OPERATION (Serial Interface) During receiving The received data is stored. When "1" is read: High level When "0" is read: Low level The data from the receive data buffer can be read out. Since the sift register is provided separately from this buffer, reading can be done during a receive operation in the asynchronous mode. (The buffer function is not used in the clock synchronous mode.) Read the data after waiting for a receive completion interrupt.
CHAPTER 4: PERIPHERAL CIRCUITS AND OPERATION (Serial Interface) FER: Serial interface (1) framing error flag (FF73H•D2) FERS: Serial interface (2) framing error flag (FF5BH•D2) Indicates the generation of a framing error. When "1" is read: Error When "0" is read: No error When "1" is written: Reset to "0" When "0" is written: Invalid FER/FERS is an error flag that indicates the generation of a framing error and becomes "1" when an error has been generated.
CHAPTER 4: PERIPHERAL CIRCUITS AND OPERATION (Serial Interface) 4.11.10 Programming notes (1) Be sure to initialize the serial interface mode in the transmit/receive disabled status (TXEN = RXEN = "0"). (2) Do not perform double trigger (writing "1") to TXTRG (RXTRG) when the serial interface is in the transmitting (receiving) operation.
CHAPTER 4: PERIPHERAL CIRCUITS AND OPERATION (Sound Generator) 4.12 Sound Generator 4.12.1 Configuration of sound generator The S1C63558 has a built-in sound generator for generating buzzer signals. Hence, generated buzzer signals can be output from the R00 (XBZ) and R01 (BZ) terminals. Aside permitting the respective setting of the buzzer signal frequency and sound level to 8 stages, it permits the adding of a digital envelope by means of duty ratio control.
CHAPTER 4: PERIPHERAL CIRCUITS AND OPERATION (Sound Generator) 4.12.3 Control of buzzer output The R01 and R00 terminals for buzzer output are set as general-purpose output ports at initial reset. Therefore, the R01 terminal must be set as the BZ output terminal by writing "1" to the BZOUT register before controlling buzzer output. Furthermore, the data register R01 for the R01 output port should be fixed at "1" and the high-impedance register R01HIZ at "0".
CHAPTER 4: PERIPHERAL CIRCUITS AND OPERATION (Sound Generator) 4.12.4 Setting of buzzer frequency and sound level The divided signal of the OSC1 oscillation clock (32.768 kHz) is used for the buzzer (BZ, XBZ) signals and it is set up such that 8 types of frequencies can be selected by changing this division ratio. Frequency selection is done by setting the buzzer frequency selection registers BZFQ0–BZFQ2 as shown in Table 4.12.4.1. Table 4.12.4.
CHAPTER 4: PERIPHERAL CIRCUITS AND OPERATION (Sound Generator) 4.12.5 Digital envelope A digital envelope for duty control can be added to the buzzer signal. The envelope can be controlled by staged changing of the same duty envelope as detailed in Table 4.12.4.2 in the preceding item from level 1 (maximum) to level 8 (minimum). The addition of an envelope to the buzzer signal can be done by writing "1" into ENON, but when "0" has been written it is not added.
CHAPTER 4: PERIPHERAL CIRCUITS AND OPERATION (Sound Generator) 4.12.6 One-shot output The sound generator has a one-shot output function for outputting a short duration buzzer signal for key operation sounds and similar effects. Either 125 msec or 31.25 msec can be selected by SHTPW register for one-shot buzzer signal output time. The output of the one-shot buzzer is controlled by writing "1" into the one-shot buzzer trigger BZSHT.
CHAPTER 4: PERIPHERAL CIRCUITS AND OPERATION (Sound Generator) 4.12.7 I/O memory of sound generator Table 4.12.7.1 shows the I/O addresses and the control bits for the sound generator. Table 4.12.7.
CHAPTER 4: PERIPHERAL CIRCUITS AND OPERATION (Sound Generator) XBZOUT: R00 output selection register (FF65H•D0) Selects the R00 terminal function. When "1" is written: XBZ output When "0" is written: General-purpose DC output Reading: Valid When using the R00 terminal for the XBZ output, write "1" to this register. Furthermore, fix the R00 register at "1" and the R00HIZ register at "0". At initial reset, this register is set to "0".
CHAPTER 4: PERIPHERAL CIRCUITS AND OPERATION (Sound Generator) BDTY0–BDTY2: Duty level selection register (FF6FH•D0–D2) Selects the duty ratio of the buzzer signal as shown in Table 4.12.7.3. Table 4.12.7.3 Duty ratio setting Level BDTY2 BDTY1 BDTY0 Level 1 (Max.) Level 2 Level 3 Level 4 Level 5 Level 6 Level 7 Level 8 (Min.) 0 0 0 0 1 1 1 1 0 0 1 1 0 0 1 1 0 1 0 1 0 1 0 1 Duty ratio by buzzer frequency (Hz) 4096.0 3276.8 2730.7 2340.6 2048.0 1638.4 1365.3 1170.
CHAPTER 4: PERIPHERAL CIRCUITS AND OPERATION (Sound Generator) SHTPW: One-shot buzzer pulse width setting register (FF6DH•D0) Selects the output time of the one-shot buzzer. When "1" is written: 125 msec When "0" is written: 31.25 msec Reading: Valid Writing "1" into SHTPW causes the one-short output time to be set at 125 msec, and writing "0" causes it to be set to 31.25 msec. It does not affect normal buzzer output. At initial reset, this register is set to "0".
CHAPTER 4: PERIPHERAL CIRCUITS AND OPERATION (SVD Circuit) 4.13 SVD (Supply Voltage Detection) Circuit 4.13.1 Configuration of SVD circuit The S1C63558 has a built-in SVD (supply voltage detection) circuit, so that the software can find when the source voltage lowers. It is possible to check an external voltage drop, other than the supply voltage, by mask option. Turning the SVD circuit ON/OFF and the SVD criteria voltage setting can be done with software. Figure 4.13.1.
CHAPTER 4: PERIPHERAL CIRCUITS AND OPERATION (SVD Circuit) When the SVDON register is set to "1", source voltage or external voltage detection by the SVD circuit is executed. As soon as the SVDON register is reset to "0", the result is loaded to the SVDDT latch and the SVD circuit goes OFF. To obtain a stable detection result, the SVD circuit must be ON for at least l00 µsec. So, to obtain the SVD detection result, follow the programming sequence below. 1. 2. 3. 4.
CHAPTER 4: PERIPHERAL CIRCUITS AND OPERATION (SVD Circuit) 4.13.5 Programming notes (1) To obtain a stable detection result, the SVD circuit must be ON for at least l00 µsec. So, to obtain the SVD detection result, follow the programming sequence below. 1. 2. 3. 4. Set SVDON to "1" Maintain for 100 µsec minimum Set SVDON to "0" Read SVDDT (2) The SVD circuit should normally be turned OFF because SVD operation increase current consumption.
CHAPTER 4: PERIPHERAL CIRCUITS AND OPERATION (Telephone Function) 4.14 Telephone Function (Tone/Pulse Dialer) 4.14.1 Configuration of tone/pulse dialer The S1C63558 has a telephone function built-in. This function includes DTMF (Dual Tone Multi-Frequency), DP (Dialing pulse), Pause, Flash, Hold-line, Mute control, Hook switch control and Handfree control. The configuration of the telephone function is shown in Figure 4.14.1.1. 3.
CHAPTER 4: PERIPHERAL CIRCUITS AND OPERATION (Telephone Function) 4.14.2 Mask option Output specifications for the DP terminal is selected from between complementary output and Nch open drain output by mask option. Since the R10 to R13 terminals are used for XTMUTE, XRMUTE, HDO and HFO outputs, the output specifications of the output ports R10–R13 apply to their output specifications. Either complementary output or Nch open drain output can be selected for each terminal by the output port mask option.
CHAPTER 4: PERIPHERAL CIRCUITS AND OPERATION (Telephone Function) R10HIZ "0" R11HIZ "0" R10 register "1" R11 register "1" CTMO(FF13H•D0) "1" "0" CRMO(FF13H•D1) "1" "0" CTMUT(FF18H•D0) "1" "0" CRMUT(FF18H•D1) "1" "0" R10(XTMUTE) output Hi-z "1" "1" R11(XRMUTE) output Hi-z "1" "1" Fig. 4.14.3.1 Output terminal setting procedure (2) Executing After setting, write the corresponding control register to start the execution. Table 4.14.3.2 lists control registers for executing.
CHAPTER 4: PERIPHERAL CIRCUITS AND OPERATION (Telephone Function) (3) Interrupt The dialing, pause and flash functions generate an interrupt when their operation has finished. At this time, the interrupt factor flag ID (FFF9H•D0) is set to "1". An interrupt request to the CPU will be generated when the interrupt mask register EID (FFE9H•D0) is set to "1" and will be masked when EID is set to "0".
CHAPTER 4: PERIPHERAL CIRCUITS AND OPERATION (Telephone Function) 4.14.4 Tone mode (DTMF) In tone mode, the dialer outputs a tone (pushbutton dial) signal. This mode is set by default at initial reset. To change the mode from pulse mode to this mode, write "0" to the TPS register (FF10H•D3). The PB (tone) signal generates two different frequencies that are determined by the pushed button in the push button matrix as shown in Table 4.14.4.1. Table 4.14.4.
CHAPTER 4: PERIPHERAL CIRCUITS AND OPERATION (Telephone Function) The row group and column group dividers can be operated individually. The software can select one of them to output a single tone signal as well as a dual tone signal output. Use the SINR (FF16H•D1) and SINC (FF16H•D0) registers for this control. Table 4.14.4.
CHAPTER 4: PERIPHERAL CIRCUITS AND OPERATION (Telephone Function) HSON (FF18H•D3) "0" Data bus 5 Write to TCD (FF17H) "0" DP "0" 8 9 7 tTD TONE "0" tTIP XRMUTE(R11) "1" XTMUTE(R10) "1" tTIP tTIP tMH Interrupt request tTD: Tone duration time tTIP: Tone inter-digit pause time tMH: Mute hold time Fig. 4.14.4.2 Tone output timing chart By writing data to the TCD register, the TONE terminal outputs the specified tone signal. At the same time, the XTMUTE (R10) terminal goes Low level.
CHAPTER 4: PERIPHERAL CIRCUITS AND OPERATION (Telephone Function) The following summarizes a dialing procedure in the tone mode: 1. Write "1" to the HSON register. 2. Write "1" to the CTO register. (note) 3. Write the dial tone data to the TCD register. (tone output is started) 4. Count the tone duration time and then write "0" to the CTO register. (note) 5. Reset the interrupt factor flag after an interrupt has occurred. 6. Repeat steps 2 to 5 for the number of dial digits. : Communication : 7.
CHAPTER 4: PERIPHERAL CIRCUITS AND OPERATION (Telephone Function) The inter-digit pause time is the interval between digits of a dial number. It can be selected from among 15 types within 94 msec to 1,406 msec using the IDP3–IDP0 register (FF15H) as shown in Table 4.14.5.1. Table 4.14.5.
CHAPTER 4: PERIPHERAL CIRCUITS AND OPERATION (Telephone Function) HSON (FF18H•D3) "0" Data bus Wite to TCD (FF17H) 2 3 3 "0" Make DP "0" Break XRMUTE(R11) "1" XTMUTE(R10) "1" tIDP tIDP tMH tIDP tMH Interrupt request tIDP: Inter-digit pause time tMH: Mute hold time Fig. 4.14.5.2 Pulse output timing chart When data is written to the TCD register, the specified number of pulses are output from the DP terminal. At the same time, XRMUTE (R11) and XTMUTE (R10) terminals go Low level.
CHAPTER 4: PERIPHERAL CIRCUITS AND OPERATION (Telephone Function) 4.14.6 Pause This dialer allows insertion of a pause within 1 to 15 seconds between each two digits of tone signals or pulses. The pause time should be set to the PTS3–PTS0 register (FF11H) as shown in Table 4.14.6.1 before dialing. Table 4.14.6.
CHAPTER 4: PERIPHERAL CIRCUITS AND OPERATION (Telephone Function) HSON (FF18H•D3) "0" Data bus Pause 2 Write to TCD (FF17H) "0" Write to PAUSE (FF14H•D1) "0" DP "0" TONE "0" 3 tTD tTD tTIP XRMUTE(R11) "1" XTMUTE(R10) "1" tPS tMH tTIP tMH Interrupt request tTD: tTIP: tMH: tPS: Tone duration time Tone inter-digit pause time Mute hold time Pause time Fig. 4.14.6.1(b) Pause execution timing chart in tone mode PAUSE is a write-only bit and is used as the trigger for a pause insertion.
CHAPTER 4: PERIPHERAL CIRCUITS AND OPERATION (Telephone Function) 4.14.7 Flash The flash function pulls down the DP terminal to Low level for a predetermined period of time to temporarily restore the telephone to on-hook status. The flash time should be set to the FTS3–FTS0 register (FF12H). Table 4.14.7.1 lists the available flash time. Table 4.14.7.
CHAPTER 4: PERIPHERAL CIRCUITS AND OPERATION (Telephone Function) FLASH is a write-only bit and is used as the trigger for a flash operation. When the FLASH bit is set to "1", the DP terminal goes Low level until the flash time set by the FTS register has passed, then the DP terminal returns to High level. After that 938 msec of the flash pause time is taken and an interrupt occurs. At the same time the FLASH bit is automatically cleared to "0" by the interrupt.
CHAPTER 4: PERIPHERAL CIRCUITS AND OPERATION (Telephone Function) 4.14.9 Interrupt The dialer has three types of interrupt generation functions. (1) Dialing interrupt Tone mode In the tone mode, 94 msec of an inter-digit pause is made after a tone signal (mim. 94 msec, can be prolonged by the CTO register) is output completely. A dialing interrupt occurs immediately following the inter-digit pause. See the timing chart in Figure 4.14.4.2.
CHAPTER 4: PERIPHERAL CIRCUITS AND OPERATION (Telephone Function) 4.14.10 I/O memory of telephone function Table 4.14.10.1 shows the I/O address and the control bits for the telephone function. Table 4.14.10.
CHAPTER 4: PERIPHERAL CIRCUITS AND OPERATION (Telephone Function) R10HIZ–R13HIZ: R1 port high impedance control register (FF32H) Controls high impedance output of the output port. When "1" is written: High impedance When "0" is written: Data output Reading: Valid When using the XTMUTE, XRMUTE, HDO and HFO outputs, fix these registers at "0". R10HIZ, R11HIZ, R12HIZ and R13HIZ correspond to the XTMUTE, XRMUTE, HDO and HFO outputs, respectively. At initial reset, these registers are set to "0".
CHAPTER 4: PERIPHERAL CIRCUITS AND OPERATION (Telephone Function) CHFO: R13 output selection register (FF13H•D3) Selects the R13 terminal function. When "1" is written: HFO output When "0" is written: General-purpose DC output Reading: Valid When using the R13 terminal for the HFO output, write "1" to this register. Furthermore, fix the R13 register at "1" and the R13HIZ register at "0". The HFO output is controlled by the HF register (FF14H•D3). At initial reset, this register is set to "0".
CHAPTER 4: PERIPHERAL CIRCUITS AND OPERATION (Telephone Function) PTS0–PTS3: Pause time selection (FF11H) Selects a pause time from among the 15 types shown in Table 4.14.10.2. Table 4.14.10.
CHAPTER 4: PERIPHERAL CIRCUITS AND OPERATION (Telephone Function) PAUSE: Pause function (FF14H•D1) Executes the pause function. When "1" is written: Execute pause function When "0" is written: Cancel pause function Reading: Always "0" Writing "1" to PAUSE executes the pause function. The pause time set by the PTS register is inserted to the DP output signal. An interrupt occurs when the pause is released and the PAUSE bit is automatically cleared to "0".
CHAPTER 4: PERIPHERAL CIRCUITS AND OPERATION (Telephone Function) SINR: DTMF row frequencies output enable (FF16H•D1) Enables or disables the DTMF row frequency output. When "1" is written: Enabled When "0" is written: Disabled Reading: Valid This register is used to set the tone output mode with the SINC register. Write "1" to this register when performing dual-tone output or single-tone ROW frequency output. At initial reset, this register is set to "1".
CHAPTER 4: PERIPHERAL CIRCUITS AND OPERATION (Telephone Function) TCD0–TCD3: Telephone code for dialing (FF17H) By writing code to this register, the dialer starts outputting the corresponding dial pulses (in pulse mode) or tone signals (in tone mode). When the output is finished, an interrupt occurs. At initial reset, this register is set to "0000B". The following shows the register settings for each mode. (1) Pulse mode In this mode, write data for a dial number (1–9, 0) to this register. Table 4.14.10.
CHAPTER 4: PERIPHERAL CIRCUITS AND OPERATION (Telephone Function) CTMUT: Transmit mute control (FF18H•D0) Controls the transmit mute. When "1" is written: Transmit mute output When "0" is written: Low level output on XTMUTE (R10) terminal Reading: Valid When "0" is written to the CTMUTE register, the XTMUTE (R10) terminal is pulled down to Low (VSS) level to mute the transmit line.
CHAPTER 4: PERIPHERAL CIRCUITS AND OPERATION (Telephone Function) ID: Interrupt factor flag (FFF9H•D0) Indicates the dialing interrupt generation status. When "1" is read: Interrupt has occurred When "0" is read: Interrupt has not occurred When "1" is written: Flag is reset When "0" is written: Invalid The interrupt factor flag ID is set to "1" when a dialing interrupt factor occurs (when a dialing output, pause or flash cycle is completed).
CHAPTER 4: PERIPHERAL CIRCUITS AND OPERATION (FSK Demodulator) 4.15 FSK Demodulator 4.15.1 Configuration of FSK demodulator The S1C63558 has a built-in FSK (Frequency Shift Keying) demodulator that interfaces to various calling information delivery services such as calling number delivery (compatible with ITU-T V.23/Bell 202). Figures 4.15.1.1 and 4.15.1.2 show the block diagram of the FSK demodulator and the configuration of FSK core block, respectively.
CHAPTER 4: PERIPHERAL CIRCUITS AND OPERATION (FSK Demodulator) AVDD AVSS – Amp + TIP RING Band-pass filter FSK demodulator FSKIN FB BPOUT 0.1µF CDIN Carrier detection circuit VDD CDET RDIN RDET RDRC Reference voltage generation circuit VREF FOSC3 Clock generator PWDN Fig. 4.15.1.2 FSK core configuration The external terminals of the FSK demodulator are as follows: AVDD, AVSS TIP RING FB BPOUT CDIN RDIN RDRC VRFF Power terminals for the FSK block.
CHAPTER 4: PERIPHERAL CIRCUITS AND OPERATION (FSK Demodulator) 4.15.2 Mask option The gain of the input amplifier shown in Figure 4.15.1.2 is fixed at 1 (0dB) when the internal feedback resistor is used. Use of this internal feedback resistor can be selected by mask option. When "Use" is selected: FB VREF 40kΩ 100kΩ 100kΩ – Amp + TIP 100kΩ RING 100kΩ 40kΩ VREF Fig. 4.15.2.1 Circuit configuration when the internal feedback resistor is used The gain is fixed at 1 (0dB). Leave the FB terminal open.
CHAPTER 4: PERIPHERAL CIRCUITS AND OPERATION (FSK Demodulator) 4.15.3 Ring/carrier detection and interrupt The FSK block has a ring detection circuit and a carrier detection circuit built-in. When a ring signal is input, the ring detection circuit sets the RDET bit (FF66H•D1) to "1" while the signal is being input. In the same way, when a carrier is input, the carrier detection circuit sets the CDET bit (FF66H•D0) to "1".
CHAPTER 4: PERIPHERAL CIRCUITS AND OPERATION (FSK Demodulator) Since the value of both RDIT and CDET is the same as the comparison register, an interrupt does not occur at (1). When a ring is input, the ring detection interrupt will be generated since RDIT changes "0" to "1" and no longer matches the contents of RDETCP at (2). To generate an interrupt when a ring input is completed, write "1" to RDETCP.
CHAPTER 4: PERIPHERAL CIRCUITS AND OPERATION (FSK Demodulator) Data input procedure (example for Bellcore) is shown below. FSK receiving no 1st RDET yes OSCC ← 1 5 msec wait CLKCHG ← 1 FSKON ← 1 RXENS ← 1 Receiving error yes no no Receiving complete yes Received data reading from TRXD0–TRXD7 Error processing RXTRGS ← 1 no CDET → 0 yes RXENS ← 0 FSKON ← 0 CLKCHG ← 0 OSCC ← 0 END Fig. 4.15.4.1 Data input flow (example for Bellcore) 1. Detect the falling edge (RDET = "0") of the first ring input.
CHAPTER 4: PERIPHERAL CIRCUITS AND OPERATION (FSK Demodulator) 4.15.5 I/O memory of FSK demodulator Table 4.15.5.1 shows the I/O address and control bits for the FSK demodulator. Table 4.15.5.
CHAPTER 4: PERIPHERAL CIRCUITS AND OPERATION (FSK Demodulator) CDET: Carrier detection bit (FF66H•D0) Indicates the carrier detection status. When "1" is read: Carrier is detected When "0" is read: Carrier is not detected Writing: Invalid CDET goes "1" when a carrier is input. When the carrier is stopped, CDET returns to "0". This bit is dedicated for reading, so writing can not be done. At initial reset, this bit is set to "0".
CHAPTER 4: PERIPHERAL CIRCUITS AND OPERATION (FSK Demodulator) The interrupt factor flag is reset to "0" by writing "1". After an interrupt occurs, the same interrupt will occur again if the interrupt enabled state (I flag = "1") is set or the RETI instruction is executed unless the interrupt factor flag is reset. Therefore, be sure to reset (write "1" to) the interrupt factor flag in the interrupt service routine before shifting to the interrupt enabled state. At initial reset, these flags are set to "0".
CHAPTER 4: PERIPHERAL CIRCUITS AND OPERATION (Interrupt and HALT) 4.16 Interrupt and HALT The S1C63558 provides the following interrupt functions.
CHAPTER 4: PERIPHERAL CIRCUITS AND OPERATION (Interrupt and HALT) ID EID IRDET EIRDET ICDET NMI request Watchdog timer EICDET IPT0 EIPT0 IPT1 EIPT1 ISER EISER ISRC EISRC ISTR EISTR ISERS EISERS ISRCS EISRCS ISTRS EISTRS Interrupt vector generation circuit K00 KCP00 SIK00 Program counter (low-order 4 bits) K01 KCP01 SIK01 IK0 K02 INT Interrupt request EIK0 KCP02 SIK02 K03 Interrupt flag KCP03 SIK03 K10 KCP10 SIK10 K11 KCP11 Interrupt factor flag SIK11 IK1 K12 Interrupt mask register EIK1 KC
CHAPTER 4: PERIPHERAL CIRCUITS AND OPERATION (Interrupt and HALT) 4.16.1 Interrupt factor Table 4.16.1.1 shows the factors for generating interrupt requests. The interrupt flags are set to "1" depending on the corresponding interrupt factors. The CPU operation is interrupted when an interrupt factor flag is set to "1" if the following conditions are established. • The corresponding mask register is "1" (enabled) • The interrupt flag is "1" (EI) The interrupt factor flag is reset to "0" when "1" is written.
CHAPTER 4: PERIPHERAL CIRCUITS AND OPERATION (Interrupt and HALT) 4.16.2 Interrupt mask The interrupt factor flags can be masked by the corresponding interrupt mask registers. The interrupt mask registers are read/write registers. They are enabled (interrupt authorized) when "1" is written to them, and masked (interrupt inhibited) when "0" is written to them. At initial reset, the interrupt mask register is set to "0". Table 4.16.2.
CHAPTER 4: PERIPHERAL CIRCUITS AND OPERATION (Interrupt and HALT) 4.16.4 I/O memory of interrupt Tables 4.16.4.1(a) and (b) show the I/O addresses and the control bits for controlling interrupts. Table 4.16.4.
CHAPTER 4: PERIPHERAL CIRCUITS AND OPERATION (Interrupt and HALT) Table 4.16.4.
CHAPTER 4: PERIPHERAL CIRCUITS AND OPERATION (Interrupt and HALT) KCP03–KCP00, KCP13–KCP10: SIK03–SIK00, SIK13–SIK10: EIK0, EIK1: IK0, IK1: Input comparison registers (FF22H, FF26H) Interrupt selection registers (FF20H, FF24H) Interrupt mask registers (FFE4H•D0, FFE5H•D0) Interrupt factor flags (FFF4H•D0, FFF5H•D0) Refer to Section 4.4, "Input Ports". EIT3–EIT0: Interrupt mask registers (FFE6H) IT3–IT0: Interrupt factor flags (FFF6H) Refer to Section 4.8, "Clock Timer".
CHAPTER 5: SUMMARY OF NOTES CHAPTER 5 SUMMARY OF NOTES 5.1 Notes for Low Current Consumption The S1C63558 contains control registers for each of the circuits so that current consumption can be reduced. These control registers reduce the current consumption through programs that operate the circuits at the minimum levels. The following lists the circuits that can control operation and their control registers. Refer to these when programming. Table 5.1.
CHAPTER 5: SUMMARY OF NOTES 5.2 Summary of Notes by Function Here, the cautionary notes are summed up by function category. Keep these notes well in mind when programming. Memory and stack (1) Memory is not implemented in unused areas within the memory map. Further, some non-implementation areas and unused (access prohibition) areas exist in the display memory area and the peripheral I/O area. If the program that accesses these areas is generated, its operation cannot be guaranteed. Refer to Section 4.7.
CHAPTER 5: SUMMARY OF NOTES Output port (1) When using an output port (R00–R03, R10–R13) for special output, fix the corresponding data register (R00–R03, R10–R13) at "1" and the high impedance control register (R00HIZ–R03HIZ, R10HIZ– R13HIZ) at "0" (data output). Be aware that the output terminal is fixed at a low (VSS) level the same as the DC output if "0" is written to the data registers when the special output has been selected.
CHAPTER 5: SUMMARY OF NOTES (2) The programmable timer actually enters RUN/STOP status in synchronization with the falling edge of the input clock after writing to the PTRUN0/PTRUN1 register. Consequently, when "0" is written to the PTRUN0/PTRUN1 register, the timer enters STOP status at the point where the counter is decremented (-1). The PTRUN0/PTRUN1 register maintains "1" for reading until the timer actually stops. Figure 5.2.1 shows the timing chart for the RUN/STOP control.
CHAPTER 5: SUMMARY OF NOTES Sound generator (1) Since the BZ and XBZ signals are generated asynchronous to the BZE register, hazards may be produced when the signal goes ON/OFF due to the setting of the BZE register. (2) The one-shot output is only valid when the normal buzzer output is OFF (BZE = "0") and will be invalid when the normal buzzer output is ON (BZE = "1").
CHAPTER 5: SUMMARY OF NOTES 5.3 Precautions on Mounting ● Oscillation characteristics change depending on conditions (board pattern, components used, etc.). In particular, when a ceramic oscillator or crystal oscillator is used, use the oscillator manufacturer's recommended values for constants such as capacitance and resistance. ● Disturbances of the oscillation clock due to noise may cause a malfunction.
CHAPTER 5: SUMMARY OF NOTES ● In order to prevent generation of electromagnetic induction noise caused by mutual inductance, do not arrange a large current signal line near the circuits that are sensitive to noise such as the oscillation unit. ● When a signal line is parallel with a high-speed line in long distance or intersects a high-speed line, noise may generated by mutual interference between the signals and it may cause a malfunction.
CHAPTER 6: BASIC EXTERNAL WIRING DIAGRAM CHAPTER 6 BASIC EXTERNAL WIRING DIAGRAM C1 C2 TEST VDD AVDD VD1 C3 S1C63558 OSC3 CGC CR OSC4 VC1 VC23 VC4 VC5 CDC CRES AVSS VSS C5 C6 C7 C4 0.1µ 0.2µ 270k DP TONE RESET 1000p 10k X'tal OSC2 R00 (XBZ) R01 (BZ) R02 (TOUT) R03 (FOUT) R10 (XTMUTE) R11 (XRMUTE) R12 (HDO) R13 (HFO) R20–R23 1000p + CP CGX OSC1 [The potential of the substrate (back of the chip) is VSS.
CHAPTER 7: ELECTRICAL CHARACTERISTICS CHAPTER 7 ELECTRICAL CHARACTERISTICS 7.1 Absolute Maximum Rating (VSS=0V) Item Rated value Unit Symbol Supply voltage -0.5 to 7.0 V VDD Input voltage (1) VI -0.5 to VDD + 0.3 V Input voltage (2) VIOSC -0.5 to VD1 + 0.
CHAPTER 7: ELECTRICAL CHARACTERISTICS 7.3 DC Characteristics Unless otherwise specified: VDD=3.0V, VSS=0V, fOSC1=32.768kHz, Ta=-20 to 70°C, VD1/VC1/VC23/VC4/VC5 are internal voltage, C1–C7=0.2µF Min. Typ. Condition Item Max. Symbol 0.8·VDD K00–03, K10–13 High level input voltage (1) VIH1 VDD P00–03, P10–13, P20–23, P30–33 RESET, TEST 0.9·VDD VDD High level input voltage (2) VIH2 0.75·VDD VDD RDIN, RDRC High level input voltage (3) VIH3 VIL1 K00–03, K10–13 0 0.2·VDD Low level input voltage (1) VIL2 0.
CHAPTER 7: ELECTRICAL CHARACTERISTICS 7.4 Analog Circuit Characteristics and Power Current Consumption Unless otherwise specified: VDD=3.0V, VSS=0V, fOSC1=32.768kHz, CG=25pF, Ta=-20 to 70°C, VD1/VC1/VC23/VC4/VC5 are internal voltage, C1–C7=0.2µF Item Symbol Min. Typ. Max. Unit Condition LCD drive voltage VC1 1/2·VC23 1/2·VC23 V Connect 1 MΩ load resistor between VSS and VC1 (without panel load) ×0.95 -0.1 VC23 Connect 1 MΩ load resistor LC0–3="0" 1.95 V between VSS and VC23 LC0–3="1" 1.
CHAPTER 7: ELECTRICAL CHARACTERISTICS 7.5 Oscillation Characteristics The oscillation characteristics change depending on the conditions (components used, board pattern, etc.). Use the following characteristics as reference values. OSC1 crystal oscillation circuit Unless otherwise specified: VDD=3.0V, VSS=0V, fOSC1=32.
CHAPTER 7: ELECTRICAL CHARACTERISTICS 7.6 Serial Interface (1), (2) AC Characteristics 1. Clock synchronous master mode (during 1 MHz operation) Condition: VDD=3.0V, VSS=0V, Ta=-20 to 70°C, VIH1=0.8VDD, VIL1=0.2VDD, VOH=0.8VDD, VOL=0.2VDD Min. Typ. Max. Item Symbol 200 tsmd Transmitting data output delay time 400 tsms Receiving data input set-up time tsmh 200 Receiving data input hold time Note that the maximum clock frequency is limited to 1 MHz. Unit ns ns ns 2.
CHAPTER 7: ELECTRICAL CHARACTERISTICS 7.7 FSK Demodulator Characteristics Unless otherwise specified: VDD=5.0V, VSS=0V, fCLK=3.579545MHz, Ta=-20 to 70°C Min. Typ. Max. Unit Item Symbol Condition 1188 1200 1212 Baud Transfer rate TRATE fB1 1188 1200 1212 Hz Bell202 mark (logic 1) frequency fB0 2178 2200 2222 Hz Bell202 space (logic 0) frequency fV1 1280 1300 1320 Hz ITU-T V.23 mark (logic 1) frequency fV0 2068 2100 2132 Hz ITU-T V.23 space (logic 0) frequency SNR 20 – – dB Signal-to-noise ratio GBPF – 9.
CHAPTER 7: ELECTRICAL CHARACTERISTICS 7.8 Telephone Function Characteristics Unless otherwise specified: VDD=3.0V, VSS=0V, fCLK=3.
CHAPTER 7: ELECTRICAL CHARACTERISTICS 7.10 Characteristic Curves (reference value) High level output current (Pxx, Rxx, BZ) Ta = 70˚C, Max. value 1.0 0.8 VDD–VOH [V] 0.6 0.4 0.2 0.0 0 -1 -2 -4 IOH [mA] -3 -5 VDD = 3.0 V -6 -7 VDD = 5.0 V -8 Low level output current (Pxx, Rxx, BZ) Ta = 70˚C, Min. value VDD = 5.0 V 14 12 10 IOL [mA] VDD = 3.0 V 8 6 4 2 0 0.0 0.2 0.4 0.6 0.8 1.
CHAPTER 7: ELECTRICAL CHARACTERISTICS High level output current (SEGxx) Ta = 70˚C, Max. value 1.0 0.8 VDD–VOH [V] 0.6 0.4 0.2 0.0 0.0 -0.1 -0.2 -0.4 -0.5 -0.6 VDD = 3.0 V IOH [mA] -0.3 -0.7 -0.8 VDD = 5.0 V -0.9 -1.0 Low level output current (SEGxx) Ta = 70˚C, Min. value VDD = 5.0 V 2.0 VDD = 3.0 V 1.8 1.6 IOL [mA] 1.4 1.2 1.0 0.8 0.6 0.4 0.2 0.0 0.0 0.2 0.4 0.6 0.8 1.
CHAPTER 8: PACKAGE CHAPTER 8 PACKAGE 8.1 Plastic Package QFP15-128pin (Unit: mm) 16±0.4 14±0.1 96 65 16±0.4 64 14±0.1 97 INDEX 128 33 1.4±0.1 32 0.4 +0.1 0.16 –0.05 +0.05 0.125–0.025 0° 10° 0.5±0.2 0.1 1.7max 1 1 The dimensions are subject to change without notice.
CHAPTER 8: PACKAGE 8.2 Ceramic Package for Test Samples (Unit: mm) ±0.4 32 28±0.28 96 65 97 INDEX 128 170 33 0.35 32 0.15 0.8 0.2 3.05max 1 32±0.4 28±0.28 64 0.8±0.
CHAPTER 9: PAD LAYOUT CHAPTER 9 PAD LAYOUT 9.1 Diagram of Pad Layout 30 25 20 15 10 5 1 Die No. 122 120 35 115 40 Y 45 (0, 0) X 105 4.50 mm 110 50 100 55 95 60 65 70 75 80 85 90 4.
CHAPTER 9: PAD LAYOUT 9.2 Pad Coordinates No. Pad name 1 R10 2 3 4 R03 R02 R01 5 6 7 R00 CDIN BPOUT 8 9 10 RDRC RDIN VREF 11 AVSS FB RING TIP AVDD 12 13 14 15 16 17 18 19 20 21 22 23 24 25 26 27 28 29 30 – P33 P32 P31 P30 P23 P22 P21 P20 P13 P12 P11 P10 P03 P02 P01 X 1767 1629 1490 Y 2118 2118 2118 No.
International Sales Operations AMERICA ASIA EPSON ELECTRONICS AMERICA, INC. EPSON (CHINA) CO., LTD. - HEADQUARTERS - 23F, Beijing Silver Tower 2# North RD DongSanHuan ChaoYang District, Beijing, CHINA Phone: 64106655 Fax: 64107319 150 River Oaks Parkway San Jose, CA 95134, U.S.A. Phone: +1-408-922-0200 Fax: +1-408-922-0238 SHANGHAI BRANCH 4F, Bldg., 27, No. 69, Gui Jing Road Caohejing, Shanghai, CHINA Phone: 21-6485-5552 Fax: 21-6485-0775 - SALES OFFICES West 1960 E.
In pursuit of “Saving” Technology, Epson electronic devices. Our lineup of semiconductors, liquid crystal displays and quartz devices assists in creating the products of our customers’ dreams. Epson IS energy savings.
S1C63558 Technical Manual ELECTRONIC DEVICES MARKETING DIVISION EPSON Electronic Devices Website http://www.epsondevice.