
User`s guide


Printing on Special Media
3-19
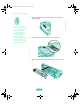
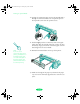
14. Follow the instructions in Chapters 1 or 2 as necessary to
send a print job. Be sure to select
Tractor Feeder as the
Paper Source option and then choose the correct
Paper
Size. The continuous paper loads and printing begins
when the printer receives the print job.
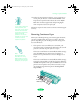
Follow the steps in the next section to remove continuous paper
correctly.
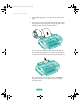
Removing Continuous Paper
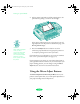
When you’ve finished printing a continuous paper document,
you must carefully follow these steps to remove it from the
printer, depending on your media type and the setting of the
auto tear-off feature.
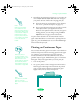
1. If the printer’s auto tear-off feature is turned on, your
continuous paper is automatically advanced to the tear-off
position at the end of a print job. Go to step 2.
If the auto tear-off feature is turned off (the default setting),
press the
LF/FF button as many times as necessary to
advance the last printed sheet to the tear-off edge. Go to
step 2.
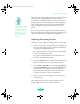
If the auto tear-off feature is turned off (the default setting),
and you’re printing labels, tear off the next sheet of labels at
the back of the printer. Then press the
LF/FF button on the
printer’s control panel as many times as necessary to eject
the remaining pages from the printer. Do not perform
steps 2 and 3.
Caution:
If you need to adjust the
loading position, see
page 3-21. Never use the
knob on the left side of
the printer to adjust the
loading or tear-off
positions. This would
damage your printer and
cause it to lose the
top-of-form position.
Note:
See Appendix B for
information on using
default-setting mode to
change the auto tear-off
setting for your print job.
Loire-PLUS.BK.book Page 19 Friday, May 2, 2003 2:56 PM