
User Setup Information


1Set up the printer
1Set up the printer
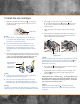
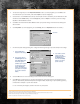
2 Put on the paper
support
Insert the paper support in the top slot on the
back of the printer until it is securely seated.
Caution:
Place the printer near the computer, but avoid
areas
◗ with high temperature or humidity
◗ in direct sunlight or dusty conditions
◗ near sources of heat or electromagnetic
interference.
Follow all the Safety Instructions in the
Introduction of your
User’s␣ Guide
.
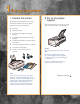
1 Unpack the printer
Remove any packing material from the printer.
See the Notice Sheet in the box for details.
Make sure you’ve got all these items:
◗ the printer
◗ the paper support
◗ one color and one black ink cartridge
package
◗ the CD-ROM package called “Your printer
software”
◗ the EPSON
®
Media Pack containing sample
ink jet paper
◗ a facsimile of a print sample you can create
◗ your
User’s Guide
package
◗ a cable to connect the printer (not
supplied)
Note:
To connect your printer to a PC, you need a
shielded, twisted-pair parallel cable (6 to 10
feet long). To connect it to a Macintosh,
®
you’ll
need an Apple
®
System Peripheral-8 cable
(Belkin brand recommended). If you’re
connecting to a network, see Appendix A
and B in your
User’s Guide
for instructions.
Start
Here
Start
Here
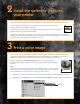
2
Your printer
software
1
2
3
2
Your printer
software
Open to continue
▼