® EPSON STYLUS Pro and Pro XL COLOR INK JET PRINTER ® Setup and Software Guide for Macintosh All rights reserved. No part of this publication may be reproduced, stored in a retrieval system, or transmitted in any form or by any means, electronic, mechanical, photocopying, recording, or otherwise, without the prior written permission of Seiko Epson Corporation. No patent liability is assumed with respect to the use of the information contained herein.
FCC Compliance Statement For United States Users This equipment has been tested and found to comply with the limits for a Class B digital device, pursuant to Part 15 of the FCC Rules. These limits are designed to provide reasonable protection against harmful interference in a residential installation. This equipment generates, uses, and can radiate radio frequency energy and, if not installed and used in accordance with the instructions, may cause harmful interference to radio or television reception.
Printer Parts output tray interface interface ink cartridge clamps paper thickness lever Control Panel Operate button
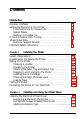
Contents lntroduction Optional Interfaces . . . . . . . . . . . Getting the Most Out of Your Printer . Three Resolutions to Choose From Special Papers . . . . . . . . . . . . Specially Formulated Ink . . . . . . If You Are New to Color Printing . . . Where to Get Help . . . . . . . . . . . Electronic Support Services . . . . Important Safety Instructions . . . . . Chapter 1 . . . . . . . . . . . . . . .............. .............. . . . . . . . . . . . . . . . . . . . . . . . . . . . . .............. . . .
Using the Macintosh Printer Driver . . Accessing the Driver . . . . . . . . . Color /Halftone Setting . . . . . . . Print Settings . . . . . . . . . . . . . Visual Effects Settings . . . . . . . . Selecting Paper Size and Orientation Chapter 3 .............. . . . . . . . . . . . . . . . . . . . . . . . . . . . . . . . . . . . . . . . . . . . . . . . . . . . . . . . . Using Page Setup . . . 2-7 2-7 2-9 2-11 2-13 2-14 Using the Printer Driver Utilities Managing Print Jobs . . . . . . . . . . . . . . . .
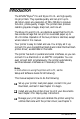
® ® The EPSON Stylus Pro and Stylus Pro XL are high-quality ink jet printers. They operate quietly and can print up to 16 million colors at a resolution of 720 x 720 dpi to produce full-color, photo-quality images. The printers also produce realistic grayscale images, sharp text, and line art. The Stylus Pro and Pro XL are identical except that the Pro XL has a wide carriage that can print on oversized paper up to 13 x 19 inches.
After you install the printer driver, select the ReadMe 1st icon in the Driver Disk window for the latest information about your printer. Refer to the Reference Guide for instructions on operating and maintaining your printer, as well as for troubleshooting guidelines and technical specifications. Optional Interfaces You can supplement the capabilities of your printer’s built-in hardware interfaces by installing an optional interface card.
Use 720 dpi for the best possible images. For high-quality images in less time, use 360 dpi. When speed is important and draft quality is good enough, use 180 dpi. For guidelines on selecting the best resolution for your print jobs, see Chapter 2. Special Papers The type of paper you use is very important. Although you get good results with plain bond paper, you will get better results by using coated papers because they do not absorb as much ink.
If You Are New to Color Printing Color printing with the EPSON Stylus Pro or Pro XL produces amazing images, whether you print text, graphics, line drawings, photographs, or documents containing many different image types. However you use your color printer, keep the following in mind: 0 You need to leave a large amount of hard disk drive space free to make room for your color images.
Your printer driver settings help you closely match colors as appropriate for your image type, resolution, and paper. If you use a scanner, make sure your scanning software is set to the correct setting for ink jet printers to help you match colors. Also, your application may include image editing capabilities that let you adjust the colors. If you need extreme precision in matching colors, you can use a color calibration system available with many software applications.
You can purchase ink cartridges, paper, parts, printed manuals, and accessories for EPSON products from EPSON Accessories at (800) 873-7766 (U.S. sales only). In Canada, call (8OO)BUY-EPSON. If you purchased your printer outside the United States or Canada, contact your EPSON dealer or the marketing location nearest you for customer support and service. If you need help with any software program you are using, see that program’s documentation for technical support information.
0 Your own user ID and password 0 A complimentary subscription to CompuServe Magazine, CompuServe’s monthly publication. To take advantage of this offer, call (800) 848-8199 in the United States and Canada and ask for representative #529. In other countries, call the following U.S. telephone number: (614) 529-1611, or your local CompuServe access number. World Wide Web site If you are connected to the Internet and have a Web browser, you can access EPSON’s World Wide Web site at http://www.epson.com.
0 Connect all equipment to properly grounded power outlets. Avoid using outlets on the same circuit as photocopiers or air control systems that regularly switch on and off. 0 Do not let the power cord become damaged or frayed. 0 If you use an extension cord with the printer, make sure the total ampere rating of the devices plugged into the extension cord does not exceed the cord’s ampere rating. Also, make sure the total of all devices plugged into the wall outlet does not exceed 15 amperes.
Chapter 1 Installing the Printer This chapter defines the system requirements you’ll need to use the printer and explains how to set up your printer and connect it to your Macintosh. System Requirements To use your printer with a Macintosh, it is recommended that you have the following: Any Macintosh or Power Macintosh model except the Macintosh +, Macintosh 512, or Macintosh PowerBook™ 100 System 7.
Guidelines for Connecting the Printer You can connect the printer to your Macintosh in one of two ways: Cl Use the built-in serial interface to directly connect the printer to a single Macintosh. 0 Install the optional LocalTalk or Ethernet interface card and connect the printer to an AppleTalk or EtherTalk network. The installation procedure differs, depending on whether you are using the serial interface or one of the optional network interfaces.
If you are connecting the printer to an AppleTalk or EtherTalk network, you need to do the following: 1. Install the optional LocalTalk or Ethernet interface card and connect it to the network. See Appendix A of the Reference Guide. 2. Set up the printer as described in “Setting Up the Printer,” below. 3. Install the printer driver as described in Chapter 2. 4. Assign a name to the printer using the EPSON Namer. See “Assigning a Name to the Printer” in Chapter 2. 5.
Choosing a location When choosing a location for the printer, use a surface that is flat, horizontal, and stable. Avoid locations subject to rapid changes in temperature and humidity. Also keep the printer away from direct sunlight, heat sources, and sources of electromagnetic interference, such as the base units of cordless telephones. Always leave adequate space around the printer to accommodate its cables. Also make sure nothing is touching the knob on the right side of the printer.
You must remove all protective materials packed around and inside your printer before you set it up and turn on the power. Follow the directions on the Notice Sheet (packed with the printer) to remove these materials. Save all packaging and protective materials in case you need to ship the printer in the future. It should always be transported in its original packaging or eqivalent materials. Attaching the Paper Tray and Output Tray 1.
2. Install the output tray on top of the paper tray. The sides of the output tray fit over the sides of the paper tray. Plugging In and Turning On the Printer 1. Make sure you have removed all protective packing materials from inside the printer. (See the Notice Sheet for more information.) 2. Make sure the printer is turned off by checking the position of the Operate button. The button is in the off position when its surface is even with the button protectors on each side, as shown below.
3. Plug the power cord into a properly grounded electrical outlet. 4. Turn on the printer by pressing the Operate button. The Pause light flashes while the printer initializes itself. Installing the Ink Cartridges Follow the steps below to install the printer’s ink cartridges. Warning: The ink cartridges are self-contained units. Under ordinary use, ink will not leak from a cartridge. If ink gets on your hands, wash them thoroughly with soap and water.
3. Press the Pause button. Make sure the Pause light on the control panel comes on. 4. Hold down the Alt button for about five seconds until the print head moves slightly left, to the the ink cartridge install position. The Pause light begins flashing. 5. Pull up each of the ink cartridge clamps to open them.
6. Open the foil ink cartridge packages and remove the cartridges. Then remove the tape seal from each ink cartridge as shown below. black cartridge color cartridge Caution: You must remove the tape seal from the cartridges. Leaving the tape on will permanently damage them. 7. Lower the cartridges into their holders with the label facing up and the arrow on top of the cartridge pointing toward the back of the printer. The color cartridge, which is larger, goes on the left.
Be sure to install both ink cartridges. The printer will not work if only one cartridge is installed. 8. Push down the ink cartridge clamps until they lock in place. Caution: Once you install the ink cartridges, do not open the clamps or remove the cartridges except to replace them with new ones. Once you remove a cartridge, do not reuse it; this may damage the print head. 9. Press the Alt button again to return the print head to its home position.
10. Press the Pause button. 11. Close the printer cover. In order to maintain optimum print quality, the printer periodically performs a cleaning operation. You may notice the cleaning cycle being performed when the printer has been on for a while without being used or when you turn it on after it has been off for a while. You may sometimes need to manually activate a cleaning cycle to clean the print heads if you notice a decline in print quality. See Chapter 3 of the Reference Guide for instructions.
4. Locate the paper thickness lever, which is the small blue lever in front of the ink cartridges. Try rotating this lever to the left (counterclockwise). If it cannot be rotated any further, it is in the correct position. hickness lever 5. Press the Alt button. Then press Pause. 6. Close the printer cover. Loading Paper The following procedure describes how to load plain bond paper. You can load up to 100 sheets of plain paper.
1. Remove the output tray from the top of the paper tray. 2. Slide the left edge guide inside the paper tray to the left as far as it will go. 3. Flip up the rear edge guide and slide it toward you as far as it will go. 4. Fan a stack of paper; then tap it on a flat surface to even the edges.
5. Load the stack of paper, printable side down, so that its right edge rests against the right side of the paper tray. Slide the stack into the tray until you feel some resistance. Then slide the left edge guide against the left edge of the paper as shown below. You can load up to 100 sheets of plain bond paper, but do not load paper above the arrow mark on the left edge guide. 6. Slide the rear edge guide against the rear edge of the paper. 7. Place the output tray on top of the paper tray.
Testing the Printer Before continuing, it is recommended that you test the printer to ensure it is functioning properly. For the self test, use paper that is 8% inches wide if you have the Stylus Pro, or 13 inches wide if you have the Stylus Pro XL. Otherwise, ink sprays directly onto the platen and can smear subsequent pages. Be sure to load at least several sheets of paper, as described above. 1. Press the Operate button to turn off the printer.
Connecting the Printer to Your Macintosh Follow this procedure only if you are connecting the printer to the Macintosh using the serial interface. If you are connecting to a network, see Appendix A of the Reference Guide. For the serial interface, you need to obtain an Apple System/ Peripheral-8 cable (part number M0197) or equivalent. Note: The printer also has a parallel port, which is standard for most PCs but is not used by the Macintosh. 1. Make sure both your printer and Macintosh are turned off. 2.
3. Connect the other end of the interface cable to either the modem or printer port on the Macintosh, marked with the following icons: modem port printer port Normally it is recommended that you use the modem port if you are not using an external modem. This frees up your printer port for connecting to an AppleTalk Network. 4. Turn on the printer by pressing the Operate button. 5. Turn on your Macintosh. Now see Chapter 2 for instructions on installing the printer driver.
Chapter 2 Installing and Using the Printer Driver This chapter describes how to install the Macintosh driver and use it to control printer settings such as resolution, media type, and halftoning. Installing the Macintosh Printer Driver A printer driver is software that allows your computer to control the printer. You must install a printer driver to use the printer.
3. If necessary, double-click the Driver Disk icon to open the Driver Disk window. 4. Double-click the ReadMe 1st icon in the Driver Disk window to read the latest information on your printer and its driver. (You may want to print this file for reference.) 5. Double-click the Installer icon to install the driver. 6. When you see the initial screen, click OK to continue. You see the following screen: Click the Items you want to select: Shift-click to select multiple Items. Network Driuer Package “,-,” __,,.
The Serial and Network Driver Packages contain all the driver components needed for serial or network connection. Normally you should choose Serial Driver Package if you’re using the serial interface, or the Network Driver Package if you’re using AppleTalk or EtherTalk. This will ensure you have all the software you need to use the printer.
9. You see a screen telling you when the installation is complete. If you installed the AT-StylusColor driver, choose Quit to quit the installer and then restart your Macintosh. If you installed the StylusColor driver, click Restart to eject the driver diskette and restart the computer. The Installer places the Bi-D Calibration Utility in the Stylus COLOR folder on your hard disk and places the Epson Monitor2 utility in the Extentions folder.
Using the Chooser to Select the Printer After you install the printer driver, follow the steps below to select the printer before you begin printing. You need to choose the printer only the first time you use it or whenever you want to use another printer. (Your Macintosh always prints using the last printer selected.) Follow these steps to choose the printer: 1. Open the Chooser under the Apple menu. You see the Chooser window. 2.
If the wrong printer is shown, the printer may be turned off or not connected properly. Turn on the printer, if necessary, and check the connections; then click RETRY. If the printer name is still wrong, change the port selection on the Chooser window and repeat steps 2 through 6. 7. If you wish, turn on background printing by clicking the button so you can print in the background while using your Macintosh for other tasks.
Using the Macintosh Printer Driver The Macintosh printer driver contains settings that allow you to control your print job. The printer comes with default values for all the settings, as listed in the table on page 2-8. Change the printer driver settings only if you want to use values different from the default ones. The driver includes an Automatic option (default) for the Method setting.
To access the printer driver settings, choose the Options button. You see the following dialog box: ,Color / Halftone Settina-----Inks: [ C o l o r KMY& -1 Method: Automatic Dark light f T r Print q Screen pattern I [ Cancel [ H e l p It q High Speed Mode (If you do not see this dialog box, the driver has not been installed correctly. See page 2-l for instructions on installing the driver.) The table below summarizes the printer driver settings. (Factory defaults are in bold type.
I Box title Print Setttng Options Resolution Super -720 dpi Best -360 dpi Draft -180 dpi Media Type Plain Paper Transparency Coated Paper - 360 dpi, Coated Paper - 720 dpi HQ Glossy Paper Visual Effects MicroWeave Mode On, off High Speed Mode On, off Finest Detail On, off Flip Horizontal On, off Flip Vertical On, off Invert ImaRe On, off Screen pattern On, off Color/Hallftone Setting The following settings control the ink the printer uses and the halftone method.
Method Select Automatic halftone setting, No Halftoning, or one of three halftone methods. For the best results, select Automatic so your printer driver can analyze the data on each page of your document and adjust the halftone settings automatically. If you prefer to set the halftone method manually, follow these guidelines: 0 Use No Halftoning to speed printing for text or monochrome line art. Do not use it when printing in color. 0 Dithering A and Dithering B arrange dots in orderly patterns.
Print Settings The following settings control the resolution, media type, and print options. Resolution Specifies the resolution to be 720 dpi, 360 dpi, or 180 dpi. Resolution is the amount of detail used to create an image. The higher the resolution, the sharper and finer the image. For the best possible resolution, choose Super -720 dpi. When you select this resolution, MicroWeave is automatically turned on and High Speed mode is turned off.
Media Type Sets up the printer for the type of paper you loaded. Depending on your Resolution setting, Media Type can be one of the following: Plain Paper Transparency Coated Paper - 360 dpi Coated Paper - 720 dpi HQ Glossy Paper Note: You may not see all paper types listed because some are not available for all resolutions. Be sure to select the Resolution before selecting the Media Type. For specific information on when to use each media type, see Chapter 1 of the Reference Guide.
Note: If the vertical lines appear misaligned when you print using High Speed mode, calibrate the printer as described in Chapter 3. Finest Detail When you select the Super - 720 dpi resolution, you can turn on Finest Detail mode to print text, solid graphics, and line art with very sharp edges. It may take considerably longer to print using this mode and it will increase your Macintosh memory requirements.
Selecting Paper Size and Orientation Using Page Setup By default, the printer expects letter-size (8.5 x 11 inches) paper. To select a different paper size, choose Page Setup in the File menu of your application program.
Select the orientation of the image on the page by clicking one of the following buttons: In portrait orientation, the top of the page is parallel with the short edge of the paper. In landscape orientation, the top of the page is parallel with the long edge of the paper. Note: Print speed varies depending on the orientation setting in the driver. It is best to select the image orientation using your application, not the driver.
Using the Printer Driver Utilities This chapter explains managing print jobs that you send to the printer with the Epson Monitor2 utility. It also tells you how to calibrate the printer using the Bi-D Calibration Utility if vertical lines in your printed output become misaligned. If you selected the Serial or Network Driver Package option when you installed the driver, both of these utilities were copied to your hard disk.
You see a dialog box similar to the following: Printing Waiting 1 Microsoft Word-Untitled2 2 Microsoft Word-Untitled3 I Cancel Printing 1 Printing Untitled1 Page Printing : One page remaining. Driver : StylusCOLOR Printing Status: Processing job>> sending data...(H2m) User : Print Time : Wed, Mar 22, 1995 5:47 PM I The print job listed under Printing is currently being printed. Jobs listed under Waiting are queued to begin when the current job is completed.
Follow these steps: 1. Open the Hard Drive folder and double-click Bi-D Calibration Utility. 2. You see a prompt asking you to choose the interface type. Click Serial or Network, as appropriate. 3. You see the Bi-D Calibration Utility screen. First specify whether you connected the printer to the modem or printer port by clicking the appropriate icon. 4. Click the Pattern 1 button to align the print heads using the first pattern page.
Index A Accessories, purchasing, Intro-6 Aligning vertical lines, 2-3-4, 2-13, 3-l-3 Apple Macintosh driver, see Printer driver model, l-l-2 AppleTalk, connecting to, Intro-2, 1-2-3, 2-3 making active, 2-5 making inactive, 2-5 selecting network type, 2-6 Automatic halftone option, 2-7, 2-10 B Background printing, 2-6, 3-l Banding, 2-12 BBS, Intro-8 Bi-D Calibration Utility, 2-1, 2-3--4, 3-l-3 Bidirectional printing 2-12 Black ink cartridge, see Ink cartridges Bulletin Board Service, Intro-6 C Cable, print
F L Fast printing, 2-12 Film transparencies, 2-9, 2-12 Finest Detail mode, 2-9, 2-13 Flip Horizontal setting, 2-9, 2-13 Flip Vertical setting, 2-9, 2-13 Landscape setting, 2-14-15 Left edge guide, 1-13 Lever, paper thickness, l-11--12 Light/Dark slider, 2-8, 2-10 Lines, aligning vertical, 2-3--4, 2-13, 3-l-3 Location, for printer, l-4 G Glossy paper, Intro-3, 2-9, 2-12 Grayscale, 2-9, 2-12 H Halftoning settings, 2-7-11 Hard disk space, Intro-4, l-l Help, where to get, Intro-5-7 High Speed mode, 2-9, 2-
Optional interface card, Ethernet, Intro-2, 1-l-3 installing Intro-2, 1-2-3 LocalTalk, Intro-2, 1-l-3, 2-6 Orientation of paper, 2-14-15 Output tray, l-4-6, 1-13 Oversized paper, l-12 P Paper centered, 2-14 coated, Intro-3, 2-9, 2-11-12 custom sizes, 2-15 envelopes, 2-14 glossy, Intro-3, 2-9, 2-12 height, 2-15 loading, 1-12-14 orientation, 2-14-15 printable area, 2-14 printable surface, 1-12 selecting size, 2-14-15 selecting type, 2-9, 2-12 special, Intro-3 transparencies, 2-9, 2-12 tray, l-4-6, 1-13-14 ty
Requirements, system, l-l Resolution, Intro-l-3, 2-9, 2-12 RGB method, Intro-4 s Safety instructions, Intro-7-8 Scanners, Intro-5 Screen pattern setting, 2-9, 2-13 Self test, 1-15 Serial driver package, 2-3 Serial interface, Intro-l, l-2-3, l-16-17 Service, Intro-5-7 Setting up printer, 1-3-14 Special papers, Intro-3 speed, Intro-2, Intro-4, 2-12 Support, online, Intro-6-7 System requirements, l-l T Technical assistance, Intro-5--7 Telephone numbers, Intro-5--7 Temperature, l-4 Testing the printer, 1-15 T