
Service manual


Table Of Contents
- EPSON Stylus CX3100/3200
- PRODUCT DESCRIPTION
- Operating Principles
- Troubleshooting
- Disassembly and Assembly
- Adjustment
- 5.1 Overview
- 5.2 Adjustment by Adjustment Program
- 5.2.1 Adjustment Program Installation
- 5.2.2 Adjustment Program Start
- 5.2.3 Destination Setting (EEPROM Initialization)
- 5.2.4 Head ID Input
- 5.2.5 Bi-D Adjustment
- 5.2.6 USB ID Input
- 5.2.7 Top Margin Adjustment
- 5.2.8 First Dot Position Adjustment
- 5.2.9 Head Cleaning
- 5.2.10 Ink Charge
- 5.2.11 Protection Counter
- 5.2.12 EEPROM Data Backup
- 5.2.13 Check Pattern Printing
- 5.2.14 EEPROM Data
- 5.3 Firmware Uploading
- Maintenance
- Appendix
EPSON Stylus CX3100/3200 Revision A
Adjustment Adjustment by Adjustment Program 61
The Adjustment Program has the following buttons.
Quit
Click the [Quit] button, and a menu screen to select [Quit] or [Next] will be
displayed. Clicking the [Quit] button on that menu screen will complete the
adjustment and close the program. Clicking the [Next] button will return the
display to the screen for selecting a Model Name and Destination.
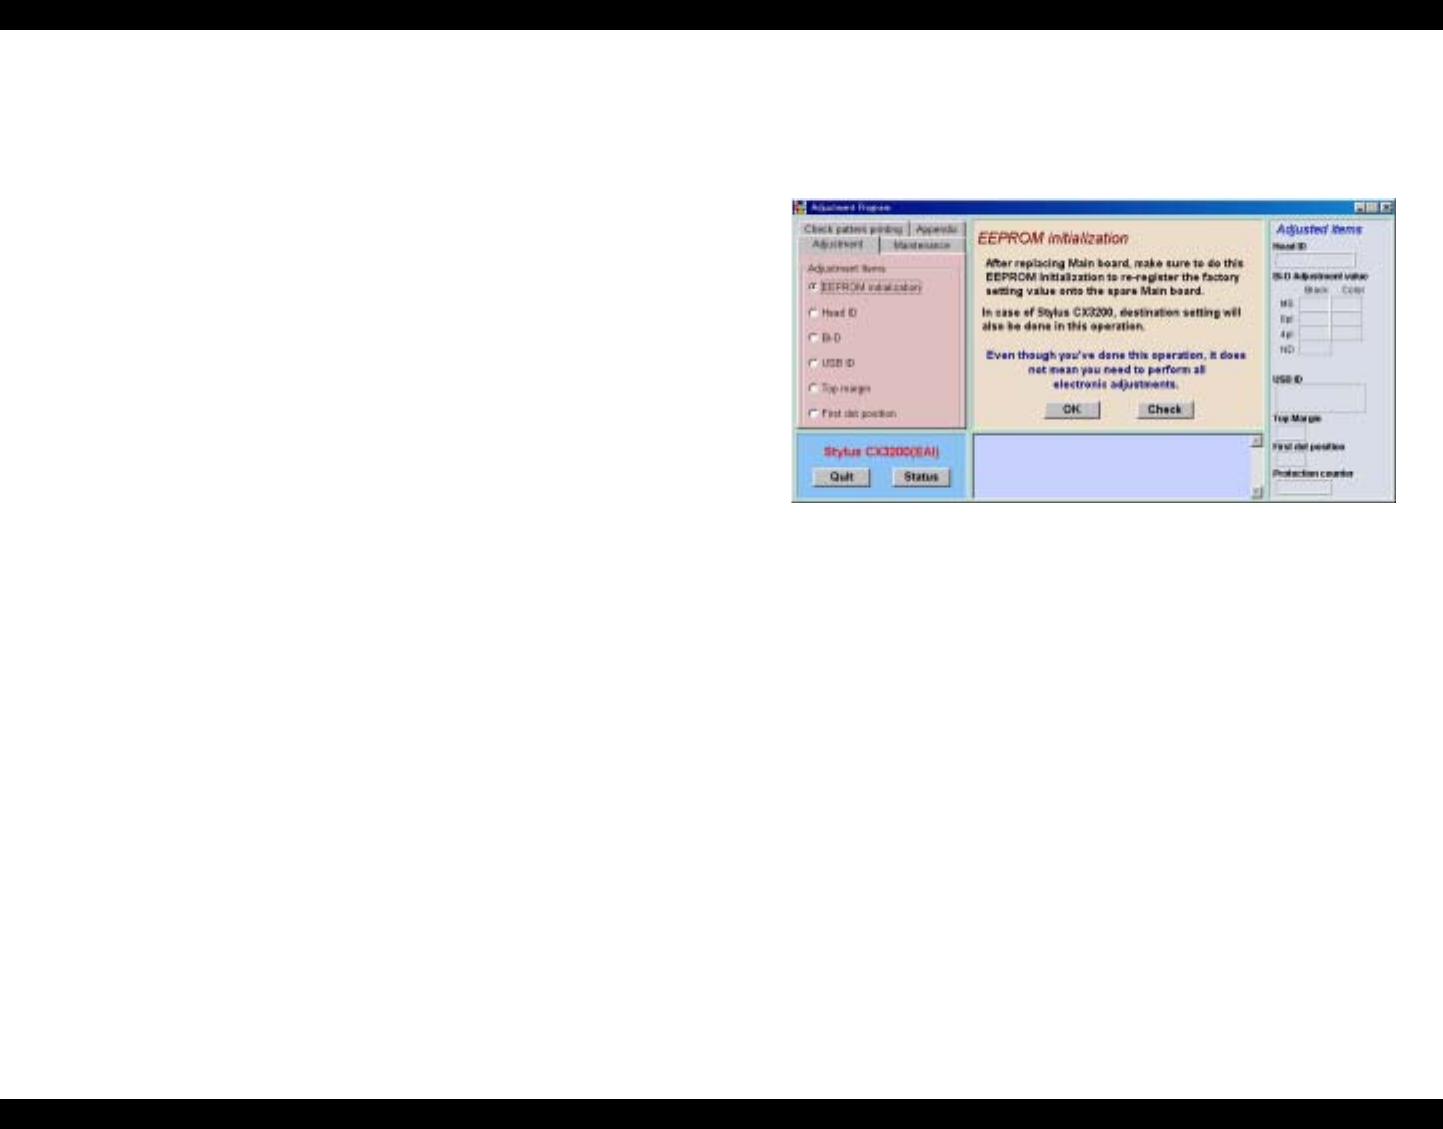
5.2.3 Destination Setting (EEPROM Initialization)
When the Main Board of this machinery has been replaced with a new one, enter the
initial setting values in EEPROM with this Adjustment Item.
Figure 5-3. EEPROM Initialization
Click the [OK] button, and the message indicating that the initial values of Stylus
CX3100/3200 have been written will appear in the lower center of the screen.
Click the [Check] button, and you can check the current setting of printer destination.