
Service manual
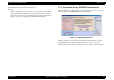


Table Of Contents
- EPSON Stylus CX3100/3200
- PRODUCT DESCRIPTION
- Operating Principles
- Troubleshooting
- Disassembly and Assembly
- Adjustment
- 5.1 Overview
- 5.2 Adjustment by Adjustment Program
- 5.2.1 Adjustment Program Installation
- 5.2.2 Adjustment Program Start
- 5.2.3 Destination Setting (EEPROM Initialization)
- 5.2.4 Head ID Input
- 5.2.5 Bi-D Adjustment
- 5.2.6 USB ID Input
- 5.2.7 Top Margin Adjustment
- 5.2.8 First Dot Position Adjustment
- 5.2.9 Head Cleaning
- 5.2.10 Ink Charge
- 5.2.11 Protection Counter
- 5.2.12 EEPROM Data Backup
- 5.2.13 Check Pattern Printing
- 5.2.14 EEPROM Data
- 5.3 Firmware Uploading
- Maintenance
- Appendix
EPSON Stylus CX3100/3200 Revision A
Adjustment Adjustment by Adjustment Program 64
1. Click the item for which the adjustment is to be made and click the [OK] button.
When you select “Printing the Bi-D adjustment pattern”, you can print the pattern.
When “Checking present Bi-D parameter” is selected, the set value is indicated at
the lower center of the screen. When you select “Input Bi-Directional adjustment
value”, you can input the adjusted values.
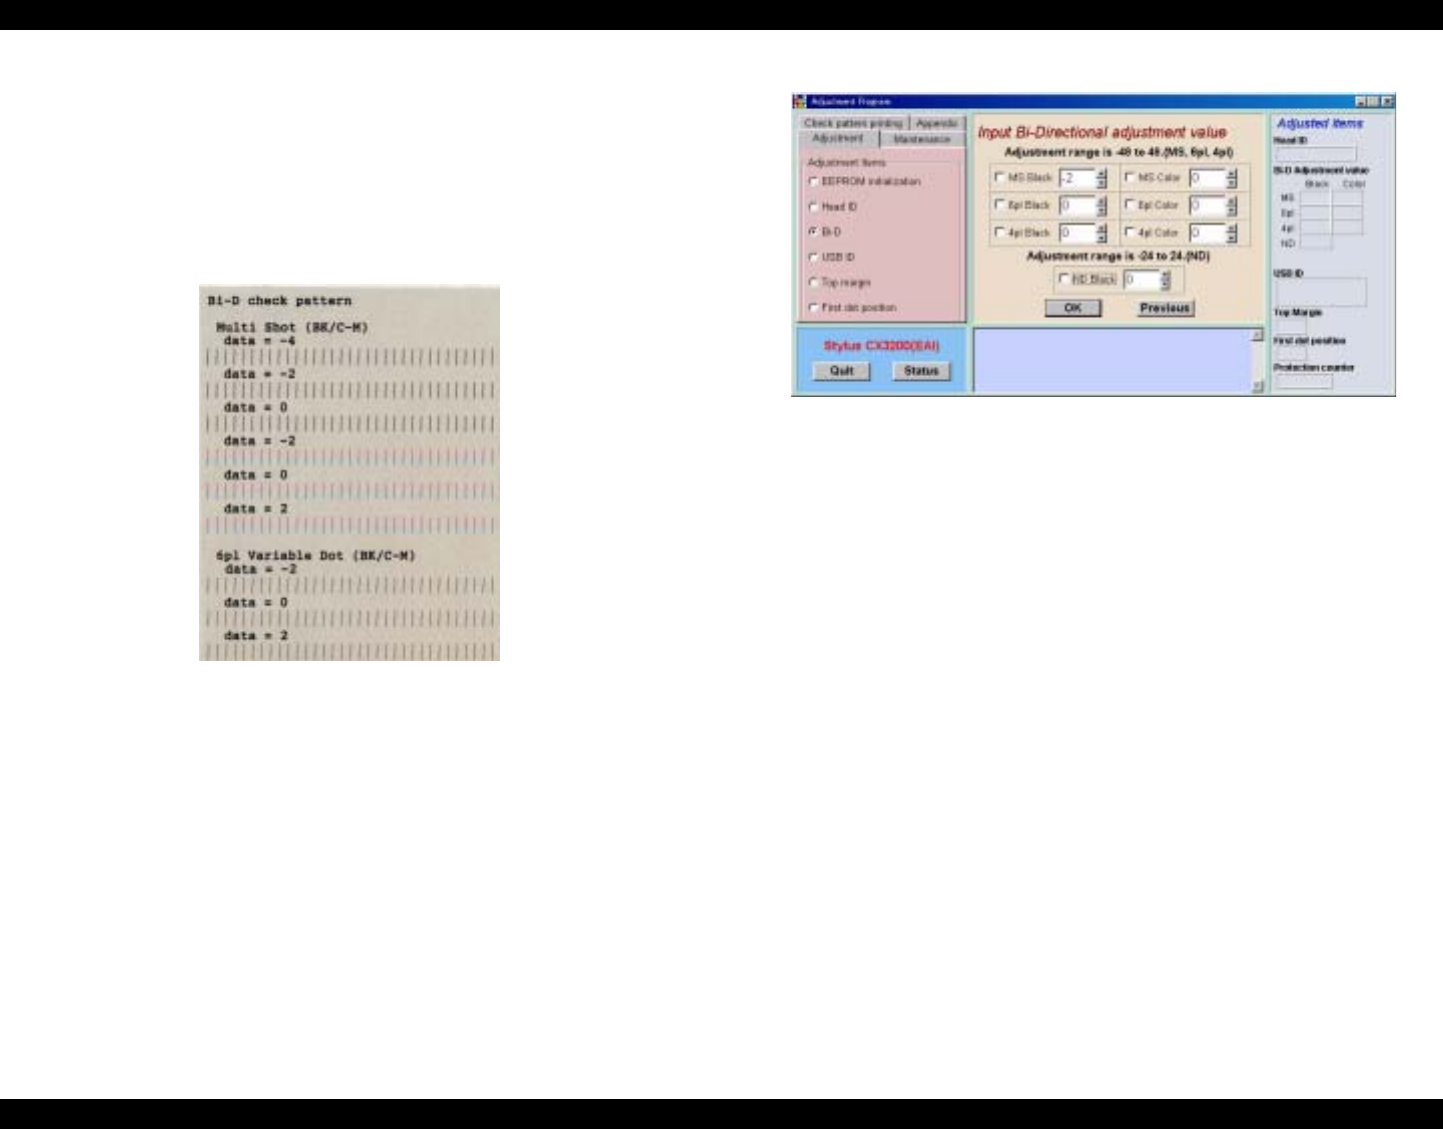
2. From the printed Bi-D adjustment pattern, judge which vertical line corresponding
to which compensation value for each mode is straight.
Figure 5-7. Bi-D Adjustment Pattern
3. If adjustment is necessary, select [Bi-D Adjustment] and input the compensation
values at the relevant points in each mode. Adjusted values can be input for each
mode.
Figure 5-8. Input Bi-Directional Adjustment Value
4. Check the item for which the adjustment is to be made. The input value is
indicated in [Adjusted items] at the right side of the screen.
5. By repeating steps 1 to 4 above, make adjustment to minimize the deviation of
bidirectional printing timing.