
Printer User Manual
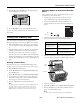
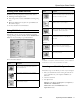
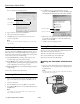
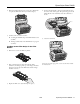

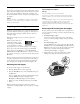
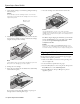
Table Of Contents
- Epson Stylus Photo RX600 Parts
- Accessories
- Specifications
- Loading Paper
- Placing the Original Document
- Copying Without a Computer
- Viewing Photos from a Memory Card
- Printing From a Memory Card
- Printing From Other Devices
- Using EPSON Smart Panel
- Scanning to a File With Epson Scan
- Scanning From a Program
- Scanning With the Scan Button
- Placing Film or Slides on the Scanner
- Cleaning the Print Head
- Replacing Ink Cartridges
- Aligning the Print Head
- Transporting the RX600
- Related Documentation

Epson Stylus Photo RX600
18 - Epson Stylus Photo RX600 2/04
10. Close the scanner unit carefully until it clicks back into
place.
11. Repack the RX600 and its attachments in the original box
using the protective materials that came with them.
Caution:
Keep the RX600 level as you transport it.
After transporting the RX600, remove the orange print head
lock or tape securing the print head, unlock the transportation
lock securing the scanner carriage, and print a test copy. If you
notice a decline in quality, clean the print head (see page 14);
if output is misaligned, align the print head (see page 16).
Related Documentation
CPD-17415 Epson Stylus Photo RX600
Start Here
CPD-17417 Epson Stylus Photo RX600
How to Copy and Print
CPD-17418 Epson Stylus Photo RX600
User’s Guide
CPD-17416 Epson Stylus Photo RX600
CD-ROM (includes online
Reference Guide)