
Printer User Guide
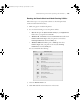
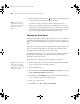
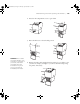
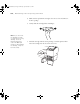
Table Of Contents
- Front Matter
- Contents
- Introduction
- Chap 1-Setting Up the Printer
- Unpacking and Assembling the Epson Stylus Pro 7800
- Unpacking and Assembling the Epson Stylus Pro 9800
- Connecting the Power Cord
- Installing Ink
- Connecting to Your System
- Connecting to the Network
- Installing the Software for Macintosh
- Installing the Software for Windows
- Updating Your Printer Firmware
- Configuring the Printer for Your Network
- Chap 2-Handling Paper and Other Media
- Chap 3-Printing with Epson Drivers for Macintosh
- Chap 4-Printing with Epson Drivers for Windows
- Chap 5-Maintaining and Transporting the Printer
- Checking Printer Status and Part Life
- Checking and Cleaning the Print Head
- Aligning the Print Head
- Replacing Ink Cartridges
- Switching Black Ink Cartridges
- Changing the Date and Time
- Using Maintenance Mode
- Replacing the Paper Cutter Blade
- Replacing the Maintenance Tank
- Cleaning the Printer
- Transporting or Storing the Printer
- Chap 6-Solving Problems
- Appendix A: Specifications
- Index
5-123
Maintaining and Transporting the Printer | 123
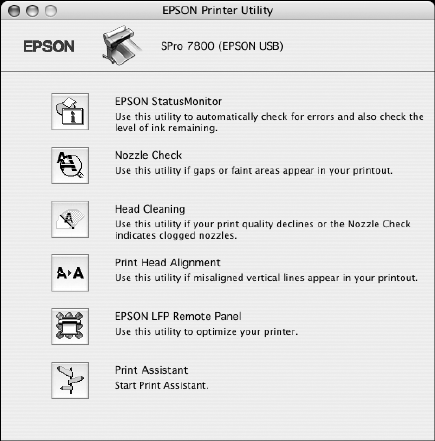
Running the Nozzle Check and Head Cleaning Utilities
Follow these steps to use your printer software to check the print head
nozzles and clean them if necessary:
1. Make sure paper is loaded in the printer.
2. Do one of the following to access the printer utilities:
• Mac OS X: Open the Epson Printer Utility in your Applications
folder. Select your printer and click
OK.
• Windows XP: Click Start and select Control Panel. Double-click
Printers and Faxes. Right-click your printer icon and select
Printing Preferences. Click the Utility tab.
• Windows 2000: Click Start, point to Settings, then select
Printers. Right-click your printer icon and select Printing
Preferences. Click the Utility tab.
You see a menu like the following:
3. Select the
Nozzle Check icon.
4. Click
Auto and follow the instructions on the screen.
7800-9800Guide.book Page 123 Monday, April 10, 2006 11:59 AM