
Printer User Guide
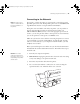
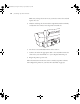
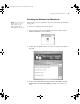
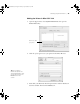
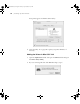

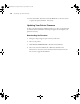
Table Of Contents
- Front Matter
- Contents
- Introduction
- Chap 1-Setting Up the Printer
- Unpacking and Assembling the Epson Stylus Pro 7800
- Unpacking and Assembling the Epson Stylus Pro 9800
- Connecting the Power Cord
- Installing Ink
- Connecting to Your System
- Connecting to the Network
- Installing the Software for Macintosh
- Installing the Software for Windows
- Updating Your Printer Firmware
- Configuring the Printer for Your Network
- Chap 2-Handling Paper and Other Media
- Chap 3-Printing with Epson Drivers for Macintosh
- Chap 4-Printing with Epson Drivers for Windows
- Chap 5-Maintaining and Transporting the Printer
- Checking Printer Status and Part Life
- Checking and Cleaning the Print Head
- Aligning the Print Head
- Replacing Ink Cartridges
- Switching Black Ink Cartridges
- Changing the Date and Time
- Using Maintenance Mode
- Replacing the Paper Cutter Blade
- Replacing the Maintenance Tank
- Cleaning the Printer
- Transporting or Storing the Printer
- Chap 6-Solving Problems
- Appendix A: Specifications
- Index
1-45
Setting Up the Printer | 45
Adding the Printer in Mac OS X 10.4
1. Open the Apple menu, select System Preferences, then open the
Print & Fax Utility.
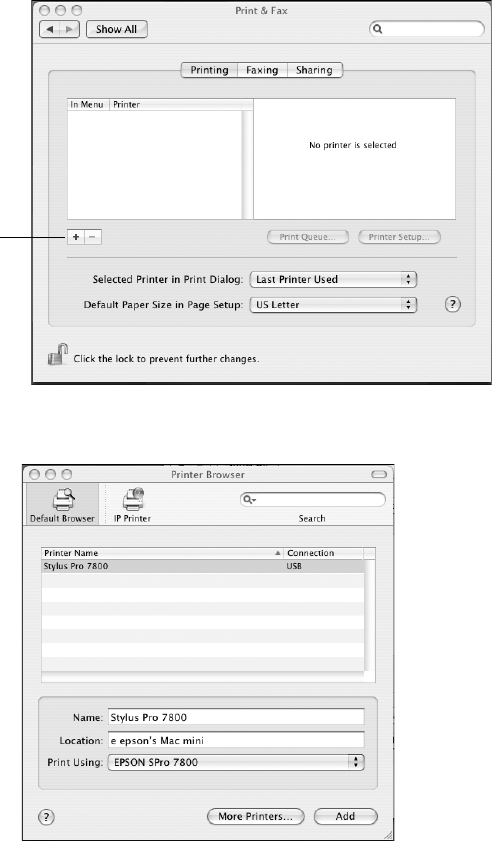
2. Click the
+ plus sign. You see your printer in the Printer Browser:
3. Wait while your Macintosh finds the printer driver and the Add button
becomes available. Then click the
Add button.
Click here to add
your printer
Tip: If you want to
rename the printer for
easier identification, enter
a new name for it in the
Name field on this
screen.
7800-9800Guide.book Page 45 Monday, April 10, 2006 11:59 AM