
user manual


Table Of Contents
- Front Matter
- Contents
- Introduction
- Chap 1-Setting Up the Printer
- Unpacking and Assembling the Epson Stylus Pro 7800
- Unpacking and Assembling the Epson Stylus Pro 9800
- Connecting the Power Cord
- Installing Ink
- Connecting to Your System
- Connecting to the Network
- Installing the Software for Macintosh
- Installing the Software for Windows
- Updating Your Printer Firmware
- Configuring the Printer for Your Network
- Chap 2-Handling Paper and Other Media
- Chap 3-Printing with Epson Drivers for Macintosh
- Chap 4-Printing with Epson Drivers for Windows
- Chap 5-Maintaining and Transporting the Printer
- Checking Printer Status and Part Life
- Checking and Cleaning the Print Head
- Aligning the Print Head
- Replacing Ink Cartridges
- Switching Black Ink Cartridges
- Changing the Date and Time
- Using Maintenance Mode
- Replacing the Paper Cutter Blade
- Replacing the Maintenance Tank
- Cleaning the Printer
- Transporting or Storing the Printer
- Chap 6-Solving Problems
- Appendix A: Specifications
- Index
4-107
Printing with Epson Drivers for Windows | 107
The widths shown in the table on page 106 work with the Standard
Expansion setting. If you use the slider to adjust the amount of expansion (as
described on page 104), you can calculate the image width as follows:
• Using the Min setting, subtract 0.125 inch from the media width to
determine the image width.
• Using the Max setting, subtract 0.415 inch from the media width to
determine the image width.
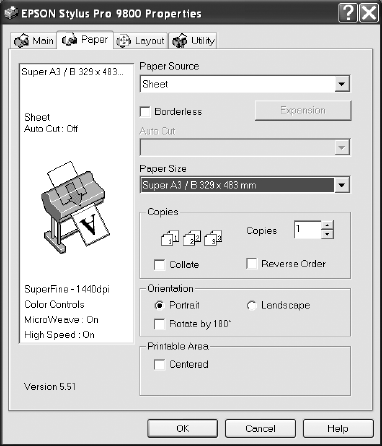
Choosing Cut Sheet Paper Options
1. On the Properties window, click the Paper tab. You see this window:
2. Select Sheet as the Paper Source setting.
3. If you want to print to the edges of the page, click
Borderless. Note
that borderless printing applies only to the left and right sides of the
page on cut sheets; margins are required at the top and bottom of the
page. For full-bleed borderless printing, use roll paper, as described on
page 103.
7800-9800Guide.book Page 107 Monday, April 10, 2006 11:59 AM