user manual
Table Of Contents
- Front Matter
- Contents
- Introduction
- Chap 1-Setting Up the Printer
- Unpacking and Assembling the Epson Stylus Pro 7800
- Unpacking and Assembling the Epson Stylus Pro 9800
- Connecting the Power Cord
- Installing Ink
- Connecting to Your System
- Connecting to the Network
- Installing the Software for Macintosh
- Installing the Software for Windows
- Updating Your Printer Firmware
- Configuring the Printer for Your Network
- Chap 2-Handling Paper and Other Media
- Chap 3-Printing with Epson Drivers for Macintosh
- Chap 4-Printing with Epson Drivers for Windows
- Chap 5-Maintaining and Transporting the Printer
- Checking Printer Status and Part Life
- Checking and Cleaning the Print Head
- Aligning the Print Head
- Replacing Ink Cartridges
- Switching Black Ink Cartridges
- Changing the Date and Time
- Using Maintenance Mode
- Replacing the Paper Cutter Blade
- Replacing the Maintenance Tank
- Cleaning the Printer
- Transporting or Storing the Printer
- Chap 6-Solving Problems
- Appendix A: Specifications
- Index

5-134
134 | Maintaining and Transporting the Printer
9. When LOWER THE RIGHT INK LEVER appears on the LCD display,
lower the ink lever on the right ink compartment.
The printer starts draining ink and
DRAINING INK XX% appears on
the LCD display. Wait until draining is complete.
Installing the New Black Ink Cartridge
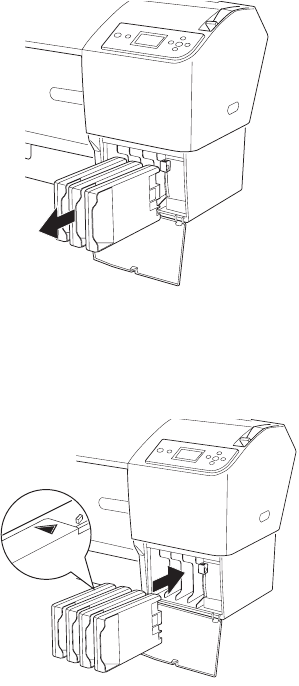
1. When draining is complete, RAISE THE RIGHT INK LEVER appears on
the LCD. Raise the ink lever on the right ink compartment.
2. When
REMOVE C/M/Y CONVERSION CARTRIDGES appears,
remove the conversion cartridges from the slots on the right ink
compartment.
3. When
INSTALL ALL FOUR INK CARTRIDGES ON THE RIGHT SIDE
appears, insert the cartridges in their specified slots, including the new
black ink cartridge.
7800-9800Guide.book Page 134 Monday, April 10, 2006 11:59 AM


