
user manual


Table Of Contents
- Front Matter
- Contents
- Introduction
- Chap 1-Setting Up the Printer
- Unpacking and Assembling the Epson Stylus Pro 7800
- Unpacking and Assembling the Epson Stylus Pro 9800
- Connecting the Power Cord
- Installing Ink
- Connecting to Your System
- Connecting to the Network
- Installing the Software for Macintosh
- Installing the Software for Windows
- Updating Your Printer Firmware
- Configuring the Printer for Your Network
- Chap 2-Handling Paper and Other Media
- Chap 3-Printing with Epson Drivers for Macintosh
- Chap 4-Printing with Epson Drivers for Windows
- Chap 5-Maintaining and Transporting the Printer
- Checking Printer Status and Part Life
- Checking and Cleaning the Print Head
- Aligning the Print Head
- Replacing Ink Cartridges
- Switching Black Ink Cartridges
- Changing the Date and Time
- Using Maintenance Mode
- Replacing the Paper Cutter Blade
- Replacing the Maintenance Tank
- Cleaning the Printer
- Transporting or Storing the Printer
- Chap 6-Solving Problems
- Appendix A: Specifications
- Index
3-83
Printing with Epson Drivers for Macintosh | 83
7. Choose the appropriate Orientation and Scale for printing.
8. Click
OK. Then continue with the instructions in the next section to
select additional settings for printing.
Choosing Basic Print Options
Once you have selected your page setup options, you need to select printing
options. The Epson driver offers automatic settings that optimize print
quality and speed when you’re using Epson media. You can also choose
advanced settings for more control over your printer and color management
options, as described on page 87.
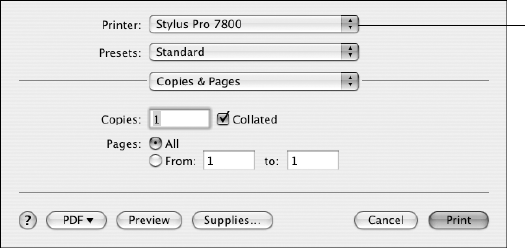
1. Select
Print in your application. You see the screen shown below:
2. Choose your printer from the Printer menu.
3. Select
Print Settings from the Copies & Pages drop-down menu.
Select your
printer
7800-9800Guide.book Page 83 Monday, April 10, 2006 11:59 AM