
user manual


Table Of Contents
- Front Matter
- Contents
- Introduction
- Chap 1-Setting Up the Printer
- Unpacking and Assembling the Epson Stylus Pro 7800
- Unpacking and Assembling the Epson Stylus Pro 9800
- Connecting the Power Cord
- Installing Ink
- Connecting to Your System
- Connecting to the Network
- Installing the Software for Macintosh
- Installing the Software for Windows
- Updating Your Printer Firmware
- Configuring the Printer for Your Network
- Chap 2-Handling Paper and Other Media
- Chap 3-Printing with Epson Drivers for Macintosh
- Chap 4-Printing with Epson Drivers for Windows
- Chap 5-Maintaining and Transporting the Printer
- Checking Printer Status and Part Life
- Checking and Cleaning the Print Head
- Aligning the Print Head
- Replacing Ink Cartridges
- Switching Black Ink Cartridges
- Changing the Date and Time
- Using Maintenance Mode
- Replacing the Paper Cutter Blade
- Replacing the Maintenance Tank
- Cleaning the Printer
- Transporting or Storing the Printer
- Chap 6-Solving Problems
- Appendix A: Specifications
- Index
3-93
Printing with Epson Drivers for Macintosh | 93
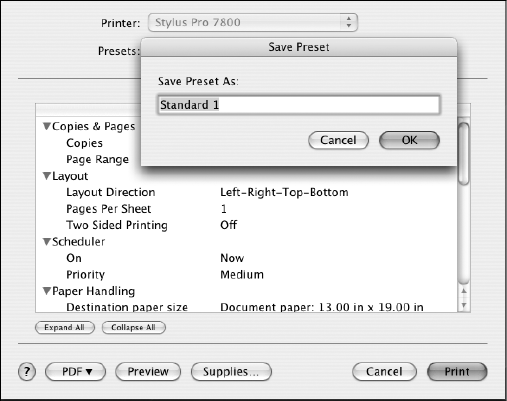
Creating a Custom Preset and Printing
Once you’ve made the correct settings for your print job, create a
custom preset. This will save you time when you use the same
profile/printer/ink/media combination for future print jobs.
1. Select
Summary from the drop-down menu.
2. After verifying that your settings are correct, select
Save As from the
Presets drop-down menu.
You see the following:
3. Type a name, and click
OK.
4. When you’re ready to print, click the
Print button.
See page 96 for instructions on monitoring your print job.
Note: If you check the
settings on each screen
in the drop-down menu,
go through them carefully
from top to bottom.
Avoid cycling through
them repeatedly, or you
may lose your settings.
Caution: Do not open
and close the Presets
menu without typing a
name, or you will lose
your settings.
7800-9800Guide.book Page 93 Monday, April 10, 2006 11:59 AM