
Instruction manual


34
34 | Setting Up the Printer
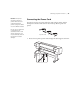
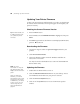
2. Open the packages containing the cleaning cartridges.
3. Open both ink cartridge compartment covers on the back of the printer,
insert the cleaning cartridges as shown, and close the covers.
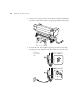
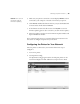
4. Follow the instructions on the LCD display to check the status of the
waste ink tank.
The printer processes the cleaning cartridges for about eight minutes
while
CLEANING appears on the LCD display.
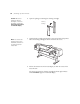
Caution: Be sure to
install the cleaning
cartridges, not the ink
cartridges, at this point.
Follow the instructions
on the LCD display.
Cleaning
cartridge
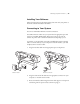
Note: You need to be
present during the ink
installation process. Do
not leave the printer
unattended.