
Installation Instructions

16
Setting Up Your Stylus Scan 2000
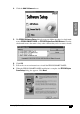
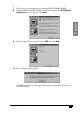
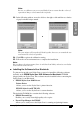
11. After the applications have been installed, the following message appears.
Click OK and restart your computer. Then turn on the Stylus Scan by pressing the
power button.
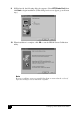
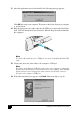
12. Plug the appropriate end of the cable into the USB port on the back of the Stylus
Scan. (The end that fits the Stylus Scan has a different shape from the end that fits
the computer.)
Note:
To connect the Stylus Scan to a USB port, you need a standard shielded USB
cable.
13. Connect the other end of the cable to the computer’s USB port.
Note:
If you have more than one USB hub connected to your computer, connect the
Stylus Scan to the hub that is connected directly to your computer. If the EPSON
Stylus Scan does not work properly when connected to the hub, connect it
directly to the computer’s USB port.
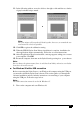
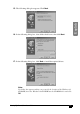
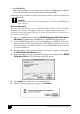
14. If the following dialog box appears, click Next. Otherwise skip to step 19.