
Operation Manual

Maintenance 11-5
You can carry out cleaning either from the your computer or from
the control panel. To run cleaning from your computer, use the
Head Cleaning utility. Both methods are described below.
Note:
❏ Print head cleaning uses both color and black ink. To avoid wasting
ink, clean the print head only if print quality declines.
❏ Use the Nozzle Check utility to confirm that the print head needs to
be cleaned. This saves ink.
❏ When the Black or Color Ink Out light is flashing or on, you cannot
clean the print head. Replace the appropriate ink cartridge first.
❏ Do not start the Head Cleaning or the Nozzle Check utility while
printing is in progress; otherwise your printout may be marred.
Using the Head Cleaning utility
For Windows users
1. Make sure that an ink out message is not displayed on LCD
panel.
Note:
If the ink out message is displayed, you cannot clean the print head.
Replace the appropriate ink cartridge first.
2. Access the printer software window. If you need instructions,
see “Accessing the printer software” on page 4-2.
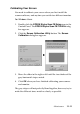
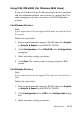
3. Click the Utility tab in the printer window, then click the Head
Cleaning button.
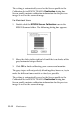
4. Follow the messages on your screen.
The Operate light flashes while the Stylus Scan performs the
cleaning cycle. The cycle takes about one minute to complete.