
Operating instructions

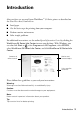
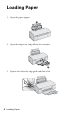
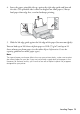
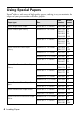
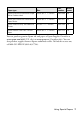
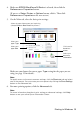
Table Of Contents
- Contents
- Introduction
- Loading Paper
- Using Special Papers
- Basic Printing
- Printing in Windows
- Printing With a Macintosh
- Selecting the Correct Paper Type
- Maintaining Your Printer
- Checking the Print Head Nozzles
- Cleaning the Print Head
- Checking the Ink Cartridge Status
- Replacing Ink Cartridges
- Solving Problems
- Checking for Software Updates
- Error Indicators
- Problems and Solutions
- Where To Get Help
- Notices
- Important Safety Instructions
- FCC Compliance Statement
- Declaration of Conformity
- Epson America, Inc., Limited Warranty
- Copyright Notice
Printing in Windows 9
4. Make sure
EPSON WorkForce 30 Series is selected, then click the
Preferences or Properties button.
(If you see a
Setup, Printer, or Options button, click it. Then click
Preferences or Properties on the next screen.)
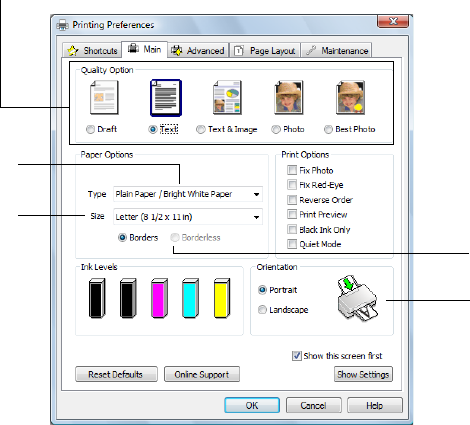
5. On the Main tab, select the basic print settings:
Make sure you choose the correct paper
Type setting for the paper you are
using (see page 15 for details).
Note:
For quick access to the most common settings, click the Shortcuts tab and select
one of the presets. You can create your own presets by clicking the Save Settings
button on the Advanced tab.
6. For more printing options, click the Advanced tab.
Note:
For more information about basic print settings or advanced settings, click Help
button or see your online Epson Information Center.
Select the type of document you’re printing
(choose Photo or Best Photo for pictures)
Select your
document
Orientation
Select your
paper Size
Select your
paper Type
Click here for
borderless
photos