TM-C100 Technical Reference Guide Rev.
TM-C100 Technical Reference Guide CAUTIONS ❏ No part of this document may be reproduced, stored in a retrieval system, or transmitted in any form or by any means, electronic, mechanical, photocopying, recording, or otherwise, without the prior written permission of Seiko Epson Corporation. ❏ The contents of this document are subject to change without notice. Please contact Seiko Epson for the latest information.
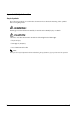
Important Safety Information Key to Symbols The following symbols are used in this document. Please check the meaning of the symbols before using the printer. WARNING: Warnings must be followed carefully to avoid serious bodily injury or death. CAUTION: Cautions must be observed to avoid the following kinds of damage. • Physical injury • Damage to property • Loss of data and the like Note: Notes provide useful information about maintaining the performance of your printer and its operation. ii Rev.
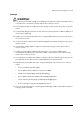
TM-C100 Technical Reference Guide Warnings WARNING: ❏ Turn off the printer and unplug it immediately if it produces smoke, a strange odor, or unusual noise. Continued use may lead to fire or electric shock. ❏ Do not disassemble or modify the printer. Doing so may result in injury, fire, or electric shock. ❏ To avoid the danger of electric shock, do not set up the printer or attach cables to it when there is lightning. ❏ Always use the specified power source.
Cautions CAUTION: ❏ Do not attach any equipment not shown in this guide. Doing so may result in failure, fire, and the like. ❏ Do not place the printer on an unstable or tilted surface. Doing so may cause it to fall, resulting in injury. ❏ Do not place the printer in a humid or dusty location. Doing so may result in failure, fire or electric shock. ❏ Do not stand on the printer or place heavy objects on it. Doing so may break the printer or cause you to fall, leading to injury.
TM-C100 Technical Reference Guide About This Manual Aim of the Manual The purpose of this manual is to provide all necessary information to development engineers who are developing, designing or installing commercial systems using the TM-C100 printer, or who are developing or designing applications for the printer.
Related Software and Documents Related Software and Documents Software/document name Description TM-C100 User's Manual This provides information allowing the operator to use the TMC100 safely and correctly. This manual is packed in the box with the printer.* TM-C100 Technical Reference Guide This manual.* EPSON OPOS-X ADK This is the OCX driver. EPSON OPOS-X ADK Manual This provides information required for programming using OPOS-X. This is included in the EPSON OPOS-X ADK.
TM-C100 Technical Reference Guide Contents Revision Information . . . . . . . . . . . . . . . . . . . . . . . . . . . . . . . . . . . . . . . . . . . . . . . . . . . . . . . . . . . . . . . . . . . . . . Important Safety Information . . . . . . . . . . . . . . . . . . . . . . . . . . . . . . . . . . . . . . . . . . . . . . . . . . . . . . . . . . . . . . . Key to Symbols . . . . . . . . . . . . . . . . . . . . . . . . . . . . . . . . . . . . . . . . . . . . . . . . . . . . . . . . . . . . . . . . . . . . .
3.4.7 The paper is not cut (roll paper specification) . . . . . . . . . . . . . . . . . . . . . . . . . . . . . . . . . . . . . . . . . 3-10 3.5 FAQ . . . . . . . . . . . . . . . . . . . . . . . . . . . . . . . . . . . . . . . . . . . . . . . . . . . . . . . . . . . . . . . . . . . . . . . . . . . . . . . . . . 3-11 3.5.1 Printing on long paper (roll paper specification) . . . . . . . . . . . . . . . . . . . . . . . . . . . . . . . . . . . . . . . 3-11 3.5.
TM-C100 Technical Reference Guide Chapter 1 Product Outline 1.1 Features The TM-C100 is a compact inkjet printer, newly designed for commercial applications. Besides printing product photographs and POP items, the printer has the following features. ❏ Since it is small and light-weight, it can be used effectively on limited counter space. ❏ Thanks to its high reliability and durable design, it can be used every day for commercial applications.
1.2.2 Standard Accessories The printer comes with the following accessories. ❏ User's Manual ❏ Exclusive ink cartridge ❏ Power unit ❏ Power cable (not included for some models) ❏ Roll paper: 1 roll (roll paper specification only) Note: Since the packaged ink cartridge is for trial use, it may not last as long as a normal cartridge. The printer does not come with a USB cable. Please provide this yourself. 1.2.3 TM-C100 related products The table below shows the TM-C100 related products.
TM-C100 Technical Reference Guide For customers from North America: http://pos.epson.com/ For customers from other countries: http://www.epson-pos.com/ Select the product from the “Select any product” pull-down menu. 1.3 Consumables 1.3.1 Ink cartridges Ink cartridges are necessary for printing. ❏ Part number: four-color model: SJIC9P, single color model: SJIC10P(K) Note: The TM-C100 uses an exclusive ink cartridge. You cannot install other type of ink cartridge.
1.3.3 Standard size paper The following types of paper are available for use with the TM-C100 (ASF specification). These can be purchased from your dealer. Part number Paper size Paper type Number of sheets ENS105-148 A6 Plain paper 500 sheets EFS105-148 A6 Special fine paper 250 sheets Note: We recommend that you use genuine Epson paper to ensure that your printer gives maximum performance. 1-4 Product Outline Rev.
TM-C100 Technical Reference Guide Chapter 2 Setup 2.1 Part Names and Basic Operations 2.1.1 Part names Roll paper specification release lever printer cover Enlarged view of the control panel tab INK LED & CLEANING switch control panel paper tray roll paper holder locking clip POWER LED & POWER switch roll paper edge guide PAPER LED & PAPER switch ❏ Release lever Pressing this lever switches between the paper clamp status (preparing to print) and paper release status (ready for insertion of paper).
ASF (auto sheet feeder) specification release lever edge guide auto sheet feeder (ASF) printer cover tab control panel paper tray Enlarged view of the control panel POWER LED & POWER switch INK LED & CLEANING switch PAPER LED & PAPER switch ❏ Release lever Pressing this lever switches between the paper clamped status (preparing to print) and paper released status (ready for insertion of paper).
TM-C100 Technical Reference Guide 2.1.2 Control panel The following shows the functions of the control panel. ❏ POWER switch This switches the power on and off. The POWER LED indicates whether the power is on or off. • POWER LED: Indicates whether the power is on or off. On: The power is on. (power on) Off: The power is off. (power off) Flashing: The power is performing an operation. (cleaning, power-on process, power-off process, voiding remaining print data and so on.
❏ CLEANING switch The printer performs head cleaning if the switch is pressed for 3 seconds or more. For information about head cleaning, see "Ink head cleaning" on page 3-7. Note: Head cleaning consumes ink. Note that performing head cleaning more than necessary shortens the product lifetime of the ink cartridge. • INK LED: Indicates the status of ink remaining. On: Ink cartridge is not installed or it is time to replace the ink cartridge. Install a cartridge or replace it with a newone.
TM-C100 Technical Reference Guide 2.2 Setup Procedure To get the best performance from your printer, it is necessary to make various settings before you use it. Set up the printer as required. The procedure for preparing the printer for use is as follows. 1. Printer setup (See "Printer Setup" on page 2-6.) ❏ Install the options • Roll paper unit, paper tray, roll paper • ASF unit, paper tray, standard size paper ❏ Connect the printer to the power supply ❏ Install the ink cartridge 2.
2.3 Printer Setup 2.3.1 Installing options ❏ When using the ASF (auto sheet feeder) specification printer, see "Installing the ASF (auto sheet feeder) unit" on page 2-6. ❏ When using the roll paper specification printer, see "Installing the roll paper holder" on page 2-8. 2.3.1.1 Installing the ASF (auto sheet feeder) unit 1. Check that the printer is not connected to the AC adapter. If the printer is on, turn it off and remove the AC adapter. 2.
TM-C100 Technical Reference Guide 4. Push down the auto sheet feeder until the triangle marks on the printer and the auto sheet feeder are aligned. 5. Insert the connector of the auto sheet feeder cable into the option socket at the bottom of the back of the printer. option socket 6. Attach the paper support. paper support 7. Attach the paper tray to complete installation of the ASF unit.
2.3.1.2 Installing the roll paper holder 1. Check that the printer is not connected to the AC adapter. If the printer is on, turn it off and remove the AC adapter. 2. Insert the hooks of the roll paper holder into the slots at the back of the printer while placing the printer on the base of the roll paper holder. slot hook slot roll paper holder hook 3. Attach the paper tray. Insert the hooks of the paper tray into the 2 slots in the bottom of the printer at the front.
TM-C100 Technical Reference Guide 4. Plug the power cable into the power connector. power connector Note: To unplug the power connector, grip the part with the arrow mark and pull it straight out. 5. Turn on the printer. When the printer is turned on, it recognizes the ASF unit or roll paper holder, enabling it for use. Note: In order to use the ASF unit or roll paper holder, it is necessary to set the driver accordingly. For details, see the manual of the relevant driver. 2.3.
5. Push down the ink cartridge until it clicks firmly into place. Note: Do not use excessive force. 6. Close the printer cover (the INK LED goes off). Note: If the INK LED stays on, the ink cartridge is not installed properly. Check it again. When the printer is used for the first time, it automatically performs the ink charging sequence for about 1 minute. During the ink charging sequence the POWER LED flashes.
TM-C100 Technical Reference Guide 2.3.4 Connecting the printer to the host PC / POS terminal Note: To connect the printer to your computer you need a USB interface cable. The printer does not come with a cable. Please provide this yourself. 1. If the printer is turned on, turn it off with the POWER switch. 2. Attach the provided cable hook to the back of the printer. 3. Hook the USB cable through the cable hook, as shown in the figure below.
2.4 Installing a Printer Driver in the Host PC / POS Terminal Epson provides 2 kinds of printer drivers for the TM-C100. The drivers are the Advanced Printer Driver (APD) and OPOS-X for Windows®. 2.4.1 Advanced Printer Driver (APD) The Epson Advanced Printer Driver (APD) is a Windows printer driver provided by Epson. For details and information about obtaining the drivers, see "Windows Driver (Epson Advanced Printer Driver)" on page B-1. 2.4.1.
TM-C100 Technical Reference Guide The procedure for installation and setup is as follows. Start 1. Installing OPOS-X ADK ( Run Setup.exe on DISK1, then follow the steps in the wizard.) Installation completed? Error Completed 2. Using the SetupPOS-X utility to setup OPOS-X and devices For details, refer to the [Installation Manual]. You can use SetupPOS-X to setup OPOS-X and devices. 2.1 OPOS-X and device setup ❏ Select the device and I/F settings ❏ Device-specific settings Rev.
2.2. Run CheckHealth and perform the device communication test. Result code Error Succeeded An error has been detected with the CheckHealth method call OPOS-X and device setup normal. & Installation and setup completed. Check the error status. Refer to the [Application Development Guide]. 3. Check with the sample program 4. Create an OPOS-X compliant program Finish 2-14 Setup Rev.
TM-C100 Technical Reference Guide 1. Installation Run Setup.exe in Disk 1, and continue the installation with the wizard. 2. Perform the OPOS-X and device settings 1. Set the device setting by using SetupPOS-X utility. • Select the device and I/F settings. • Device-specific settings (perform settings specific to the device). 2. Run CheckHealth. Device communication test • • If the result is "SUCCESS," the device is set correctly.
❏ Manuals • Installer Manual: Explains installation and setup of the EPSON OPOS ADK • Application Development Guide (ADG): Detailed information on development support devices General Development: General information on development. General Functions: Common information to all the devices. POS Printer: General information on the device class. Operation Manual Sample Programs: Information on the sample programs.
TM-C100 Technical Reference Guide Chapter 3 Using the Printer This chapter describes typical usage of the printer and troubleshooting. 3.1 How to Set, Replace, and Print on the Paper 3.1.1 With the auto sheet feeder (ASF) specification 3.1.1.1 How to set and replace the paper Note: Use paper that is flat, without curls, folds or wrinkles. Do not print envelopes with a closure in the middle of the back.
5. If the release lever is lowered, press it again and raise the release lever. Note: If you insert paper that is too small (shorter than 85 mm) by mistake, you may not be able to remove it from the top of the auto sheet feeder, so use paper of the right size. If you cannot remove paper that you inserted, see "A paper jam occurred" on page 3-9. 3.1.1.2 Printing method 1. Check the following 3 points before printing.
TM-C100 Technical Reference Guide CAUTION: Attempting to remove the roll paper edge guide without squeezing the locking clip may damage the components. Always squeeze the clip when removing the guide. 4. Remove the used roll paper core if there is one. If there is roll paper inside the printer, remove it also. 5. Pull up the edge of the new roll paper approximately 10 cm {4 in}. Check the label instructions for the proper direction for the paper to come off of the roll. 6.
3.1.2.2 Printing method 1. Check the following 3 points before printing. • The printer is turned on • The release lever is up • Paper is set in the roll paper holder 2. When a print command is sent from an application, the printer prints the data. Note: During printing, do not press the release lever. If you press the release lever to release it during printing, printing stops and all the print data is lost. Settings for cutting the roll paper, margins and so on are all made in the driver.
TM-C100 Technical Reference Guide 5. Check that the paper is placed straight. 6. Press the release lever again, so that the release lever is in the raised position (clamped). 7. Positioning and printing of the cut sheet is performed automatically. Note: During printing, do not press the release lever. If you press the release lever to release it during printing, printing stops and all the print data is lost. During positioning, the paper is moved toward the back of the printer.
4. Remove the new ink cartridge from its box and open the transparent plastic bag. Note: Install the ink cartridge in the printer promptly after opening the plastic bag. If an opened cartridge is left out of its plastic bag for an extended period of time, print quality may be adversely affected. 5. Insert the ink cartridge into the top of the ink cartridge holder in the printer. Make sure the ink cartridge is facing the right way. Note: Also see the label on the underside of the printer cover. 6.
TM-C100 Technical Reference Guide 3.3 Maintenance 3.3.1 Ink head cleaning If the print appears blurred, the ink head nozzles may be blocked. In this case you can return the printer to its normal performance with ink head cleaning. Note: Since cleaning uses ink, avoid ink head cleaning if there is no problem with the print results. 3.3.1.1 Using the switch on the printer Cleaning starts if the CLEANING switch on the printer is pressed for 3 seconds or more. The POWER LED flashes during cleaning.
3.4 Troubleshooting 3.4.1 Flashing LEDs When only 1 of the 3 LEDs on the control panel is on, the printer is running normally. When more than 1 LED is on or flashing, an error has occurred. See the table below. LED status POWER PAPER INK Status Measures On Off Off Normal status The printer is not printing, and its status is normal. No measures are necessary. On On Off Printer cover open Close the printer cover. On Flashing Off/ Flashing Paper control Try the following measures.
TM-C100 Technical Reference Guide LED status POWER PAPER INK Status Measures Flashing Flashing On Autocutter error, or failure status 1 • Turn off the printer promptly, and if there is a paper jam, remove the paper. Then turn the printer on again. • If these measures do not return the printer to normal, have the printer serviced. Flashing Flashing Flashing Failure status 2 The head or motor have reached the end of their product lifetime. Have the printer serviced. 3.4.
Note: When using OPOS-X, the option setting is set automatically. Change only the feed setting. (Use the "SlpPaperBinNumber" properties.) ❏ Change the driver "Feed setting" to "ASF." ❏ Turn off the printer, and reconnect the cable of the ASF unit to the printer. Then turn on the printer again. ❏ Check with "ASF Specification" on page A-7 that the size of the paper you are using is appropriate for the product specification. 3.4.
TM-C100 Technical Reference Guide 3.5 FAQ 3.5.1 Printing on long paper (roll paper specification) By turning on "Long print mode" in the driver settings, you can print long pages without changing the paper size. See the driver manual for details. Note: When using OPOS-X, any cut position can be programmed. Note that there is no "Long print mode." 3.5.
4. Printing is performed and paper is output. Self test print example 5. The printer is ready to receive data as soon as it completes the self test. Normal printing is now possible. Note: If this self test is not possible, try a self test by hand feeding paper ("Feeding paper by hand" on page 313). 3.6.1.2 With the roll paper specification Note: You can check the operation of the autocutter with the self test when the roll paper holder is installed. 1.
TM-C100 Technical Reference Guide 3.6.1.3 Feeding paper by hand 1. Check that the printer is turned off, the printer cover is properly closed, and no option (ASF, roll paper holder) is installed. 2. While pressing FEED, turn on the printer. 3. Lower the release lever so that it is released, and set the paper. 4. Press the release lever again, so that the release lever is in the raised position (clamped). 5. Printing is performed and paper is output. Self test print example 6.
3-14 Using the Printer Rev.
TM-C100 Technical Reference Guide Chapter 4 Application Development Information This chapter contains useful information for developing POS systems using the printer. 4.1 Bar Code Printing 4.1.1 Using the Windows Advanced Printer Driver When using the Windows Advanced Printer Driver, you need to create the necessary bar code image data yourself. Create the data with commercial bar code creation software or the like.
4.2 Precautions When Using OPOS-X This section explains the precautions necessary when using OPOS-X. For details of the functions, see the OPOS-X manual. 4.2.1 Distinguishing between the ASF and roll paper specifications OPOS-X automatically determines from the connected TM-C100 whether it is the ASF or roll paper specification, so no settings are necessary. 4.2.
TM-C100 Technical Reference Guide Appendix A Product Specifications of the TM-C100 A.
Item Specification Vibration resistance test specifications: Packaged: Frequency 5 to 55 Hz Acceleration approximately 19.6 m/s 2 {2 G} Sweep 10 minutes (half cycle) Time 1 hour Orientation XYZ No external or internal damage was observed and no problems occurred in operation after vibration under the above conditions.
TM-C100 Technical Reference Guide A.2 Printing Specifications Item Specification Printing Method Serial ink-jet dot matrix Color printing Print direction Bidirectional, logic seeking Paper feed Forward and reverse friction feed Printing width 116 mm Max.
Note: 1. Printing speed is with continuous printing without cleaning, auto-cutting, or paper feed or ejection. 2. Printing speed may be slower, depending on the data transmission speed, status receiving and so on. A.
TM-C100 Technical Reference Guide A.3.1 Print area and cutter position A.3.1.1 Plain paper/special paper autocut position 15 mm or more when auto-cutting hand fed paper guide overall size feed direction 2 paper width 45 mm to 105 mm print area autocut position 2 roll paper guide 2 0.42 2 [Unit: mm] Print area and cutter position (plain paper/special paper) Rev.
A.3.1.2 Plain borderless label paper paper width 45 mm to 105 2 feed direction hand fed paper 15 mm or more when auto-cutting autocut position overall size autocut position 2 roll paper guide 0.42 2 2 1 (scrap) 1 (scrap) print area [Unit: mm] Print area and cutter position (borderless label sheets) Note: Borderless label paper must have scraps on both sides (a portion of installing only). Do not print on the scrap parts (the portion of installing only). The values given are typical values.
TM-C100 Technical Reference Guide A.4 ASF Specification Item Specification Cut sheet feeder specifications Paper feed type: Friction feed ASF unit detection: Detection by an optional connector Cut sheet detection: Detection by the TOF/BOF sensor Paper specifications Paper type: Plain paper/special paper (special fine paper, special matte paper)/plain borderless label paper Paper size: 55 to 135 mm (width) × 85 to 210 mm (length) Paper thickness: 0.08 to 0.
A.4.1 Print area A.4.1.1 For standard printing paper width feed direction 2 overall size hand fed paper guide area that is printable but where print quality is reduced 2 17 2 or more maximum print area 109 (high speed) 114 (normal, fine) 2 2 [Unit: mm] print area Print area (cut sheet) A-8 Product Specifications of the TM-C100 Rev.
TM-C100 Technical Reference Guide A.5 Hand Fed Paper Specifications Item Specification Paper specifications Paper type: Plain paper/special paper (special fine paper, special matte paper)/plain borderless label paper Paper size: 49 to 210 mm (width) × 120 to 297 mm (length) Paper thickness: 0.06 to 0.25 mm Basic weight (reference value): 52.3 to 218 g/m2 (JIS P8124) (45 to 188 kg / 1,000 sheets / 788 × 1,091 mm) Note: The paper must be flat, without curls or wrinkles (especially at the top edges).
A.5.1 Print area A.5.1.1 For standard printing paper width feed direction 2 overall size hand fed paper guide area that is printable 2 but where print quality 17 is reduced 2 maximum print area 2 or more 2 111 (high speed) 116 (normal, fine) [Unit: mm] print area Print area (cut sheet) A.6 Case Specifications A.6.
TM-C100 Technical Reference Guide A.6.3 Outline drawing 137 (tray retracted) A.6.3.1 Roll paper specification [Unit: mm, typical value] Roll paper specification - External view Rev.
137 (tray retracted) A.6.3.2 ASF specification [Unit: mm, typical value] ASF specification - External view A-12 Product Specifications of the TM-C100 Rev.
TM-C100 Technical Reference Guide Appendix B System Design This chapter contains useful information for system design. B.1 Control Method The printer can print and be controlled using either of the following 2 methods. 1. Windows printer driver (Epson Advanced Printer Driver) 2. EPSON OPOS ADK To obtain the driver, see "How to Obtain the Driver" in this chapter. B.1.
The following manuals are provided in other packages. • Epson Advanced Printer Driver: User's Manual • Status API: Reference Manual B.1.1.3 Epson Advanced Printer Driver support environment ❏ Supported interfaces • USB ❏ Supported operating systems (checked OS's) • Windows 2000 • Windows XP Note: For detailed information, please contact your dealer or Epson. B.1.
TM-C100 Technical Reference Guide B.1.2.1 EPSON OPOS ADK Outline OPOS Control, included in the EPSON OPOS ADK, has the following features. ❏ Provides CO for each device class and SO for Epson devices.
❏ Utilities • SetUpPOS Utility You can select a device and connection port to use, and make various settings. (Waiting to print time and so on) • Sample programs You can install sample programs for VB and VC++. B.1.2.3 EPSON OPOS ADK support environment ❏ Supported interfaces • USB ❏ Supported operating systems (checked OS's) • Windows 2000 • Windows XP ❏ Supported development languages • Visual Basic • VisualC++ B.1.