Gebruikershandleiding NPD4708-00 NL
Gebruikershandleiding Auteursrechten en handelsmerken Auteursrechten en handelsmerken Auteursrechten en handelsmerken Niets uit deze uitgave mag worden verveelvoudigd, opgeslagen in een geautomatiseerd gegevensbestand of openbaar worden gemaakt, in enige vorm of op enige wijze, hetzij elektronisch, mechanisch, door fotokopieën, opnamen of op enige andere manier, zonder voorafgaande schriftelijke toestemming van Seiko Epson Corporation.
Gebruikershandleiding Auteursrechten en handelsmerken IN NO EVENT SHALL SAM LEFFLER OR SILICON GRAPHICS BE LIABLE FOR ANY SPECIAL, INCIDENTAL, INDIRECT OR CONSEQUENTIAL DAMAGES OF ANY KIND, OR ANY DAMAGES WHATSOEVER RESULTING FROM LOSS OF USE, DATA OR PROFITS, WHETHER OR NOT ADVISED OF THE POSSIBILITY OF DAMAGE, AND ON ANY THEORY OF LIABILITY, ARISING OUT OF OR IN CONNECTION WITH THE USE OR PERFORMANCE OF THIS SOFTWARE.
Gebruikershandleiding Inhoudsopgave Inhoudsopgave Glasplaat. . . . . . . . . . . . . . . . . . . . . . . . . . . . . 28 Auteursrechten en handelsmerken Auteursrechten en handelsmerken. . . . . . . . . . . . . . 2 Kopiëren Documenten kopiëren. . . . . . . . . . . . . . . . . . . . . . 30 Normaal kopiëren. . . . . . . . . . . . . . . . . . . . . . . 30 Menulijst kopieermodus. . . . . . . . . . . . . . . . . . . . 30 Inleiding Informatie vinden. . . . . . . . . . . . . . . . . . . . . . . .
Gebruikershandleiding Inhoudsopgave Software-informatie. . . . . . . . . . . . . . . . . . . . . . . 67 Epson Scan Driver starten. . . . . . . . . . . . . . . . . 67 Andere software voor scannen starten. . . . . . . . 68 Voor Mac OS X. . . . . . . . . . . . . . . . . . . . . . . . 100 Het configuratiescherm gebruiken. . . . . . . . . . 101 Tijdelijk afdrukken met zwarte inkt wanneer de kleurencartridges opgebruikt zijn. . . . . . . . . . . . . 102 Voor Windows. . . . . . . . . . . . . . . . . . . . . . .
Gebruikershandleiding Inhoudsopgave Alleen het Aan-/Uit-lampje brandt. . . . . . . . . . 144 Er wordt een inktfout aangegeven nadat u de cartridge hebt vervangen. . . . . . . . . . . . . . . . . 145 De afdruksnelheid verhogen (alleen Windows). . . 146 Overige problemen. . . . . . . . . . . . . . . . . . . . . . . 147 Gewoon papier stil afdrukken. . . . . . . . . . . . . 147 Gegevens overdragen met behulp van een extern opslagapparaat Voorzorgsmaatregelen voor opslagapparaten. . . .
Gebruikershandleiding Inhoudsopgave Fax: specificaties. . . . . . . . . . . . . . . . . . . . . . . 161 Specificaties netwerkinterface. . . . . . . . . . . . . 162 Mechanische specificaties. . . . . . . . . . . . . . . . 162 Elektrische specificaties. . . . . . . . . . . . . . . . . . 163 Omgevingsspecificaties. . . . . . . . . . . . . . . . . . 165 Normen en goedkeuringen. . . . . . . . . . . . . . . 165 Interface. . . . . . . . . . . . . . . . . . . . . . . . . . . . .
Gebruikershandleiding Inleiding Inleiding Informatie vinden De nieuwste versies van de volgende handleidingen staan op de ondersteuningswebsite van Epson. http://www.epson.eu/Support (Europa) http://support.epson.net/ (buiten Europa) ❏ Hier beginnen (document): Biedt u informatie over de instellingen van het product en de installatie van de software. ❏ Basishandleiding (document): Biedt u basisinformatie voor gebruik van de printer zonder computer.
Gebruikershandleiding Inleiding Besturingssystemen en versies In deze handleiding worden de volgende afkortingen gebruikt. ❏ Windows 7 wordt gebruikt voor Windows 7 Home Basic, Windows 7 Home Premium, Windows 7 Professional en Windows 7 Ultimate. ❏ Windows Vista wordt gebruikt voor Windows Vista Home Basic Edition, Windows Vista Home Premium Edition, Windows Vista Business Edition, Windows Vista Enterprise Edition en Windows Vista Ultimate Edition.
Gebruikershandleiding Belangrijke instructies Belangrijke instructies Veiligheidsvoorschriften Lees en volg deze instructies voor een veilig gebruik van dit apparaat. Bewaar deze handleiding voor toekomstig gebruik. Neem ook alle waarschuwingen en voorschriften die op het apparaat zelf staan in acht. ❏ Gebruik alleen het netsnoer dat met het product is meegeleverd en gebruik het snoer niet voor andere apparatuur.
Gebruikershandleiding Belangrijke instructies Productadviezen en waarschuwingen Lees en volg deze instructies om schade aan het apparaat of uw eigendommen te voorkomen. Bewaar deze handleiding voor toekomstig gebruik. Het apparaat installeren/gebruiken ❏ De openingen in de behuizing van het apparaat mogen niet worden geblokkeerd of afgedekt. ❏ Gebruik alleen het type stroombron dat staat vermeld op het etiket op het apparaat.
Gebruikershandleiding Belangrijke instructies ❏ Steek geen voorwerpen door de openingen in het apparaat. ❏ Steek uw hand niet in het apparaat en raak de cartridges niet aan tijdens het afdrukken. ❏ Raak de witte, platte kabel binnen in het apparaat niet aan. ❏ Gebruik geen spuitbussen met ontvlambare stoffen in of in de buurt van dit apparaat. Dit kan brand veroorzaken. ❏ Verplaats de cartridgehouder niet met de hand. Hierdoor kan het apparaat worden beschadigd. ❏ Zet het apparaat altijd uit met de knop P.
Gebruikershandleiding Belangrijke instructies ❏ Maak het display alleen schoon met een droge, zachte doek. Gebruik geen vloeibare of chemische reinigingsmiddelen. ❏ De afdekplaat van het display kan breken bij hevige schokken. Neem contact op met uw leverancier als het display barst of breekt. Raak het gebroken glas niet aan en probeer dit niet te verwijderen.
Gebruikershandleiding Belangrijke instructies Modellen met 2,5 inch kleurendisplay: Druk op x en selecteer Stand. inst. herstellen > Alle instellingen. Modellen met monochroom display met 2 regels: Druk op x en selecteer Fabrieksinstellingen > Alle instellingen resetten.
Gebruikershandleiding Aan de slag met uw apparaat Aan de slag met uw apparaat Beschikbare functies Nagaan wat beschikbaar is voor uw product.
Gebruikershandleiding Aan de slag met uw apparaat c. Zijgeleider* d. Papierlade van de ADF (plaats hierop uw originelen voor het kopiëren)* e. Uitvoerlade van de ADF (uw originelen worden na het kopiëren op deze lade geplaatst)* * De beschikbaarheid van dit onderdeel verschilt per product. a. Zijgeleider b. Papierinvoer aan de achterkant c. Verlenging voor papiersteun d. Papiersteun e. Toevoergeleider f. Uitvoerlade g. Stop a. Deksel b. Glasplaat c. Configuratiescherm d.
Gebruikershandleiding Aan de slag met uw apparaat a. Scanner b. Cartridgehouder c. Printkop (onder de cartridgehouder) a. Netaansluiting b. LAN-poort* c. EXT.-poort d. LINE-poort e. USB-verbinding * De beschikbaarheid van dit onderdeel verschilt per product. Uitleg over het configuratiescherm Opmerking: Hoewel het configuratiescherm, het menu, de namen van opties en andere items op het display kunnen verschillen van uw apparaat, werken ze op dezelfde manier.
Gebruikershandleiding Aan de slag met uw apparaat Knoppen en display Knoppen Functie a Schakelt het apparaat in of uit b Naar kopieermodus gaan. c Naar faxmodus gaan. d Naar scanmodus gaan. e — Lcd-scherm (2,5 inch kleurendisplay) f — Lcd-scherm (monochroom display met 2 regels) g l, u, r, d, OK h 0-9,*,# Druk op l, u, r, d om een menu te selecteren. Druk op OK om de gekozen instelling te bevestigen en naar het volgende scherm te gaan.
Gebruikershandleiding Aan de slag met uw apparaat Knoppen Functie k Zorgt dat de printer stopt met werken of zet de huidige instellingen terug. Als deze knop wordt ingedrukt om kopiëren, scannen of faxen stop te zetten terwijl de ADF in gebruik is, worden all originelen in de ADF uitgevoerd. l Geeft gedetailleerde instellingen voor elke modus weer. m Annuleren/terugkeren naar het vorige menu. n Alleen bij modellen met Wi-Fi.
Gebruikershandleiding Papier en afdrukmateriaal gebruiken Papier en afdrukmateriaal gebruiken Algemene informatie over het gebruiken, laden en opslaan van afdrukmateriaal De meeste soorten gewoon papier zijn geschikt voor deze printer. Gecoat papier geeft echter het beste resultaat, omdat dit type papier minder inkt absorbeert. Epson levert afdrukmateriaal dat speciaal bedoeld is voor de inkt die in Epson-inkjetprinters wordt gebruikt. Dergelijk papier wordt aanbevolen voor een hoogwaardig resultaat.
Gebruikershandleiding Papier en afdrukmateriaal gebruiken Afdrukmateriaal Gewoon papier*1 Formaat Laadcapaciteit (vellen) Randloos afdrukken Letter*2 maximaal 11 mm — A4*2 maximaal 11 mm — B5*2 maximaal 11 mm — A5*2 maximaal 11 mm — A6*2 maximaal 11 mm — Legal 1 — Gebruikergedefinieerd 1 — #10 10 — DL 10 — C6 10 — Epson Bright White Ink Jet Paper (Inkjetpapier helderwit) A4*2 80 — Epson Photo Quality Ink Jet Paper (Inkjetpapier fotokwaliteit) A4 80 — Epson Matte Pa
Gebruikershandleiding Papier en afdrukmateriaal gebruiken Afdrukmateriaal Epson Glossy Photo Paper (Fotopapier glanzend) Formaat Laadcapaciteit (vellen) Randloos afdrukken A4 20 ✓ 10 × 15 cm (4 × 6 inch) 20 ✓ 13 × 18 cm (5 × 7 inch) 20 ✓ *1 Papier met een gewicht van 64 g/m² (17 lb) tot 90 g/m² (24 lb). *2 De laadcapaciteit voor handmatig dubbelzijdig afdrukken is 30 vellen. Opmerking: De beschikbaarheid van papier kan van land tot land verschillen.
Gebruikershandleiding Papier en afdrukmateriaal gebruiken Voor dit papier Papiersoort in printerdriver Epson Premium Glossy Photo Paper (Fotopapier glanzend Premium)* Epson Premium Glossy Epson Premium Semigloss Photo Paper (Fotopapier halfglanzend Premium)* Epson Premium Semigloss Epson Glossy Photo Paper (Fotopapier glanzend)* Epson Glossy Epson Photo Paper (Fotopapier)* Epson Photo Epson Matte Paper — Heavyweight (Mat papier zwaar)* Epson Matte Epson Photo Quality Ink Jet Paper (Inkjetpapier
Gebruikershandleiding Papier en afdrukmateriaal gebruiken B Schuif de papiersteun en de uitvoerlade uit en zet de stop omhoog. Opmerking: Zorg ervoor dat aan de voorkant van het product voldoende ruimte is voor het papier dat uit het apparaat komt. C Schuif de zijgeleider naar links. D Laad het papier met de afdrukzijde naar boven en de rand van het papier tegen de rechterkant van de papierinvoer aan de achterkant.
Gebruikershandleiding Papier en afdrukmateriaal gebruiken Opmerking: ❏ Waaier het papier los en maak een rechte stapel voordat u het papier in de lade plaatst. E ❏ De afdrukzijde is meestal witter of glanzender dan de andere zijde. ❏ Laad papier met de korte zijde eerst in de papierinvoer aan de achterkant, ook als u liggende afbeeldingen afdrukt. ❏ U kunt de volgende papierformaten met gaatjes gebruiken: A4, A5, A6, Legal, Letter. Laad slechts één vel tegelijk.
Gebruikershandleiding Papier en afdrukmateriaal gebruiken F Klap de toevoergeleider naar achteren. Originelen plaatsen Automatische documentinvoer (ADF) De beschikbaarheid van dit onderdeel verschilt per product. U kunt uw originele documenten in de automatische documentinvoer (ADF) plaatsen om meerdere pagina's snel te kopiëren, scannen of faxen. U kunt de volgende originelen in de ADF plaatsen.
Gebruikershandleiding Papier en afdrukmateriaal gebruiken B Tik de originelen op een vlakke ondergrond om de randen mooi gelijk te maken. C Verschuif de zijgeleider in de automatische documentinvoer. D Plaats de originelen in de automatische documentinvoer met de bedrukte zijde naar boven en de korte zijde eerst. E Verschuif de zijgeleider tot deze op gelijke hoogte met de originelen komt.
Gebruikershandleiding Papier en afdrukmateriaal gebruiken F Controleer of het lampje van de ADF op het configuratiescherm brandt. Opmerking: ❏ Het lampje van de ADF kan uit blijven als er nog originelen op de glasplaat liggen. Als u in dat geval op x drukt, wordt het origineel op de glasplaat gekopieerd, gescand of gefaxt in plaats van de originelen in de ADF. ❏ Het lampje van de ADF gaat niet branden als het apparaat in de slaapstand staat.
Gebruikershandleiding Papier en afdrukmateriaal gebruiken Opmerking: Zie de volgende gedeelten als er problemen optreden met het scangebied of de scanrichting wanneer u EPSON Scan gebruikt. & “De randen van het origineel worden niet gescand” op pagina 153 & “Meerdere documenten worden als een enkel bestand gescand” op pagina 153 C Sluit de klep zachtjes.
Gebruikershandleiding Kopiëren Kopiëren Documenten kopiëren Normaal kopiëren Volg onderstaande instructies voor het kopiëren van documenten. A Laad het papier. & “Papier en enveloppen laden” op pagina 23 B Plaats uw origineel in de automatische documentinvoer of op de glasplaat. & “Originelen plaatsen” op pagina 26 C Druk op r om naar de kopieermodus te gaan. D Druk op u of d om het aantal exemplaren in te stellen.
Gebruikershandleiding Afdrukken Afdrukken Printerdriver en Status Monitor In de printerdriver kunt u een groot aantal opties instellen om de beste afdrukresultaten te krijgen. Met de statusmonitor en de printerhulpprogramma's kunt u de printer controleren en ervoor zorgen dat het apparaat optimaal blijft werken. Opmerking voor Windows-gebruikers: ❏ De printerdriver gaat op de website van Epson op zoek naar de nieuwste versie van de printerdriver, waarna eventuele updates automatisch worden geïnstalleerd.
Gebruikershandleiding Afdrukken Vanuit het menu Start ❏ Windows 7: Klik op de knop Start en selecteer Devices and Printers (Apparaten en printers). Klik vervolgens met de rechtermuisknop op de printer en selecteer Printing preferences (Voorkeursinstellingen voor afdrukken). ❏ Windows Vista: Klik op de knop Start, selecteer Control Panel (Configuratiescherm) en selecteer Printer in de categorie Hardware and Sound (Hardware en geluiden).
Gebruikershandleiding Afdrukken Epson Printer Utility 4 Voor Mac OS X 10.7 klikt u op System Preferences (Systeemvoorkeuren) in het menu Apple en vervolgens op Print & Scan (Afdrukken en scannen). Selecteer uw printer in het lijstvak Printers, klik op Options & Supplies (Opties en toebehoren), Utility (Hulpprogramma) en vervolgens op Open Printer Utility (Open Printerhulpprogramma). Voor Mac OS X 10.
Gebruikershandleiding Afdrukken B Open de printerinstellingen. & “De printerdriver voor Windows openen” op pagina 31 C Klik op het tabblad Main (Hoofdgroep). D Selecteer de gewenste instelling voor Document Size (Documentformaat). U kunt ook een aangepast papierformaat definiëren. Zie de online-Help voor meer informatie. E Selecteer Borderless (Randloos) als u randloze foto's wilt afdrukken.
Gebruikershandleiding Afdrukken H Klik op OK om het venster met printerinstellingen te sluiten. Opmerking: Zie het betreffende gedeelte om de geavanceerde instellingen te wijzigen. I Druk het bestand af. Basisinstellingen van de printer voor Mac OS X Opmerking: Schermafbeeldingen van vensters van de printerdriver in dit gedeelte zijn afkomstig van Mac OS X 10.7. A Open het bestand dat u wilt afdrukken. B Open het dialoogvenster Print (Afdrukken).
Gebruikershandleiding Afdrukken C Selecteer de printer die u gebruikt bij Printer. Opmerking: Afhankelijk van de toepassing kunt u bepaalde items in dit dialoogvenster mogelijk niet selecteren. Kies in dat geval Page Setup (Pagina-instelling) in het menu File (Archief) van uw toepassing en geef de gewenste instellingen op. D Selecteer de gewenste instelling voor Paper Size (Papierformaat).
Gebruikershandleiding Afdrukken H Selecteer de juiste instelling bij Expansion (Uitbreiding) tijdens het randloze afdrukken om te regelen hoeveel van de afbeelding buiten de rand van het papier valt. I Klik op Print (Afdrukken) om te beginnen met afdrukken. Afdrukken annuleren U kunt het afdrukken annuleren op de hierna beschreven manieren. De printerknop gebruiken Druk op y om de afdruktaak te annuleren.
Gebruikershandleiding Afdrukken C Klik op de knop Delete (Verwijderen) om de afdruktaak te annuleren. Overige opties Een eenvoudige manier om foto's af te drukken Met Epson Easy Photo Print kunt u uw digitale afbeeldingen afdrukken op verschillende soorten papier. Dankzij de stapsgewijze instructies bereikt u snel het gewenste resultaat zonder dat u allerlei ingewikkelde instellingen hoeft op te geven.
Gebruikershandleiding Afdrukken Voor Mac OS X Dubbelklik op de map Applications (Programma's) op de vaste schijf van uw Mac OS X, dubbelklik om de beurt op de mappen Epson Software en Easy Photo Print en dubbelklik vervolgens op het pictogram Easy Photo Print. Voorkeursinstellingen van de printer (alleen voor Windows) Met de voorkeursinstellingen voor de printerdriver kunt u razendsnel afdrukken. U kunt ook zelf voorkeursinstellingen maken.
Gebruikershandleiding Afdrukken Opmerking: ❏ Deze functie is niet beschikbaar voor Mac OS X. ❏ Deze functie is bij sommige instellingen mogelijk niet beschikbaar. ❏ Deze functie is mogelijk niet beschikbaar wanneer de printer via een netwerk of als gedeelde printer wordt gebruikt. ❏ De laadcapaciteit is verschillend bij handmatig dubbelzijdig afdrukken. & “Papier selecteren” op pagina 20 ❏ Gebruik alleen papier dat geschikt is voor dubbelzijdig afdrukken. Anders kan het resultaat sterk tegenvallen.
Gebruikershandleiding Afdrukken Volledige pagina afdrukken Hiermee kunt u een document automatisch vergroten of verkleinen en zo aanpassen aan het papierformaat dat in de printerdriver is geselecteerd. Opmerking: Deze functie is bij sommige instellingen mogelijk niet beschikbaar. Printerinstellingen voor Windows A Open de printerinstellingen.
Gebruikershandleiding Afdrukken Pagina's per vel afdrukken Hiermee kunt u de printerdriver gebruiken om twee of vier pagina's op één vel af te drukken. Opmerking: Deze functie is bij sommige instellingen mogelijk niet beschikbaar. Printerinstellingen voor Windows A Open de printerinstellingen. & “De printerdriver voor Windows openen” op pagina 31 B Selecteer 2-Up (2 per vel) of 4-Up (4 per vel) als instelling voor Multi-Page (Meerdere pagina's) op het tabblad Main (Hoofdgroep).
Gebruikershandleiding Afdrukken De printer voor afdrukken delen Instellingen voor Windows Deze instructies laten zien hoe u de printer kunt delen met andere gebruikers binnen het netwerk. U moet de printer eerst instellen als gedeelde printer via de computer waarop de printer rechtstreeks is aangesloten. Vervolgens moet u de printer toevoegen aan elke computer die via het netwerk gebruik gaat maken van de printer. Opmerking: ❏ Deze instructies zijn alleen bedoeld voor kleine netwerken.
Gebruikershandleiding Afdrukken C Selecteer Share this printer (Deze printer delen) en geef een naam op. Opmerking: Gebruik in de sharenaam van de printer geen spaties of liggende streepjes. Als u automatisch printerdrivers wilt downloaden voor computers met andere versies van Windows, klikt u op Additional Drivers (Extra stuurprogramma's) en selecteert u de omgeving en het besturingssysteem van de andere computers. Klik op OK en plaats vervolgens de cd met printersoftware.
Gebruikershandleiding Afdrukken A Windows 7: Klik op de knop Start en selecteer Devices and Printers (Apparaten en printers). Windows Vista: Klik op de knop Start, selecteer Control Panel (Configuratiescherm) en selecteer Printer in de categorie Hardware and Sound (Hardware en geluiden). Windows XP: Klik op Start, selecteer Control Panel (Configuratiescherm) en selecteer Printers and Faxes (Printers en faxapparaten) in de categorie Printers and Other Hardware (Printers en andere hardware).
Gebruikershandleiding Afdrukken Instellingen voor Mac OS X Als u de printer wilt configureren voor gebruik in een Mac OS X-netwerk, gebruikt u de instelling Printer Sharing (Printerdeling). Raadpleeg de Macintosh-documentatie voor meer informatie.
Gebruikershandleiding Scannen Scannen Proberen te scannen Starten van het scannen Laten we een document scannen om aan het proces te wennen. A Plaats het origineel op de glasplaat. & “Originelen plaatsen” op pagina 26 B Start Epson Scan. ❏ Windows: Dubbelklik op het pictogram Epson Scan op het bureaublad. ❏ Mac OS X: Selecteer Applications (Programma's) > Epson Software > EPSON Scan. C Selecteer Home Mode (Thuismodus).
Gebruikershandleiding Scannen D Selecteer Text/Line Art (Tekst/lijntekeningen) bij Document Type (Documenttype). E Klik op Preview (Voorbeeld). F Klik op Scan (Scannen).
Gebruikershandleiding Scannen G Klik op OK. Uw gescande beeld wordt opgeslagen. Mogelijkheden voor aanpassen van afbeeldingen Epson Scan biedt tal van mogelijkheden om de kleuren, de scherpte en het contrast te verbeteren, en diverse andere aspecten die van invloed zijn op de beeldkwaliteit te veranderen. Zie de Help voor details aangaande Epson Scan. Histogram Een grafisch overzicht voor het aanpassen van de lichte delen, schaduwen en gammaniveaus.
Gebruikershandleiding Scannen Tone Correction (Tooncorrectie) Een grafisch overzicht voor het aanpassen van de verschillende tonen. Image Adjustment (Afbeeldingsaanpassing) Hiermee past u helderheid en contrast aan en bepaalt u het balans tussen de kleuren rood, groen en blauw in de hele afbeelding. Color Palette (Kleurenpalet) Biedt een grafische interface voor aanpassing van middentinten, zoals huidtinten, zonder iets te veranderen aan de lichte en donkere delen van de afbeelding.
Gebruikershandleiding Scannen Backlight Correction (Tegenlichtcorrectie) Hiermee worden donkere delen uit foto's met veel tegenlicht automatisch lichter gemaakt. Dust Removal (Stof verwijderen) Hiermee wordt stof op uw originelen automatisch onzichtbaar gemaakt. Text Enhancement (Tekst verbeteren) Hiermee wordt de tekstherkenning tijdens het scannen verbeterd.
Gebruikershandleiding Scannen A Plaats uw origineel in de automatische documentinvoer of op de glasplaat. & “Originelen plaatsen” op pagina 26 B Druk op C Selecteer een item. Gebruik u of d om een menu te selecteren en klik op OK. D Selecteer uw computer. om naar de scanmodus te gaan. & “Scanmodus” op pagina 93 Opmerking: ❏ Als het apparaat is verbonden met een netwerk, kunt u de computer selecteren waar u de gescande afbeelding wilt opslaan.
Gebruikershandleiding Scannen Opmerking: ❏ In de Home Mode (Thuismodus) kunt u alleen vanaf de glasplaat scannen. ❏ Zie de Help voor details aangaande Epson Scan. A Plaats een of meerdere originelen. & “Glasplaat” op pagina 28 B Start Epson Scan. & “Epson Scan Driver starten” op pagina 67 C Selecteer Home Mode (Thuismodus) onder Mode (Modus). D Selecteer het Document Type (Documenttype). E Selecteer het Image Type (Beeldtype). F Klik op Preview (Voorbeeld).
Gebruikershandleiding Scannen G Stel de belichting, helderheid en andere beeldkwaliteitsinstellingen in. H Klik op Scan (Scannen). I In het venster File Save Settings (Instellingen voor Bewaar bestand), selecteert u de instelling voor Type en klikt u op OK.
Gebruikershandleiding Scannen C Selecteer Office Mode (Kantoormodus) onder Mode (Modus). D Selecteer het Image Type (Beeldtype). E Selecteer de Document Source (Documentbron). F Selecteer het formaat van het origineel bij Size (Grootte). G Selecteer een geschikte resolutie voor uw originelen bij Resolution (Resolutie). H Klik op Scan (Scannen).
Gebruikershandleiding Scannen I In het venster File Save Settings (Instellingen voor Bewaar bestand), selecteert u de instelling voor Type en klikt u op OK. Opmerking: Als het selectievakje Show this dialog box before next scan (Dit dialoogveld voor de volgende scan tonen) niet is aangevinkt, start Epson Scan meteen met scannen zonder het scherm File Save Settings (Instellingen voor Bewaar bestand) weer te geven. Uw gescande beeld wordt opgeslagen.
Gebruikershandleiding Scannen C Selecteer Professional Mode (Professionele modus) onder Mode (Modus). D Selecteer het type originelen dat u wilt scannen bij de instelling Document Type (Documenttype). E Selecteer de Document Source (Documentbron). F Als u Reflective (Reflecterend) selecteert bij Document Type (Documenttype), selecteert u Photo (Foto) of Document bij Auto Exposure Type (Automatische belichting).
Gebruikershandleiding Scannen G Selecteer het Image Type (Beeldtype). H Selecteer een geschikte resolutie voor uw originelen bij Resolution (Resolutie). I Klik op Preview (Voorbeeldscan) om de scan(s) vooraf te bekijken. Het venster Preview (Voorbeeldscan) wordt geopend waarin u het voorbeeld kunt zien.
Gebruikershandleiding Scannen Het scangebied weergeven en aanpassen Een voorbeeldmodus selecteren Nadat u de basisinstellingen en de resolutie hebt geselecteerd, kunt u een voorbeeld van de gescande afbeelding weergeven en het scangebied selecteren of aanpassen in het venster Preview (Voorbeeldscan). Er zijn twee manieren om een voorbeeldscan te maken. ❏ Normal (Normaal) voorbeeld: hiermee worden afbeeldingen volledig weergegeven.
Gebruikershandleiding Scannen ❏ Om automatisch een selectiekader te tekenen, klikt u op het pictogram automatisch lokaliseren. U kunt dit pictogram alleen gebruiken bij het bekijken van een normale voorbeeldscan en wanneer er slechts een enkel document op de glasplaat ligt. ❏ Om een selectiekader met een bepaald formaat te tekenen, voert u de nieuwe breedte en hoogte in bij Document Size (Documentformaat).
Gebruikershandleiding Scannen Diverse scantypes Een tijdschrift scannen Plaats eerst het tijdschrift en start Epson Scan. & “Starten van het scannen” op pagina 47 A Selecteer Home Mode (Thuismodus) onder Mode (Modus). B Selecteer Magazine bij Document Type (Documenttype). C Klik op Preview (Voorbeeld). D Stel de belichting, helderheid en andere beeldkwaliteitsinstellingen in. Zie de Help voor details aangaande Epson Scan.
Gebruikershandleiding Scannen E Klik op Scan (Scannen). F Selecteer PDF als het Type en klik op OK. Uw gescande beeld wordt opgeslagen. Meerdere documenten als een PDF-bestand scannen Plaats eerst het document en start Epson Scan. & “Starten van het scannen” op pagina 47 Opmerkingen voor de automatische documentinvoer (ADF): Plaats alleen de eerste pagina als u de voorbeeldfunctie gebruikt.
Gebruikershandleiding Scannen A Selecteer Professional Mode (Professionele modus) onder Mode (Modus). B Selecteer de Document Source (Documentbron). C Klik op Preview (Voorbeeld). Opmerkingen voor de automatische documentinvoer (ADF): ❏ De door de ADF uitgeworpen documentpagina is nog niet gescand. Plaats het gehele document opnieuw in de ADF. ❏ Plaats geen papier boven de lijn net onder de pijlmarkering d op de ADF.
Gebruikershandleiding Scannen D Stel de belichting, helderheid en andere beeldkwaliteitsinstellingen in. E Klik op Scan (Scannen). F Selecteer PDF als het Type en klik op OK. Zie de Help voor details aangaande Epson Scan. Opmerking: Indien het vakje Show Add Page dialog after scanning (Toon venster Pagina toevoegen na scannen) niet is aangevinkt, slaat Epson Scan uw document automatisch op zonder het venster Add Page Confirmation (Bevestiging voor Pag. toevoegen) te tonen.
Gebruikershandleiding Scannen I Klik op Edit page (Pagina bewerken) of Save File (Bestand opslaan). Edit page (Pagina bewerken) Selecteer deze knop indien u een van de pagina's wilt wissen of de volgorde wilt veranderen. Gebruik vervolgens de pictogrammen onderaan in het venster Editing Page (Pagina bewerken) om pagina’s te selecteren, te draaien, te herschikken of te verwijderen. Zie de Help voor details aangaande Epson Scan. Klik nadat u de gewenste wijzigingen hebt aangebracht, op OK.
Gebruikershandleiding Scannen Een foto scannen Plaats eerst de foto op de glasplaat en start Epson Scan. & “Starten van het scannen” op pagina 47 A Selecteer Home Mode (Thuismodus) onder Mode (Modus). B Selecteer Photograph (Foto) bij Document Type (Documenttype). C Klik op Preview (Voorbeeld). D Stel de belichting, helderheid en andere beeldkwaliteitsinstellingen in. Zie de Help voor details aangaande Epson Scan.
Gebruikershandleiding Scannen E Klik op Scan (Scannen). F Selecteer JPEG als het Type en klik op OK. Uw gescande beeld wordt opgeslagen. Software-informatie Epson Scan Driver starten Met deze software kunt u alle aspecten van het scannen regelen. U kunt dit programma als een afzonderlijk scanprogramma of samen met andere TWAIN-scanprogramma's gebruiken. Starten ❏ Windows: Dubbelklik op het pictogram EPSON Scan op het bureaublad.
Gebruikershandleiding Scannen Andere software voor scannen starten Opmerking: Bepaalde software voor scannen is voor sommige landen mogelijk niet bijgeleverd. Epson Event Manager Hiermee kunt u het openen van een scanprogramma aan een van de toetsen van het product toewijzen. U kunt tevens vaak gebruikte instellingen voor het scannen opslaan zodat scanwerkzaamheden aanzienlijk sneller kunnen worden uitgevoerd.
Gebruikershandleiding Scannen Starten ❏ Windows: Klik op de startknop of Start > All Programs (Alle programma's) of Programs (Programma's) > ABBYY FineReader map > ABBYY FineReader. ❏ Mac OS X: Selecteer Applications (Programma's) en dubbelklik op ABBYY FineReader. Presto! PageManager Met deze software kunt u foto's en documenten scannen, beheren en delen.
Gebruikershandleiding Faxen Faxen Introductie FAX Utility FAX Utility is een softwareprogramma waarmee gegevens zoals documenten, tekeningen en tabellen gemaakt in een programma voor tekstverwerking of werkbladen rechtstreeks doorgefaxt kunnen worden, zonder afdrukken. Gebruik de volgende procedure om het hulpprogramma uit te voeren. Windows Klik op de startknop (Windows 7 en Vista) of klik op Start (Windows XP), wijs naar All Programs (Alle programma's), selecteer Epson Software en klik op FAX Utility.
Gebruikershandleiding Faxen Gebruik de telefoonlijn alleen om te faxen A Verbind een telefoonkabel van een telefoonaansluiting naar de LINE-poort. B Controleer of Voltooid. op Aan staat. & “Faxen automatisch ontvangen” op pagina 81 Belangrijk: c Als u geen externe telefoon met het apparaat verbindt, moet u automatisch beantwoorden activeren. Als u dit niet doet, kunt u geen faxen ontvangen. Lijn delen met telefoontoestel A Verbind een telefoonkabel van een telefoonaansluiting naar de LINE-poort.
Gebruikershandleiding Faxen B Verwijder de plug. C Verbind een telefoontoestel of antwoordapparaat met de EXT.-poort. Opmerking: ❏ Zie hieronder voor andere manieren van aansluiten. ❏ Zie de documentatie bij uw apparaten voor meer informatie.
Gebruikershandleiding Faxen c DSL-modem Verbinden met ISDN (één telefoonnummer) a ISDN-aansluiting d Terminalaansluiteenheid of ISDN-router Verbinden met ISDN (twee telefoonnummers) a ISDN-aansluiting d Terminalaansluiteenheid of ISDN-router De faxverbinding controleren U kunt controleren of de printer faxberichten kan verzenden of ontvangen. A Laad gewoon papier. & “Papier en enveloppen laden” op pagina 23 B Druk op K om naar de faxmodus te gaan.
Gebruikershandleiding Faxen C Druk op x om de menu's te openen. D Selecteer Faxinstellingen > Faxverbinding controleren. Gebruik u of d om een menu te selecteren en klik op OK. E Druk op één van de knoppen x om het rapport af te drukken. Opmerking: Als er fouten op het rapport staan, probeert u de oplossingen vermeld in het rapport. Registreert of de stroom wordt uitgeschakeld Wanneer de printer wordt uitgeschakeld, worden de volgende gegevens in het tijdelijke geheugen van de printer gewist.
Gebruikershandleiding Faxen Modellen met monochroom display met 2 regels: Selecteer Faxinstellingen > Snelkiezen inst. D Selecteer Maken. U krijgt de beschikbare invoernummers voor snelkiezen te zien. E Selecteer het nummer voor snelkeuze dat u wilt registreren. Gebruik u of d om een nummer te selecteren en klik op OK. U kunt tot 60 invoeren registreren. F Gebruik de toetsen op het numerieke toetsenbord om een telefoonnummer in te voeren en druk op OK. U kunt tot 64 tekens invoeren.
Gebruikershandleiding Faxen F Voer een naam in om de groepskiesinvoer te identificeren. U kunt tot 30 tekens invoeren. Modellen met 2,5 inch kleurendisplay: Selecteer Klaar en druk op OK om de naam te registreren. Modellen met monochroom display met 2 regels: Druk op OK om de naam te registreren. G Selecteer een snelkiesinvoer dat u in de groepskieslijst wilt registreren. Gebruik u of d om de invoer te selecteren en doe het volgende om het aan de groep toe te voegen.
Gebruikershandleiding Faxen E Druk op d om Uw telefoonnummer te selecteren en druk op OK. F Gebruik het numerieke toetsenbord met andere knoppen op het configuratiescherm om uw telefoonnummer in te voeren. U kunt tot 20 tekens invoeren. Opmerking: Druk op de knop # om een plusteken in te voeren (+) dat staat voor een internationaal voorvoegsel voor het telefoonnummer. Let op: de asterisk * kan niet worden gebruikt. G Druk op OK om de informatie voor de kopregel te registreren.
Gebruikershandleiding Faxen Faxen verzenden via snelkiezen/groepskiezen Volg de onderstaande instructies om faxen te verzenden via snelkiezen/groepskiezen. Opmerking: Bij groepskiezen kun u faxen alleen in zwart-wit verzenden. A Plaats uw origineel in de automatische documentinvoer of op de glasplaat. & “Originelen plaatsen” op pagina 26 B Druk op K om naar de faxmodus te gaan. C Druk op . Opmerking: te drukken, kunt u tussen de snelkieslijst en groepskieslijst wisselen.
Gebruikershandleiding Faxen B Druk op K om naar de faxmodus te gaan. C Druk op x om de menu's te openen. D Selecteer Groepsfax. Opmerking: Ga naar stap 7 om ontvangers van een snelkieslijst of groepskieslijst te selecteren. E Voer het faxnummer in. F Druk op d om naar de volgende regel te gaan. Opmerking: ❏ Herhaal stap 5 en 6 of ga naar stap 7 om nog een nummer toe te voegen.
Gebruikershandleiding Faxen B Druk op K om naar de faxmodus te gaan. C Voer het faxnummer in. U kunt ook de functie opnieuw kiezen, snelkiezen of groepskieslijsten gebruiken om faxnummers te selecteren. D Druk op x om de menu's te openen. E Selecteer Fax later verzenden. Gebruik u of d om het menu te selecteren en klik op OK. F Druk op d om Aan te selecteren. G Stel het tijdstip in waarop u de fax wilt verzenden en druk vervolgens op OK.
Gebruikershandleiding Faxen E Leg de telefoon neer. Faxen ontvangen Faxen automatisch ontvangen Volg de instructies om het automatisch ontvangen van faxberichten in te stellen. A Plaats papier in de papierinvoer aan de achterkant. & “Papier en enveloppen laden” op pagina 23 B Druk op K om naar de faxmodus te gaan. C Druk op x om de menu's te openen. D Controleer of Voltooid. op Aan staat.
Gebruikershandleiding Faxen Opmerking: Wanneer u een oproep ontvangt en de andere partij een fax is, ontvangt het apparaat de fax automatisch, zelfs als het antwoordapparaat de oproep opneemt. Als u de telefoon opneemt, moet u wachten tot op het display een melding wordt weergegeven dat verbinding is gemaakt voor u ophangt. Als de andere partij een beller is, kan de telefoon zoals gewoonlijk worden gebruikt of kan een bericht worden achtergelaten op het antwoordapparaat.
Gebruikershandleiding Faxen Volg de onderstaande instructies om een fax te ontvangen via polling. A Plaats papier in de papierinvoer aan de achterkant. & “Papier en enveloppen laden” op pagina 23 B Druk op K om naar de faxmodus te gaan. C Voer het faxnummer in. D Druk op x om de menu's te openen. E Selecteer het menu dat hieronder is weergegeven. Gebruik u of d om een menu te selecteren en klik op OK. Modellen met 2,5 inch kleurendisplay: Selecteer Polling.
Gebruikershandleiding Faxen D Selecteer het menu dat hieronder is weergegeven. Gebruik u of d om een menu te selecteren en klik op OK. Modellen met 2,5 inch kleurendisplay: Selecteer Faxrapport. Modellen met monochroom display met 2 regels: Selecteer Faxinstellingen > Rapp. afdr. E Selecteer het item dat u wilt afdrukken. Opmerking: Alleen het Faxlog kan op het scherm worden bekeken. F Druk op één van de knoppen x om het geselecteerde rapport af te drukken.
Gebruikershandleiding Menulijst van het configuratiescherm Menulijst van het configuratiescherm U kunt dit apparaat gebruiken als printer, kopieerapparaat, scanner en fax. Wanneer u een van deze functies gebruikt, uitgezonderd de printerfunctie, selecteert u de gewenste functie door op de overeenkomstige modusknop op het configuratiescherm te drukken. Wanneer u de modus selecteert, verschijnt het hoofdscherm van deze modus.
Gebruikershandleiding Menulijst van het configuratiescherm Menu Item en beschrijving instellen. Wi-Fi/Netwerkinstellingen Wi-Fi Setup Zie de online Netwerkhandleiding. U kunt direct naar de menu's voor Wi-Fi Installatie gaan door op de knop te drukken. Handmatige inst. Wi-Fi/ netw. Verbindingscontrole Wi-Fi/netwerk U kunt de status van de netwerkverbinding controleren en het rapport afdrukken. Indien er een probleem is met de verbinding, kunt u het rapport gebruiken om de oplossing te vinden.
Gebruikershandleiding Menulijst van het configuratiescherm Item instellen Item en beschrijving instellen. Fabrieksinstellingen Instellingen verzenden/ ontvangen fax resetten Schakelt de standaardinstellingen om faxen te verzenden/ontvangen aan. Instellingen faxgegevens herstellen Schakelt de standaardinstellingen voor faxgegevens in. Netwerkinstellingen resetten Schakelt de standaard netwerkinstellingen in. Reset Wi-Fi-instellingen Schakelt de standaardinstellingen voor Wi-Fi in.
Gebruikershandleiding Menulijst van het configuratiescherm Item instellen Item en beschrijving instellen. Onderhoud Inktniveau Controleert de status van cartridges. Controle spuitkanaal Drukt een patroon voor de controle van het spuitkanaal af om de staat van de printkop te controleren. Printkop reinigen Reinigt de printkop om de staat van de printkop te verbeteren. Printkop uitl. Past de uitlijning van de printkop aan. Cartridge vervangen Selecteer dit om cartridges te vervangen.
Gebruikershandleiding Menulijst van het configuratiescherm Menu Item instellen Beschrijving Groepsk. inst. Maken & “Invoeren voor groepskiezen instellen” op pagina 75. Bew. Verw. Fax later verzenden — & “Een fax verzenden op een specifiek tijdstip” op pagina 79. Groepsfax — & “Groepsfaxen verzenden” op pagina 78. Polling — & “Een fax ontvangen via polling” op pagina 82. Faxrapport Faxlog Drukt het communicatielog af of geeft het weer. Laatste verz.
Gebruikershandleiding Menulijst van het configuratiescherm Menu Item instellen Beschrijving Faxinstellingen Instellingen faxverzending Kwalit.: Selecteer deze optie om de kwaliteit voor faxgegevens die worden verzonden te wijzigen. Contrast: Selecteer deze optie om het contrast voor faxgegevens die worden verzonden te wijzigen. Rapport laatste verz.: Geeft aan of het apparaat al dan niet een rapport afdrukt voor uitgaande faxen.
Gebruikershandleiding Menulijst van het configuratiescherm Menu Item instellen Beschrijving Inktniveau & “Kopieermodus” op pagina 85. Onderhoud Printerinstellingen Wi-Fi/Netwerkinstellingen Epson Connect-services Afdrukinst. van Google cloud Instellingen bestandsdeling Fabrieksinstellingen Modellen met monochroom display met 2 regels Druk op x om het menu te openen. Menu Item instellen Beschrijving Kwalit. — Selecteer deze optie om de kwaliteit voor faxgegevens die worden verzonden te wijzigen.
Gebruikershandleiding Menulijst van het configuratiescherm Menu Item instellen Beschrijving Faxinstellingen Rapp. afdr. Faxlog: Drukt het communicatielog af of geeft het weer. Laatste verz.: Drukt het log van inkomende communicatie af voor de vorige verzending of de vorige ontvangen resultaten van polling. Snelkiezen: Drukt de snelkieslijst af. Groepsk.: Drukt de groepskieslijst af. Opnieuw afdr.: Drukt opnieuw af vanaf de laatst ontvangen fax.
Gebruikershandleiding Menulijst van het configuratiescherm Menu Item instellen Beschrijving Communicatie DRD: Geeft het soort ringpatroon van het antwoord aan dat u wilt gebruiken om faxen te ontvangen. Om een andere optie dan All (of Uit) te selecteren, moet u uw telefoonsysteem instellen om verschillende ringpatronen te gebruiken. Afhankelijk van het land kan deze optie Aan of Uit zijn.
Gebruikershandleiding Menulijst van het configuratiescherm Modellen met 2,5 inch kleurendisplay Menu Instelling en opties Scannen naar USB-apparaat Formaat JPEG, PDF Scangebied A4, Autom. bijsnijden, Max. gebied, Legal Document Tekst, Foto Resolutie 200 dpi, 300 dpi, 600 dpi Contrast -4 tot +4 Afdrukstand document Staand, Liggend Scannen naar Cloud Zie voor instructies over het gebruik de Epson Connect-handleiding.
Gebruikershandleiding Menulijst van het configuratiescherm Modellen met monochroom display met 2 regels Menu Instelling en opties Scannen naar computer & “Normaal scannen via het configuratiescherm” op pagina 51 Scannen naar computer (PDF) Scannen naar computer (e-mail) Scannen naar computer (WSD) Deze functie is alleen beschikbaar voor Engelstalige versies van Windows 7/Vista. Druk op x om het menu te openen. Menu Beschrijving Fabrieksinstellingen & “Kopieermodus” op pagina 85.
Gebruikershandleiding Cartridges vervangen Cartridges vervangen Veiligheidsvoorschriften, voorzorgsmaatregelen en specificaties voor cartridges Veiligheidsvoorschriften Houd bij het hanteren van de cartridges rekening met het volgende: ❏ Houd cartridges buiten het bereik van kinderen. ❏ Wees voorzichtig met gebruikte cartridges. Er kan inkt rond de inkttoevoer kleven. Als u inkt op uw huid krijgt, wast u de plek grondig met water en zeep.
Gebruikershandleiding Cartridges vervangen ❏ Raak de groene chip of het kleine venster aan de zijkant van de cartridge niet aan. Dit kan de normale werking schaden. ❏ Plaats na het verwijderen van een lege cartridge altijd direct een nieuwe cartridge. Zet de printer niet aan tijdens het vervangen van cartridges. Als u de cartridge niet meteen installeert, kan inkt in spuitkanaaltjes van de printkop uitdrogen en kunt u mogelijk niet meer afdrukken.
Gebruikershandleiding Cartridges vervangen ❏ Open de verpakking van de cartridge pas op het moment waarop u de cartridge wilt installeren. De cartridge is vacuümverpakt om de betrouwbaarheid te waarborgen. Als u een cartridge langere tijd buiten de verpakking bewaart en dan pas gebruikt, is normaal afdrukken misschien niet meer mogelijk. ❏ Installeer alle cartridges, anders kunt u niet afdrukken.
Gebruikershandleiding Cartridges vervangen De cartridgestatus controleren Voor Windows Opmerking: Wanneer een cartridge bijna leeg is, verschijnt automatisch het venster Low Ink Reminder (Herinnering weinig inkt). In dit venster kunt u de cartridgestatus controleren. Als u dit venster niet wilt weergegeven, opent u de printerdriver en klikt u op het tabblad Maintenance (Hulpprogramma's) en op Monitoring Preferences (Controlevoorkeursinstellingen).
Gebruikershandleiding Cartridges vervangen ❏ Open de printerdriver, klik op het tabblad Maintenance (Hulpprogramma's) en klik op de knop EPSON Status Monitor 3. Er verschijnt een grafische weergave van de cartridgestatus. Opmerking: ❏ Als EPSON Status Monitor 3 niet verschijnt, gaat u naar de printerdriver en klikt u op het tabblad Maintenance (Hulpprogramma's) en vervolgens op de knop Extended Settings (Extra instellingen).
Gebruikershandleiding Cartridges vervangen B Klik op het op het pictogram EPSON Status Monitor. De EPSON Status Monitor wordt weergegeven. Opmerking: ❏ U ziet de cartridgestatus van het moment waarop de EPSON Status Monitor werd geopend. Klik op Update (Updaten) als u de cartridgestatus wilt actualiseren. ❏ Het inktniveau is een geschatte waarde. Het configuratiescherm gebruiken A Druk op x om de menu's te openen. B Voor modellen met 2,5 inch kleurendisplay: Selecteer Inktniveau.
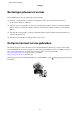
Gebruikershandleiding Cartridges vervangen Tijdelijk afdrukken met zwarte inkt wanneer de kleurencartridges opgebruikt zijn Wanneer de kleureninkt op is maar u nog wel zwarte inkt hebt, kunt u nog korte tijd verder afdrukken met alleen zwarte inkt. U moet de opgebruikte cartridge(s) echter zo snel mogelijk vervangen. Zie het gedeelte hierna als u tijdelijk wilt afdrukken met zwarte inkt.
Gebruikershandleiding Cartridges vervangen A Wanneer EPSON Status Monitor 3 u laat weten dat u de afdruktaak moet annuleren, klikt u op Cancel (Annuleren) of Cancel Print (Afdrukken annuleren) om de afdruktaak te annuleren. Opmerking: Als de foutmelding over een opgebruikte kleurencartridge afkomstig is van een andere computer in het netwerk, kan het zijn dat u de afdruktaak moet annuleren op de printer. B Laad gewoon papier of een envelop. C Open de printerinstellingen.
Gebruikershandleiding Cartridges vervangen H Druk het bestand af. I EPSON Status Monitor 3 wordt opnieuw weergegeven op uw computerscherm. Klik op Print in Black (Afdrukken in zwart-wit) om af te drukken met zwart inkt. Voor Mac OS X Volg de onderstaande instructies om tijdelijk af te drukken met zwarte inkt. A Als het afdrukken niet kan worden hervat, klik dan op het printerpictogram in het Dock.
Gebruikershandleiding Cartridges vervangen F Klik op de knop Show Details (Toon details) (voor Mac OS X 10.7) of op de knop d (voor Mac OS X 10.6 of 10.5) om dit dialoogvenster uit te breiden. G Selecteer bij Printer de printer die u gebruikt en geef de gewenste instellingen op. H Selecteer Print Settings (Printerinstellingen) in het venstermenu. I Selecteer plain papers (gewoon papier) of Envelope (Enveloppe) bij Media Type (Afdrukmateriaal). J Selecteer de optie Grayscale (Grijswaarden).
Gebruikershandleiding Cartridges vervangen ❏ Klik op de knop No (Neen) om de resterende zwarte inkt te gebruiken voor het uitvoeren van de huidige afdruktaak. Hetzelfde venster wordt weergegeven wanneer u de volgende keer een soortgelijke afdruktaak uitvoert. U hebt dan weer de mogelijkheid om op dezelfde manier zwarte inkt te besparen. ❏ Klik op Disable this feature (Deze functie uitschakelen) om verder af te drukken met de resterende zwarte inkt.
Gebruikershandleiding Cartridges vervangen B Knijp en verwijder de cartridge. Opmerking: Bij verwijderde cartridges kan er inkt zitten om de inkttoevoer. Wees dus voorzichtig dat er geen inkt in de omgeving van de cartridge wordt gemorst wanneer de cartridges worden verwijderd. C Schud alle cartridges voorzichtig vier of vijf keer en haal ze vervolgens uit de verpakking. c ❏Belangrijk: Pas op dat u de haakjes aan de zijkant van de cartridge niet afbreekt als u deze uit de verpakking haalt.
Gebruikershandleiding Cartridges vervangen D Verwijder alleen de gele tape. c ❏Belangrijk: Voordat u de cartridge installeert, moet u de gele tape verwijderen, anders kan de afdrukkwaliteit minder zijn of kunt u mogelijk niet afdrukken. ❏ Als u een cartridge hebt geïnstalleerd zonder de gele tape te verwijderen, haalt u de cartridge uit de printer, verwijdert u de gele tape en installeert u de cartridge opnieuw.
Gebruikershandleiding Cartridges vervangen Voor Windows Als u een lege cartridge moet vervangen, klikt u op How to (Hoe) in het venster van de statusmonitor. Volg de instructies op het scherm om de cartridge te vervangen. Raadpleeg het hierna genoemde gedeelte voor meer informatie over het gebruik van uw computer voor het vervangen van cartridges. & “Voor Windows” op pagina 130.
Gebruikershandleiding Cartridges vervangen Open Epson Printer Utility 4 als u een cartridge moet vervangen voordat deze leeg of bijna leeg is. & “De printerdriver voor Mac OS X openen” op pagina 32. Zie de online-Help voor meer informatie over het gebruik van de printerhulpprogramma's.
Gebruikershandleiding Uw printer en software onderhouden Uw printer en software onderhouden De spuitkanaaltjes in de printkop controleren Als uw afdrukken opeens vager worden of als er puntjes ontbreken, controleer dan eerst de spuitkanaaltjes van de printkop. U kunt de spuitkanaaltjes van de printkop vanaf uw computer controleren met het hulpprogramma Nozzle Check (Spuitkanaaltjes controleren) of rechtstreeks vanaf de printer met de knoppen op het configuratiescherm.
Gebruikershandleiding Uw printer en software onderhouden E Volg de instructies op het scherm. Het configuratiescherm gebruiken Volg de onderstaande stappen om de spuitkanaaltjes van de printkop te controleren via het configuratiescherm. A Controleer of er geen waarschuwingen of foutberichten op het configuratiescherm worden weergegeven. B Zorg ervoor dat de papierinvoer aan de achterkant papier van A4-formaat bevat. C Druk op x om de menu's te openen. D Selecteer Onderhoud. E Selecteer Spuitk.
Gebruikershandleiding Uw printer en software onderhouden & “De printkop reinigen” op pagina 113 & “De printkop uitlijnen” op pagina 114 De printkop reinigen Als uw afdrukken opeens vager worden of als er puntjes ontbreken, kunt u proberen het probleem op te lossen door de printkop te reinigen, zodat de inkt weer op de juiste wijze door de spuitkanaaltjes wordt toegevoerd.
Gebruikershandleiding Uw printer en software onderhouden Het hulpprogramma Printkop reinigen gebruiken in Mac OS X Om de printkop te reinigen met het hulpprogramma Head Cleaning (Printkop reinigen) gaat u als volgt te werk. A Controleer of er geen waarschuwingen of foutberichten op het configuratiescherm worden weergegeven. B Open de Epson Printer Utility 4. & “De printerdriver voor Mac OS X openen” op pagina 32 C Klik op het op het pictogram Head Cleaning (Printkop reinigen).
Gebruikershandleiding Uw printer en software onderhouden Het hulpprogramma Printkop uitlijnen gebruiken in Windows Om de printkop uit te lijnen met het hulpprogramma Print Head Alignment (Printkop uitlijnen) gaat u als volgt te werk. A Controleer of er geen waarschuwingen of foutberichten op het configuratiescherm worden weergegeven. B Zorg ervoor dat de papierinvoer aan de achterkant papier van A4-formaat bevat.
Gebruikershandleiding Uw printer en software onderhouden D Selecteer Onderhoud. E Selecteer Printkop uitl. en volg de instructies op het display om de patronen af te drukken. F Zoek in de groepen 1 tot en met 4 het beste (meest complete) patroon. G Voer het patroonnummer van het beste patroon van groep 1 in. H Herhaal stap 7 voor de andere groepen (2 tot en met 4). I Ga verder met het uitlijnen van de printkop.
Gebruikershandleiding Uw printer en software onderhouden G Stel de tijd in. Opmerking: Om zomertijd te selecteren, stelt u Zomertijd in als Aan. H Selecteer Land. I Selecteer het land. J Selecteer Ja. Opmerking: Wanneer de stroom gedurende een lange tijd uitgeschakeld is, is het mogelijk dat de klok teruggezet is. Controleer de klok wanneer u de stroom terug inschakelt. Energie besparen Het display wordt zwart als er gedurende een ingestelde periode geen handelingen worden uitgevoerd.
Gebruikershandleiding Uw printer en software onderhouden B Klik op de knop Printer Settings (Printerinstellingen). Het scherm Printer Settings (Printerinstellingen) wordt weergegeven. C Selecteer 3 minutes (3 minuten), 5 minutes (5 minuten) of 10 minutes (10 minuten) als instelling voor Sleep Timer (Slaaptimer). D Klik op de knop Apply (Toepassen). Het configuratiescherm gebruiken A Druk op x om de menu's te openen. B Modellen met 2,5 inch kleurendisplay: Druk op Printerinstellingen.
Gebruikershandleiding Uw printer en software onderhouden ❏ Maak het oppervlak van de glasplaat schoon met een droge, zachte, schone doek. Reinig voorzichtig de linkerkant van de glasplaat als er rechte lijnen op de afdruk of de gescande gegevens staan. ❏ Als de glasplaat besmeurd is met vetplekken of een andere hardnekkige substantie, veegt u de plaat schoon met een doek met daarop een klein beetje glasreiniger. Verwijder al het overtollige vocht.
Gebruikershandleiding Uw printer en software onderhouden c ❏Belangrijk: Pas op dat er geen water of andere vloeistoffen op de elektronische onderdelen terechtkomt. ❏ Spuit geen smeermiddelen in de printer. ❏ Wanneer u de verkeerde olie gebruikt, kunt u het mechanisme beschadigen. Neem contact op met uw leverancier of een erkende servicemedewerker als de printer moet worden gesmeerd. A Controleer of er geen waarschuwingen of foutberichten op het configuratiescherm worden weergegeven.
Gebruikershandleiding Uw printer en software onderhouden Opmerking: Als de cartridgehouder niet in de uitgangspositie (rechts) staat, zet u de printer aan en wacht u totdat de cartridgehouder uiterst rechts is geparkeerd. Vervolgens zet u de printer uit. C Bevestig de cartridgehouder zoals weergegeven met tape aan de behuizing en sluit vervolgens de scanner. Opmerking: Bevestig geen tape op de witte, platte kabel binnen in het apparaat.
Gebruikershandleiding Uw printer en software onderhouden Voor Windows A B Windows 7 en Vista: Klik op de startknop en selecteer Control Panel (Configuratiescherm). Windows XP: klik op Start en selecteer Control Panel (Configuratiescherm). Windows 7 en Vista: Klik op Uninstall a program (Dit programma verwijderen) in de categorie Programs (Programma's). Windows XP: dubbelklik op het pictogram Add or Remove Programs (Software). C Controleer de lijst met momenteel geïnstalleerde programma's.
Gebruikershandleiding Uw printer en software onderhouden A Schakel het apparaat uit. B Trek de interfacekabel van het apparaat uit de computer. C Ga op een van de volgende manieren te werk. Windows 7 en Vista: Klik op de startknop en selecteer Control Panel (Configuratiescherm). Windows XP: klik op Start en selecteer Control Panel (Configuratiescherm). D Ga op een van de volgende manieren te werk.
Gebruikershandleiding Uw printer en software onderhouden Voor Mac OS X Opmerking: ❏ Om uw software te verwijderen moet u de Uninstaller downloaden. Ga naar de website: http://www.epson.com Selecteer het onderdeel "ondersteuning" van uw lokale Epson-website. ❏ Als u toepassingen wilt verwijderen, moet u zich aanmelden met de account van een Computer Administrator (Beheerder). U kunt geen software verwijderen als u als beperkte gebruiker bent aangemeld.
Gebruikershandleiding Gegevens overdragen met behulp van een extern opslagapparaat Gegevens overdragen met behulp van een extern opslagapparaat Opmerking: De beschikbaarheid van deze functie verschilt per product. De externe USB-poort van de printer maakt het mogelijk om bestanden te kopiëren naar een computer die op de printer is aangesloten. Omgekeerd kunt u ook bestanden van de computer naar het opslagapparaat kopiëren.
Gebruikershandleiding Gegevens overdragen met behulp van een extern opslagapparaat C Dubbelklik op het pictogram van de verwisselbare schijf en selecteer de map waarin de bestanden zich bevinden. Opmerking: Als u het volumelabel hebt ingesteld, wordt dit als stationsnaam weergegeven. Als u het volumelabel niet hebt ingesteld, wordt de verwisselbare schijf als stationsnaam weergegeven (in Windows XP).
Gebruikershandleiding Foutindicatoren Foutindicatoren Foutmeldingen op het configuratiescherm In dit gedeelte wordt de betekenis van de meldingen weergegeven op het display beschreven. Modellen met 2,5 inch kleurendisplay Foutmeldingen Oplossingen Papier is vastgelopen & “Vastgelopen papier” op pagina 132 Printerfout. Schakel het apparaat uit en vervolgens weer in. Zie de documentatie voor meer informatie. Zet het apparaat uit en daarna weer aan.
Gebruikershandleiding Foutindicatoren Modellen met monochroom display met 2 regels Foutmeldingen Oplossingen Papier vast Druk op OK. Als de fout niet verdwijnt, moet u het papier met de hand verwijderen. Verwijder het vastgelopen papier. & “Vastgelopen papier” op pagina 132 Papier vastgelopen in de ADF. Verwijder het vastgelopen papier. Communicatiefout. Controleer of de computer is aangesloten en probeer het opnieuw. Zorg ervoor dat de computer correct is aangesloten.
Gebruikershandleiding Probleemoplossing voor afdrukken/kopiëren Probleemoplossing voor afdrukken/kopiëren De oorzaak van het probleem opsporen Volg in geval van printerproblemen altijd de volgende twee stappen. Probeer eerst de oorzaak van het probleem te achterhalen en pas dan de meest voor de hand liggende oplossingen toe totdat het probleem is opgelost.
Gebruikershandleiding Probleemoplossing voor afdrukken/kopiëren De printerstatus controleren Als er tijdens het afdrukken een probleem optreedt, verschijnt er een foutbericht in het venster van de statusmonitor. Als u de foutmelding krijgt dat de inktkussentjes van de printer het einde van hun levensduur hebben bereikt, neemt u contact op met de Epson-klantenservice voor de vervanging ervan. De melding wordt weergegeven, totdat de inktkussentjes zijn vervangen.
Gebruikershandleiding Probleemoplossing voor afdrukken/kopiëren ❏ Huidige status: Als de inkt bijna of helemaal op is, verschijnt de knop How to (Hoe) in het venster EPSON Status Monitor 3. Als u op How to (Hoe) klikt, worden er instructies weergegeven voor het vervangen van de cartridge en wordt de cartridgehouder naar de positie verplaatst waarin u de cartridge kunt vervangen. ❏ Ink Levels (Inktniveau): EPSON Status Monitor 3 biedt een grafische weergave van de cartridgestatus.
Gebruikershandleiding Probleemoplossing voor afdrukken/kopiëren U kunt dit programma ook gebruiken om vóór het afdrukken de cartridgestatus te controleren. De EPSON Status Monitor toont de cartridgestatus van het moment waarop het programma werd geopend. Klik op Update (Updaten) als u de cartridgestatus wilt actualiseren. Als de inkt (bijna) op is, verschijnt de knop How to (Hoe). Klik op How to (Hoe) en de EPSON Status Monitor geeft u stapsgewijze instructies voor het vervangen van de cartridges.
Gebruikershandleiding Probleemoplossing voor afdrukken/kopiëren Vastgelopen papier uit de printer verwijderen A Open de scanner. Belangrijk: c Til de scanner niet op wanneer het deksel open is. B Verwijder al het papier en alle eventuele losse stukken. C Sluit de scanner langzaam.
Gebruikershandleiding Probleemoplossing voor afdrukken/kopiëren Vastgelopen papier verwijderen uit de automatische documentinvoer (ADF) Opmerking: De beschikbaarheid van deze functie verschilt per product. A Verwijder de stapel papier uit de papierlade van de ADF. B Open het deksel van de ADF. Belangrijk: c Open in ieder geval het deksel van de ADF voordat u vastgelopen papier verwijdert. Als u dat niet doet, kan de printer beschadigd raken. C Verwijder voorzichtig het vastgelopen papier.
Gebruikershandleiding Probleemoplossing voor afdrukken/kopiëren D Open de ADF. E Verwijder al het papier en alle eventuele losse stukken. F Sluit de ADF. G Til de papierlade van de ADF omhoog.
Gebruikershandleiding Probleemoplossing voor afdrukken/kopiëren H Verwijder voorzichtig het vastgelopen papier. I Zet de papierlade van de ADF terug en sluit het deksel van de ADF. Vastlopen van papier voorkomen Als het papier regelmatig vastloopt, controleert u het volgende: ❏ Het papier mag niet ruw, omgekruld of gekreukeld zijn. ❏ Het papier dat u gebruikt moet van goede kwaliteit zijn. ❏ De afdrukzijde van het papier in de papierinvoer aan de achterkant moet naar boven gericht zijn.
Gebruikershandleiding Probleemoplossing voor afdrukken/kopiëren C Schakel het selectievakje Print Preview (Afdrukvoorbeeld) in op het venster Main (Hoofdgroep) van de printerdriver. D Geef de gewenste afdrukinstellingen op. E Klik op OK om het venster met printerinstellingen te sluiten en druk uw bestand af. Het venster Print Preview (Afdrukvoorbeeld) wordt geopend.
Gebruikershandleiding Probleemoplossing voor afdrukken/kopiëren & “Onjuiste of ontbrekende kleuren” op pagina 139 & “Vage afdrukken en vegen” op pagina 139 Horizontale strepen ❏ De afdrukzijde van het papier (de wittere of glanzendere zijde) in de papierinvoer aan de achterkant moet naar boven gericht zijn. ❏ Voer het hulpprogramma Head Cleaning (Printkop reinigen) uit om eventuele verstopte spuitkanaaltjes vrij te maken.
Gebruikershandleiding Probleemoplossing voor afdrukken/kopiëren ❏ Voor Windows schakelt u het selectievakje High Speed (Hoge snelheid) uit in het venster More Options (Meer opties) van de printerdriver. Zie de online-Help voor meer informatie. Selecteer voor Mac OS X Off (Uit) in High Speed Printing (Afdrukken met hoge snelheid).
Gebruikershandleiding Probleemoplossing voor afdrukken/kopiëren ❏ Zorg ervoor dat de papiersoort die in het display of in de printerdriver is geselecteerd, overeenkomt met het type papier in de printer. & “Papier selecteren” op pagina 20 ❏ Verwijder elk afgedrukt vel meteen uit de opvangbank. ❏ Raak de bedrukte zijde van papier met een glanzend oppervlak niet aan en zorg ervoor dat deze zijde nergens mee in aanraking komt.
Gebruikershandleiding Probleemoplossing voor afdrukken/kopiëren ❏ Verwijder de printerdriver en installeer de driver vervolgens opnieuw. & “De software verwijderen” op pagina 122 Afdruk is enigszins scheef ❏ Controleer of het papier correct in de papierinvoer aan de achterkant is geplaatst.
Gebruikershandleiding Probleemoplossing voor afdrukken/kopiëren ❏ Verwijder de printerdriver en installeer de driver vervolgens opnieuw. & “De software verwijderen” op pagina 122 De afdrukzijde bevat vlekken of vegen ❏ Strijk het papier glad of buig het een beetje om in de tegenovergestelde richting als het is omgekruld in de richting van de afdrukzijde. ❏ Maak enkele kopieën zonder document op de glasplaat te leggen.
Gebruikershandleiding Probleemoplossing voor afdrukken/kopiëren ❏ Het papier mag niet te oud zijn. Zie de instructies bij het papier voor meer informatie. ❏ Let er bij gewoon papier op dat het niet boven de streep net onder de pijl H aan de binnenzijde van de zijgeleider komt. Zorg er bij speciaal afdrukmateriaal van Epson voor dat het aantal vellen niet meer bedraagt dan het maximum dat voor het betreffende afdrukmateriaal is opgegeven.
Gebruikershandleiding Probleemoplossing voor afdrukken/kopiëren ❏ Als het papier gekreukeld uit de printer komt, is het mogelijk vochtig of te dun. Laad een nieuwe stapel papier. Opmerking: Bewaar ongebruikt papier in de originele verpakking en op een droge plaats. De printer drukt niet af Er branden geen lampjes ❏ Druk op de knop P om de printer aan te zetten. ❏ Controleer of het netsnoer goed in het stopcontact zit.
Gebruikershandleiding Probleemoplossing voor afdrukken/kopiëren Er wordt een inktfout aangegeven nadat u de cartridge hebt vervangen A Open de scanner. Belangrijk: c Til de scanner niet op wanneer het deksel open is. B Controleer of de cartridgehouder zich in de positie voor het vervangen van cartridges bevindt. Opmerking: Klik op x, selecteer Onderhoud en selecteer vervolgens Cartridge vervangen als de cartridgehouder zich helemaal rechts bevindt.
Gebruikershandleiding Probleemoplossing voor afdrukken/kopiëren C Verwijder de cartridge en plaats deze terug. Ga vervolgens verder met het installeren van de cartridge. Controleer of de bovenkant van alle cartridges gelijk loopt. D Sluit de scanner langzaam en druk op OK in het configuratiescherm. De afdruksnelheid verhogen (alleen Windows) Als de afdruksnelheid te laag is, kan deze worden verhoogd door bepaalde instellingen in het venster Extended Settings (Extra instellingen) te selecteren.
Gebruikershandleiding Probleemoplossing voor afdrukken/kopiëren Het volgende dialoogvenster verschijnt. Schakel de volgende selectievakjes in om de afdruksnelheid te verhogen. ❏ High Speed Copies (Hoge-snelheidkopieën) ❏ Always spool RAW datatype (RAW-data altijd spoolen) ❏ Page Rendering Mode (Pagina genereren) ❏ Print as Bitmap (Afdrukken als bitmap) Zie de online-Help voor meer informatie over elk item.
Gebruikershandleiding Probleemoplossing voor scannen Probleemoplossing voor scannen Problemen aangeduid door meldingen op het display of via statuslampjes ❏ Controleer of het product correct op de computer is aangesloten. ❏ Schakel het product even uit en dan weer in. Indien het probleem nog niet is opgelost, functioneert het product mogelijk onjuist of moet de lichtbron van de scanner worden vervangen. Raadpleeg de plaats van aankoop. ❏ Controleer of de software voor het scannen volledig is geïnstalleerd.
Gebruikershandleiding Probleemoplossing voor scannen Gebruik van de automatische documentinvoer (ADF) ❏ Controleer het lampje van de ADF en verzeker dat de ADF voor het scannen gereed staat. ❏ Zorg ervoor dat er geen originelen op de glasplaat liggen. ❏ Indien de documentklep of ADF-afdekking open is, moet u deze sluiten en opnieuw proberen te scannen. ❏ Controleer dat u Office Mode (Kantoormodus) of Professional Mode (Professionele modus) heeft geselecteerd in Epson Scan.
Gebruikershandleiding Probleemoplossing voor scannen C Ga op een van de volgende manieren te werk. ❏ Windows 7 en Windows Vista: Selecteer Allow a program through Windows Firewall (Toegang van een programma via Windows Firewall toestaan). ❏ Windows XP: Selecteer Windows Firewall. D Ga op een van de volgende manieren te werk. ❏ Windows 7: Controleer dat het EEventManager Application vakje is aangevinkt in de lijst Allowed programs and features (Toegestane programma's en functies).
Gebruikershandleiding Probleemoplossing voor scannen ❏ Het product moet mogelijk worden gereinigd. & “De printer reinigen” op pagina 118 Papier vastgelopen in de automatische documentinvoer (ADF) Verwijder het vastgelopen papier in de ADF. & “Vastgelopen papier verwijderen uit de automatische documentinvoer (ADF)” op pagina 134 Problemen met de scantijd ❏ Computers met een Hi-Speed externe USB-poort kunnen sneller scannen dan computers met normale externe USB-poort.
Gebruikershandleiding Probleemoplossing voor scannen ❏ Pas de Threshold (Drempelwaarde) aan. Home Mode (Thuismodus): Selecteer Black&White (Zwart-wit) als Image Type (Beeldtype), klik op de knop Brightness (Helderheid), en probeer Threshold (Drempelwaarde) in te stellen. Office Mode (Kantoormodus): Selecteer Black&White (Zwart-wit) als Image Type (Beeldtype) en probeer Threshold (Drempelwaarde) in te stellen.
Gebruikershandleiding Probleemoplossing voor scannen Het scanvlak of de richting is onjuist De randen van het origineel worden niet gescand ❏ Als u met thumbnailvoorbeelden in de Home Mode (Thuismodus) of de Professional Mode (Professionele modus) scant, moet u het document of de foto circa 6 mm (0,2 inch) van de horizontale en verticale rand van de glasplaat plaatsen om te voorkomen dat de scan wordt bijgesneden.
Gebruikershandleiding Probleemoplossing voor scannen Nog steeds problemen na het uitvoeren van alle oplossingen Indien u alle oplossingen heeft uitgeprobeerd maar het probleem nog niet is opgelost, moet u de Epson Scan instellingen terugstellen. Klik op Configuration (Configuratie), selecteer het tabblad Other (Overige) en klik op Reset All (Alles resetten).
Gebruikershandleiding Probleemoplossing voor faxen Probleemoplossing voor faxen Kan geen faxberichten verzenden of ontvangen ❏ Zorg ervoor dat de telefoonkabel correct verbonden is en controleer dat de telefoonlijn werkt. U kunt de status van de telefoonlijn controleren via de functie Faxverbinding contr. & “Verbinden met een telefoonlijn” op pagina 70 ❏ Als het faxbericht niet is verzonden, zorg er dan voor dat het faxapparaat van de ontvangen aan staat en goed werkt.
Gebruikershandleiding Probleemoplossing voor faxen Kwaliteitsproblemen (ontvangen) ❏ Controleer dat ECM is ingeschakeld. & “Faxmodus” op pagina 88 Antwoordapparaat kan geen telefoongesprekken beantwoorden ❏ Wanneer automatisch beantwoorden is ingeschakeld en een antwoordapparaat is aangesloten op dezelfde telefoonlijn als dit apparaat, moet u het aantal belsignalen voor faxen worden beantwoord hoger instellen dan het aantal beltonen voor het antwoordapparaat.
Gebruikershandleiding Productinformatie Productinformatie Cartridges U kunt de volgende cartridges gebruiken voor deze printer: Cartridge Artikelnummers WF-2510 WF-2520 WF-2530 WF-2540 Voor Australië/Nieuw-Zeeland WF-2510 WF-2520 WF-2530 WF-2540 WF-2511 WF-2521 WF-2531 WF-2541 WF-2528 WF-2538 WF-2548 Black (Zwart) 16/16XL 200/200XL 193/198 190/190XL Cyan (Cyaan) 16/16XL 200/200XL 193 190 Magenta 16/16XL 200/200XL 193 190 Yellow (Geel) 16/16XL 200/200XL 193 190 Opmerking: Niet alle
Gebruikershandleiding Productinformatie Windows 7 (32-bits, 64-bits), Vista (32-bits, 64-bits), XP SP1 of hoger (32-bits) of XP Professional x64 Edition Hi-Speed USB Voor Mac OS X Systeem Interface met computer Mac OS X 10.5.8, 10.6.x, 10.7.x Hi-Speed USB Opmerking: Het UNIX-bestandssysteem voor Mac OS X wordt niet ondersteund. Technische specificaties Opmerking: Deze specificaties kunnen zonder voorafgaande kennisgeving worden gewijzigd.
Gebruikershandleiding Productinformatie A4 210 × 297 mm Formaat 10 × 15 cm (4 × 6 inch) 13 × 18 cm (5 × 7 inch) A6 105 × 148 mm A5 148 × 210 mm B5 182 × 257 mm 9 × 13 cm (3,5 × 5 inch) 13 × 20 cm (5 × 8 inch) 20 × 25 cm (8 × 10 inch) 16:9-formaat (102 × 181 mm) 100 × 148 mm Letter 8 1/2 × 11 in Legal 8 1/2 × 14 in Papiertypen Gewoon papier of speciaal papier van Epson Dikte (voor gewoon papier) 0,08 tot 0,11 mm (0,003 tot 0,004 inch) Gewicht (voor gewoon papier) 64 g/m² (17 lb) tot 90 g/m² (24 lb)
Gebruikershandleiding Productinformatie Enveloppen: Minimale marge Afdrukmateriaal Losse vellen Enveloppen A 3,0 mm (0,12 inch) 3,0 mm (0,12 inch) B 3,0 mm (0,12 inch) 5,0 mm (0,20 inch) C 3,0 mm (0,12 inch) 21,0 mm (0,83 inch) Opmerking: Afhankelijk van het gebruikte papier, kan de afdrukkwaliteit minder zijn aan de boven- en onderkant van de afdruk, of kunnen deze gedeelten vegen vertonen.
Gebruikershandleiding Productinformatie Effectieve pixels 10 200 × 14 040 pixels bij 1200 dpi Als een hoge resolutie-instelling is gekozen, kan het scangebied beperkt zijn. Documentformaat 216 × 297 mm (8,5 × 11,7 inch) A4 of US Letter Scanresolutie 1200 dpi (normaal scannen) 2400 dpi (geïnterpoleerd scannen) Outputresolutie 50 tot 4800, 7200 en 9600 dpi (50 tot 4800 dpi in stappen van 1 dpi) Beeldgegevens 16 bits per pixel per interne kleur 8 bits per pixel per externe kleur (max.
Gebruikershandleiding Productinformatie Interface RJ-11-telefoonlijn RJ-11-telefoonsetaansluiting Specificaties netwerkinterface Zie onderstaande informatie over de netwerkinterface die voor uw printer beschikbaar is. & “Beschikbare functies” op pagina 15 Wi-Fi Ethernet Standaard: IEEE 802.11b/g/n*1 Beveiliging: WEP (64-/128-bits) WPA-PSK (TKIP/AES) *2 Frequentieband: 2,4 GHz Communicatiewijzen: Infrastructuurmodus, Ad-hocmodus Standaard: IEEE802.3i/u, IEEE802.
Gebruikershandleiding Productinformatie Afmetingen Opslag Breedte: 392 mm (15,4 inch) Diepte: 377 mm (14,8 inch) Hoogte: 221 mm (8,7 inch) Afdrukken* Breedte: 392 mm (15,4 inch) Diepte: 540 mm (21,3 inch) Hoogte: 291 mm (11,5 inch) Gewicht Circa 5,8 kg (12,8 lb) zonder cartridges en voedingskabel. * Met uitgetrokken uitvoerlade.
Gebruikershandleiding Productinformatie Invoervoltage 90 tot 264 V Frequentiebereik 50 tot 60 Hz Invoerfrequentie 49,5 tot 60,5 Hz Stroomsterkte 0,8 tot 0,5 A Stroomverbruik Kopiëren zonder computer Circa 11 W (ISO/IEC24712) Gereed Circa 4,5 W Slaapstand Circa 2,3 W Uitgeschakeld Circa 0,3 W WF-2520/WF-2521/WF-2528 100–240 V-model Invoervoltage 90 tot 264 V Frequentiebereik 50 tot 60 Hz Invoerfrequentie 49,5 tot 60,5 Hz Stroomsterkte 0,8 tot 0,5 A Stroomverbruik Kopiëren zonder co
Gebruikershandleiding Productinformatie 100–240 V-model Invoervoltage 90 tot 264 V Frequentiebereik 50 tot 60 Hz Invoerfrequentie 49,5 tot 60,5 Hz Stroomsterkte 0,8 tot 0,5 A Stroomverbruik Kopiëren zonder computer Circa 10 W (ISO/IEC24712) Gereed Circa 5,0 W Slaapstand Circa 2,4 W Uitgeschakeld Circa 0,3 W Opmerking: Het voltage van uw printer staat vermeld op het etiket op de achterkant.
Gebruikershandleiding Productinformatie Dit product voldoet aan lid 15 van de FCC-regelgeving en RSS-210 van de IC-regelgeving. Epson aanvaardt geen enkele verantwoordelijkheid wanneer aan de beschermingsvereisten afbreuk wordt gedaan ten gevolge van een niet-geautoriseerde wijziging aan het product.
Gebruikershandleiding Productinformatie Interface Hi-Speed USB (apparaatklasse voor computers) Hi-Speed USB (apparaatklasse voor externe opslag)* * Dit geldt alleen voor de WF-2540/WF-2541/WF-2548. Voor het aansluiten van een USB-flashgeheugen (tot 2 TB, geformatteerd in FAT, FAT32 of exFAT). Epson kan niet garanderen that extern aangesloten apparaten correct werken.
Gebruikershandleiding Hulp vragen Hulp vragen Technische ondersteuning (website) Deze website van Epson biedt u technische ondersteuning bij problemen die u niet kunt oplossen met de informatie in de productdocumentatie. Als u beschikt over een webbrowser en een aansluiting hebt op het Internet, kunt u de website bezoeken op: http://support.epson.net/ http://www.epson.eu/Support (Europa) Ga voor de nieuwste drivers, vragen en antwoorden, handleidingen en ander materiaal om te downloaden naar: http://www.
Gebruikershandleiding Hulp vragen Hulp voor gebruikers in Europa In het pan-Europese garantiebewijs leest u hoe u contact kunt opnemen met de klantenservice van Epson. Hulp voor gebruikers in Taiwan Epson biedt hier de volgende informatiebronnen, ondersteuning en diensten: Internet (http://www.epson.com.tw) Informatie over productspecificaties, drivers om te downloaden, antwoorden op vragen met betrekking tot het gebruik van producten.
Gebruikershandleiding Hulp vragen Telefoonnummer Faxnummer Adres 07-5520918 07-5540926 1F., No. 337, Minghua Rd., Gushan Dist., Kaohsiung City 804, Taiwan 07-3222445 07-3218085 No. 51, Shandong St., Sanmin Dist., Kaohsiung City 807, Taiwan 08-7344771 08-7344802 1F., No. 113, Shengli Rd., Pingtung City, Pingtung County 900, Taiwan Hulp voor gebruikers in Australië Epson Australia staat voor u klaar als u hulp nodig hebt.
Gebruikershandleiding Hulp vragen Epson-helpdesk (telefoon: (65) 6586 3111) Ons helpdeskteam kan u telefonisch helpen met betrekking tot: ❏ Verkoopvragen en productinformatie ❏ Vragen met betrekking tot het gebruik van producten of problemen ❏ Vragen met betrekking tot reparaties en garantie Hulp voor gebruikers in Thailand Epson biedt hier de volgende informatiebronnen, ondersteuning en diensten: Internet (http://www.epson.co.
Gebruikershandleiding Hulp vragen Epson-helpdesk ❏ Verkoopvragen en productinformatie ❏ Technische ondersteuning Telefoon (62) 21-572 4350 Fax (62) 21-572 4357 Epson-servicecentrum Jakarta Mangga Dua Mall 3rd floor No. 3A/B Jl. Arteri Mangga Dua, Jakarta Telefoon/fax: (62) 21-62301104 Bandung Lippo Center 8th floor Jl. Gatot Subroto No. 2 Bandung Telefoon/fax: (62) 22-7303766 Surabaya Hitech Mall lt IIB No. 12 Jl.
Gebruikershandleiding Hulp vragen Hulp voor gebruikers in Hong Kong Voor technische ondersteuning en andere diensten kunnen gebruikers contact opnemen met Epson Hong Kong Limited. Internet Epson Hong Kong heeft een eigen webpagina in het Chinees en Engels om gebruikers de volgende informatie aan te bieden: ❏ Productinformatie ❏ Antwoorden op veelgestelde vragen ❏ Nieuwste versies van drivers voor Epson-producten Gebruikers kunnen deze internetpagina bezoeken op: http://www.epson.com.
Gebruikershandleiding Hulp vragen Epson-helpdesk ❏ Verkoopvragen en productinformatie (Infoline) Telefoon: 603-56288222 ❏ Vragen met betrekking tot reparaties en garantie, het gebruik van producten en technische ondersteuning (Techline) Telefoon: 603-56288333 Hulp voor gebruikers in India Epson biedt hier de volgende informatiebronnen, ondersteuning en diensten: Internet (http://www.epson.co.
Gebruikershandleiding Hulp vragen Epson India — hoofdkantoor — Bangalore Telefoon: 080-30515000 Fax: 30515005 Epson India — regionale kantoren: Locatie Telefoonnummer Faxnummer Mumbai 022-28261515 /16/17 022-28257287 Delhi 011-30615000 011-30615005 Chennai 044-30277500 044-30277575 Kolkata 033-22831589 / 90 033-22831591 Hyderabad 040-66331738/ 39 040-66328633 Cochin 0484-2357950 0484-2357950 Coimbatore 0422-2380002 Niet van toepassing Pune 020-30286000 /30286001/30286002 020-3
Gebruikershandleiding Hulp vragen Ons helpdeskteam kan u telefonisch helpen met betrekking tot: ❏ Verkoopvragen en productinformatie ❏ Vragen met betrekking tot het gebruik van producten of problemen ❏ Vragen met betrekking tot reparaties en garantie 176
Gebruikershandleiding Index Index DSL...................................................................................................73 Dubbelzijdig afdrukken.................................................................39 2 2-zijdig..............................................................................................62 E A Easy Photo Print.............................................................................38 Energie besparen........................................................
Gebruikershandleiding Index besparen van zwarte inkt in Windows..................................105 cartridge controleren via het configuratiescherm................101 cartridgestatus controleren in Mac OS X..............................100 cartridgestatus controleren in Windows.................................99 tijdelijk afdrukken met zwarte inkt........................................102 voorzorgsmaatregelen................................................................96 Instellen groepskiezen.......
Gebruikershandleiding Index Software verwijderen................................................................................122 Software voor scannen bundel-software..........................................................................68 Specificaties automatische documentinvoer...............................................161 cartridges...................................................................................157 fax.........................................................................